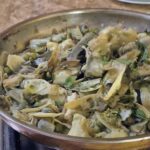
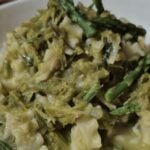
Traditional Southern Italian Cavatelli

Traditional Southern Italian Cavatelli

This post may contain affiliate links, that help support this blog. If you make a purchase through these links, I may earn a commission—at no cost to you. For more information read my disclosure policy.

What Are Cavatelli?

Cavatelli are small shell-shaped pasta traditionally made with semolina flour and water. The name comes from the Italian word cavato, meaning “hollowed.”

Unlike northern egg pastas, Southern Italian pasta is typically made without eggs because semolina wheat was abundant and durable in warmer climates. That’s why this dough is simple — and perfect.

There’s something sacred about making pasta by hand. before mixers. before attachments. before shortcuts. it was   just semolina flour, warm water, and your hands.

Cavatelli are one of the oldest and most beloved pastas from Southern Italy. They’re small, rustic, slightly chewy, and designed to catch sauce in that beautiful little hollow. In many Southern Italian homes, this wasn’t “fancy Sunday pasta.” This was everyday pasta — made on a wooden board, shaped with two fingers, and served with whatever was growing or simmering nearby. No eggs. No fuss. Just tradition.

And once you make them once, you’ll never be intimidated again.

Things to know about this Traditional Southern Italian Cavatelli recipe

Good to Know

  • Fresh cavatelli freeze beautifully. Freeze on a tray first, then transfer to a bag. Cook from frozen — do not thaw.

  • This pasta is meant to be slightly chewy (al dente), not soft like egg noodles.

  • If your pasta feels too dense, your dough may have been too dry.

  • If it falls apart, it may have had too much water.

How to Serve Cavatelli

Cavatelli pair beautifully with:

  • Broccoli or broccoli rabe

  • Italian sausage

  • Simple tomato sauce

  • Garlic and olive oil

  • Butter and sage

One of the most classic pairings is:
Cavatelli e Broccoli — a Southern Italian staple.

Now that you’ve mastered homemade cavatelli, it’s time to put them to work.

Make a full Southern Italian classic with my Cavatelli with Broccoli Rabe & Italian Sausage (link to that post), or keep it simple with a rustic  cacio and pepe Pasta

If you love traditional pasta recipes, don’t miss my Lasagna Bolognese  and Authentic fettuccine alfredo (no cream) for more authentic Italian cooking inspiration.

Cook it. Taste it. Make it your own.

And if you make this recipe, leave a comment and tell me how your cavatelli turned out — I read every one.

Traditional Southern Italian Cavatelli

Cavatelli Dough

  • 2 cups  fine semolina flour (semola rimacinata preferred)
  • ¾–1  cup warm water
  • Pinch of salt (optional)

Cavatelli with Broccoli & Garlic (Cavatelli e Broccoli)

  • 1 lb cavatelli pasta
  • 1 large head broccoli (cut into small florets)
  • 3-4 cloves garlic, sliced
  • ¼–½  tbsp red pepper flakes
  • ⅓ cup extra virgin olive oil
  • salt
  • Freshly grated Pecorino Romano
  • Optional: Italian sausage (sweet or hot)

How to Make Cavatelli Dough

  1. Form the Dough

    Place the semolina flour on a wooden board or in a large bowl. Make a well in the center.

    Slowly add warm water while mixing with a fork or your fingers until a shaggy dough forms.

  2. Knead

    Knead for 8–10 minutes until smooth and firm.

    The texture should feel like:

    Firm play-dough

    Smooth but not sticky

    Elastic but not soft

    If too dry → add a few drops of water.If sticky → dust lightly with semolina.

  3. Rest

      Cover with plastic wrap or a towel and let rest 20–   30 minutes.

      Resting relaxes the gluten and makes shaping easier.

How to Shape Cavatelli

  1. Cut off a portion of dough. Keep the rest covered.
  2. Roll into a rope about ½-inch thick.
  3. Cut into ½-inch pieces.
  4. Using two fingers, press and drag the dough toward you to create the hollow center.
  5. You can:

    Leave them smooth (very traditional)

    Use a gnocchi board for ridges

  6. Lightly dust with semolina as you work.

How to Cook Fresh Cavatelli

  1. Bring a large pot of heavily salted water to a boil.

  2. Add pasta and cook:

    4–6 minutes total

    They will float early, but continue cooking until tender

  3. Always taste one before draining.

  4. An easy, traditional way to serve cavatelli is simple, rustic, and full of flavor — just like it’s done in Southern Italy. Here’s a classic you’ll love 👇

Cavatelli with Broccoli & Garlic (Cavatelli e Broccoli)

  1. Boil the pasta

    Bring a large pot of salted water to a boil. Add the broccoli first and cook 3–4 minutes.

    Add the cavatelli to the same pot and cook until al dente. Reserve ½ cup pasta water before draining.

  2. Sauté the garlic

    In a large skillet, heat olive oil over medium-low. Add sliced garlic and red pepper flakes. Cook until fragrant and lightly golden — don’t burn it.

  3. Combine

    Add drained pasta and broccoli to the skillet. Toss well. Add a splash of reserved pasta water to help create a light sauce.

  4. Finish

    Taste for salt. Top with freshly grated Pecorino Romano and a drizzle of olive oil.


Authentic Fettuccine Alfredo (No Cream )

Authentic Fettuccine Alfredo (No Cream )

This post may contain affiliate links, that help support this blog. If you make a purchase through these links, I may earn a commission—at no cost to you. For more information read my disclosure policy.

If you grew up in America, you probably think Alfredo sauce means heavy cream, garlic, and maybe even chicken. But authentic Fettuccine Alfredo is something entirely different.

This iconic Roman pasta was created in the early 1900s by Alfredo di Lelio in Rome. And the original version? Just butter, Parmigiano Reggiano, fresh fettuccine, and pasta water. No cream. No flour. No garlic.

When made properly, the  Alfredo sauce becomes naturally creamy and glossy from the emulsion of butter, cheese, and starchy pasta water. It’s simple—but technique matters.

Let me show you exactly how to make it the authentic way.

Things to know about this Authentic Fettuccine Alfredo (No Cream )

Pro Tips for Perfect Alfredo

  • Use freshly grated Parmigiano Reggiano. Pre-shredded cheese will not melt properly.

  • Keep heat low to prevent the cheese from clumping.

  • Toss constantly—movement creates the emulsion.

  • If sauce thickens too much, add another splash of hot pasta water.

What Makes This Different from American Alfredo?

American versions typically include heavy cream and sometimes garlic.

The original Roman version relies entirely on technique and high-quality ingredients. The creaminess comes from the emulsion—not dairy overload.

Simple ingredients. Perfect execution.

Storage

This pasta is best served immediately.

If needed:

  • Store leftovers in an airtight container up to 2 days.

  • Reheat gently with a splash of water over very low heat.

Freezing is not recommended, as the sauce can separate.

Ready to Make Real Fettuccine Alfredo?

Now you know — authentic Alfredo doesn’t need cream. Just quality ingredients, proper technique, and a little confidence.

If you make this recipe, I’d love to hear how it turned out. Leave a comment below and let me know — and don’t forget to tag me on Instagram so I can see your pasta creations!

If you loved this recipe, you might also enjoy:

• Homemade Fresh Fettuccine
• Cacio e Pepe
• Sunday Sauce with Meatballs

Be sure to bookmark LorianasheaCooks.com for more authentic Italian recipes made the traditional way.

Buon appetito 🇮🇹✨

Authentic Fettuccine Alfredo ( no cream)

  • 1 pound fresh fettuccine (or high-quality dried fettuccine) ((16 oz))
  • 8 tbsps unsalted butter, room temperature ((1 stick / 113g))
  • 1 ½ cups freshly grated Parmigiano Reggiano ((150g))
  • 2 tsps fine sea salt ((for pasta water, plus more as needed))
  • ½  tsp freshly cracked black pepper ((optional, traditional in Rome))
  1. Boil the Pasta

    • Bring a large pot of water to a rolling boil.

    • Add salt — the water should taste like the sea.

    • Cook the fettuccine until al dente (usually 1–2 minutes less than package instructions if using dried).

    REMINDER: Before draining, reserve 1½ cups of pasta water.

  2. Prepare the Butter Base

    • Place the room temperature butter in a large serving bowl or wide sauté pan.

    • Add a few tablespoons of hot pasta water to the butter.

    • Stir gently until the butter melts and forms a creamy base.

    TIP: Keep heat very low if using a pan — do not brown the butter.

  3. Add the Pasta

    • Transfer the hot pasta directly into the butter mixture.

    • Toss gently to coat the noodles.

  4. Add the Cheese

    • Sprinkle in the freshly grated Parmigiano Reggiano gradually while tossing continuously.

    • Add pasta water a tablespoon at a time as needed.

    This is the key: The starch in the water binds the butter and cheese together, creating a smooth, silky sauce.

    Keep tossing until glossy and creamy. The sauce should cling to the pasta—not pool at the bottom.

  5. Finish

    • Add freshly cracked black pepper if desired.

    • Taste and adjust salt if needed.

    • Serve immediately in warm bowls.

    Authentic Alfredo waits for no one.


Homemade Fettuccine (Authentic Italian Fresh Pasta)

Homemade Fettuccine (Authentic Italian Fresh Pasta)

This post may contain affiliate links, that help support this blog. If you make a purchase through these links, I may earn a commission—at no cost to you. For more information read my disclosure policy.

There is nothing like fresh pasta made by hand.

Homemade fettuccine has a texture and flavor you simply cannot get from a box. When made with a blend of semolina and white flour, it has the perfect balance — tender, yet structured enough to hold sauce beautifully.

And while we’re cutting this dough into fettuccine today, this recipe is not just for fettuccine. This is a foundational fresh pasta dough that can be used to make tagliatelle, pappardelle, linguine, lasagna sheets, ravioli, and more.

It’s one dough — endless possibilities.

This is traditional Italian fresh pasta. No oil. No shortcuts. Just flour, eggs, and technique.

Once you make it yourself, you’ll understand why Italians treat pasta as something sacred.

Things to know about  Homemade Fettuccine (Authentic Italian Fresh Pasta)

• Fresh pasta cooks much faster than dried pasta — usually in 2–3 minutes. Stay close to the pot.

• The dough should feel firm but pliable. If it’s too soft, it will stick in the pasta machine. If it’s too dry, it will crack when rolled.

• Humidity affects flour. On humid days, you may need slightly more flour. On dry days, the dough may need a tiny bit of moisture.

• Always use freshly grated cheese in your sauces. Pre-shredded cheese won’t melt properly with fresh pasta.

• Fresh pasta pairs best with lighter sauces like authentic Alfredo, butter and sage, or a simple pomodoro — it doesn’t need heavy sauces to shine.

• If your pasta sticks after cutting, dust lightly with semolina and gently toss — don’t pull it apart aggressively.

Why Use Semolina?

Semolina gives fresh pasta:

• Better structure
• Improved sauce grip
• Slight chew
• A more authentic Italian texture

It’s especially perfect for dishes like authentic Fettuccine Alfredo.

Storage

Refrigerate: Up to 24 hours, lightly floured and covered.
Freeze: Form into nests and freeze up to 1 month. Cook directly from frozen.

Ready to Make Fresh Pasta at Home?

If you’ve never made homemade pasta before, let this be your sign. It’s simple, rustic, and incredibly satisfying — and once you taste it, there’s no going back to boxed.

If you make this recipe, I’d love to see it!
Tag me on Instagram and leave a comment below letting me know how it turned out.

And if you loved this recipe, you might also enjoy:

• My Sunday Sauce with Meatballs
• Italian Beef Stew
• Chicken Piccata

More authentic Italian recipes are coming — so be sure to bookmark this page and check back often. 🇮🇹

Buon appetito!

Homemade Fettuccine (Authentic Italian Fresh Pasta)

Main Ingredients

  • 1 cup semolina flour ((140g))
  • 1 cup all-purpose flour or Italian “00” flour ((120g))
  • 3 large eggs, room temperature
  • ½ tsp fine sea salt

For Dusting:

  • Additional  flour for dusting
  1. Make the Dough

    • On a clean work surface, combine the semolina and white flour.

    • Form into a mound and create a well in the center.

    • Crack the eggs into the well.

    • Add the salt.

    • Using a fork, gently beat the eggs, slowly incorporating flour from the inside of the well.

    • When the mixture becomes thick, use your hands to bring it together into a shaggy dough.

  2. Knead

    Knead the dough for 8–10 minutes.

    Push it forward with the heel of your hand, fold it over, rotate, and repeat.

    The dough should become smooth, firm, and elastic. Semolina makes it slightly firmer than all-white flour dough — this is normal.

    If sticky, sprinkle lightly with flour.If dry, dampen your hands slightly and continue kneading.

  3. Rest

    Wrap the dough tightly in plastic wrap.Let it rest at room temperature for 30 minutes.

    This relaxes the gluten and makes rolling much easier.

  4. Roll the Pasta (Hand Pasta Machine Method)

    Divide the dough into 4 equal pieces. Keep unused pieces wrapped.

    • Set your hand pasta machine to the widest setting (usually #0 or #1).

    • Flatten one piece of dough and feed it through while turning the handle steadily.

    • Fold the dough into thirds and pass it through the widest setting again. Repeat 2–3 times.

    • Now begin reducing the thickness:

    • Pass once through each setting until you reach setting 5 or 6. The sheet should be thin but not tearing.

    • Lightly dust with flour as needed to prevent sticking.

  5. Cut the Fettuccine

    • Attach the fettuccine cutter to your pasta machine.

    • Lightly dust the pasta sheet with semolina.

    • Feed it through the cutter attachment while turning the handle steadily.

    • Catch the noodles and gently separate them.

    • Lay them in small nests or on a lightly floured surface.

    • Let rest for 10–15 minutes before cooking.

  6. Cook

    Bring a large pot of well-salted water to a rolling boil.

    Add fresh fettuccine and cook for 2–3 minutes.

    Fresh pasta cooks quickly — it should be tender but still slightly firm.

    Reserve pasta water for your sauce.


The Ultimate Chicken Recipes Collection

The Ultimate Chicken Recipes Collection

This post may contain affiliate links, that help support this blog. If you make a purchase through these links, I may earn a commission—at no cost to you. For more information read my disclosure policy.

10 Easy Italian-Inspired Chicken Dinners

Chicken is one of the most versatile proteins you can cook. It can be crispy, saucy, creamy, light, baked, grilled, or made in one pan. Whether you need a quick weeknight dinner or something special for Sunday, this collection has you covered.

Here are 10 of my favorite chicken recipes — all in one place.

Chicken Francese

Lightly floured chicken cutlets pan-fried until golden, then simmered in a delicate lemon butter white wine sauce. Bright, fresh, and perfect with pasta or roasted potatoes.

GO TO RECIPE

Chicken Valdostana

Tender chicken layered with prosciutto and melted fontina. Elegant but simple — a beautiful dinner for guests or a cozy night in.GO TO RECIPE

Chicken Parmesan

Crispy breaded chicken baked with marinara and mozzarella until bubbly and golden. A true Italian-American classic that never disappoints.GO TO RECIPE

Chicken Marsala

Golden chicken cutlets simmered with mushrooms in a silky Marsala wine sauce. Rich, savory, and perfect served over pasta.GO TO RECIPE

Chicken Milanese (Stuffed Version)

These Milanese-style stuffed chicken breasts are crispy on the outside and tender on the inside, filled with a savory combination of cheese and herbs. Breaded and baked (or lightly pan-fried), they have that classic golden crust with an extra flavorful center. It’s a beautiful dish for entertaining but still simple enough for a weeknight dinner.GO TO RECIPE

Stuffed Chicken Breasts with Mushroom Gravy

Tennder chicken breasts stuffed with a savory filling, then topped with a rich, homemade mushroom gravy. This dish is hearty, comforting, and perfect for a Sunday dinner or when you want something cozy and satisfying.

The creamy mushroom sauce makes it feel special, but it’s made with simple, everyday ingredients.

GO TO RECIPE

Pollo al Limone (Italian Lemon Chicken)

This classic Italian-style lemon chicken is light, bright, and full of fresh flavor. Tender chicken is sautéed until golden, then finished in a simple lemon, white wine, and butter sauce that’s silky but not heavy.

It’s elegant enough for guests but easy enough for a weeknight dinner. Serve it with roasted vegetables, pasta, or crusty bread to soak up the sauce.

GO TO RECIPE

Creamy Chicken Breast with Mushrooms

Juicy chicken breasts simmered in a rich, creamy mushroom sauce flavored with garlic and herbs. This is one of those easy skillet dinners that feels restaurant-worthy but comes together with simple ingredients.

It’s perfect served over pasta, rice, or even mashed potatoes to soak up that creamy sauce.

GO TO RECIPE

Tuscan Chicken Under a Brick

This rustic Tuscan-style chicken is pressed under a brick while cooking, creating incredibly crispy skin and juicy, flavorful meat. Seasoned simply with olive oil, garlic, herbs, and lemon, it’s a beautiful example of how traditional Italian cooking turns simple ingredients into something extraordinary.

The brick method ensures even cooking and that signature crisp exterior while keeping the inside tender and moist.

GO TO RECIPE

Italian Roasted Lemon Chicken Dinner

This Italian roasted lemon chicken dinner is simple, comforting, and full of fresh flavor. The chicken is roasted with olive oil, garlic, herbs, and fresh lemon until golden and juicy, creating a beautiful pan sauce as it cooks.

It’s the kind of meal that feels effortless but tastes like Sunday dinner — especially when served with roasted potatoes or seasonal vegetables.

GO TO RECIPE


Italian White Beef Stew with Potatoes & Peas

Italian White Beef Stew with Potatoes & Peas

(Spezzatino di Manzo in Bianco)This post may contain affiliate links, that help support this blog. If you make a purchase through these links, I may earn a commission—at no cost to you. For more information read my disclosure policy.

There’s something deeply comforting about a pot of beef stew slowly simmering on the stove. This Italian White Beef Stew—known as Spezzatino di Manzo in Bianco—is rustic, simple, and full of old-world flavor.

Unlike tomato-based stews, this version is made without tomatoes, creating a light, savory sauce that lets the beef, potatoes, and sweet peas shine. It’s the kind of dish you’d find in a nonna’s kitchen on a Sunday afternoon—served with crusty bread and good conversation.

Tender chunks of beef, silky potatoes, and bright green peas come together in a rich broth built from olive oil, aromatics, and slow cooking. It’s humble, hearty, and exactly the kind of meal that warms you from the inside out.

Things to know about this Italian White Beef Stew with Potatoes & Peas

  • Cut of beef matters: Chuck or stewing beef gives the most tender results.

  • Flouring the meat: Lightly coating the beef in flour thickens the sauce naturally.

  • Vegetable timing: Add peas at the very end to keep them bright and tender.

  • Flavor boost: Letting the stew rest 10–15 minutes off heat allows flavors to meld beautifully.

Storage & Reheating

  • Fridge: Store in an airtight container for up to 3–4 days.

  • Freezer: Freeze in a freezer-safe container for up to 3 months.

  • Reheating: Gently reheat on the stovetop over low heat, adding a splash of broth if needed. The potatoes may absorb some liquid, so stir occasionally to keep it saucy.


If you loved this Spezzatino di Manzo in Bianco, check out more cozy Italian recipes on the blog:

Don’t forget to save this recipe for your next Sunday dinner and share it with friends who love Italian comfort food.

Italian White Beef Stew with Potatoes & Peas

  • 2 lbs beef chuck, cut into 1½-inch cubes
  • 3 tbsps olive oil
  • 1 medium yellow onion, finely diced
  • ½ cup diced celery
  • ½ cup diced carrots
  • 2 cloves garlic, minced
  • ½ cup dry wine or additional broth
  • 3 cups beef broth ((more if needed))
  • 1 bay leaf
  • 1 tsp chopped fresh rosemary ((or ½ tsp dried))
  • 1 ½ lbs Yukon Gold potatoes, peeled and cut into chunks
  • 1 cup frozen peas
  • Salt and black pepper, to taste
  • Fresh parsley, for garnish
  1. Lightly Flour & Brown the Beef

    Pat the beef dry and season generously with salt and pepper. Lightly coat each piece with flour, shaking off any excess.Heat olive oil in a heavy Dutch oven over medium heat. Brown the beef gently on all sides, letting it caramelize slightly for deeper flavor.

  2. Cook the Vegetables

    Add the diced onion, celery, and carrots to the same pot. Cook until softened, about 5–7 minutes. Add garlic and cook another 30 seconds.

  3. Deglaze & Simmer

    Deglaze the pan with wine or a splash of broth, scraping up all the browned bits from the bottom. Add the rest of the broth, bay leaf, and rosemary. Make sure the liquid just covers the meat and vegetables.

    Bring to a gentle simmer, cover, and cook on low for about 1 hour, stirring occasionally.

  4. Add the Potatoes

    Add the potatoes to the pot. Cover and continue simmering another 25–30 minutes, or until both the beef and potatoes are fork-tender.

  5. Finish with Peas

    Stir in the peas during the last 5–7 minutes of cooking. Adjust salt and pepper as needed. Remove the bay leaf and sprinkle with fresh parsley before serving


Broiled Lobster Tails for Two – Easy Recipe

Broiled Lobster Tails for Two – Easy Recipe

This post may contain affiliate links, that help support this blog. If you make a purchase through these links, I may earn a commission—at no cost to you. For more information read my disclosure policy.

Looking to make a restaurant-quality lobster dinner at home? These broiled lobster tails are simple, elegant, and full of flavor. With butter, lemon, white wine, and a silky pan sauce, this recipe is perfect for any special occasion—or just a treat-yourself night.

Even if you’ve never cooked lobster before, this method is easy to follow and yields a beautifully tender, juicy lobster tail every time. By propping the meat on top of the shell and broiling just long enough, you get a gorgeous presentation and maximum flavor with minimal effort. This is a recipe that feels fancy but doesn’t require hours in the kitchen.

Things to know about this Broiled Lobster Tails for Two – Easy Recipe

  • Lobster tails cook quickly – 6–8 minutes is usually enough for 4 oz tails; overcooking will make them tough.

  • Pan sauce tip: Let the butter and wine emulsify after broiling for a silky, rich sauce.

  • Make it fancy: Garnish with fresh herbs like parsley or chives for a beautiful presentation.

  • Scaling up: This recipe can easily be doubled or tripled for a larger dinner party.

Tips & Variations

    • Serve with pasta, roasted vegetables, or a simple salad.

    • Garnish with lemon wedges for extra brightness.

    • Perfect for date nights, celebrations, or a special weeknight dinner.

    • Ready to complete your seafood dinner? Try pairing this broiled lobster with:

      Don’t forget to save this recipe for your next special dinner night !!

Broiled Lobster Tails for Two – Easy Recipe

  • 2 lobster tails (4 oz each)
  • 3 tbsp butter
  • ¼ cup white wine
  • 1 lemon sliced
  • Salt, to taste
  • Black pepper, to taste
  • Paprika (optional)
  1. Preheat the broiler, rack about 6 inches from the heat.

  2. Add butter, lemon slices and white wine to a broiler-safe pan.

  3. Prep the lobster tails:

    • Cut down the center of the shell with sharp kitchen shears, or knife. Cut away the legs from underneath

    • Loosen the meat away from the shell with your finger and lift it up, resting it on top of the shell to prop it up.

  4. Season with salt, pepper, and paprika if using.

  5. Place lobster over butter, lemons and wine in the pan.

  6. Broil 6–8 minutes until the meat is opaque and lightly golden (internal temp ~140–145°F).

  7. Remove lobster,  return the pan back to the oven let pan sauce emulsify, about 5-7 minutes and spoon over before serving.


Farinata Italian Chickpeas Flatbread

Farinata Italian Chickpeas Flatbread

This post may contain affiliate links, that help support this blog. If you make a purchase through these links, I may earn a commission—at no cost to you. For more information read my disclosure policy.

Farinata Italian chickpeas flatbread is one of those quietly iconic Italian foods — simple, humble, and deeply rooted in tradition. Originating in Liguria, this thin chickpea flatbread has been made for centuries using just chickpeas, water, olive oil, and salt. It began as street food, valued for being filling, affordable, and made entirely from pantry staples.

Traditionally, farinata is prepared with chickpea flour, but this version goes straight to the source by using whole dried chickpeas. After soaking and blending, the batter bakes into a flatbread with crisp, golden edges and a soft, creamy center. It’s rustic, naturally gluten-free, and a perfect example of how Italian cooking lets simple ingredients do the work.

Things to know about this Farinata Italian Chickpeas Flatbread

  • Farinata Italian chickpeas flatbread should always be thin — a thick batter will bake up dense instead of creamy.

  • Resting the batter improves both flavor and texture, so don’t skip it.

  • Using whole chickpeas creates a slightly more rustic result than chickpea flour, while staying true to tradition.

  • A hot cast iron or metal pan is key for proper browning and crisp edges.

  • Farinata is best enjoyed hot, straight from the oven, but leftovers reheat well in a hot pan.

Variation: Rustic Farinata (Unstrained Batter)

For a heartier, more rustic farinata, skip straining the blended chickpea batter. The finished flatbread will be slightly thicker with more texture, while still keeping the classic crispy edges and creamy center. Just be sure the batter remains thin enough to spread easily in the pan before baking.

Storage & Reheating

Farinata Italian chickpeas flatbread is best enjoyed fresh, but leftovers store well.

  • Refrigerator: Store cooled farinata in an airtight container for up to 3 days.

  • Reheating: Reheat in a hot skillet with a small drizzle of olive oil until warmed through and the edges crisp again.

  • Avoid the microwave if possible — it softens the texture and dulls the flavor.

Farinata does not freeze well, as the texture becomes grainy once thawed.

If you love simple Italian recipes made from pantry staples, be sure to explore more on the blog. Pair this farinata with my
Homemade Beef Bone Broth for a comforting meal, or serve it alongside my Italian and Italian-inspired soups for an easy, rustic spread.

And if you make this farinata Italian chickpeas flatbread, leave a comment below or tag me on social — I love seeing how you serve it and make it your own.

Farinata Italian Chickpeas Flatbread

  • 1 cup dried chickpeas, soaked overnight (12–24 hours)
  • 1 to 1¼ cups  fresh water (for blending)
  • ½ tsp fine sea salt
  • 3–4 tbsp extra virgin olive oil, divided
  • Freshly ground black pepper, to finish

Optional Toppings (add sparingly)

  1. Soak the chickpeas. Soak dried chickpeas in plenty of water overnight. Drain and rinse well.

  2. Optional (but recommended for texture): Simmer the soaked chickpeas in fresh water for 20–30 minutes, just until tender.Drain and let cool slightly.

  3. Blend the batter. Add chickpeas and 1 cup water to a high-speed blender.Blend until completely smooth.Add more water, a little at a time, if needed — the batter should be thin, like crêpe batter, not thick like hummus.

  4. Strain for smoothness. Strain the batter through a fine-mesh sieve for a smoother texture, or skip this step for a more rustic farinata

  5. Season and rest. Stir in the salt.Cover and let the batter rest at room temperature for at least 1 hour, preferably 2–3 hours.Skim off any foam that forms on top.

  6. Preheat oven and pan. Preheat oven to 425°F (Place a 12-inch cast iron skillet or metal baking pan in the oven to heat.

  7. Oil the pan

  8. Carefully remove the hot pan and add 2 tablespoons olive oil, swirling to coat evenly.

  9. Bake. Pour the rested batter into the pan (it should spread thinly).Drizzle the remaining olive oil over the top.Add rosemary or onions now, if using.

  10. Cook until set and golden. Bake for 18–25 minutes, until:

    • Edges are crisp and deeply golden

    • Top has light browning

    • Center is just set and creamy

  11. Optional: Broil for 2–3 minutes for extra char.

  12. Serve immediately. Finish with black pepper and any fresh toppings.Slice into wedges and serve hot.


Italian Crespelle with Parmigiano in Beef Broth

Italian Crespelle with Parmigiano in Beef Broth

This post may contain affiliate links, that help support this blog. If you make a purchase through these links, I may earn a commission—at no cost to you. For more information read my disclosure policy.

This is a traditional primo piatto made with paper-thin crespelle, a light filling of Parmigiano Reggiano, and very hot broth. When done right, it tastes comforting and simple, never heavy.

In older homes, especially in Emilia‑Romagna and central Italy, crespelle were treated like fresh pasta sheets. The batter was lean. The filling was minimal. All the richness came from the broth.

For this version, I use homemade beef bone broth made with neck bones and beef shank. It gives the dish body, clarity, and natural gelatin without needing butter or cream.

What Are Crespelle?

Crespelle are Italian crêpes, but they are not sweet. They are thinner and more delicate than breakfast crêpes and are used the same way Italians use fresh pasta.

When served in brodo, crespelle are filled lightly with Parmigiano and placed in a bowl. Hot broth is poured over just before serving so the cheese melts gently.


Things to know when making Italian Crespelle with Parmigiano in Beef Broth

  • Crespelle are unsweetened and very thin.
  • Butter is not traditional for crespelle served in broth.
  • Parmigiano should be used sparingly so the broth stays clear.
  • This dish is served as a first course, not a main soup.
  • The quality of the broth matters more than anything else.

Tips for Success

  • Use finely grated Parmigiano so it melts quickly.
  • Do not overfill the crespelle.
  • Warm your bowls before serving.
  • Add salt to the broth only at the end.

A Dish Built on Broth

Crespelle al Parmigiano in brodo is a reminder that Italian cooking values simplicity over excess. When the broth is good, everything else falls into place.

Serve it hot, eat it slowly, and let the dish be what it is.

Make the Broth First

This dish depends entirely on good broth. If you don’t already have some on hand, start there.

👉 [Homemade Beef Bone Broth with Neck Bones and Beef Shank] — a slow-simmered, clear broth that gives this dish its depth, body, and natural richness.

Once the broth is ready, these crespelle come together quickly and simply.

Italian Crespelle with Parmigiano in Beef Broth Test

Servings: 3–4 (primo piatto)

Crespelle Batter (No Butter)

  • 2 large eggs
  • 1 cup whole milk ((240 ml))
  • 3/4 cup all‑purpose flour ((95 g))
  • Pinch of fine salt
  • For the pan: a lightly oiled paper towel, wiped almost dry

Filling

  1. Make the Batter

    In a medium bowl, whisk the eggs and milk until fully combined. Add the flour and salt and whisk until smooth. Let the batter rest at room temperature for 20–30 minutes.

  2. Cook the Crespelle

    Heat a 8 inch nonstick pan over medium‑low heat. Lightly wipe the surface with oil, then remove any excess.

    Pour about ¼ cup of batter into the pan and swirl immediately to create a very thin crespella. Cook for 30–40 seconds until set, then flip and cook for another 10–15 seconds.

    Transfer to a plate and repeat with the remaining batter. Stack the crespelle and keep them covered.

  3. Assemble

    Lay one crespella flat and sprinkle lightly with Parmigiano Reggiano. Fold into quarters or roll gently. Place 2–3 crespelle into each warmed bowl.

  4. Serve in Brodo

    Bring the beef bone broth to a gentle boil and taste for salt. Ladle the very hot broth over the crespelle just before serving. Serve immediately.


French Onion Soup with an Italian Twist

French Onion Soup with an Italian Twist

This post may contain affiliate links, that help support this blog. If you make a purchase through these links, I may earn a commission—at no cost to you. For more information read my disclosure policy.

French onion soup has always felt like the ultimate comfort food to me, but I can’t help adding an Italian touch to the dishes I love most. In my kitchen, onions are never rushed—they’re slowly caramelized the way I learned growing up, filling the house with that unmistakable, cozy aroma that signals something special is coming. For this version, I use a mix of red onions, yellow onions, and leeks, then finish the soup the Italian way—with herb focaccia and freshly grated Fontina instead of the classic baguette and Gruyère. It’s familiar yet different, rustic but comforting, and exactly the kind of soup I make when I want something simple, soulful, and meant to be shared.

Things to know about this French Onion Soup with an Italian Twist


  • A mix of yellow onions, red onions, and leeks adds natural sweetness and depth without needing sugar.

  • Fontina melts smoothly and stays creamy, making it a perfect Italian alternative to Gruyère.

  • Herb focaccia absorbs the broth while still holding its shape, giving you that perfect bite every time.

  • The soup base can be made a day ahead; add the focaccia and cheese just before serving for best texture.

  • Storage: Store leftover soup (without focaccia or cheese) in an airtight container in the refrigerator for up to 4 days.

  • Freezing: This soup freezes well without the bread and cheese. Freeze in freezer-safe containers for up to 3 months. Thaw overnight in the refrigerator and reheat on the stovetop before adding toppings.

  • Always add the focaccia and Fontina fresh just before broiling for the best texture and flavor.

  • If you love classic comfort food with an Italian twist, this French Onion Soup with an Italian Twist is a must-try. The combination of caramelized onions, leeks, herb focaccia, and melty Fontina makes it a cozy, flavorful soup perfect for any season.

    For more hearty Italian soups, explore my Creamy Sausage Tortellini Soup or Potato Leek Soup with Pancetta—both are easy to make and full of rich, comforting flavors.

    Want to try more Italian-inspired weeknight recipes? Don’t miss my Italian sausage Escarole and Beans or Spinach Ricotta Balls for quick, flavorful meals the whole family will love.

    Remember to save this French Onion Soup recipe for later and follow my blog for more Italian cooking inspiration delivered right to your inbox!


French Onion Soup with an Italian Twist

Soup

  • 2 tablespoons olive oil
  • 2 tablespoons unsalted butter
  • 2 large yellow onions (thinly sliced)
  • 2 medium red onions (thinly sliced)
  • 2 large leeks (white and light green parts only, thinly sliced and well rinsed)
  • 1 teaspoon salt (plus more to taste)
  • ½ teaspoon freshly ground black pepper
  • 2 cloves garlic (minced)
  • ¼ cup dry white wine
  • 6 cups beef broth (or chicken broth for a lighter version)
  • 1 teaspoon fresh thyme leaves (or ½ teaspoon dried)
  • 1 bay leaf

Topping

  • 4 –6 slices herb focaccia
  • 1½ cups freshly grated Fontina cheese
  1. Caramelize the onions

    In a large heavy-bottomed pot or Dutch oven, heat the olive oil and butter over medium heat. Add the yellow onions, red onions, and leeks. Sprinkle with salt and pepper. Cook, stirring occasionally, for 35–40 minutes, until deeply golden, soft, and caramelized. Reduce heat if needed to prevent burning.

  2. Build the flavor

    Add the garlic and cook for 1 minute until fragrant. Pour in the white wine, scraping up any browned bits from the bottom of the pot. Simmer for 2–3 minutes until slightly reduced.

  3. Simmer the soup

    Add the broth, thyme, and bay leaf. Bring to a gentle simmer, cover partially, and cook for 25–30 minutes. Taste and adjust seasoning. Remove the bay leaf.

  4. Prepare for broiling

    Preheat the broiler. Ladle the soup into oven-safe bowls and place them on a baking sheet.

  5. Add the Italian topping

    Top each bowl with a slice of herb focaccia, then generously sprinkle with Fontina cheese.

  6. Broil

    Broil for 2–4 minutes, until the cheese is fully melted, bubbling, and lightly golden. Watch closely.

  7. Serve

    Serve immediately, hot and bubbling, with extra focaccia on the side if desired.


15 Classic & Italian‑Inspired Pasta Recipes

15 Classic & Italian‑Inspired Pasta Recipes

Why This Pasta Collection

Pasta has always been at the heart of Italian cooking and at the heart of my kitchen. From humble pantry pastas like pasta e piselli to cozy baked dishes and restaurant‑style favorites, this pillar post brings together 15 of my most popular pasta recipes already on the blog—all in one place for easy browsing.

Use this guide to:

  • Find the right pasta for the season
  • Discover weeknight vs. Sunday sauces
  • Navigate sauces by style (tomato, cream, broth, baked)

1. Pasta e Piselli (Pasta and Peas)

A classic Italian comfort dish made with olive oil, onion, peas, and pasta—simple, nostalgic, and budget‑friendly.GO TO RECIPE

2. Authentic Pasta e Fagioli

A childhood favorite featuring beans, pasta, aromatics, and a rich tomato base—rustic Italian cooking at its best.GO TO RECIPE

3. Pasta e Ceci (Pasta with Chickpeas)

A humble Roman-style pasta made with chickpeas, garlic, olive oil, and pasta—simple, nourishing, and deeply comforting.GO TO RECIPE

Creamy & Cheesy Pasta Recipes

4. One‑Pot Pasta and Potatoes

A classic Italian one‑pot dish where pasta and potatoes cook together, creating a naturally creamy, comforting sauce.GO TO RECIPE


5. Italian Cauliflower Pasta Alfredo

A lighter twist on Alfredo using cauliflower for creaminess without sacrificing flavor.GO TO RECIPE

6. Mushroom Pasta alla Norcina

A rich pasta made with mushrooms,  cream, and Pecorino Romano—GO TO RECIPE

Sunday Sauces & Hearty Pastas

7. Classic Meatball Sunday Sauce with Pasta

A slow‑simmered tomato sauce served with pasta—just like Sundays in an Italian kitchen.GO TO RECIPE

8. Sausage and Lentil Pasta (New Year’s Tradition)

A traditional Italian pasta dish symbolizing luck and prosperity, made with lentils and sausage.GO TO RECIPE

9. Mushroom and  Sausage Pasta

A deeply savory sauce made with mushrooms and Italian sausage, perfect for your favorite pasta shape.GO TO RECIPE

Baked Pasta Favorites

10. Baked Spaghetti Pie

A fun and comforting baked pasta dish with layers of spaghetti, cheese, and sauce.GO TO RECIPE

11. Easy cheesy stuffed  Shells

Large pasta shells filled with cheese and spinach and topped with my easy marinara sauce—perfect for entertaining.GO TO RECIPE

Seafood Pasta Dishes

12. Spaghetti e Gamberi (Shrimp Spaghetti)

A simple, restaurant‑style shrimp pasta with garlic, olive oil, and wine.GO TO RECIPE

13. Seared Scallops with Orzo

A seafood‑forward pasta dish with bold flavors and a creamy finish.GO TO RECIPE

Rustic & Regional Pasta Recipes

14. Pasta al Forno (Baked Italian Pasta)

A classic Italian baked pasta layered with sauce, cheese, and pasta—comforting, crowd‑pleasing, and perfect for make‑ahead meals.GO TO RECIPE

15. Spaghetti Carbonara

A traditional Roman pasta made with eggs, Pecorino Romano, black pepper, and crispy guanciale—simple, rich, and timeless.GO TO RECIPE

Things to know about 15 Classic & Italian‑Inspired Pasta Recipes

  • Pasta shapes matter: Short pastas work best for baked dishes and chunky sauces, while long pastas shine with smooth or egg‑based sauces like carbonara.
  • Salt your water well: Properly salted pasta water is essential for authentic Italian flavor—this is where the pasta gets seasoned.
  • Sauce meets pasta, not the plate: Always finish cooking pasta in the sauce so the flavors marry together.
  • Traditional doesn’t mean complicated: Many classic Italian pastas use just a handful of ingredients—quality matters more than quantity.
  • Make it your own: These recipes are rooted in tradition but flexible enough for home cooks.