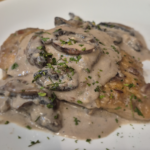
Chicken Meatballs with Marry Me Orzo

Chicken Meatballs with Marry Me Orzo

This post may contain affiliate links, that help support this blog. If you make a purchase through these links, I may earn a commission—at no cost to you. For more information read my disclosure policy.

Tender chicken meatballs are always a hit at the dinner table, and when you pair them with creamy Marry Me Orzo, you’ve got the ultimate comfort meal. This dish brings together juicy baked chicken meatballs and orzo pasta simmered in a rich Parmesan and sun-dried tomato cream sauce. It’s the kind of meal that feels special enough for date night yet easy enough for a weeknight family dinner.

The name “Marry Me Orzo” comes from the idea that the flavors are so irresistible, they just might win someone’s heart. I love how the baked meatballs soak up the creamy sauce, making every bite flavorful and hearty. If you’re looking for a one-pan recipe that’s simple, satisfying, and a little bit romantic, this is it.

Things to Know About Chicken Meatballs with Marry Me Orzo

  • Bake, don’t fry: Baking the meatballs keeps them juicy without extra oil, and it’s hands-off while you prepare the orzo.

  • Cream swap: Heavy cream gives the sauce its velvety texture, but you can lighten it up with half-and-half or even whole milk (just simmer a little longer to thicken).

  • Cheese matters: Freshly grated Parmesan melts more smoothly than pre-shredded, giving the sauce that silky finish.

  • Customize the spice: Red pepper flakes add a gentle kick—use more if you like a little heat, or leave them out for a milder dish.

  • Make it ahead: The meatballs can be baked in advance and refrigerated (up to 3 days) or frozen (up to 3 months). Add them to the orzo to reheat.

  • Serving ideas: This dish is filling on its own, but it pairs beautifully with a crisp green salad or roasted vegetables.

  • Storage tips: Leftovers keep well in the fridge for 2–3 days. Reheat gently on the stove with a splash of broth or cream to loosen the sauce.

If you loved these Chicken Meatballs with Marry Me Orzo, you’ll also enjoy other comforting Italian favorites: try my Shrimp Marry Me Orzo for a seafood twist, or cozy up with Creamy Sausage Tortellini Soup for a hearty weeknight dinner.


Chicken Meatballs with Marry Me Orzo

For the Chicken Meatballs

  • 1 lb ground chicken
  • 1 large egg
  • 1 cup breadcrumbs
  • ½ cup grated Parmesan cheese
  • 2 cloves garlic, minced
  • 2 tbsp onion, grated or finely minced
  • 2 tbsp fresh parsley, chopped
  • salt and pepper to taste

For the Marry Me Orzo

  1. Bake the Meatballs. Preheat oven to 400°F (200°C). Line a baking sheet with parchment paper.In a mixing bowl, combine ground chicken, egg, breadcrumbs, Parmesan, garlic, onion, parsley, salt, and pepper. Mix until just combined and roll into about 18–20 small meatballs.Place on the prepared baking sheet and bake for 18–20 minutes, until cooked through and lightly golden.

  2. Start the Orzo. While the meatballs bake, heat olive oil in a large skillet over medium heat. Add garlic and sun-dried tomatoes, sautéing for 1–2 minutes. Stir in the orzo and toast lightly.

  3. Simmer the Sauce. Pour in chicken broth and heavy cream. Bring to a gentle simmer and cook, stirring occasionally, until the orzo is al dente and creamy, about 10–12 minutes. Add more broth as needed to keep it saucy.

  4. Finish the Dish. Stir in Parmesan, red pepper flakes, thyme, salt, and pepper. Add the baked meatballs to the skillet and simmer for 2–3 minutes so the flavors meld.

  5. Add Spinach & Serve. Stir in baby spinach (if using) until wilted. Garnish with extra Parmesan and parsley. Serve immediately.


Tuscan Chicken Under a Brick Recipe

Tuscan Chicken Under a Brick Recipe

This post may contain affiliate links, that help support this blog. If you make a purchase through these links, I may earn a commission—at no cost to you. For more information read my disclosure policy.

In Tuscany, there’s a beloved way of cooking chicken known as Pollo al Mattone — literally, “chicken under a brick.” Traditionally, the chicken is flattened and pressed beneath hot bricks while it cooks, creating crisp golden skin and juicy, flavorful meat. Since I don’t keep bricks in my kitchen, I use a heavy cast iron pan instead, which delivers the same beautiful results with a touch of rustic Italian charm. This method transforms simple ingredients like garlic, rosemary, thyme, and lemon into a dish that feels both traditional and effortless.

Things to Know About Tuscan chicken under a brick

  • What does Pollo al Mattone mean?
    In Italian, it translates to “chicken under a brick.” The brick’s weight helps press the chicken flat, ensuring even cooking, golden crisp skin, and juicy meat.

  • Do I need a brick?
    Traditionally, yes — the brick is wrapped in foil and heated. But a heavy cast iron skillet or Dutch oven works just as well and is easier to manage in a home kitchen.

  • Why spatchcock the chicken?
    Removing the backbone and flattening the chicken helps it cook faster and more evenly. It’s the key to achieving that irresistible crisp skin without drying out the meat.

  • Flavor profile.
    This dish is all about simplicity. Olive oil, garlic, rosemary, thyme, and lemon are classic Tuscan ingredients that let the chicken shine.

  • Cooking method.
    While it can be made on the stovetop or in the oven, it’s equally delicious grilled over wood or charcoal — the way it’s often enjoyed in Tuscany.

  • Serving ideas.
    Pair with roasted potatoes, Tuscan white beans, or a peppery arugula salad. Keep the sides rustic and simple, just like the dish itself.

  • Love this Tuscan-style chicken? Try my Oven-Roasted Spatchcock Chicken next for another easy way to get juicy, golden chicken at home.


Tuscan Chicken Under a Brick Recipe

Tuscan Chicken Under a Brick is a classic Italian dish featuring a whole chicken pressed under a weight for incredibly crispy, golden skin and juicy, flavorful meat. Seasoned with fresh herbs, garlic, lemon, and olive oil, this rustic recipe brings authentic Tuscan flavors to your table.

  • 1 medium whole chicken (about 3 ½–4 lbs, backbone removed and butterflied (spatchcocked))
  • 3 Tbsp. olive oil
  • 4 garlic cloves (minced)
  • 2 sprigs fresh rosemary (finely chopped)
  • 2 sprigs fresh thyme (leaves removed)
  • 1 lemon (zest and juice)
  • salt and pepper to taste (or to taste)
  1. Prepare the Chicken

    Place the chicken breast-side down on a cutting board. Using sharp kitchen shears, cut along both sides of the backbone and remove it. Flip the chicken breast-side up and press firmly to flatten. Pat dry with paper towels.

  2. Season the Chicken

    In a small bowl, mix together olive oil, garlic, rosemary, thyme, lemon zest, lemon juice, salt, and pepper.

    Rub the mixture all over the chicken, making sure to get under the skin where possible for maximum flavor.

  3. Heat the Pan

    Preheat a large cast iron skillet over medium-high heat for 5 minutes until hot. Lightly oil the pan.

  4. Cook the Chicken

    Place the chicken skin-side down in the hot skillet.

    Carefully place another heavy cast iron skillet (or a Dutch oven) on top of the chicken to press it flat.

    Cook for about 12–15 minutes without moving, until the skin is deeply golden and crispy.

  5. Finish Cooking

    Remove the top skillet and carefully flip the chicken over.

    Return the weight on top and cook another 30–35 minutes, or until the thickest part of the thigh registers 165°F (74°C) on a meat thermometer.

  6. Rest and Serve

    Transfer chicken to a cutting board and let rest for 10 minutes before carving.

    Serve with lemon wedges, roasted potatoes, or a crisp green salad.

Main Course
Italian


Crispy Barbecued Buffalo Chicken Wing Recipe

Crispy Barbecued Buffalo Chicken Wing Recipe

This post may contain affiliate links, that help support this blog. If you make a purchase through these links, I may earn a commission—at no cost to you. For more information read my disclosure policy.

Some of our most-loved recipes have their roots in the kitchens of our restaurants, and these Barbecued Buffalo Chicken Wings are no exception. Just like our Smashed Italian Sausage & Pepper Sandwiches, these wings quickly became a customer favorite — and later, a family favorite at home too.

Back in the restaurant, we made them the classic way: fried until golden and crispy, with that irresistible crunch that made them a staple on the menu. We kept the seasoning simple — salt, pepper, paprika, mustard, garlic powder, and a touch of cornstarch — but the result was magic. Crispy wings with just the right balance of smoky, spicy flavor that had people coming back for more.

Over time, I started making them at home too, sometimes grilling or baking instead of frying, but always keeping that same bold flavor. Whether served with a cold drink at the bar or around our own family table, these wings are the kind of dish that proves simple ingredients can deliver unforgettable flavor.


Crispy Barbecued Buffalo Chicken Wing Recipe

For the Wings

  • 2 lb chicken wings, split into drumettes and flats, tips removed
  • 1 tbsp baking powder (aluminum-free)
  • 1 tsp garlic powder
  • 1 tsp onion powder
  • 1 tsp smoked paprika
  • ½ tsp salt
  • ½ tsp black pepper

For the Buffalo BBQ Sauce

  • ½ cup buffalo wing sauce
  • ¼ cup barbecue sauce
  • 2 tbsp unsalted butter, melted
  • 1 tbsp honey (optional, for a touch of sweetness)
  • 1 tsp Worcestershire sauce

For Serving (Optional)

  • Ranch or blue cheese dressing
  • Celery sticks
  • Carrot sticks
  • Chopped fresh parsley
  1. Preheat the oven to 425°F (220°C). Line a baking sheet with foil and place a wire rack on top. Lightly grease the rack.

  2. Pat the chicken wings completely dry with paper towels. Dry skin is the key to crispy wings.

  3. In a large bowl, combine the baking powder, garlic powder, onion powder, smoked paprika, salt, and black pepper. Toss the wings until evenly coated.

  4. Arrange the wings in a single layer on the prepared wire rack, leaving space between each wing.

  5. Bake for 20 minutes, then flip the wings and continue baking for another 20–25 minutes, or until golden brown and crispy.

  6. While the wings bake, whisk together the buffalo wing sauce, barbecue sauce, melted butter, honey (if using), and Worcestershire sauce in a small saucepan over low heat. Warm for 2–3 minutes, stirring occasionally.

  7. Transfer the hot wings to a large bowl. Pour the warm Buffalo BBQ sauce over the wings and toss until evenly coated.

  8. For extra caramelization, return the sauced wings to the oven or place them under the broiler for 2–3 minutes, watching carefully to prevent burning.

  9. Serve immediately with ranch or blue cheese dressing, celery sticks, and carrot sticks.

  10. Baking powder helps create an extra crispy skin without frying.

    For a smokier flavor, grill the wings over medium heat for 3–5 minutes after saucing instead of broiling.

    Adjust the heat by using more barbecue sauce for a milder flavor or adding extra buffalo sauce for more spice.


Ciambotta with Chicken – Italian Vegetable Stew

Ciambotta with Chicken – Italian Vegetable Stew

This post may contain affiliate links, that help support this blog. If you make a purchase through these links, I may earn a commission—at no cost to you. For more information read my disclosure policy.

Every summer, my mother would make a big pot of ciambotta — the rustic Italian vegetable stew that filled our home with the aroma of fresh herbs and slowly simmering garden vegetables. First, she would gather whatever was ripe from the garden — zucchini, eggplant, peppers, and tomatoes. Then, she would let them cook gently until the flavors melded together into pure comfort.

In this version, I add tender chicken breast for extra heartiness. However, the beauty of ciambotta is how adaptable it is. Whether you use vegetables from your own garden or pick them up at the market, you’ll always end up with a wholesome, flavorful meal. For even more richness, you can swap in Italian sausage or combine it with chicken for a complete one-pan Italian dinner everyone will love.

Things to know about this Ciambotta with Chicken – Italian Vegetable Stew

You said:Origin & Tradition

Ciambotta is a classic Southern Italian vegetable stew, especially popular in regions like Campania and Calabria. Traditionally, it’s a simple, rustic dish made with seasonal vegetables simmered together to create a comforting, hearty meal.

Customizable Vegetables
The beauty of Ciambotta lies in its flexibility — you can use whatever fresh vegetables are in season or available. Common ingredients include eggplant, zucchini, bell peppers, tomatoes, potatoes, and onions.

Protein Options: Chicken or Sausage
Chicken adds a mild, tender protein that soaks up the flavors beautifully, while Italian sausage brings a richer, spiced, and heartier element to the stew. You can choose either, or combine both for extra depth.

Flavor Profile
This stew is seasoned with garlic and fresh herbs like basil and oregano, sometimes with a splash of red wine or vinegar for added depth. Olive oil and ripe tomatoes give it a rich, savory base.

Cooking Method
Everything is simmered slowly, allowing the flavors to meld. The chicken or sausage can be browned first for extra flavor or cooked directly in the stew.

Serving Suggestions
Ciambotta with chicken or sausage can be enjoyed on its own as a hearty main dish or served alongside crusty bread or creamy polenta to soak up the delicious sauce.

Healthy & Comforting
This nutritious dish is packed with vegetables and protein, perfect for a cozy family meal.

Personal Touch
Many families, like my mother’s, have their own twist on Ciambotta — the choice of vegetables, herbs, or protein makes it special and personal every time.


If you love this Ciambotta with Chicken – Italian Vegetable Stew, try these other fresh and flavorful summer sides:

Grilled Peach Caprese Salad
Juicy peaches, summer tomatoes, fresh mozzarella, and basil drizzled with simple balsamic.

Crispy Cauliflower Bites
Crunchy, savory veggie bites that everyone will love.

Ciambotta with Chicken – Italian Vegetable Stew

  • 2 boneless (skinless chicken breasts (about 1 lb), cut into bite-sized pieces)
  • 2 tablespoons olive oil
  • 1 medium onion (diced)
  • 3 garlic cloves (minced)
  • 1 bell pepper (diced)
  • 1 medium eggplant (about 1 lb, diced)
  • 2 medium zucchini (about 12 oz, diced)
  • 2 medium potatoes (about 10 oz, diced)
  • 2 cups chopped tomatoes (or 1 can/14 oz diced tomatoes)
  • 1 cup chicken broth
  • 1/2 cup red wine
  • 1 teaspoon dried oregano
  • 1 teaspoon dried basil
  • ½ teaspoon crushed red pepper flakes (optional)
  • salt and pepper to taste
  • Fresh parsley or basil (chopped, for garnish)
  1. Prep the chicken: Season chicken breast pieces with ½ teaspoon salt and ¼ teaspoon black pepper.
  2. Brown the chicken: Heat 1 tablespoon of olive oil in a large Dutch oven or heavy pot over medium-high heat. Add the chicken and cook for 4–5 minutes, until lightly golden but not fully cooked through. Remove and set aside.
  3. Sauté aromatics: Add the remaining tablespoon of olive oil to the pot. Stir in the onion and cook for 3 minutes until softened. Add garlic and cook for 30 seconds until fragrant.
  4. deglaze the pan with the red wine waiting until fully absorbed before proceeding
  5. Add vegetables: Stir in the bell peppers, eggplant, zucchini, and potatoes. Cook for 5–6 minutes, stirring occasionally, until the vegetables begin to soften.
  6. Build the stew: Add the cherry tomatoes (or canned tomatoes), chicken broth, oregano, basil, crushed red pepper flakes (if using), and remaining salt and pepper. Stir well, scraping up any browned bits from the bottom.
  7. Simmer: Return the chicken to the pot. Bring to a gentle simmer, cover, and cook for 20–25 minutes, stirring occasionally, until the vegetables are tender and the chicken is cooked through.
  8. Finish & serve: Taste and adjust seasoning if needed. Garnish with fresh parsley or basil. Serve hot with crusty bread to soak up the flavorful sauce


Pollo al Limone Italian lemon chicken

Pollo al Limone Italian lemon chicken

This post may contain affiliate links, that help support this blog. If you make a purchase through these links, I may earn a commission—at no cost to you. For more information read my disclosure policy.

Lemons are in peak season right now, and there’s no better way to celebrate their bright, zesty flavor than with this Italian Lemon Chicken. Known as Pollo al Limone, this dish is simple, rustic, and full of Southern Italian charm. With a golden sear, a light pan sauce, and a fresh lemon-parsley drizzle, it’s the kind of meal that tastes like summer.

Things to Know About This Pollo al Limone (Italian Lemon Chicken):

  • Lemons are the star – Use fresh, juicy lemons (preferably in-season Meyer lemons if available) for the brightest flavor. Bottled juice won’t do it justice.

  • Fresh parsley finishes the dish – A drizzle of lemon juice mixed with chopped Italian parsley adds a fresh pop right before serving.

  • Bone-in, skin-on chicken gives the best flavor – The skin crisps up beautifully when seared, and the bone keeps the meat juicy.

  • wine for depth – A splash of dry white wine in the sauce adds subtle complexity, but it’s just as delicious without it if you want to go alcohol free

  • One pan simplicity – This is a no-fuss dish that’s mostly done on the stovetop with minimal cleanup.

  • Perfect for any night – Light enough for a summer dinner, yet cozy and comforting year-round.

  • Craving more Italian chicken dishes? Don’t miss my other easy and flavorful chicken recipes—perfect for weeknights, gatherings, or Sunday dinners. Browse more here ➝Easy chicken piccata 
  • or one of my personal favorites Easy and quick chicken francese
  • ENJOY!!!

Pollo al Limone Italian lemon chicken

  • 4 boneless skinless chicken breast
  • 2 Tbsp. olive oil
  • 2 Tbsp. butter
  • 2 garlic cloves (minced)
  • zest and Juice of 2 lemons
  • 1/3 cup chopped Italian parsley
  • 1 cup chicken broth
  • 1 /2 cup dry white wine
  • 2 teaspoon dried oregano
  • 2 teaspoon paprika
  • Salt and pepper (to taste)
  • Fresh parsley (chopped)
  1. Season the Chicken Pat the chicken dry with paper towels. Season both sides generously with salt, pepper, paprika and dried oregano .

  2. Sear the Chicken In a large skillet, heat the olive oil over medium-high heat. Place the in the oil  sear for 2-3 minutes without moving, until deeply golden. Flip and sear the other side for another 2-3 minutes. Remove chicken and set aside.

  3. Make the Pan Sauce In the same skillet (do not wipe it), reduce the heat to medium. Add minced garlic and sauté for about 30 seconds until fragrant.  Deglaze the pan with the wine waiting until  it is fully absorbed and  scraping up any browned bits from the bottom of the pan before adding the chicken broth,  let it simmer for 2–3 minutes to slightly reduce.

  4. Return Chicken to the Pan Place the seared chicken back into the pan. Cover the skillet with a lid and simmer over low heat for about 7- 10  minutes, until the chicken is cooked through and tender.

  5. Make the Lemon-Parsley Drizzle While the chicken is  cooking, whisk together the fresh lemon juice, chopped Italian parsley, and lemon zest  in a small bowl.

  6. Finish the Dish Add the butter and  the lemon-parsley mixture to the chicken, let it simmer uncovered for an additional 5 minutes until the sauce is emulsified Garnish with fresh lemon slices and more parsley if desired.

  7. Serve Serve warm with roasted potatoes, sautéed greens, or crusty Italian bread to soak up the sauce. ENJOY!!!


One-Pan Italian Chicken with Peppers and Tomatoes

One-Pan Italian Chicken with Peppers and Tomatoes

This post may contain affiliate links, that help support this blog. If you make a purchase through these links, I may earn a commission—at no cost to you. For more information read my disclosure policy.

This One-Pan Italian Chicken with Peppers and Tomatoes is one of those meals I make when I want something easy but full of flavor. It’s just simple ingredients—tender chicken, sweet peppers, juicy cherry tomatoes, and a scoop of my marinara—all cooked together in one skillet. Then I top it off with fresh mozzarella and let it melt . So good, and it always feels a little extra special without being fussy.

I’ve been making some version of this dish for years—it’s the kind of meal that doesn’t need measuring cups or fancy techniques, just good ingredients and a hot pan. The peppers get soft and sweet, the cherry tomatoes burst into the sauce, and everything comes together with that final layer of melty mozzarella.

Things to know about this One-Pan Italian Chicken with Peppers and Tomatoes

It’s quick and easy.
This recipe comes together in about 30 minutes with just one pan, making it perfect for busy weeknights.

Use what you have.
Don’t have cherry tomatoes? Grape tomatoes or even a few chopped ripe tomatoes will work. You can also swap mozzarella for provolone or fontina.

Make it your own.
Add a handful of olives or capers for a briny twist, or a pinch of chili flakes if you like a little heat.

Great for leftovers.
The flavors only get better the next day. Slice up the leftover chicken and peperonata and tuck it into a sandwich or warm it up over rice or pasta.

It pairs well with just about anything.
Serve it with crusty bread, creamy polenta, simple pasta, or even a fresh green salad for balance.

Give this One-Pan Italian Chicken with Peppers and Tomatoes a try and let me know if it makes it into your regular dinner rotation—don’t forget to snap a photo and tag me, I’d love to see your version!

One-Pan Italian Chicken with Peppers and Tomatoe

  • 2 boneless (skinless chicken breasts, halved horizontally (makes 4 cutlets))
  • Salt and black pepper (to taste)
  • 2 tablespoons olive oil
  • 1 red bell pepper (thinly sliced)
  • 1 green bell pepper (thinly sliced)
  • 1 small chopped onion
  • 2 garlic cloves (minced)
  • 2 cups cherry tomatoes (halved or whole)
  • 1 cup marinara sauce (use my easy homemade marinara version!)
  • 1/2 cup white wine
  • Pinch of red pepper flakes (optional)
  • 4 slices fresh mozzarella
  • Fresh basil or parsley (for garnish)
  1. Sear the chicken: Season chicken cutlets with salt and pepper. Heat 1 tablespoon olive oil in a large skillet over medium heat. Sear chicken 3–4 minutes per side until golden brown. Transfer to a plate and keep warm.
  2. Add garlic and tomatoes: Stir in the garlic and cook for 1 minute. Add halved cherry tomatoes and cook another 4–5 minutes until they begin to soften and release juices.
  3. Add the vegetables: Add the sliced peppers and onion with a pinch of salt until softened, about 8–10 minutes.
  4. Deglaze the pan with the white wine waiting until it’s fully absorbed before proceeding
  5. Add marinara and season: Stir in your marinara sauce, a pinch of red pepper flakes if using. Simmer 3–5 minutes until slightly thickened.
  6. Return chicken & melt cheese: Nestle the chicken back into the pan and spoon some sauce over each piece. Top each cutlet with a slice of mozzarella. Cover and cook on low for 3–4 minutes, or until the cheese is melted. Top with fresh basil.


Bruschetta Grilled Chicken Tenders with Mozzarella

Bruschetta Grilled Chicken Tenders with Mozzarella

This post may contain affiliate links, that help support this blog. If you make a purchase through these links, I may earn a commission—at no cost to you. For more information read my disclosure policy.

Quick-cooking chicken tenders grilled to juicy perfection, topped with fresh mozzarella and a zesty tomato bruschetta mix. A light, Italian-style dish perfect for warm weather meals.

The chicken is seasoned simply with garlic, olive oil, and herbs, then grilled until golden with crisp edges and tender centers. As soon as it comes off the grill, it’s topped with slices of fresh mozzarella that melt slightly from the heat. A generous spoonful of bright, garlicky tomato bruschetta—made with cherry tomatoes, basil, red onion, and a splash of balsamic—finishes the dish. Serve it with grilled bread, over arugula, or alongside a light pasta for an easy and elegant summer meal.

Things to know about this Bruschetta Grilled Chicken Tenders with Mozzarella

This recipe is as versatile as it is flavorful. The chicken tenders can be grilled outdoors for that classic smoky char, but they’re just as delicious cooked indoors on a grill pan or skillet. Short on time or want a more hands-off option? You can also bake them in the oven. No matter which method you choose, the juicy chicken gets topped with fresh, garlicky tomato bruschetta and melty mozzarella for a quick and easy Italian-inspired meal.

Serve these bruschetta chicken tenders as a light main dish with a side salad, or pair them with pasta, rice, or grilled vegetables for a more filling meal. They’re great for entertaining too—easy to prep ahead and assemble just before serving. The combination of warm, juicy chicken, bubbling mozzarella, and fresh tomato topping is a crowd-pleaser that tastes like summer any time of year.

Craving more easy and flavorful chicken ideas? Don’t stop here—check out my full collection of chicken recipes for everything from quick weeknight dinners to comforting classics. Whether you’re in the mood for something grilled, baked, or simmered in sauce, I’ve got plenty of delicious options waiting for you! 👉lorianasheacooks.com 

Bruschetta Grilled Chicken Tenders with Mozzarella

  • 1 ½ lb chicken tenders
  • 2 tbsp olive oil
  • 2 tsp Italian seasoning
  • 2 tsp garlic powder
  • 2 tsp paprika
  • Salt and pepper (to taste)
  • 8 oz fresh mozzarella (sliced or torn)

For the bruschetta topping:

  • 2 cups cherry tomatoes (diced)
  • 2 cloves garlic (minced)
  • 2 tbsp fresh basil (chopped)
  • 1 tbsp balsamic vinegar
  • 2 tbsp olive oil
  • Salt and pepper (to taste)
  1. Prep the chicken: Toss chicken tenders with olive oil, Italian seasoning, garlic powder, paprika, salt, and pepper. Let marinate for 15–20 minutes.
  2. Make the bruschetta: In a bowl, combine tomatoes, garlic, basil, balsamic vinegar, and olive oil. Season with salt and pepper. Set aside.
  3. Grill the chicken: Preheat grill (or grill pan) to medium-high. Grill tenders for 3–4 minutes per side until golden and just cooked through. In the last minute of cooking, top each tender with a piece of fresh mozzarella. Cover briefly to help it melt.
  4. Finish and serve: Arrange the tenders on a serving platter, spoon the fresh bruschetta mixture over the top, and drizzle with balsamic glaze if desired. Garnish with extra basil.


Easy crispy chicken parmesan

Easy crispy chicken parmesan

This post may contain affiliate links, that help support this blog. If you make a purchase through these links, I may earn a commission—at no cost to you. For more information read my disclosure policy.

This easy crispy  Chicken parmesan,  is the perfect recipe when your craving classic Italian, but need it to be easy and quick.

Crispy, golden chicken, tangy marinara, and gooey melted cheese—it’s the kind of dish that never goes out of style. But what if you could get all that Italian comfort without spending all evening in the kitchen? This version keeps things simple but delivers big on flavor. The secret? I use equal parts grated cheese and breadcrumbs to coat the chicken before frying it to golden perfection. That cheesy crust gets irresistibly crisp and flavorful, adding an extra layer of richness to every bite.

After a quick pan-fry, the chicken is topped with sauce and more cheese, then baked just until everything is bubbling and beautifully melted. It’s the best of both worlds: that classic fried texture with a shortcut finish in the oven that brings it all together.

Quick enough for a weeknight, special enough for Sunday dinner—this extra cheesy Chicken Parmesan is the kind of recipe that earns a spot in your regular rotation.

Things to know about this Easy crispy chicken parmesan recipe

  • Pound the chicken thin for even cooking and maximum crispiness. Thinner cutlets cook faster and more evenly, helping you avoid dry chicken.

  • Use a mix of breadcrumbs and Parmesan for a flavorful, golden crust. Italian-seasoned breadcrumbs work great, but feel free to add extra herbs like oregano or basil.

  • Fry until golden, then finish in the oven. Pan-frying gives the chicken its signature crunch, while baking it with sauce and cheese melts everything together perfectly without getting soggy.

  • Don’t drown it in sauce. A light spoonful of marinara keeps the crust crispy while adding just the right amount of flavor.

  • Fresh mozzarella and basil are game changers. They bring that homemade Italian touch that makes this dish feel special and restaurant-worthy.

  • Make it a complete meal : Serve it along side freshly cooked spaghetti for a meal everyone will love. If you like easy Italian inspired recipes try one my other personal favorites Quick and easy shrimp scampi spaghetti an delicious recipe ready in less than 30 minutes.

    Ready to make this Easy Crispy Chicken Parmesan tonight?
    Give it a try and let me know how it turns out in the comments! Don’t forget to save this recipe for later and share it with someone who loves Italian comfort food!


Easy Crispy Chicken Parmesan

  • 4 cups my easy marinara sauce
  • 4 skinless (boneless chicken breast)
  • 2 cups seasoned Italian bread crumbs
  • 1 tbsp chopped Italian parsley
  • 2 cups Parmesan cheese
  • 1 cup shredded mozzarella
  • Salt and pepper to taste
  • 1 cup olive oil for frying
  1. Make the bread coating: In a shallow bowl, whisk together 1 egg and 2 tablespoons of milk until well combined. In another bowl, mix ½ cup breadcrumbs with ¼ cup grated Parmesan and 2 tablespoons chopped Italian parsley.
  2. Prepare the chicken: Pound 2–3 boneless, skinless chicken breasts until thin and even. Season both sides with salt and pepper. Dip each piece first in the egg mixture, then coat thoroughly in the breadcrumb mixture.
  3. Pan-fry the chicken: Heat oil in a large skillet over medium-high heat. Fry the chicken in batches for 2–3 minutes per side, or until golden brown. Transfer to a paper towel-lined plate to drain.
  4. Assemble the dish: Preheat oven to 375°F (190°C). Spread 1 cup of marinara sauce on the bottom of a 9×13-inch casserole dish. Place the fried chicken on top. Cover with another cup of marinara and sprinkle with the remaining ¼ cup of Parmesan.
  5. Bake: Cover with foil and bake for 20 minutes. Remove the foil, top with 1 cup of shredded mozzarella, and bake uncovered for another 10 minutes, or until the cheese is bubbly and golden.
  6. Finish and serve: Sprinkle with more Parmesan and fresh parsley if desired. Serve hot.


Easy Summer Italian Cobb Pasta Salad

Easy summer Italian cobb pasta salad

This post may contain affiliate links, that help support this blog. If you make a purchase through these links, I may earn a commission—at no cost to you. For more information read my disclosure policy.

This Easy Summer Italian Cobb Pasta Salad is the perfect way to turn everyday ingredients into something truly crave-worthy. Packed with tender grilled chicken, crispy bacon, hard-boiled eggs, sweet tomatoes, and creamy mozzarella, it’s a fresh, satisfying take on the classic Cobb—pasta salad style! Tossed in a light Italian vinaigrette and bursting with bold, zesty flavor, it’s hearty yet refreshing—just right for hot summer days.

Whether you’re meal prepping for the week, planning a picnic, or making the most of fridge leftovers, this salad hits the mark every time.

Things to about this know Easy Summer Italian Cobb Pasta Salad recipe

This Easy Summer Italian Cobb Pasta Salad is the perfect way to enjoy a fresh, hearty, and flavor-packed meal with minimal effort. I made this recipe using leftover grilled chicken breast, which added a smoky, savory layer to the dish without any extra cooking time—perfect for summer days when you want something cool and satisfying.

Inspired by the classic Cobb salad, this pasta version brings in all the favorites—juicy tomatoes, crisp romaine, creamy avocado, chopped hard-boiled eggs, crumbled bacon, and sharp provolone or gorgonzola—tossed together with short pasta and a tangy Italian vinaigrette.

What’s Inside:

  • Cooked short pasta (like rotini or penne)

  • Diced grilled chicken breast (leftovers work beautifully)

  • Hard-boiled eggs, chopped

  • Cherry tomatoes, halved

  • Crispy bacon

  • Avocado chunks

  • Italian cheese like provolone or gorgonzola

  • Tossed in a zesty Italian vinaigrette

Variations You Can Try:

  • Protein Swap: Use rotisserie chicken, grilled shrimp, or even chickpeas for a vegetarian option.

  • Cheese Choices: Blue cheese, mozzarella pearls, or shaved Parmesan are all delicious here.

  • Dressing Options: Italian dressing is my go-to, but balsamic vinaigrette or a creamy garlic dressing also work great.

  • Add-Ins: Try sliced olives, pepperoncini, or marinated artichokes for extra Mediterranean flair.

  • Make it Gluten-Free: Use your favorite GF pasta for a delicious gluten-free version.

This Easy Summer Italian Cobb Pasta Salad is a delicious, versatile dish that transforms simple ingredients—especially leftover grilled chicken—into a satisfying and flavorful meal. It’s perfect for warm days when you want something fresh, easy, and ready in minutes. Plus, with so many ways to customize it, you can make it your own every time. Give it a try and let me know how you made it your own. If you want more summer recipes try my Personal favorite Easy summer caprese tomato salad.

Easy summer Italian cobb pasta salad

For the Salad:

  • 8 oz short-cut pasta (such as rotini, penne, or farfalle)
  • 1 ½ cups cooked grilled chicken (chopped (leftovers work great))
  • 4 slices cooked bacon (crumbled)
  • 2 hard-boiled eggs (peeled and chopped)
  • 1 cup cherry tomatoes (halved)
  • 1 cup fresh mozzarella pearls or diced mozzarella
  • ¼ cup red onion (thinly sliced (optional))
  • ¼ cup fresh basil (chopped)
  • Salt and black pepper (to taste)

For the Dressing:

  • ¼ cup extra virgin olive oil
  • 2 tablespoons red wine vinegar (or lemon juice)
  • 1 teaspoon Dijon mustard
  • 1 Tbsp. plain Greek yogurt
  • 1 garlic clove (minced)
  • ½ teaspoon dried oregano
  • Salt and black pepper (to taste)
  1. Cook pasta according to package instructions. Drain and rinse under cold water to cool. Set aside.
  2. Make the Dressing In a small bowl, whisk together olive oil, vinegar (or lemon juice), Dijon, yogurt, garlic, oregano, salt, and pepper until well blended. Adjust seasoning to taste.
  3. In a large bowl, combine the cooled pasta, chicken, bacon, hard-boiled eggs, cherry tomatoes, mozzarella, and red onion if using.
  4. Pour the dressing over the salad and gently toss until everything is evenly coated.
  5. Stir in the chopped basil. Taste and adjust seasoning with salt and pepper as needed. Serve immediately or refrigerate for 30 minutes to let the flavors develop.


Buffalo Air fried chicken Wings

 Buffalo Air Fried chicken Wings

This Buffalo air fried  wing recipe is prefect when your craving chicken wings but want healthy too!!

We’ve been on a chicken wing kick lately. It all started on my wedding anniversary.  When our conversion turned  to the first night we met at the Anchor Bar in Buffalo  New York , where the famous Buffalo chicken wing originated.

And in our first hole in the wall eatery the lines were out the door for  the copycat version of the original Anchor Bar chicken wing.

No wonder Buffalo chicken wings have a special place  in my heart and kitchen. It’s an extra bonus that  chicken wings are a family favorite.

Even with my love for the original deep fried Buffalo Chicken wings, my direction at this age is to take the classics and make them healthier if possible. This Buffalo chicken wing recipe was an easy one to make a little heathier  using my air fry

What I used for these Buffalo air fried chicken wings

The original Anchor bar recipe for Buffalo chicken wings calls for deep frying the wings. You can use the deep frying method if it fits your lifestyle and taste. If your going the healthier route then air fried is the way to go.

The most important ingredient in the original Buffalo chicken wing recipe and in this air fried version is the Frank’s Hot sauce.

I used both sections of the  chicken wing cutting off the tip. Feel free to use the whole wing  without cutting them if that’s your preference.

Please watch the video and please don’t forget to leave  me a comment here and tag me on Instagram with your creations. I love hearing from you it’s my favorite part!!!

Ingredients

  • 2 lbs. chicken wing sections
  • 1 stick of butter
  • 1/2 cup Franks hot sauce
  • 2 Tbs. each ground garlic, onion powder, chili powder and Italian seasoning
  • 2 Tbsp. baking powder
  • Salt and pepper to taste

Instructions

  1. Wash the chicken wings then pat dry let sit on a  cookie sheet in the refrigerator for at a least an hour.
  2. Mix the dry ingredients together
  3. Use half of the dry ingredients for the chicken wing dry rub add the baking powder to this half. Reserve  the remaining spices for the hot sauce
  4. Cover the chicken wings and set in refrigerator again for at least an hour
  5.  Set air fryer to 400 or oven temperature
  6. Meanwhile melt the butter add  the hot sauce and remaining dry rub.
  7. Air fry or bake the chicken wings for 15 minutes
  8. Toss in Buffalo sauce while hot