Ciambella Italian Bundt cake

 Ciambella Italian Bundt Cake

Hello everyone

Ciambella is an easy Italian Bundt cake found in most Italian kitchens. This Italian bundt cake is light and full of lemon flavors.

Most of you know although I am an admire of fancy towering layer cakes, I am a baker of simple cakes. And a lover of bundt cakes because of how easy they are versatile and easy they are to made. You could make a bundt cake everyday for a week and not repeat the same recipe.

This Italian bundt cake is easy to make and uses few ingredients, you probably already have on hand.

This Ciambella Italian bundt cake recipe is my most request cake recipe not only because its easy but its delicious. It’s an impressive cake with not too much effort!!!

Tips for success when making Ciambella Italian Bundt cake

The first tip

When making this Ciambella Italian bundt cake is to beat the eggs and sugar until light. This process takes about 5 minutes.

Second

Be sure to preheat your oven before baking. Baking temperatures can vary depending on your oven check after 35 minutes for doneness by inserting a toothpick in the center and if it comes clean the cake is done. It’s the old fashion way that still works.

Third the right pan is important.

If the pan is too big or too small for this recipe your  cake will either be to flat or the batter will be spilling over. A lot of you wanted to know what bundt  pan I used. Here is the link to the  decorative bundt pan I used in this recipe.

And lastly if you make this recipe please leave me a comment. I love hearing from you. It’s my favorite part!!!

Ingredients

  • 5 Eggs
  • 1 1/2 cups of sugar
  • 1 cup vegetable oil
  • 1 cup water
  • lemon zest and juice from 2 lemons
  • 1 Tablespoon vanilla
  • 2 1/2 cups sifted flour
  • 1 Tablespoon baking powder

Instructions

  1. Preheat oven to 375 degrees
  2. beat the eggs with the sugar until light and double in volume about 3 minutes
  3. Add the lemon zest, juice , oil , water and vanilla beat until mixed well
  4.  Mix the sifted flour with the baking powder. Add to the egg mixture slowly mixing just until well incorporated.
  5. Bake in a preheated 375 degree oven 35 to 40 minutes.
  6. Dust with powder sugar. ENJOY!!!


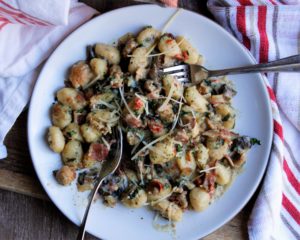
30 minute Broccolini and Sausage Pasta

30 minute Broccolini and sausage pasta

This is one of the easiest 30 minute lunch or dinner recipes.

I shared this 30 minute broccolini and sausage pasta recipe last year using pancetta and orecchiette shaped pasta.

This recipe is basically the same. I Am just using Italian sausage instead of the pancetta and cavatelli shaped pasta instead of the orecchiette.

30 minute broccolini and sausage pasta variations

If you want to make this 30 minute broccolini and sausage pasta healthier you can substitute the pork sausage for chicken sausage.

In this broccolini and sausage pasta recipe I used mild Italian sausage you can use spicey if that fits your taste.

This recipe works well with regular broccoli too or a combination of both broccolini or broccoli.

One more thing the pasta water adds creaminess to sauces. I usually save more pasta water than the recipe calls for, just in case the sauce is too dry.

If you make this 30 minute broccolini and sausage recipe please let me know how it works out for you.

Ingredients

  • 1 Lbs. small shaped pasta
  • 2 links Italian sausage
  • 1 bunch broccolini
  • 1/2 chopped yellow onion
  • 1 Tbls. minced garlic
  • 1 Tbls. hot pepper flakes
  • 1 cup chicken stock
  • 2 cups pasta water
  • Grated parmesan
  • Italian parsley
  • Salt and pepper

Instructions

  1. Cook your pasta el dente reserving 2 cups of the pasta water
  2. In 2 tablespoons of olive oil saute the onion and garlic until soft and just beginning to brown
  3. Add the Italian sausage breaking it up with a wooden spoon until brown
  4. Deglaze the pan with the chicken stock or white wine. Simmer for a few minutes
  5. Add the broccolini mix to absorb the sausage and pan flavorings.
  6. Add the reserved pasta water simmer until broccolini is crisp tender
  7. Toss the pasta into the sauce adjust your flavoring with salt and pepper
  8. Grate parmesan cheese over the top, sprinkle with Italian parsley and ENJOY!!!!


Lemon blueberry ricotta Bundt cake

Lemon blueberry ricotta  Bundt cake

It’s no secret I love Bundt cakes. Bundt cakes are easy to make and delicious plus the combinations are endless. This lemon blueberry ricotta bundt cake is easy and it doesn’t need too many ingredients. Moist and fluffy this Italian lemon ricotta cake is delicious.

I love the combination of lemon and ricotta together. I use ricotta and lemon together in many recipes, both sweet and savory. But when you add blueberries to this sweet ricotta and lemon  cake it takes this already delicious lemon blueberry ricotta cake up a level!!!

Tips For making this Lemon blueberry  ricotta Bundt cake

Tip number 1! To insure a light cake be sure to beat the mixture after adding the ricotta until light and fluffy, 2 to 3 minutes.

Number 2!  Use the right size pan in this recipe I used a 10 inch bundt pan.

Three ! Use Italian ricotta cheese. Cottage cheese doesn’t produce the same flavors.

And lastly oven temperatures vary. Check for doneness by inserting a toothpick in the center if it comes out clean its done. Let cool before slicing.

Please leave me a comment. Let me know your experience with this lemon blueberry Bundt cake recipe. Love hearing from you its my favorite part!!!

Ingredients

  • 1 stick of butter
  • 1 1/2 cup sugar
  • 3 eggs
  • 1 Tablespoon vanilla
  • rind and juice from one lemon
  • 2 cups ricotta
  • 2 cups blueberries
  • 2 1/2 cups sifted flour
  • 1 tablespoon baking powder
  • pinch of salt
  • powered sugar

Instructions

  1. Beat the butter, sugar and ricotta until light
  2. add the eggs blending well after each addition
  3. Add the lemon rind and juice
  4. Add the flour and baking powder mix until just well blended
  5. Fold in the blueberries
  6. Bake in a 350 degree oven for 45 minutes
  7. sprinkle with powered sugar


Beefy Shell Pasta Dish

Beefy Shell pasta dish

This beefy shell pasta dish is delicious and healthy full of good for you vegetables. A little secret shsssss don’t tell my family, I add chopped spinach to a lot of my recipes.

It’s a good way to get our picky eaters to eat some greens and a good place to put them is in this pasta dish recipe.

It’s a cozy family meal that comes together quick, is easy and doesn’t need a lot of ingredients.

It can be on your table in 30 minutes, not only is it quick and easy it’s real good, and that’s not even the best part, the best part ONE PAN COOKING!!!

It’s a great  recipe for those busy night, when commitments are long and time is short, or fancy enough for special meals with friends.

Customize This Beefy shell pasta Dish

This beefy shell pasta dish recipe is easy to customize to fit your lifestyle and taste.

The recipe calls for 2 cups of spinach if your family likes spinach, by all means add more, I do. I used ground beef, you can go a healthier route and use chicken, or ground turkey if that s what you prefer.

It doesn’t matter how much spinach you use, what shaped pasta or what meat you use, this recipe is sure to become a family favorite in your home  as it has in mine!!!!

One thing that does matter in this beefy shell pasta dish recipe, or any one pan meal is to be sure to use the right size pan to hold all the ingredients. I’ve linked my favorite.

I hope you try this easy comforting recipe and please leave me a comment when you do. I love hearing from you it’s my favorite part!!!

Ingredients

  • 1/2 Lbs. shell pasta
  • 1 Lbs. lean ground beef
  • 2 cups spinach chopped
  • 1 chopped onion
  • 2 peeled and chopped carrots
  • 2  chopped celery stalks
  • 1 chopped bell pepper
  • 1 tablespoon chopped garlic
  • 1 14.5 oz. can chopped tomatoes
  • 1 14.5 oz. con tomato sauce
  • 1 cup chicken stock
  • 1 cup grated parmesan
  • 2 Tbs. paprika
  • 1 Tbs. each chopped Italian parsley, basil, and thyme
  • 2 Tbs. each olive oil and butter
  • Instruction
  • 1. Heat oil and butter to medium heat add onion and garlic saute until tender and just beginning to brown
  • Add the carrots, bell pepper and celery saute just a few minutes to blend flavors
  • Add ground beef cook until brown salt and pepper to taste
  • Add tomatoes and chicken stock
  • Simmer  covered  15 minutes
  • Add pasta simmer 15 minutes longer
  • Add the parmesan cheese, spinach and herbs last 5 minutes
  • Salt and pepper to taste


Two Bean Steak Chili

Two Bean Steak Chili

It’s chili season, and Am excited to share my best Two Bean Steak Chili Recipe with you. Tender melt in your mouth slow cooked steak, white and red kidney beans in a rich tomato sauce make this chili my favorite chili recipe.

I go easy on the beans in this chili recipe, but you can add more or less or omit them altogether.

My family doesn’t like too spicy food so I go easy on the chili powder too, you can adjust the heat in this recipe use less or more depending on what you like.

I like to use chuck steak which has a lot of beefy flavor. But any cut of beef that’s marked “stewing beef” works well in this recipe. You want a tough cut of meat that  soften and become tender and tasty after a long cook time.

You’ll want to keep this recipe on your meal rotation to make at least once a week, during the colder weather months.

Toppings For This Two Bean Steak Chili

Normally,  it’s all about the toppings in chili recipes. But this Two Bean Steak Chili recipe is so rich that you won’t need a lot of go -to chili toppings.

The topping I liked the best on this steak chili are avocados and sharp cheddar cheese. I found that adding more toppings distract from the rich flavor of the chili, instead of adding to it. I am not saying to not test different toppings for yourself, am saying that’s what I found.

Here’s some to try red onions, nacho chips, cilantro or sliced jalapenos, just remember not to over powder the rich beefy flavor with to many toppings!!!

This Two Bean Steak Chili is the ultimate comfort food, A chili so good you won’t have any leftovers, but if you do this recipe is so freezer friendly if stored in the right freezer containers.

Here’s a tip you should purposely double this chili recipe, for delicious ready made meals on busy weeknights.

Ingredients

  • 1 Lb. Chuck Steak
  • 2 chopped yellow onions
  • 3 Tbls. chopped garlic
  • 1 cup chopped celery
  • 1  chopped and seeded  pepper jalapeno pepper
  • 1 14.5 can each diced tomatoes and tomato sauce
  • 1 14.5 can each red and white kidney beans undrained
  • 2 cups beef broth
  • 3 Tbs. chili powder
  • 2 Tbs. each cumin, oregano, smoky paprika  and coriander
  • 2 bay leaves
  • 3 Tbls. olive oil
  • Salt and pepper to taste

Instructions

  1. Cut the steak into equal size pieces and salt and pepper
  2. In a medium size stock pot bring the oil to medium high heat
  3. Add the steak and sear completely
  4. Add the onions, garlic and jalapeno pepper saute until tender and just beginning to brown
  5. Add all the spices now
  6. Add the tomatoes and beef broth lower the heat, simmer covered  for 2 hours
  7. Add the beans adjust seasonings and simmer an additional 30 minutes
  8. Top with your favorite chili toppings ….ENJOY!!!


Spicy Shrimp Bruschetta

Spicy Shrimp Bruschetta

Spicy Buffalo shrimp bruschetta , crispy Italian bread,  topped with large spicy shrimp, sprinkled with crispy bacon, and celery, carrot slaw, served with my homemade ranch dressing for dipping or drizzle.

Really you guys it doesn’t get much better than this when it comes to bruschetta. This is such a decant, rich recipe it’s prefect for lunch or a light dinner.

You can control the heat by using less hot sauce, it also doesn’t  matter what kind of bread you use, as long as it’s substantial enough to hold the spicy shrimp and slaw. You don’t want soggy or bread that falls apart when you pick it up.

I use crusty Italian bread, if the bread is stale it’s even better.  The bread can be toasted ahead of serving, heck you can even toast it and freeze it for easy prep.

This recipe is so versatile if you want you can roast the shrimp instead of sauteing, and don’t use bacon for a lighter version,

when using this method I  use my toaster oven/ air fryer so I don’t heat up my kitchen using my large wall ovens, also saves money

s

Bruschetta Then And Now

This spicy Buffalo shrimp bruschetta has come  a long way from what bruschetta started like, with just a mixture of chopped tomatoes, balsamic, garlic, and basil spooned over olive-oil brushed slices of toasted bread.

Now you can find almost any kind of flavor with so many variations of topping making bruschettas prefect for breakfast, lunch or like this spicy Buffalo shrimp, that’s decant enough enough for weeknight family dinners or Saturday night dinner with friends.

If you make this delicious bruschetta please leave me a comment and don’t forget to tag me on Instagram, that’s my favorite part!!!

Ingredients

  • 6 slices toasted Italian country bread
  • 1/2 lbs. large shrimp
  • 2 slices  bacon
  • 4 stalks celery finely chopped
  • 3 carrots grated
  • 1/2 red onion chopped
  • 2 tablespoons each Italian parsley, thyme, oregano and garlic
  • 1/2 cup franks hot sauce
  • 1/2 stick butter melted
  • 1/2 cup prepared pesto

Instructions

  1. Cut bread on a diagonal
  2. Spread bread with pesto toast until golden brown
  3. Cook bacon until crispy remove from pan cut into small dice reserve pan and bacon fat
  4. Make slaw by mixing, carrots, celery and onion toss with 1 tablespoon red wine vinegar, 3 tablespoons olive oil and 1 tablespoons prepared hot sauce
  5. Make the hot sauce by mixing the melted butter with the hot sauce,garlic, oregano, Italian parsley  thyme, salt and pepper to taste
  6. Reserve 1 tablespoon for the slaw
  7. Marinate the shrimp in the hot sauce for 1 to 2 hours or overnight
  8. Remove shrimp from marinate shake excess liquid off
  9. Saute shrimp in resevered saute pan on medium high heat 2 to 3 minutes per side
  10. Assemble the pesto toast by topping with celery slaw and 2 to 3 shrimp
  11. Sprinkle with Additional herbs serve with lemon wedges and …ENJOY!!!


Vegetarian Stuffed Eggplant

Vegetarian Stuffed Eggplant

This vegetarian eggplant dinner can be on your table in less than an hour. Yep a restaurant quality dinner without leaving home.

The hardest part about this recipe is coring the eggplant, and that’s not even that difficult if you use a sharp paring knife or you can scoop it out with a spoon.

Roasting the eggplant shells before filling softens them and produces a caramelized  outer skin from the , garlic and oil rub.

I  like to use my Cuisinart toaster oven to roast the eggplant, so I don’t have to heat up my whole house by using my large wall ovens.

In this recipe you can use pre cooked rice or cook the rice according to package directions.

The same  for the marinara sauce make my homemade marinara or use your favorite store bought brand.

To Peel Or Not To Peel Eggplant

While the skin of a small or young eggplant is edible, the skin becomes bitter on larger or older eggplants, and should be peeled.

For these vegetarian stuffed eggplant recipe  I used small eggplant and didn’t peel them.

When in doubt the answer do you peel eggplant the answer is Yes, peel them using a vegetable peeler or sharp paring knife

If you make this recipe please leave me a comment and don’t forget to tag me on Instagram  that’s my favorite part!!!!!

Ingredients

  • 4 medium eggplant
  • 2 cups cooked brown rice
  • 3 cups prepared marinara sauce divided
  • 1 chopped onion
  • 3 Tablespoons  chopped garlic
  • 2 cups chopped spinach
  • 1 cup parmesan cheese
  • 1 Tablespoon each Italian parsley, basil, and thyme
  • salt and pepper to taste
  • 1/4 cup olive oil


Instructions

Turn oven to 375 degrree

  1. Slice eggplants in half with a spoon remove insides
  2. Rub eggplant shells with olive oil, garlic, salt and  pepper
  3. Roast eggplant in preheated oven for 15 minutes
  4. Mean while cut inside of eggplant into medium cubes
  5. Saute onion and garlic until limp
  6. Add eggplant saute until eggplant is soft
  7. Mix in prepared rice, spinach, and  Parmesan cheese
  8. Divide filling among the 8 eggplant half’s
  9. Line the roasting pan with 1 cup prepared marinara sauce
  10. Place the eggplant on top of the marinara sauce
  11. Top each eggplant half with remaining 2 cup marinara sauce and additional parmesan
  12. Return to oven bake covered for an additional 30 minutes…..ENJOY!!!!


Vegetarian Topped Cauliflower Steaks

Vegetarian Cauliflower Steaks

Vegetarian dinner on your table in 30 minutes!!!!!

These spinach pie, vegetarian cauliflower steaks, get all the flavor of Greek spinach pie (spanokapita) in a fraction of the time, no pastry layering required.making this one of those meals when your wanting vegetarian that’s healthy.

This satisfying vegetarian meal  doesn’t require any fancy ingredients, just homemade goodness.

I like roasting the cauliflower it produces a rich flavorful meatless dinner, your whole family will love!

Like many of my recipes I use my Cuisinart air fryer, toaster oven, to roast the cauliflower, eliminating having to turn on the large wall oven.

This cauliflower, vegetarian dinner is one meal you can feel good about. Cauliflower is considered a super food, because of it’s nutrient rich content, it  is also high in vitamins A and B.

Cauliflower is a versatile vegetable that can be dressed up in many ways. in this recipe I dressed it up with the tangy Greek pie filling Sponakapita.

You can vary the filling by adding or subtracting ingredients, according to your lifestyle and taste.

Not only is it a family favorite it’s a crowd pleasing meal on a budget add a salad, crusty french bread, and you have dinner special enough for weekend get together’s and easy enough for weeknight family meals.This is a great go to dinner when you want easy, healthy, flavorful,  vegetarian meals, the trifecta for dinner success.

You can double or triple this recipe.  It keeps in your refrigerator up to 3 days,  and is freezer friendly, for ready make meals.

If you make this Cauliflower Steak dinner, please leave me a comment and don’t forget to tag me on Instagram……

The whole idea behind food and creating recipes is to experiment and have fun doing it…..!!!!!Ingredients

1 head cauliflower cut into four thick slices ( steak slice)

8 oz. bag spinach

1 cup ricotta cheese

1 cup feta cheese

1 cup parmesan cheese

1 cup sharp cheddar for topping

1 chopped onion

2 Tablespoons chopped garlic

1 Tbs. each chopped Italian parsley and fresh dill

2 Tbs. each olive oil and butter

Salt and pepper to taste

Instruction

Heat toaster oven to 375 degrees

Cut cauliflower into four thick slices

Rub cauliflower steaks with olive oil, garlic, salt and pepper to taste

Roast cauliflower until golden brown about 20 minutes

Heat oil and butter in a deep saute pan

Add onion, garlic Saute until opaque

Add spinach in batches until wilted Salt and pepper to taste

Remove from fire Mix in cheeses

Divide spinach mixture among the four cauliflower steaks

Top  Cauliflower steaks with  the sharp cheddar

Return to oven 10 minutes or until cheese is melted and bubbly

……..Enjoy


Stuffed Bell Peppers

Stuffed peppers are what leftovers are for. They can be filled with any combination of starches, meats, beans and sauces,

making them a great vessel for leftovers. Most stuffed peppers are made because we have left over rice.

You can adjust this recipe in many different places. The rice can be swamped for couscous or quinoa,

you can use ground beef, or leftover roast chicken instead of the chicken breast, or leave the meat out

if your going the vegetarian route and replace it with beans of your liking. Some stuffed pepper recipes call for cutting off

the tops and using them as a lid for the peppers. In this recipe I sliced the peppers in half, for easier eating, plus

who doesn’t like to see a cheesy open faced stuffed pepper.

I used a mixture of white rice and brown rice, cook the rice according to package directions, or you can use precooked rice if you have some laying around.

I used different colored peppers for this recipe, the more common green peppers work just as well.

Roast the the peppers about 10 minutes before filling, I use my toaster oven for this recipe, I don’t like using my big oven for roasting small amounts of

ingredients, it heats up quickly and produces the same results. In fact I use my toaster oven on a more regular basis then my large oven.

After stuffing the bell peppers, top them with sharp cheddar or a cheese of your choice,  place them in a oven to table casserole dish, and return to oven for 30 minutes minutes,

or until the cheese is brown and bubbly. This peppers are great for next day reheats  or you can freeze leftovers for ready made meals

. They can also be cooked and kept in your freezer for months, for ready made meals. This is a great recipe for weeknight family dinners or a hands free company’s coming dinner

If you make this recipe be sure to leave me a comment and please don’t forget to tag me on Instagram…..

Happy cooking!!!!


Ingredients 

6 large bell peppers

2 chicken breast

1 15 oz. can crushed tomatoes

2 cups cooked brown or white rice

2 cups chopped spinach

1 chopped onion

2 tablespoons chopped garlic

2 tablespoons olive oil and 2 tablespoons butter

1 cup grated parmesan

1/3 cup  chopped Italian parsley

1 egg

salt and pepper to taste

Instruction

Preheat oven to 375 degrees

Cook rice according to package directions

Rub bell peppers  with olive oil, salt and pepper.

Roast in a 375 degree oven for 10 minutes… set aside

Heat oil and butter in deep saute pan

Salt and pepper chicken cut into small dice

Saute chicken until golden

add onion and garlic, saute until onions are translucent

Add drained tomatoes simmer covered for  15 minutes

add chopped spinach, parmesan, cooked rice and egg to the saute pan

Mix all filling ingredients

Divide filling among the 6 bell pepper half’s

Bake 30 minutes

Top with parmesan cheese last 10 minutes

Top with Italian parsley and more parmesan ………ENJOY!!!!


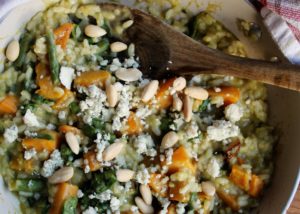
Butternut Squash Risotto

Easy risotto

It’s no surprise most Italian restaurants have risotto on their menu, it seems too complicated for the home cook.
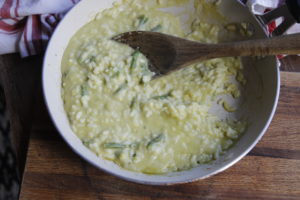
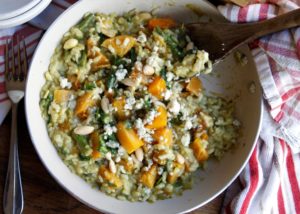
Well Am here to tell you it’s not complicated at all. Risotto is a northern Italian rice dish cooked with broth until it reaches a creamy consistency.

The broth can be derived from meat, fish or vegetables, I used chicken broth, if your vegetarian you can use vegetable stock.

For risotto the best rice to use  is a short grain Italian rice the most common is arborio rice. It’s important to use a short grain rice.

it has a higher starch content to produce the creamiest risotto. Toasting  the rice in the olive oil and butter before adding the liquid adds a bit of crunch,

the  broth should be hot when adding it to the rice while stirring, only add small amounts of stock,

waiting until it’s absorbed into the rice before adding more.Roasting the  butternut squash caramelizes it with a sweet glaze, I love it and have to stop myself from eating to much of it
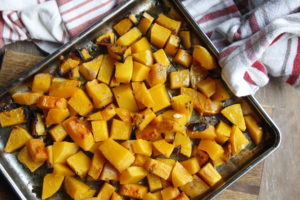

and leave enough for the recipe. Because I use my Cuisinart toaster oven instead of heating up my large oven am more likely to roast most of my vegetables.

I have to say I use my toaster oven more than my large ovens.

This is  one of those recipes you make a enough of, for next day reheats or freeze for a quick ready made meal. Plus, it’s easy and versatile

enough to have on your family weeknight meal plan. This restaurant quality recipe is also prefect for  Saturday,night dinner with friends,

to show off what a great home chef you are. Serve it up in some pretty restaurant style white plates, cloth napkins and your favorite drink

and you just make yourself a restaurant style meal without leaving home.

If you make this recipe be sure to leave me a comment, and please don’t forget to tag me on Instagram.


[wpforms id=”1396″ title=”false” description=”false”]


Ingredients serves four

2 cups Italian short grain rice

1 small butternut squash cubed

1/3 cup olive oil 2 tablespoons butter

1/2 chopped onion

2 Tablespoons chopped garlic

2 cups chopped spinach

4 cups chicken stock

1 cup crumbled  gorgonzola cheese

1 cup grated parmesan

2 tablespoons chopped Italian parsley

1/2 cup pine nuts

salt and pepper to taste

Instruction

Peel and cut butternut squash into cubes

drizzle with olive oil, salt and pepper

roast in a 375 degree oven for 30 minutes

Mean while heat chicken stock keep warm, in a deep saute pan heat the butter and olive oil,

add onion and garlic, saute until translucent, add rice cook rice until golden, salt and pepper to taste, add hot  chicken stock

slowly and a little at a time  waiting until the stock is absorbed before  adding more while  stirring continuously,

until risotto is firm to the bite cooked about 20 minutes. Add parmesan cheese, roasted butternut squash,

and gorgonzola adding more broth if the sauce is to thick. Top with Italian parsley, more gorgonzola and toasted pine nuts….ENJOY!!!


Add tomatoes, broth and herbs cover simmer for 30 minutes.

Add beans, chopped kale and roasted squash

Simmer 10 minutes longer…..Sprinkle with Parmesan and Enjoy!!!!!