Balsamic Glazed Brussels Sprouts

Delicious, easy and quick  this crispy bacon brussel sprouts in a mustard, balsamic glaze is a staple side  dish at Thanksgiving dinner in my house, but because I love brussels sprout, and it’s so easy, simple and impressive I make it more often.

After crisping the bacon you should have about 1 tablespoon of bacon fat, coating the brussel sprouts in the fat adds a delicious smokey flavor.

Have enough liquid in the pan to cover the brussel sprouts, adding more if needed. The last 10 minutes of cooking the pan should be left uncovered, to extract the liquid and leave the sprouts covered in a beautiful syrupy  glaze. This recipe is make easy by how quickly it comes together and it uses few ingredients, cooks in one pan and is prefect for potluck dinners.

If am asked to bring a side dish this is one of my go to recipes This is the saute pan I like to use when braising meats or vegetables on the stove top.  .

To protect the surface of the non stick surface on this pan use wooden utensils not to scratch the surface.

Brussel sprouts are in the cabbage family, I find them to be a bit more bitter than cabbage which is balanced in this recipe by adding the brown sugar and vinegar.
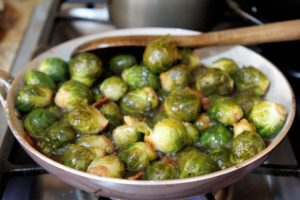
You can adjust the the amount of sugar, according to your taste, or leave it out. The balsamic vinegar, sweetens the brussel sprouts adding a syrupy delicious glaze, eliminating  the need for sugar.

To add extra flavor let the Brussels sprouts simmer in the bacon drippings  before adding the liquids.


Ingredients serves four

1 Lbs. Brussels sprouts

4 slices diced bacon

1 tablespoon butter

1 cup chicken stock

1 cup balsamic vinegar

1 tablespoon garlic

2 tablespoons brown sugar

2 tablespoons Dijon mustard

1 Tablespoon each chopped Italian parsley, thyme, red pepper flacks and lemon zest

1 cup Parmesan cheese

Salt and pepper to taste

Instruction

Melt the butter in a large saute pan

Add diced bacon cook until brown

Add Brussels sprouts mix to coat in bacon drippings

Add rest of ingredients except the herbs and Parmesan

Simmer covered 45 minutes or until the Brussels spouts are fork tender and the sauce is syrupy

Add herbs last 10 minutes and lemon zest sprinkle with parmesan …ENJOY!!!


Buffalo Air fried Wings

 Buffalo Air Fried  Wings

This Buffalo air fried  wing recipe is prefect when your craving chicken wings but want healthy too!!

We’ve been on a chicken wing kick lately. It all started on my wedding anniversary.  When our conversion turned  to the first night we met at the Anchor Bar in Buffalo  New York , where the famous Buffalo chicken wing originated.

And in our first hole in the wall eatery the lines were out the door for  the copycat version of the original Anchor Bar chicken wing.

No wonder Buffalo chicken wings have a special place  in my heart and kitchen. It’s an extra bonus that  chicken wings are a family favorite.

Even with my love for the original deep fried Buffalo Chicken wings, my direction at this age is to take the classics and make them healthier if possible. This Buffalo chicken wing recipe was an easy one to make a little heathier  using my air fry

What I used for these Buffalo air fried wings

The original Anchor bar recipe for Buffalo chicken wings calls for deep frying the wings. You can use the deep frying method if it fits your lifestyle and taste. If your going the healthier route then air fried is the way to go.

The most important ingredient in the original Buffalo chicken wing recipe and in this air fried version is the Frank’s Hot sauce.

I used both sections of the  chicken wing cutting off the tip. Feel free to use the whole wing  without cutting them if that’s your preference.

Please watch the video and please don’t forget to leave  me a comment here and tag me on Instagram with your creations. I love hearing from you it’s my favorite part!!!

Ingredients

  • 2 lbs. chicken wing sections
  • 1 stick of butter
  • 1/2 cup Franks hot sauce
  • 2 Tbs. each ground garlic, onion powder, chili powder and Italian seasoning
  • 2 Tbsp. baking powder
  • Salt and pepper to taste

Instructions

  1. Wash the chicken wings then pat dry let sit on a  cookie sheet in the refrigerator for at a least an hour.
  2. Mix the dry ingredients together
  3. Use half of the dry ingredients for the chicken wing dry rub add the baking powder to this half. Reserve  the remaining spices for the hot sauce
  4. Cover the chicken wings and set in refrigerator again for at least an hour
  5.  Set air fryer to 400 or oven temperature
  6. Meanwhile melt the butter add  the hot sauce and remaining dry rub.
  7. Air fry or bake the chicken wings for 15 minutes
  8. Toss in Buffalo sauce while hot


Crispy Italian Flavored Tacos

Crispy Italian Flavored Tacos

This crispy Italian style taco recipe combines two of my favorite flavors Italian and Mexican.

A taco recipe can be made with a variety of fillings and seasonings, including beef, pork, chicken or fish, just to name a few.

Some people want the traditional Mexican ground beef kind, and me I like to experiment  with different combinations of fillings and taco shells.

I would like to say these tacos came about from a brain storm, but the truth is, my intention was to make a Philly sandwich using ground sirloin on sourdough bread until I realized I didn’t have the bread but I did have corn taco shells, a recipe is created just like that sometimes.

How I Made these Crispy Italian flavored Tacos

This crispy Italian flavored Taco recipe started like this.

First I sautéed the peppers, onions and garlic, then I added the ground sirloin, you can use any ground meat you like. Be sure not to over cook the meat, since it will be cooked twice.

Then I filled corn taco shells with the Italian flavored mixture, covered them with mozzarella cheese baked them in my toaster/air fryer until crispy and  the cheese  melted and golden brown.

Just like that a new recipe was created and let me just say put a few aside for yourself before serving them, these Italian inspired tacos tend to disappear quickly.

Ingredients

  • 8 corn taco shells
  • 1 Lb. ground sirloin
  • 2 Tbs. olive oil
  • 1 Tbs. butter
  • 1 green and1 red bell pepper sliced
  • 1 sliced yellow onion
  • 1 Tbs. minced garlic
  • 1 cup shredded mozzarella
  • 1 cup prepared marinara

Instructions

  1. In a large saute pan over bring the olive oil and butter to medium high
  2. Add the  onions, bell peppers and garlic saute until tender and just beginning to brown
  3. Add the ground sirloin saute until brown salt and pepper
  4. Add the marinara and mix well
  5. Divide beef mixture among the taco shells in a oven proof casserole dish
  6. Bake in a 375 degree oven for 15 minutes add the cheese last 5 minutes
  7. ENJOY!!!


Garden Pesto Bruschetta Pizza

Garden Pesto Bruschetta Pizza

This garden Pesto bruschetta Pizza is easy and quick when you use some store- bought ingredients.

I love pizza just about as much as I love pasta, and for almost the same reasons.

Just like pasta pizza is versatile and if you use some store bought ingredients it’s easy and quick Too!! With pizza It’s all about the topping. Although topping combinations are endless I like to top my pizzas with simple in season ingredients.

This pesto bruschetta pizza uses few ingredients, but don’t let that fool you into thinking it’s flavorless, it’s not, in fact it’s so full of flavor, it should come with a warning sign!!! Addicting!!!

3 Tips for Delicious results When Making this Garden Pesto Bruschetta Pizza

First tip when making any pizza is the crust has to be good. In this Garden Pesto Bruschetta Pizza recipe I used a good quality pizza crust imported from Italy. You can use your favorite store bought crust or you can make your own if you want to go that route.

Second, after the crust, the main ingredient in this bruschetta pizza recipe is tomatoes. And although using garden tomatoes produces the best taste, you can find  tasty tomatoes every where when they are in season.

And third, to prevent a soggy crust I like to precook it, for 5 to 10 minutes before topping it, to prevent a soggy crust.

One more thing please leave me a comment if you make this easy Pesto Bruschetta Pizza. I love hearing from you, it’s my favorite part!!!

Ingredients

  • 1 store bought pizza crust
  • 1/2 cup prepared pesto sauce
  • 3 to 4 tomatoes of your choice thinly sliced
  • 8 oz. fresh mozzarella balls
  • 2 Tbls. chopped garlic
  • 1/2 bunch chopped basil
  • 2 Tbls. extra virgin olive oil
  • 1 cup grated parmesan cheese
  • Salt and pepper to taste

Instructions

1. Spread the prepared pizza crust with the pesto

2. Line with the tomatoes overlapping

3. Randomly place the mozzarella balls

4. drizzle with the olive oil

5. Top the grated cheese and basil salt and pepper to taste

6. Bake in a preheated 400 degree oven for 15 to20 minutes or until the cheese is melted and the crust is golden brown


Raspberry Vinaigrette Salad Dressing

Raspberry Vinaigrette Salad Dressing

Hello Everyone!

This raspberry vinaigrette salad dressing is so easy to make and taste way better than store bought. You only need a few ingredients and just a few minutes to make a salad dressing so good you’ll want to make it often.

Everyone loves raspberry  salad dressing, but they don’t realize how easy it is to make at home!!! To be honest this  salad vinaigrette is so easy to make, I was hesitate on whether it was a worthy enough blog post.

1138670980c8fa518933ab793a20fd0c

3 Tips for success With this Raspberry vinaigrette Salad Dressing

The first tip for success when you make this raspberry vinaigrette salad dressing is to use fresh or frozen real  raspberries. There is just something about fresh raspberries in salad dressing  verses using fruit jams.

Second, in vinaigrette salad dressing recipes the oil you use is very important. In these oil based vinaigrette recipes use a good quality extra virgin olive oil.

And third one of the most important tips when making oil based salad dressing vinaigrettes, the oil goes in last, in a slow steady stream with the blender or food processor running.

One more thing if you make this Raspberry vinaigrette salad dressing please leave me a comment. I love hearing from you it’s  my favorite part!!!

Ingredients

  • 8 oz. fresh raspberries
  • 1/4 cup honey
  • 1/2 red wine vinegar
  • 1 1/2 cups extra virgin olive oil
  • 1 Tsp. chopped garlic
  • 1 Tbls raspberry or strawberry jam
  • Salt and pepper to taste

Instructions

  1. In a food processer or blender pulse the washed raspberries until smooth
  2. With the blender running add the rest of the ingredients up to the olive oil
  3. Add the olive oil at the end with the blender running in a slow steady stream
  4. Store in glass jar in fridge up to 2 weeks


Basic Sourdough Starter Focaccia

Basic Sourdough Starter Focaccia

My girlfriend gave me some sour dough starter, that someone gave to her, and so on.

There are stories some sourdough starters have bits that are hundreds of years old.

A women somewhere in the United States claims her is 122 years old. I like to think my was part of ancient ancestry.

The process is simple, whatever you use from the starter is replaced called “feeding the starter”

with equal parts of flour and water, I use 1 cup of flour to 1/2 cup of water.

The starter is ready when it appears frothy with air bubbles and has a sour smell.

This process takes a few hours, longer if you keep your starter in the refrigerator, I keep my on the counter,

it will also let you know when it’s hunger, it falls flat, you can revive it by feeding it.

Not all of us are so lucky to have sour dough starter passed down to us from our bread baking friends.

Thankfully, making mother sourdough starter is as simple as stirring together equal parts of flour and water and letting it sit. no expensive heirloom starters, or mysterious rituals required. A good mixing bowl and the right size pan is all you need to make bakery quality focaccia.

To make the mother starter use the same process as” feeding the starter, and let it sit out  on your counter for 7 days. I keep my sour dough starter on my counter in glass mason jars, that I give to family and friends.

 Things You Can Make with this Basic Sourdough Starter Focaccia

This Basic Sourdough Starter Focaccia is only one recipe, this basic sourdough starter is the beginning of many delicious and easy bread recipes.

I have used the same recipe adjusting the water and flour ratio to make focaccia, pizzas, and flat breads.

I was looking for a artisan Focaccia recipe that tasted and looked like the focaccia I bought at the local bakery, well I think I found it.

This focaccia recipe is quick, easy and hopefully becauce it is so easy, the start to your focaccia  making journey, it was mine.

Please leave me a comment if you make this Basic Sourdough starter focaccia.  Please tune in soon for more sweet and savory recipes using basic sourdough starter.

If you visit please stay. Enjoy!!!

Ingredients

  • 1 1/4 cup sourdough starter
  • 11/2 cups cool water
  • 4 cups flour
  • 1 tablespoon salt
  • 4 Tbs. olive oil
  • 2 Tbs. rosemary
  • 12 cloves garlic
  • 2 Yukon gold potatoes thinly sliced
  • Salt and pepper to taste
  • Instructions
  • Preheat oven to 425
  • Whisk water and sour dough starter mixing well
  • Combine flour and salt slowly add to starter mixture mix until well blended
  • Gather dough into a ball knead lightly  on floured board
  • Gather into a ball place in a bowl covered with a damp towel.
  • Let raise 8 to 10 hours or over night at room temperature
  • The second raise
  • Put 2 Tbs. of olive oil on a cookie sheet
  • After the dough is almost doubled knead lightly  form a rough oblong shape
  • Let raise for 2 hours covered in a warm place
  • Put the dough on the cookie sheet turn to coat both sides with the olive oil
  • Reshape into rough oblong poke your fingers randomly throughout the focaccia
  • Add the garlic cloves, potatoes and rosemary press into the dough
  • Sprinkle with salt and pepper
  • Bake  for 30 minute


Pesto Shrimp Bruschetta

Pesto Shrimp Bruschetta

This Pesto Shrimp Bruschetta is prefect when your looking for a filling appetizer or a light lunch.

Succulent large shrimp coated with pesto, sautéed in  a delicious sauce flavored with salty crispy prosciutto makes this the prefect topping for the toasted Italian bread smeared with pesto, then topped with tangy feta cheese.

Here’s How I made this Pesto Shrimp Bruschetta

When I made this Pesto Shrimp Bruschetta, I started by slicing some good quality Italian bread on a diagonal into roughly 1/2  inch thickness, and toasting it, in my  toaster oven/ air fryer. This step can be done ahead of time even the day before.

Next I defrosted the shrimp in cold water for a quick thaw, this or defrosting the shrimp in the refrigerator overnight are the best methods of defrosting food.

Finally in a large saute pan, I sautéed some red onion and garlic,  threw in a hand full of tomatoes, deglazed the pan with chicken stock you can use white wine if you prefer, then I sautéed the shrimp to a beautiful sear, and topped the toast with the shrimp and some feta cheese.

If you make this recipe please let me know how it goes. leave me a comment. And please don’t forget to tag me on Instagram with your creations. I love hearing from you, It’s my favorite part!!!

Ingredients

  • 1/2 Lb. large cleaned shrimp
  • 1/2 loaf Italian bread cut into 1/2 inch slice
  • 2 slices prosciutto thinly sliced
  • 1/2 cup pesto sauce plus 1/3 cup to brush on  bread
  • 1/3 cup chicken stock
  • 1 cup feta cheese
  • 1/2 cup diced tomatoes
  • 1 Tbs. each chopped Italian parsley and basil
  • 2 Tbs. butter
  • 1 Tbs. olive oil
  • 1/3 cut chopped red onion
  • 1 Tbs. chopped garlic

Instructions

  1. Toast bread then spread lightly with pesto set aside
  2. Toss shrimp in the pesto sauce set aside
  3. Meanwhile in a large sauté pan bring the butter and oil to medium heat
  4. Add the onion and garlic saute until tender and just beginning to brown
  5. Add the prosciutto saute until crisp
  6. Deglaze the pan with the chicken broth simmer about 5 minutes
  7. Add the shrimp cook just until shrimp is cooked through 4 to 5 minutes
  8. Add the Italian parsley and basil
  9. Top toast with shrimp sprinkle with feta cheese… ENJOY


Roasted Grape Pizza

Roasted Grape Pizza

Pizza has came a long way since our days in the Pizza business. Back then Canadian bacon and pineapple toppings on pizza were a novelty.

Now there are as many different pizza toppings and combinations as there  are people who love pizza.

This Roasted Grape Pizza may sound like an unusually mix of ingredients but it all comes together with the most delicious flavor.

Roasting the grapes sweetens them and releases their juices producing a sweet, syrupy pizza sauce. Mix the sharp bite of the gorgonzola with the mild taste of grapes, honey and thyme, add crunchy walnuts and you a recipe for delicious results.

3 things to know About this Roasted Grape Pizza Recipe

The first thing to know about this Roasted Grape Pizza is I used The pizza dough from Trader Joe’s you can use any pizza dough you like.

Second any grape works with this recipe, I’ve used white and it was just as delicious as using the red grapes. Third and one step not to miss is to prebake the crust, so you don’t end up with a soggy crust. One more thing I  baked this this pizza in my Cuisinart Toaster Oven/ Air fryer my most used small appliance.

And lastly please leave me a comment if you make this Roasted Grape Pizza and please don’t forget to tag me on Instagram with your creations.

I love hearing from you, it’s my favorite  part!!!!


Ingredients

  •  1 lb. prepared pizza dough
  • 3 cups red grapes
  • 2 cups gorgonzola cheese
  • 1 cup grated parmesan
  • 2 cups coarsely chopped walnuts
  • 2 Tbs. thyme leaves
  • 4 Tbs. honey
  • 3 Tbs. olive oil
  • Salt and pepper to taste

Instructions

  1. Preheat oven to 400
  2. Stretch dough into thin 12 inch circle let rise for 15 minutes
  3. Meanwhile drizzle cleaned and separated whole grapes  and walnuts with olive oil, salt and thyme
  4. Roast grapes and walnuts on a small cookie sheet in  the preheated oven for 15 minutes set aside
  5.  Brush the crust with olive oil Pre bake the pizza crust for ten minutes or until crust is lightly golden
  6.  Top pre baked pizza crust with the roasted undrained grapes, gorgonzola and parmesan
  7. Return to oven and bake 15 minutes or until cheese is melted ……ENJOY!!!!


Buffalo langostino Lobster Bruschetta

Buffalo Langostino Lobster Bruschetta

Don’t let the sound of this Buffalo Langostino Lobster Bruschetta intimidate  you.  It’s an easy recipe and affordable too when you use langostino lobster.

Consumers are attracted to using langostino lobster for two main reasons size and cost. The size of the langostino tail is ideal for cooks looking for bite size portions of meat. Moreover the price of langostino lobster is well under half the price of lobster.

As far as am concerned, they taste and eat pretty much the same and are prefect in this bruschetta recipe.

Langostino lobster is an affordable alternative to higher priced shellfish, and can be used in any recipe that calls for lobster, shrimp or crab.

How To Make This Buffalo Langostino Lobster Bruschetta

Start making this Buffalo Langostino Lobster Bruschetta by first toasting some really good crusty Italian bread spread with some really good pesto store bought or homemade. Next simmer the butter and Franks Hot sauce on low heat, stirring constantly.

Third you can prepare the topping ahead of time and assemble the bruschetta just before serving. This is a delicious recipe made more affordable by using less expensive Langostino Lobster.

I hope you try it and please don’t forget to leave me a command. I love hearing from you it’s my favorite part!!!

Ingredients

  • 8 slices crusty Italian bread
  • 1 cup prepared pesto sauce
  • 1/2 lb. langostino lobster meat
  • 1 cup Frank’s Hot sauce
  • 1/2 stick butter
  • 1 cup crumbled gorgonzola cheese
  • 1 grated carrot
  • 1 stalk thinly sliced celery
  • 1 bunch thinly sliced radishes
  • 1/2 small dice red onion
  • 1 Tbls. chopped garlic
  • Juice from one lemon
  • 1 Tbls. chopped Italian parsley
  • Salt and pepper to taste

Instructions

  1. Spread the bread with the pesto sauce toast until golden brown
  2. Meanwhile in a medium saute pan heat the butter to medium high
  3. Add the Garlic saute until tender and just beginning to brown
  4. Add the hot sauce simmer until the sauce thickens slightly about 5 minutes
  5. Add the lobster simmer 5 minutes more
  6. Make the celery slaw by mixing the celery, carrot, radishes, Italian parsley, gorgonzola and lemon juice
  7. Mix the buffalo lobster with the celery slaw
  8. Top the toasted pesto bread with the lobster mixture….. ENJOY!!!!


Air Fried Brussel Sprouts

Air Fried Brussel Sprouts

This oh-so-simple Air Fried Brussel Sprouts recipe produces  sweet, nutty, tender and crispy bits of vegetable goodness. Made with few ingredients and ready in 15 minutes, it is the prefect side dish. 

For this recipe I bought cut in half Brussel sprouts for quicker cooking and the extra bonus is you end up with more of those delicious crispy edges. If you can’t find cut in half Brussel sprouts cut them in half yourself, you’ll be happy you did, not only will they cook quicker, but there’s more places for the delicious mustard sauce to creep into.

I’ve said it before and I’ll keep saying it my Toaster oven/ Air fryer is the most used small appliance in my kitchen and for good reason. It’s quick, easy, economical and a healthier option than deep frying.

What Are  Air Fried Brussel Sprouts

These tasty Air fried  Brussel sprouts are so much fun, they look like baby cabbage heads. In fact they are in the family as other crucifers along with broccoli and cauliflower.

While brussel sprouts can be fairly bitter to the taste bud, especially when eaten raw, they can have nutty and sweet taste when air fried

or roasted!!

They are available year round, but usually  are at their peak flavor in the fall and winter, making them the prefect Holiday side dish.

If you make this Air fried Brussel Sprouts recipe please leave me a comment. And please don’t forget to tag me on Instagram with your creations. I love hearing from you, it’s my favorite part!!!

Ingredients

  • 1 Lb. Brussel sprouts cut in half
  • 2 slices bacon
  • 1/2 chopped red onion
  • 1/2 chopped yellow onion
  • 1 cup chicken stock
  • 2 Tablespoons Dijon mustard
  • 1 Tablespoon butter
  • 1 Tablespoon each Italian parsley, thyme and rosemary
  • Salt and Pepper to taste

Instructions

  1. Spray Brussel sprouts with oil lightly salt and pepper to taste
  2. Set air fryer temperature to 375
  3. Air fry the Brussel sprouts for 7 to 10 minutes or until crispy
  4. Mean while in a medium saute pan  with the tablespoon of butter fry the bacon until crispy remove, drain on paper towels
  5. Add the onion and garlic saute until tender and just beginning to brown
  6. Add the chicken stock, mustard and herbs simmer 10 minutes or until sauce thickens
  7. Cut bacon into small pieces return to saute pan
  8. Add the air fried Brussel sprouts mix to coat with the mustard sauce
  9. Sprinkle with additional chopped Italian Parsley