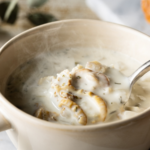
Tuscan Tomato Bread Soup (Pappa al Pomodoro) is a traditional Italian dish the consist mainly of stale bread and tomatoes. The recipe originated in the Tuscan region of Italy, where I was born.
It is a simple and delicious recipe that showcases the bold flavors of the region and is often made with fresh off the vine tomatoes.
Once thought of as peasant food this Tuscan Pappa al Pomodoro can now be found in many Italian restaurant menus.
Variations for this Tuscan Pappa al pomodoro
I wanted to keep this Tuscan pappa al pomodoro vegetarian so I used vegetable stock. You can substitute the vegetable stock for chicken stock if that fits your taste.
Another variation has to do with the bread sliced or cubed doesn’t matter it’s a personal preference. Traditionally the bread wasn’t fried. I find that this extra step of frying and seasoning the bread adds so much flavor, it’s well worth It.
I make this Tuscan Pappa al Pomodoro in the summer with just picked garden tomatoes. But if its not tomato season be sure to use good quality canned tomato product.
Tuscan Tomato Bread Soup (Pappa al Pomodoro) uses just a few ingredients, so its important to use the quality for the best price. From the tomatoes to the bread and just as important for all around good Italian kitchen cooking is a good quality extra virgin olive oil that is affordable.
Ingredients
1/2 stale loaf Italian baguette
2 Tablespoons extra virgin olive oil
1/2 cup chopped yellow onion
1 Tablespoon minced garlic
1 cup vegetable stock
1 28 oz. can crushed tomatoes or 1 Lb. chopped roma tomatoes seeds removed.
1 cup marinara sauce
1 cup white wine or vegetable stock
Salt and pepper to taste
fresh chopped basil and Italian parsley
1/2 cup grated parmesan
Instructions
Cut the bread into thin slices
Fry in the 2 Tablespoons of olive oil until browned on both sides
Add the onion and garlic saute until fragrant and just beginning to brown
Deglaze the pan with the white wine or vegetable stock simmering until absorbed
Then add the tomatoes and the remaining cup of vegetable stock
Salt and pepper to taste
Simmer on low for 30 minutes
Sprinkle with the grated parmesan and chopped Italian parsley. ENJOY!!!
Asparagus Rice Soup with Parmesan
Asparagus Rice Soup with Parmesan
It’s asparagus season and I can’t get enough of it.
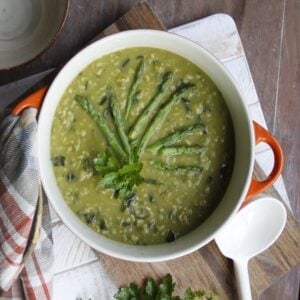
Asparagus showing up in grocery stores is one of the first signs that spring is on its way—even if the weather says otherwise. This Asparagus Rice with Parmesan soup is inspired by my love for asparagus risotto. It features some of the same comforting ingredients: arborio rice, Parmesan cheese, garlic, and of course, fresh asparagus.
Things to know about this This Asparagus Rice soup with Parmesan
If you don’t have arborio rice (a short-grain rice known for its creamy texture), you can easily substitute it with regular white or brown rice. Just make sure to trim the asparagus and remove the tough lower stems. Reserve a few of the tips for garnish—blanch them in the microwave for about a minute for a bright, fresh finish.
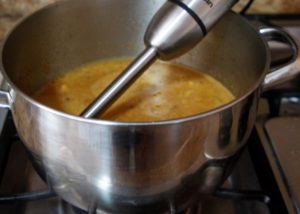
I use an immersion blender to puree the soup still leaving it chunky, if you want a smoother, creamer, consistency blend the soup longer.
It’s one of those soups you make a big pot of, to reheat or freeze for a quick lunch or it’s hearty enough for a light dinner.
It’s a kind of a feel good soup, to welcome warming temperatures, and what better way to start looking forward to Spring than a satisfying bowl of goodness, add a simple salad, some crusty bread and you have a simple, quick family meal, serve it in a soup tureen with pretty white soup bowls and now a simple soup is fancy enough for company. If you make this easy, delicious recipe be sure to leave me a comment, and please don’t forget to tag me on Instagram that’s my favorite part!!!!
Ingredients serves four
Ingredients
1 lb. fresh asparagus cleaned and trimmed
1 cup Arborio rice
1 medium russet potato, peeled and cubed
2 Tbsp. olive oil
2 tablespoons butter
1 onion, chopped
1 tablespoons minced garlic
2 to 3 bay leaves
2 tablespoons chopped Italian parsley
4 cups vegetable stock or a mix of water and stock
Salt and pepper, to taste
1 cup grated Parmesan cheese, plus more for garnish
Instructions
Wash the asparagus and trim off the tough bottom ends. Cut the remaining stalks into 2-inch pieces. Reserve a few tips for garnish.
In a large soup pot, heat the olive oil and butter over medium heat.
Add the chopped onion and garlic. Sauté until soft and fragrant, about 5 minutes.
Stir in the cubed potatoes and cook until lightly golden.
Pour in the vegetable stock (or water) and add the bay leaves.
Add the asparagus pieces (except reserved tips), cover, and simmer for 10 minutes.
Remove from heat. Use an immersion blender to puree the soup until smooth.
Return the soup to the heat. Stir in the Arborio rice and simmer for 12- 15 minutes, or until the rice is al dente.
Stir in the Parmesan cheese and season with salt and pepper to taste.
Serve hot, garnished with the reserved asparagus tips, a sprinkle of Parmesan, and a touch of chopped parsley. Enjoy!
Leftover Rotisserie Chicken Orzo Soup
Leftover Rotisserie Chicken Orzo Soup
Nothing says comfort food louder than Mom’s chicken soup. This leftover Rotisserie Chicken Orzo Soup tastes homey and only takes 15 minutes from start to finish.
Am always looking for ways to use rotisserie chicken. This easy, quick chicken soup recipe doesn’t use the carcass, instead to keep it extra easy I used chicken stock.
The recipe starts with the trilogy of chicken soup making, carrots, celery and onion. Then, I saute the orzo pasta to add a little bite to this rice shaped pasta. And I only use the chicken breast only because it’s my personal preference. You can use any part of the chicken that fits your lifestyle and taste.
3 Variations For Leftover Rotisserie Chicken Orzo Soup
The first change you can make to this Leftover Rotisserie chicken is you can use the chicken legs if that’s what you like or a combination of both white and dark meat.
Second if your family cringes at spinach or anything that resembles it, this chicken soup is so full of flavor you won’t miss anything by leaving it out.
And third if your using chicken stock it’s a good idea to use one that’s low in sodium, since most rotisserie chickens content high sodium levels.
Lastly this soup freezers well in freezer friendly containers. Sometimes I purposely double the recipe to freeze and defrost when I need a ready made meal.
One more thing please leave me a comment when you make this semi-homemade Leftover Rotisserie Chicken Orzo recipe. I love hearing from you, it’s my favorite part!!
Ingredients
2 Cups shredded Leftover rotisserie Chicken
3 Carrots peeled and sliced thin
3 Celery stalks sliced
1/2 Onion Chopped
1 Tbs. chopped garlic
2 Tbs. olive oil
1 Tbs. butter
4 cups chicken stock
1 cup water
2 cups orzo
2 cups chopped spinach
1 cup grated parmesan
Salt and pepper to taste
Instructions
In a medium size stock pot bring the butter and oil to medium heat
Add the onion, celery, carrots and garlic saute until tender and just beginning to brown
Add the orzo saute until lightly browned
Add the chicken stock, water and leftover chicken
Simmer covered 5 to 7 minutes add the spinach and Italian parsley last 2 minutes
Sprinkle with parmesan…..ENJOY
Easy Classic Chicken Potpies
Easy Classic Chicken Potpies
This post may contain affiliate links, that help support this blog. If you make a purchase through these links, I may earn a commission—at no cost to you. For more information read my disclosure policy.
These Easy Classic Chicken Potpies are made real easy by using store bought pie crusts Sure homemade everything is almost always better. But if you don’t have the time or the patience for homemade piecrust there is nothing wrong with going the semi homemade route.
In this chicken potpie recipe I used the frozen pie crust from Trader Joes. You can use whatever brand you like or go homemade if you want. Precooking the pie crust is always a good idea, if you don’t want a soggy bottom crust.
This Easy Classic Chicken Potpie recipe is full of tender chicken breast and good for you ingredients full of comforting familiar flavors everyone loves!!!
Things To Know About this Easy classic Chicken Potpie Recipe
First you don’t have to use chicken breast in this Easy Classic Chicken pot pie recipe. You can use skinless, boneless chicken thighs if that’s what you prefer.
Second I baked these chicken potpies in oven proof soup bowls for individual servings.
I love this soup bowls they go from oven to table to dishwasher OOHHH happy day with less dishes to wash and they are the prefect size for soups and cereal too!!!
The other thing is you need the right size saute pan hold all the ingredients. There’s nothing worst than having a pan that doesn’t hold the ingredients.
Not only do you end up with ingredients stilling out of the pan onto your stovetop but the food doesn’t cook right. A too small saute pan produces boiled ingredients instead of the distinct flavor of sautéed food. A 12 inch nonstick covered saute pan is essential in any kitchen.
Just one more thing if you make this Easy Classic Chicken Potpie recipe please leave e a comment and please tag me on Instagram with your creations. I love hearing from you it’s my favorite part!!!
Easy Classic Chicken Potpies
Tender chicken and vegetables simmer in a creamy herb sauce beneath golden, flaky pastry topped with Parmesan for a comforting homemade classic.
2 prepared pie crust
2 boneless skinless chicken breast cut into small dice
2 tbsp each butter and olive oil
½ chopped yellow onion
2 tbsp chopped garlic
1 cup each diced potatoes, carrots, celery and frozen peas
1 cup whole milk
1 cup chicken stock
2 tbsp each chopped Italian parsley and thyme
1 egg slightly beaten to brush crust
½ cup grated parmesan cheese for sprinkling
Salt and pepper to taste
Preheat oven to 375
Roll out pie crust using a inverted 10 inch soup bowl as a guide to cut 4 circles in each sheet of pie crust for a total of 8 circles
line the bottom and up the sides of 4 oven proof soup bowls 4 of the pie crust circles pick the crust with a fork
Precook the bottom crusts for 10 minutes or until just beginning to brown set aside
Meanwhile in a large skillet bring the butter and oil to medium heat
Salt and pepper the chicken, saute until just beginning to brown
Add the onions and garlic saute until tender and just beginning to brown
Add the carrots, celery and potatoes simmer covered for 10 minutes add the peas and herbs last 5 minutes
Fill the precooked pie crusts with the chicken mixture
Top the pot pies with the top crust brush with egg wash sprinkle with parmesan cheese return to oven, bake 15 minutes or until top crust is golden brown
Two Bean Steak Chili
Two Bean Steak Chili
This post may contain affiliate links, that help support this blog. If you make a purchase through these links, I may earn a commission—at no cost to you. For more information read my disclosure policy.
It’s chili season, and I’m excited to share my Two Bean Steak Chili Recipe with you! Made with tender, slow-cooked steak, red and white kidney beans, and a rich, flavorful tomato sauce, this hearty beef chili is the perfect comfort food for chilly days.
I go easy on the beans in this recipe because I like the flavor and texture of the tender beef to shine through. You can easily add more beans, use less, or leave them out altogether to make this chili your own.
My family prefers milder food, so I keep the chili powder on the lighter side. If you like your chili with a little more kick, feel free to increase the chili powder or add your favorite hot spices to suit your taste.
For the best flavor, I like to use chuck steak. It has a rich, beefy flavor and becomes wonderfully tender after simmering slowly in the tomato sauce. If you can’t find chuck steak, any beef labeled stew meat or stewing beef will work well. These tougher cuts are ideal for slow cooking because they soften over time, creating delicious, melt-in-your-mouth bites of beef.
This easy homemade steak chili is one you’ll want to keep in your regular dinner rotation throughout the colder months. Serve it with crusty bread, cornbread, or your favorite chili toppings for a hearty, satisfying meal the whole family can enjoy.
Best Toppings for Two Bean Steak Chili
When it comes to chili, toppings are usually half the fun! But this Two Bean Steak Chili is so rich and full of beefy flavor that you really don’t need to pile on a lot of extras.
My favorite toppings for this steak chili are creamy avocado and sharp cheddar cheese. I find that adding too many toppings can overpower the deep, savory flavor of the slow-cooked beef and tomato sauce. Of course, that’s just my preference! Feel free to experiment and find your own favorite combination.
Here are a few other chili toppings to try:
Diced red onion: Adds a little crunch and sharpness.
Tortilla chips or nacho chips: Perfect for a satisfying crunch.
Fresh cilantro: Adds a bright, fresh flavor.
Sliced jalapeños: Great if you like a little extra heat.
Sour cream: Adds a cool, creamy contrast to the warm chili.
Extra shredded cheddar cheese: Because you can never go wrong with a little more cheese!
My advice? Start with just one or two toppings and let that rich, slow-cooked steak flavor shine through.
What to Serve with Two Bean Steak Chili
This hearty homemade steak chili is delicious on its own, but you can easily turn it into a complete meal. Serve it with crusty Italian bread, homemade cornbread, or a simple green salad.
If you’re looking for more cozy meals for cold weather, try my other comforting soups and stews, too. They’re perfect for warming up on chilly evenings.
Storage and Freezing Two Bean Steak Chili
One of the best things about this Two Bean Steak Chili recipe is how well it stores and freezes. The flavors become even richer after a day in the refrigerator, making leftovers just as delicious as the first serving.
Refrigerator: Allow the chili to cool slightly, then transfer it to an airtight container. Refrigerate within two hours of cooking and enjoy within 3–4 days.
Freezer: This steak chili freezes beautifully for up to 3 months. Divide it into individual or family-sized portions and store them in freezer-safe containers or freezer storage containers. Leave a little room at the top for expansion, seal tightly, and label with the date.
Reheating: Thaw frozen chili overnight in the refrigerator when possible. Reheat on the stovetop over medium-low heat, stirring occasionally, until steaming hot throughout. Add a splash of beef broth or water if the chili has thickened too much. You can also reheat individual portions in the microwave, stirring halfway through.
My Best Meal-Prep Tip
Make a double batch! This steak chili takes time to develop its rich flavor, so cooking extra means you’ll have delicious, ready-to-heat meals waiting for busy weeknights. Freeze the chili in individual portions for easy lunches or larger containers for a family dinner.
I like using stackable, freezer-safe containers to keep everything organized and make the most of my freezer space. You can find freezer storage containers here.
More Comforting Recipes to Try
If you love hearty, homemade meals like this Two Bean Steak Chili, you might also enjoy these comforting recipes:
If you make this Two Bean Steak Chili, I’d love to hear what you think! Leave a comment and let me know which toppings you used. Your comments and reviews help other readers discover recipes they’ll love, too.
Two Bean Steak Chili
Hearty two bean steak chili made with tender pieces of steak, two kinds of beans, tomatoes, and warm chili spices. A satisfying, flavorful chili perfect for a cozy dinner.
1 lb Chuck Steak
2 chopped yellow onions
3 tbsp chopped garlic
1 cup chopped celery
1 chopped and seeded pepper jalapeno pepper
1 14.5 oz can each diced tomatoes and tomato sauce
1 14.5 oz can each red and white kidney beans undrained
2 cups beef broth
3 tbsp chili powder
1 tbsp each cumin, oregano, smoky paprika and coriander
2 bay leaves
3 tbsp olive oil
Salt and pepper to taste
Cut the steak into equal size pieces salt and pepper to taste
In a medium size stock pot bring the oil to medium high heat
Add the steak and sear completely
Add the onions, garlic and jalapeno pepper saute until tender and just beginning to brown
Add all the spices now
Add the tomatoes and beef broth lower the heat, simmer covered for 1 hour
Add the beans adjust seasonings and simmer an additional 30 minutes
Top with your favorite chili toppings
Choose chuck steak or another well-marbled cut for tender, flavorful chili. Sear the steak before adding the remaining ingredients to develop a deeper flavor. Simmer gently until the steak is fork-tender. Adjust the chili powder and spices to suit your preferred heat level. If the chili becomes too thick, add a little beef broth. If it’s too thin, simmer uncovered until it reaches your desired consistency.
Main Course
American
two bean steak chili
Chickpea Zucchini Soup
Chickpea Zucchini Soup
This post may contain affiliate links, that help support this blog. If you make a purchase through these links, I may earn a commission—at no cost to you. For more information read my disclosure policy.
This Chickpea Zucchini soup is so easy it will easily become one of your favorite soup recipes. If your craving the comfort a bowl of soup gives, but still need easy and quick give this recipe a try.
All good for you ingredients, chickpeas, zucchini and spinach in a tomato broth. It’s one of those vegetarian soups that always has my family going for a second helping and me feeling good about it, because it’s so healthy. When I make it I make it in this stock pot it holds enough for next day reheats or this recipe freezer friendly for a quick ready made lunch.
Serve this Chickpea Zucchini Soup with a salad and some crusty bread for a delicious midweek light dinner or as a starter for Saturday night dinner with friends
Add ins For Chickpea Zucchini Soup
This vegetarian Chickpea Zucchini Soup is delicious on it’s own. But if you want a heartier soup you can saute some ground beef along with the onionsand garlic.
Another ingredient you can add in is 1 15 oz. drained can of white beans for even more nutritional value. And one more delicious 1 cup chopped kale along with the spinach.
This is one of my favorite soups for so many reasons easy to make, delicious uses few ingredients, and the best part it can be on your table in less than 30 minutes!!!
If you make this recipe please leave me a comment. And Please don’t forget to tag me on Instagram with your creations. I love hearing from you!!
Chickpea Zucchini Soup
Chickpeas, zucchini, spinach, corn, and peas simmer with tomatoes and herbs for a hearty vegetable soup finished with plenty of freshly grated Parmesan.
2 cans 15 0z. drained and rinsed chickpeas
1 large zucchini cut in large dice
½ cup frozen corn
½ cup frozen peas
2 cups chopped spinach
1 chopped yellow onion
1 tbsp chopped garlic
½ bunch Italian parsley
2 tbsp each butter and olive oil
3 cups water or vegetable stock
1 cup tomato sauce
1 cup small shaped pasta
1 cup grated parmesan cheese
Salt and pepper to taste
In a large stock pot bring butter and olive oil to medium heat
Chop the parsley, garlic and onion together saute until tender and just beginning to brown
Add the zucchini and chickpeas mix with onion mixture salt and pepper now
Add the water or vegetable stock, and tomato sauce simmer covered for 15 minutes
Add the pasta, spinach, corn and peas simmer 5 minutes longer
Adjust seasoning. Serve in soup bowls top generously with parmesan cheese
Braised Short Rib Fettuccine Pasta
Braised Short Rib Fettuccine Pasta
This post may contain affiliate links, that help support this blog. If you make a purchase through these links, I may earn a commission—at no cost to you. For more information read my disclosure policy.
It’s that time of year when I bring out my Dutch Oven for slow cooked braised recipes. Your going to love this hearty braised Short Rib Fettuccini pasta recipe. Succulent short ribs slow cooked in a wine and beef broth and severed over a bed of fettuccini.
The combination of flavors is addicting and will have family and friends craving more!!! Even now days later am still craving the flavor bliss of this stick to your ribs meal!!!
Things to know about this braised short rib fettuccine pasta recipe
First and foremost use good quality Short ribs since the main ingredient in this Short Rib Fettuccini recipe is the short ribs, they should be the best.
Second and just as important be sure the heat is high enough, to sear the meat before adding the wine. And last but not least this recipe takes time to cook, so allow enough time for the three hours it takes to have the meat fork tender.
On a side note, you don’t have to use Fettuccini or pasta. This recipe is delicious on it’s own or over creamy polenta.
You don’t have to use pancetta either, you can use bacon. I had pancetta so that’s what I used. If you love slow cooked comfort food that’s easy to make try my Italian chicken and sausage scarpariello
If you make this braised short rib fettuccine pasta recipe please leave me comment here, and don’t forget to tag me on Instagram with your creations.
I love hearing from you, it’s my favorite part!!!
Braised Short Rib Fettuccine Pasta
Tender short ribs are braised with pancetta, vegetables, red wine, and herbs, then tossed with fettuccine for a rich, hearty pasta dish packed with deep savory flavor.
8 pcs boneless short ribs cut in large dice
1 lb fettuccine
½ cup flour
6 pcs pancetta diced
1 onion chopped
2 stalks chopped celery
3 peeled sliced carrots
1 cup red wine
2 cups beef broth
8 sprigs of thyme and rosemary
1 cup peas
Salt and pepper to taste
2 tbsp chopped Italian parsley
Salt and pepper the meat coat with the flour
In a Dutch oven fry the pancetta in 2 tablespoons of olive oil until crispy
Add the short ribs and cook until browned
Deglaze the pan with the red wine scrapping up the browned bits at the bottom of the pan
Now add the beef broth, thyme and rosemary
Simmer covered for 2 1/2 hours
Add the carrots, peas and celery simmer 1/2 longer
Mean while cook the fettuccini according to package directions
Toss the fettuccini with the short rib sauce
Sprinkle with Italian Parsley
Zucchini Chickpea Stew
Zucchini Chickpea Stew
This post may contain affiliate links, that help support this blog. If you make a purchase through these links, I may earn a commission—at no cost to you. For more information read my disclosure policy.
This colorful zucchini and chickpea stew is a classic Italian side dish, with a saucy melody of fork tender vegetables.
Beware zucchini season is fast approaching where I live. You know that time of year when you have more zucchini then you know what to do with, then your neighbor brings you some they didn’t know what to do with either. Yikes now what?
Enter this vegetarian stew, typically a side dish but if you add a salad and some crusty Italian bread this vegetarian stew is hardy enough for a delicious dinner.
How To Make Zucchini Chickpea Stew
Start by picking the the freshest zucchini, keep in mind that bigger isn’t necessarily better when choosing zucchini. The bigger ones tend to have more seeds and less flavor
Cut the zucchini in same size pieces to insure even cooking. Zucchini is bland in flavor salt the zucchini directly verses salting the the sauce.
I used chickpeas, but this recipe works well with great northern beans. If you have prepared marinara, which I recommend you always have you can use it in place of the canned tomatoes. Or you can use fresh tomatoes.
I didn’t included Parmesan cheese in this recipe but you should, and don’t forget about the vinegar it adds a another depth of flavor, YUM!
If you make this recipe please don’t forget to leave me a comment and tag me on Instagram… That’s my favorite part.
Zucchini Chickpea Stew
Tender zucchini, chickpeas, tomatoes, and spinach simmer together with fresh herbs for a wholesome Italian-inspired stew that's light, hearty, and full of vibrant flavor.
3 zucchini cut in large dice
1 medium onion chopped
1 15 oz. can un drained chick peas
1 chopped red bell pepper
2 cups chopped spinach
1 15 oz. can chopped tomatoes
3 tbsp chopped garlic
2 tbsp red wine vinegar
2 tbsp each chopped Italian parsley, basil and thyme
salt and pepper to taste
3 tbsp virgin olive oil for sauteing
Saute the onion and garlic in the hot olive oil until limp and fragrant
Add the tomatoes
Simmer covered for 15 minutes
Add the zucchini, red bell peppers and chickpeas…. salt and pepper now
Simmer 10 minutes longer
Add spinach, herbs, and vinegar simmer 5 minutes more
Easy Chicken And Rice Soup
Easy Chicken And Rice Soup
This post may contain affiliate links, that help support this blog. If you make a purchase through these links, I may earn a commission—at no cost to you. For more information read my disclosure policy.
Soup season is here—one of my absolute favorite times of year! And nothing hits the spot quite like a warm bowl of homemade easy chicken and rice soup.
This week, we were lucky to get a rain front here in California—liquid gold for us! And around here, rain means one thing: it’s time to celebrate with a big pot of comforting, soul-warming soup.
Let’s hear it for the ultimate comfort food… classic chicken soup. Cozy, nourishing, and made for days like these.
Most households grew up with comforting bowls of mom’s chicken soup—and mine was no different. This easy chicken rice soup is one of the most heartwarming meals from my childhood. Every Saturday morning, my mom would put on a pot while she cleaned the house. By the time the floors were sparkling and the laundry was folded, lunch was ready: a fragrant, cozy bowl of homemade chicken and rice soup.
While hers took most of the morning, my version is a little faster—ready in under an hour! It’s still rich in flavor and filled with that same homemade goodness.
Pro Tip: Use a deep, heavy stock pot with a lid when simmering soup. It helps trap in flavor and makes a big difference. And for best texture, shred your cooked chicken before stirring in the rice.
This simple chicken rice soup is quick, nourishing, and family-approved. I love serving it in oven-to-table soup bowls—they’re perfect for easy reheating and look beautiful on the table too.
Whether you’re making a big batch for meal prep or a cozy weeknight dinner, this soup delivers every time. It keeps well in the fridge for up to three days, and while I don’t recommend freezing it—the pot always seems to disappear before I even have the chance!
When the temperatures dip, nothing beats a steaming bowl of hearty chicken rice soup. Pair it with a green salad and crusty bread, and you’ve got a complete, comforting meal that’s perfect for the family—or even guests.
If you try this soup, I’d love to hear what you think—leave a comment and don’t forget to tag me on Instagram. That’s always my favorite part!
Heat the olive oil and butter in a large soup pot or Dutch oven over medium heat.
Add the onion, carrots, and celery. Cook for 5–7 minutes, stirring occasionally, until the vegetables begin to soften.
Stir in the garlic, thyme, parsley, oregano, salt, and black pepper. Cook for 30 seconds, until fragrant.
Pour in the chicken broth and bring to a gentle boil.
Add the chicken breasts (or thighs) and the uncooked rice. Reduce the heat to a simmer, cover, and cook for 20–25 minutes, or until the chicken is fully cooked and the rice is tender.
Remove the chicken from the pot and shred it into bite-sized pieces using two forks.
Return the shredded chicken to the soup. Stir in the spinach, if using, and cook for 2–3 minutes, until wilted.
Stir in the fresh parsley and lemon juice, if desired. Taste and adjust the seasoning with additional salt and black pepper.
Ladle into bowls and serve hot with crusty bread or crackers.
Use rotisserie chicken to reduce the cooking time by about 10 minutes—simply add the shredded chicken during the last 5 minutes of cooking.
If making the soup ahead of time, cook the rice separately and add it just before serving to prevent it from absorbing too much broth.
Leftovers can be refrigerated for up to 4 days or frozen for up to 3 months.
Five Star Boston Clam Chowder
Five Star Boston Clam Chowder
This post may contain affiliate links, that help support this blog. If you make a purchase through these links, I may earn a commission—at no cost to you. For more information read my disclosure policy.
Boston and New England clam chowder are one in the same,. The difference between all the clam chowders is the broth.
You see that Boston clam chowder has a thick creamy broth, New England chowder has a thinner almost clear(ish) broth and the Manhattan a red tomato based broth. Okay now that you know the difference between the most popular clam chowders, lets talk about this Boston clam chowder recipe. This recipe was given 5 stars when it was reviewed by a Bay area food critic. The recipe was given to me when we opened our first little hole in the wall, by a retired short -order cook. I can still see him standing next to the stove as I stood watching, it was a different kind of cooking for this Italian girl.That Boston clam chowder soup the retired short order cook taught me to make, was and still is the most requested soup in all our years in the restaurant industry.
A few tips add butter to the pot to help the bacon along, when you add the flour, which thickens the soup, you can use gluten free but whichever you use, let in cook for a few minutes before adding the liquid ingredients. Another thing to remember, add the clams at the end to prevent them from being tough. Wash the fresh clams thoroughly, if you have clams that don’t open when you add them to the soup, you should not use them. If you want less calories replace the cream with low fat milk, and increase the flour by 1/3 cup.
Am not a big fan of cream soups, but this one is so good it’s one of my favorites and the memories attached to it feed my soul! ENJOY!!! If you like easy and delicious soups try my Italian Vegetarian Minestrone soup or a favorite creamy sausage tortellini soup.
Cooking is meant to be fun and creative, so have fun, experiment and let me know if you try the recipes and what you think, that’s my favorite part.
Five-Star Boston Clam Chowder
4 slices bacon, chopped
2 tbsp butter
1 small onion, chopped
3 celery stalks, chopped
1 tbsp garlic, minced
2 medium potatoes, peeled and diced
2 (15-ounce) cans chopped clams, drained, reserving the clam juice
1 pound fresh clams, scrubbed clean
1 cup heavy cream
1 cup whole milk
1 cup clam juice (reserved from the canned clams, supplemented with bottled clam juice if needed)
⅓ cup all-purpose flour
1 tbsp Worcestershire sauce
1 tbsp Tabasco sauce (or to taste)
Salt and freshly ground black pepper, to taste
Scrub and rinse the fresh clams under cold running water, discarding any that are cracked or remain open after being tapped.
In a large soup pot or Dutch oven, cook the bacon over medium heat until crisp. Transfer the bacon to a paper towel-lined plate, leaving the drippings in the pot.
Add the butter to the pot. Once melted, stir in the onion, celery, garlic, and potatoes. Cook for 5–7 minutes, until the vegetables begin to soften and the onion is translucent.
Sprinkle the flour over the vegetables and stir continuously for 1–2 minutes until the flour is fully incorporated.
Gradually whisk in the reserved clam juice, additional clam juice, milk, and heavy cream until smooth.
Stir in the Worcestershire sauce, Tabasco sauce, and the canned chopped clams. Bring the chowder to a gentle simmer.
Cover and cook for about 20 minutes, or until the potatoes are fork-tender.
Add the fresh clams, cover, and cook for 5–8 minutes, or until the shells open. Discard any clams that do not open.
Stir the cooked bacon back into the chowder. Taste and season with salt and pepper as needed.
Ladle into bowls and serve hot with oyster crackers, crusty bread, or a sprinkle of fresh parsley.
 It’s one of those soups you make a big pot of, to reheat or freeze for a quick lunch or it’s hearty enough for a light dinner.