Fluffy lemon ricotta pancakes

Fluffy Lemon Ricotta Pancakes

This post may contain affiliate links, that help support this blog. If you make a purchase through these links, I may earn a commission—at no cost to you. For more information read my disclosure policy.

Bright, zesty, and melt-in- your mouth delicious! These fluffy lemon ricotta pancakes are the perfect way to start your day.

Nothing says brunch perfection like a stack of soft, fluffy lemon ricotta pancakes. With their light texture, hint of citrus, and creamy richness from the ricotta, these pancakes are a true delight. Whether you’re hosting a cozy weekend breakfast or simply treating yourself to something special, this recipe is bound to impress. These were a beloved staple on our diner menu, always a customer favorite.

Why you ‘ll love this fluffy lemon ricotta pancake recipe

Light and fluffy: The ricotta adds moisture without making the pancakes heavy.

Bright lemon flavor: A refreshing twist that makes these pancakes extra special.

Easy to make: Simple ingredients, quick prep, and delicious results.

TOPPING IDEAS

The beauty of these fluffy lemon ricotta pancakes is that they pair deliciously with a variety of toppings. Drizzle them with butter and warm maple syrup for classic comfort, dust them with powder sugar for a delicate touch, or add fresh berries for a burst of freshness. A dollop of whipped cream or mascarpone adds an extra layer of indulgence, while a sprinkle of toasted almonds or crushed pistachios provides a delightful crunch. If you’re feeling adventurous , try a spoonful of lemon curd with a drizzle of honey for an extra citrusy kick.

These fluffy lemon ricotta pancakes are a delicious way to start your morning. Whether you’re making them for a special occasion, or just because, they’re sure to bring joy to your table. Give this recipe a try , and let me know in the comments how you like to top your pancakes! don’t forget to share your creations on social media and tag me- I’d love to see how you enjoy them! 

Fluffy Lemon Ricotta Pancakes

These Fluffy Lemon Ricotta Pancakes are light, tender, and filled with fresh lemon flavor. Creamy ricotta gives the pancakes a soft, airy texture, while lemon zest and juice add a bright, refreshing finish. Easy enough for a weekend breakfast and special enough for brunch.

  • 1 cup flour
  • 1/2 cup sugar
  • 1 tsp. baking powder
  • 1/2 tsp. baking soda
  • 2 eggs
  • 1/2 cup milk
  • 1/2 cup ricotta cheese
  • The zest and juice from 1 lemon
  • 2 tsp. vanilla
  1. In a bowl wisk together flour, sugar, baking powder and baking soda

  2. In another bowl wisk the eggs, milk, ricotta, lemon juice, lemon zest and vanilla
  3. Gently fold wet ingredients into the dry – mix only until combined DON”T OVERMIX the batter should not be smooth
  4. Heat a skillet over medium low heat, add the butter, and pour the batter in medium rounds.
  5. Cook until bubbles form, about 3 minutes , flip and cook an additional 2-3 minutes.
  6. Serve with butter, maple syrup, powder sugar or fresh berries.

Breakfast
Italian
lemon ricotta pancakes,


layered potato, prosciutto and cheese slices

 Layered Potato, Prosciutto and Cheese Slices

This post may contain affiliate links, that help support this blog. If you make a purchase through these links, I may earn a commission—at no cost to you. For more information read my disclosure policy.

If you love crispy, cheesy, and savory bites, these crispy layered potato, prosciutto, and cheese slices are about to become your new favorite dish. Perfect as an appetizer, side dish or even a light lunch, this easy -to-make recipe layers thinly sliced potatoes with salty prosciutto and gooey melted cheese for a mouthwatering combination of flavors and textures.

The contrast of crispy edges and tender layers makes every bite irresistible. As the cheese melts and mingles with the savory prosciutto, it creates delicious give-me more flavors.

Why You’ll love this layered potato prosciutto and cheese slices recipe

Crispy and delicious: the potatoes turn golden and crispy, while the cheese melts into every layer

Savory and satisfying: Prosciutto adds the perfect touch of salty goodness,

Easy to make: Just a handful of simple ingredients create an impressive dish.

Versatile: SYou can erve as an appetizer, side dish, or even a light main course.

Customizable: You can swap out the cheese to fit your taste or what you have on hand. If you don’t care for prosciutto use sliced  ham or even turkey.

This crispy layered potato, prosciutto, and cheese slices recipe is an easy way to elevate your next meal with rich flavors and a crispy, cheesy texture. Try it and let me know how you enjoyed it!!!! 

Layered Potato, Prosciutto and Cheese Slices

Layered Potato, Prosciutto and Cheese Slices are a simple Italian-inspired side dish made with thinly sliced potatoes, savory prosciutto, and layers of melted cheese. Crispy around the edges and tender in the center, this comforting dish is easy enough for a weeknight and elegant enough for entertaining.

  • 4 medium Yukon gold or russet potatoes thinly sliced
  • 6 thin prosciutto slices
  • 12 slices Swiss cheese
  • 2 Tbsp. olive oil
  • 1 tbsp. Italian seasoning
  1. Preheat your oven to 400 degrees. Grease a 9 inch baking tray with olive oil or butter.

  2. Clean and peel the potatoes. Use a mandolin or slice the potatoes thin.
  3. Arrange on the prepared baking sheet. Drizzle with the olive oil, sprinkle with the Italian herbs and prebake in the preheated oven for 10-15 minutes r until the potatoes are beginning to brown.
  4. Carefully remove from the oven. Top the precooked potatoes first with prosciutto then with the Swiss cheese. Return to the oven and bake an additional 10-15 minutes, or until the cheese is melted.
Appetizer, Main Course, Side Dish
Italian
layered potato recipe, potato prosciutto and cheese,


Spicy eggs in Purgatory

Spicy Eggs in Purgatory

This post may contain affiliate links, that help support this blog. If you make a purchase through these links, I may earn a commission—at no cost to you. For more information read my disclosure policy.

Spicy eggs in purgatory is a dish that perfectly balances simplicity and bold flavors. This traditional Italian recipe features eggs poached in a rich, garlicky tomato sauce with a touch of heat. It’s an easy one- pan meal that’s perfect for breakfast, brunch or even a light dinner.

The origins of eggs in purgatory are deeply rooted in Italian cuisine, particularly in the southern regions like Campania. The name Uova in Purgatorio is said to symbolize the fiery tomato sauce as purgatory and the delicate eggs as souls within it. Similar to the Middle Eastern shakshuka, this dish showcases the universal love for eggs cooked in a flavorful sauce.

Tips for the best spicy eggs in purgatory

  1. Adjust the spice to your liking by increasing or reducing the red pepper flakes.
  2. Use my easy marinara sauce for a rich and flavorful sauce.
  3. Don’t overcook the eggs if you prefer  runny yolks, keep an eye on them as they set.
  4. Add extra toppings like crumbled feta, olives or cooked Italian sausage or pancetta.

Spicy eggs in purgatory is one of those magical dishes that delivers big flavors with minimal effort. Whether you’re enjoying it for breakfast or dinner, this dish is sure to become a staple in your kitchen.

Have you tried making Eggs in Purgatory? Let me know your favorite variations in the comments below. I love hearing from you. It’s my favorite part and it helps others. 

Spicy Eggs in Purgatory

Spicy Eggs in Purgatory is a simple Italian-inspired dish of eggs gently cooked in a rich, spicy tomato sauce with garlic and herbs. Perfect for breakfast, brunch, or an easy meatless dinner, especially with crusty bread for soaking up the sauce.

  • 2 Tbsp. olive oil
  • 2 cups sliced mixed color bell peppers
  • 1 cup chopped onions
  • 1 Tbsp. minced garlic
  • 1 Tbsp. hot pepper flakes
  • 3 cups my easy marinara sauce
  • 4 eggs
  • 1 Tbsp. each chopped basil and Italian parsley
  1. Start by cleaning your bell peppers and cutting into thin strips

  2. In a saute pan over medium high heat in the olive oil saute the bell peppers, red pepper flakes, onions and garlic until soft and translucent
  3. Then add in the marinara sauce and simmer for 10 minutes.
  4. Make 4 indentations with the back of a spoon in the sauce and drop the eggs into them. Simmer covered until the eggs reach your preferred doneness. Top with the basil and Italian parsley.
  5. Serve with toasted bread.

Simmer the tomato sauce until slightly thickened before adding the eggs so the eggs cook gently without becoming watery.

Breakfast, Main Course
Italian
spicy eggs in purgatory,


Easy Vegetarian zucchini fritters

Easy Vegetarian Zucchini Fritters

This post may contain affiliate links, that help support this blog. If you make a purchase through these links, I may earn a commission—at no cost to you. For more information read my disclosure policy.

Crispy, golden, and oh-so-delicious. These easy vegetarian zucchini fritters are the perfect blend of fresh zucchini, savory cheese, and a hint of garlic.

When you think of zucchini , summer might be the first season that comes to mind. But this versatile vegetable is perfect for creating delicious dishes all year long. One of my favorite ways to enjoy zucchini is by making these irresistibly crispy zucchini fritters. They’re golden, savory, and perfect as an appetizer, side dish, or a quick snack any time of the year!!!!

Why you’ll love these easy vegetarian zucchini fritters

Crispy and delicious: the perfect blend of fresh zucchini, cheese and herbs

Easy to make: With simple ingredients and quick prep, you’ll have these fritters ready in no time.

Versatile: Great on their own, or paired with my easy marinara sauce.

These easy vegetarian zucchini fritters are a wonderful way to enjoy zucchini beyond the summer months. They’re easy, delicious, and sure to become a staple in your kitchen. Give them a try and let me know how you like them. 

Easy Vegetarian Zucchini Fritters

These easy vegetarian zucchini fritters are crisp on the outside, tender inside, and packed with fresh zucchini and savory flavor. They're simple to make and perfect as an appetizer, side dish, light lunch, or meatless meal.

  • 2 medium zucchini washed and finely chopped
  • 2 Teaspoon. salt
  • 2 eggs slightly beaten
  • 1/2 cup grated parmesan cheese
  • 1/3 cup flour
  • 1/2 cup bread crumbs
  • 1 Tbsp. minced garlic
  • 1/3 cup chopped onion
  • 2 Tbsp. fresh chopped Italian parsley
  • salt and pepper to taste
  • 2 cups olive and canola blend oil for frying
  1. Chop the zucchini and sprinkle with salt. Let sit for 10 minutes to draw out the liquid. Use your hands to squeeze out as much liquid as possible

  2. In a bowl combine the zucchini, and the rest of the ingredients except for the frying oil. Mix until well combined.
  3. Scoop out about 2 Tbsp. of the mixture and flatten into patties
  4. Heat the oil over medium high heat until medium hot.
  5. Fry the fritters for 3-4 minutes per side until golden and crispy

Squeeze as much moisture as possible from the grated zucchini before mixing the batter. This helps the fritters brown nicely and keeps them crispy. 

Appetizer, Main Course, Side Dish
Italian
vegetarian zucchini fritters, easy


Asparagus prosciutto ricotta tart

Asparagus Prosciutto Ricotta Tart

This post may contain affiliate links, that help support this blog. If you make a purchase through these links, I may earn a commission—at no cost to you. For more information read my disclosure policy.

Spring is around the corner, and there’s no better  way to celebrate the season then with vibrant and fresh ingredients. This asparagus, prosciutto ricotta tart is the perfect dish to bring a touch of spring to your table. With it’s buttery, flaky crust and creamy ricotta filling, each bite is a blend of crisp, creamy, and savory flavors. Whether served as an appetizer, light lunch or a show- stopping side dish, this tart is as beautiful as it is delicious.

Tips for success when making asparagus, prosciutto ricotta tart

  1. Keep the puff pastry cold: For the flakiest, crispiest  crust , make sure your puff pastry is thawed but well – chilled before baking. Prebaking the pastry crust helps maintain the layers and prevents a soggy bottom.
  2. Avoid overloading the filling: While tempting to pile on the ricotta and toppings, keep a light hand. Too much filling can weigh down the pastry and prevent it from cooking evenly. Spread the ricotta in a thin even layer and avoid over stacking the asparagus and prosciutto. This asparagus, prosciutto, and ricotta tart is a true celebration of spring flavors. With it’s crisp. flaky crust, creamy ricotta filling, and the prefect balance of tender asparagus and savory prosciutto offers a delicious blend of textures and taste. It’s an elegant yet approachable dish that’s sure to impress, whether served at a brunch, a special gathering, or a simply treat for yourself. Give this recipe a try, and enjoy how effortlessly it comes together.


Asparagus Prosciutto Ricotta Tart

This savory asparagus, prosciutto, and ricotta tart combines creamy ricotta, tender asparagus, and salty prosciutto on a crisp, golden pastry crust. It's an elegant yet easy Italian-inspired dish perfect for brunch, lunch, or entertaining.

  • 1 puff pastry sheet thawed
  • 2 cups ricotta cheese
  • 1/2 cup grated parmesan
  • 1 egg
  • 1 Tbsp. chopped Italian parsley
  • 1/2 lb. cleaned (trimmed and steamed asparagus)
  • 2 slices prosciutto cut into thin strips
  • 1 egg yolk + 1 Tbsp. water for brushing
  1. Preheat your oven to 375- degrees and line a baking sheet with parchment paper

  2. Thaw out the puff pastry. Then unfold the pastry onto the baking sheet
  3. Gently score a 1 – inch border around the edges without cutting all the way through. Prick the center all over with a fork to prevent it from puffing up too much. Then prebake the puff pastry for 5-7 minutes or until just beginning to turn golden.
  4. Make the ricotta filling in a bowl mix ricotta, parmesan, egg, parsley salt and pepper to taste. Spread the ricotta mixture evenly within the scored border on the precooked puff pastry.
  5. Steam in the cleaned asparagus in boing salted water for 3 minutes drain well and pat dry. Lay the asparagus spears over the ricotta mixture.
  6. Cut the prosciutto into thin strips and nestle them between the asparagus. Mix the egg yolk with the water, brush the edges with the egg wash. Drizzle with oil olive.
  7. Bake for 15-20 minutes longer.
  8. Once out of the oven, sprinkle with fresh thyme. Slice and serve warm or at room temperature.

Blanch the asparagus briefly before adding it to the tart to ensure it becomes perfectly tender without overcooking the pastry.

Appetizer, Main Course, Side Dish
Italian


Italian sausage escarole and beans

Italian Sausage Escarole and Beans

This post may contain affiliate links, that help support this blog. If you make a purchase through these links, I may earn a commission—at no cost to you. For more information read my disclosure policy.

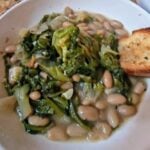
There’s something truly special about a pot of Italian escarole and beans with Italian sausage simmering on the stove. This rustic soup takes me right back to my childhood, when a big steaming bowl of it could turn an ordinary meal into something warm, comforting, and deeply satisfying.

Tender escarole, creamy white beans, and savory Italian sausage simmer together in a light, flavorful broth, creating a simple meal that feels like home. It’s hearty without being heavy and made with wholesome, everyday ingredients you may already have in your kitchen.

Whether this soup brings back memories from your own childhood or you’re discovering it for the first time, it’s the kind of old-fashioned Italian comfort food that quickly becomes a family favorite.


Things to know about this Italian sausage escarole and beans

Fresh vs. canned beans: While canned beans are convenient, uses fresh beans elevates the dish with a creamy texture and rich flavor. To use fresh beans soak them overnight and cook them right in the same pot as the sausage for 10 -15 minutes then add in the escarole and cook until the escarole is tender and the beans fork tender ( 10 minutes longer)

Broth options: Use chicken broth for a richer flavor or vegetable broth if you prefer a lighter taste.

Spice Level: If you like extra heat use more red pepper flakes to fit your taste. If on the other hand you don’t like heat you can use mild Italian sausage and leave out the red pepper flakes.

This recipe is easily customizable. You can add a drizzle of good extra virgin olive oil for a gourmet touch, toss in some tomatoes for a touch of acidity and color, or stir in small pasta like ditalini for extra heartiness.

Italian sausage escarole and beans is a timeless dish that brings comfort and flavor to your table. Whether your enjoying it with crusty bread as a soup or a side, this recipe is sure to become a staple in your kitchen too!!! 

Italian Sausage Escarole and Beans

Italian Sausage Escarole and Beans is a rustic Italian soup made with savory Italian sausage, tender escarole, creamy white beans, and a light, flavorful broth. It's hearty, comforting, and an easy one-pot meal that's perfect for a cozy family dinner.

  • 2 Tbsp. olive oil
  • 4 gloves thinly sliced garlic
  • 1 /2 lb. spicy Italian sausage crumbles
  • 2 Teaspoon hot pepper flakes
  • 1 head escarole cleaned and chopped
  • 2 cups cooked fresh cannellini beans( or 1 15 oz. can drained and rinsed
  • 4 cups chicken stock
  • Parmesan rind
  • Grated parmesan for serving
  • Crusty bread (for serving)
  • salt and pepper to taste
  1. If using fresh beans rinse and soak them in water, for at least 1 hour or overnight.

  2. Brown the sausage: In a large pot or Dutch oven in the olive oil over medium high heat, brown the sausage breaking it upas it cooks
  3. Add the garlic, to the sausage and cook until soft and translucent. Add in the red pepper flakes.
  4. Add the chicken stock, and uncooked beans cook until the beans are almost cooked through. (About 15 minutes)
  5. Add the cleaned and cut escarole, and parmesan rind and simmer or an additional 10 minutes, or until the beans are fork tender and the escarole soft.
  6. Ladle the soup into bowls top with freshly grated parmesan.

For the best flavor, brown the Italian sausage well before adding the remaining ingredients. The browned bits left in the pot add extra flavor to the broth.

Appetizer, Main Course, Side Dish
Italian
Italian sausage escarole and beans


Cheesy Italian potato croquettes

Cheesy Italian Potato Croquettes

This post may contain affiliate links, that help support this blog. If you make a purchase through these links, I may earn a commission—at no cost to you. For more information read my disclosure policy.

Golden. crispy, and packed with melty cheese. Italian potato croquettes are the perfect appetizer or side dish for any occasion, These cheesy potato croquettes are made with creamy mashed potatoes, rich pecorino Romano, mozzarella and a sprinkle of Italian parsley, then coated in crunchy breadcrumbs and fried to a golden deliciousness. Whether you’re serving them as a snack, party bite or alongside your favorite Italian meal, these croquettes are additive.

If you love classic Italian street food, these homemade potato croquettes ( crocchette di patata in Italian) will transport you straight to the heart of Naples. With their crispy exterior and gooey cheese filling, they’re a crowd -pleaser and go beautifully served with my easy marinara sauce.

What to know about this cheesy Italian potato croquette recipe

One of the best things about cheesy Italian potato croquettes is their versatility- especially when it comes to using left over mashed potatoes. If you have extra mashed potatoes from a previous meal, this recipe is a fantastic way to repurpose them into something crispy, golden, and delicious. Leftover mashed potatoes often have added butter and milk, which can add even more flavor to the croquettes. Just be sure they aren’t too runny:  if needed , you can firm them up by adding a bit more grated cheese and flour to help with consistency.

If you’re starting from scratch, making fresh mashed potatoes for croquettes is simple and worth the effort. Boil peeled, uncut, russet or Yukon gold potatoes until fork- tender , then just mash them with just enough butter and salt to enhance their flavor without making them too soft. You want a firm potato mixture that holds it’s shape when formed into croquettes. Chilling the mixture before forming the croquettes makes the process much easier, as it helps firm up the texture and prevents them from falling apart. Letting the mixture rest in the fridge for at least 30 minutes-or even overnight- ensures the croquettes hold their shape when rolling. coating and frying, resulting in a perfectly crisp and golden exterior.

Whether you’re using leftover mashed potatoes or making them fresh, these cheesy Italian potato croquettes are delicious!!!! Please leave me a comment when you make this. I love hearing from you. It’s my favorite part and it helps others. 

Cheesy Italian Potato Croquettes

These Cheesy Italian Potato Croquettes are crispy on the outside, creamy and cheesy on the inside, and packed with comforting Italian flavor. Made with mashed potatoes, cheese, and simple seasonings, they make a delicious appetizer, side dish, or snack.

  • 3 cups oil for frying canola olive-oil blend
  • 3 large potatoes
  • 2 eggs slightly beaten
  • 1 cup grated pecorino Romano cheese
  • 1/3 cup flour
  • 2 Tbsp. chopped Italian parsley
  • 6 mozzarella sticks cut in half
  • Salt and pepper to taste

FOR THE COATING

  • 2 large eggs slightly beaten
  • 1 cup breadcrumbs
  • 1/2 cup grated parmesan
  • 2 Tbsps. chopped Italian parsley
  1. Peel the potatoes and cook uncut in boiling salted water until fork tender. Then mash or rice them

  2. In a bowl combine the mashed potatoes, beaten eggs, flour, pecorino Romano, and parsley. Salt and pepper to taste.
  3. Mix well to combine, the consistency should be wet enough to form but dry enough as to not fall apart.
  4. Using a tablespoon or cookie scoop grab roughly a 1/4 cup of the potato mixture place in the palm of your hand and place a piece of mozzarella cheese in the center than roll into log shape about 2 inches long. Repeat the process for all the potatoes. You should have 10 -12 croquettes.

FOR THE COATING AND FRYING

  1. Place the slightly beaten eggs in a bowl in another add the breadcrumbs, grated Pecorino Romano, and Italian parsley
  2. Dip each potato croquette first in the egg then roll each one in the breadcrumb mixture. Lay on a parchment lined baking sheet. At this time they can be placed in the refrigerator to set up ( can be left overnight) or fried right away.
  3. In a heavy pot heat 1 inch of the oil to 350 F.
  4. Once the oil reaches frying temperature begin frying the croquettes in batches as to not overcrowd the pan 5-6 minutes or until golden on both sides.
  5. Sprinkle with additional salt if preferred and chopped Italian parsley.

Chill the shaped croquettes before frying. This helps them hold their shape and prevents the cheese filling from escaping during cooking.

Appetizer, Main Course, Side Dish
Italian
cheesy Italian potato croquettes,


Easy spinach Ricotta ball recipe

Easy Spinach Ricotta Ball Recipe

This post may contain affiliate links, that help support this blog. If you make a purchase through these links, I may earn a commission—at no cost to you. For more information read my disclosure policy.

If your looking for a vegetarian Italian recipe that doesn’t compromise on flavor or tradition, this  easy spinach ricotta ball recipe is  the perfect choice.

These tender cheesy bites are packed with savory flavors of spinach, ricotta, parmesan and fresh herbs all rolled together and baked before being simmered in my easy marinara sauce. They pair deliciously with marinara sauce, a simple salad or a loaf of crusty bread. Plus , they’re versatile enough to be made ahead of time, making them a perfect choice for busy weeknight meals or family and friend gatherings.

Trust me , this is one vegetarian dish meat-lovers included -will love.

Why I  love this easy spinach ricotta ball recipe

Healthy and delicious:  These spinach balls are packed with nutrients from the spinach and cheese making it a healthy meal that’s also full of flavor.

Easy to make: This spinach ricotta ball  recipe requires just a few ingredients and is simple to prepare , making it perfect for all cooks of all skill levels.

Versatile:  You can serve these spinach ricotta balls as an appetizer, snack, side dish or paired with a salad and crusty bread for a complete meal. They’re perfect for parties, family dinners or meal prep. They can be make ahead of time and are freezer friendly.

Baked not fried: baking these easy spinach ricotta balls instead of frying them still gives them a crispy exterior with less oil, making them a lighter, healthier option.

These spinach ricotta balls prove that vegetarian dishes can be just as satisfying  and full of flavor as their meat- based counterparts. With their tender texture and cheesy goodness, they are a true celebration of simple, classic Italian ingredients. 

Easy Spinach Ricotta Ball Recipe

These Easy Spinach Ricotta Balls are tender, light, and flavorful Italian-style dumplings made with creamy ricotta, spinach, Parmesan, and a few simple ingredients. They’re gently cooked until they become soft and delicate, then served with your favorite sauce or simply finished with melted butter and Parmesan. A wonderful meatless Italian recipe for a comforting lunch or dinner.

  • 1 Lb. ricotta
  • 2 cups steamed and chopped
  • 1/2 cup grated parmesan
  • 1/2 cup breadcrumbs
  • 1/2 cup flour
  • 1 egg
  • Salt and pepper to taste
  • 4 cups my easy marinara sauce
  1. Steam the spinach and squeeze out as much of the water as possible

  2. In a bowl mix all the ingredients.
  3. Form into golf size balls bake in a preheated 375- degree oven for 10- 15 minutes
  4. bring the marinara sauce to a slow simmer. Add the spinach ricotta balls and simmer for 10 minutes.
  5. Top with grated parmesan cheese.

Tip text
Tip text
Drain the ricotta and spinach really well. Excess moisture is the biggest reason ricotta balls can fall apart while cooking. If using frozen spinach, squeeze it very dry before adding it to the mixture. For extra insurance, refrigerate the shaped balls for about 15–20 minutes before cooking. Chef’s tip: Cook one ricotta ball first as a test. If it starts to fall apart, add a little more Parmesan or flour to the mixture before cooking the rest.

Appetizer, Main Course, Side Dish
Italian
easy spinach ricotta ball recipe


Creamy vegetarian tomato soup

Creamy Vegetarian Tomato Soup

This post may contain affiliate links, that help support this blog. If you make a purchase through these links, I may earn a commission—at no cost to you. For more information read my disclosure policy.

This creamy roasted tomato soup is made with fresh tomatoes, onions, carrots, garlic, and fresh basil. The tomatoes and vegetables are roasted first, which concentrates their flavor and brings out their natural sweetness. Everything is then blended until smooth and finished with a little cream for a rich, velvety texture.

This is a simple soup, but roasting the vegetables makes a noticeable difference in the flavor. It’s a great way to use fresh summer tomatoes and can be served as a light lunch, first course, or easy dinner. I like to serve it with crusty bread, homemade croutons, or a grilled cheese sandwich.

Serving suggestions for this creamy vegetarian tomato soup

There are so many ways to serve this creamy tomato soup. For a simple bowl, I like to finish it with fresh basil, freshly cracked black pepper, and a drizzle of cream. Homemade croutons add a nice crunch, while a little grated Parmesan is also delicious.

For me, tomato soup and grilled cheese are hard to beat. Serve the soup with a crisp, buttery grilled cheese or warm garlic bread for an easy lunch or dinner. If you’re serving it to guests, pour it into small cups and serve it as a starter.

You can also adjust the soup to suit your taste. Add red pepper flakes for a little heat, more basil for a stronger herb flavor, or an extra splash of cream if you prefer a richer soup. It’s a simple recipe that you can easily make your own.

Storage

Refrigerator: Allow the soup to cool completely, then store in an airtight container in the refrigerator for up to 4 days. Reheat gently on the stovetop or in the microwave, adding a splash of broth or cream if needed to loosen the soup.

Freezer: For best results, freeze the soup without the cream for up to 3 months. Thaw overnight in the refrigerator, reheat gently, and stir in fresh cream before serving.

More Italian Soup Recipes

If you love a warm bowl of homemade soup, try my Italian Holiday Chicken Soup, Minestrone Soup, and Tortellini sausage Soup. For even more cozy and comforting ideas, browse my Soup Recipes


If you love a warm bowl of homemade soup, try my Italian Holiday Chicken Soup, Minestrone Soup, and Tortellini Chicken Soup. For even more cozy and comforting ideas, browse my Soup Recipes.


Creamy Vegetarian Tomato Soup

A rich and creamy vegetarian tomato soup made with ripe tomatoes, aromatic vegetables, garlic, and herbs. Smooth, comforting, and easy to make, this Italian-inspired soup is perfect with crusty bread or a grilled cheese sandwich.

  • 2 Lbs. ripe tomatoes (Roma or vine ripened)
  • 1 red bell pepper
  • 2 peeled carrots
  • 2 celery stalks
  • 1 large onion quartered
  • 4 gloves peeled garlic
  • 2 Tbsp. olive oil
  • 2 Tbsp. butter
  • 3 cups vegetable or chicken stock
  • 1 cup heavy cream
  • fresh basil leaves for garnish
  1. Preheat your oven to 400-degrees

  2. prepare the vegetables by cleaning them and cutting into large dice.
  3. place the tomatoes, celery, onion, garlic, red bell pepper and carrots in an oven poof dish. drizzle with the olive oil , salt and pepper to taste, and roast for 25-35 minutes until caramelized.
  4. Then add the roasted vegetables to a a stock pot or Dutch oven add the stock and cream and simmer over low heat for 10 minutes.
  5. use an emersion blender or food processer and blend until smooth.
  6. Adjust your seasonings, ladle into soup bowls top with fresh basil leaves.

Let the tomatoes simmer before blending. This gives the vegetables and herbs time to develop a deeper flavor. For the creamiest texture, use an immersion blender directly in the pot and add the cream at the end.

Soup
American, Italian
soup, vegetarian tomato soup,


Gorgonzola and brie pear tart

Gorgonzola and Brie Pear Tart

This post may contain affiliate links, that help support this blog. If you make a purchase through these links, I may earn a commission—at no cost to you. For more information read my disclosure policy.

A few ingredients and 20 minutes is all it takes to make this flaky, buttery gorgonzola and brie pear tarts. Sometimes, the most impressive dishes are the simplest to make. Perfect for appetizers, brunch or a light dessert, these puff pastry tarts are versatile as they are delicious.

Picture this, a base of flaky puff pastry on top a spread of fig jam  and slices of creamy brie that melts into the flaky crust, crumbles of gorgonzola add a tangy twist. The star of the show? Thin slices of ripe juicy pears, their natural sweetness caramelizing slightly as they bake. Sweet and savory in every delicious bite.

Tips and variations for gorgonzola and brie pear tart

  1.  Pear perfection : Use ripe but firm pears for the best texture and flavor. Bartlett, bosc or Anjou are great choices
  2. Cheese alternatives: swap gorgonzola for goat cheese or a milder blue cheese
  3. Sweet or savory: Adjust the balance of taste with a touch more honey for sweetness or hot honey for a spicy kick. These gorgonzola and brie pear tarts are the perfect way to impress with minimal effort.    Give them a try and let me know what you think. I love hearing from you. It’s my favorite part and it helps others.
  4. Storage

    Refrigerator: Store leftover tart in an airtight container or tightly covered in the refrigerator for up to 3 days. Reheat in a 350°F oven until warmed through to help maintain the crisp pastry.

    Freezer: For the best texture, I recommend enjoying this tart fresh rather than freezing it. The cheese and pears can release moisture when thawed, which may soften the pastry.

    More Italian-Inspired Appetizers

    Love easy, delicious appetizers? Try my Italian peppers and potatoes, Baked Three Cheese Appetizer with Roasted Cherry Tomatoes chessy Italian potato  Croquettes, and other delicious Appetizer Recipes—perfect for entertaining, holidays, or an Italian-inspired gathering.


Gorgonzola and Brie Pear Tart

A beautiful savory-sweet pear tart combining creamy Brie, bold Gorgonzola, and tender pears on a flaky pastry crust. Finished with a touch of honey and fresh herbs, this elegant Italian-inspired tart makes a wonderful appetizer, brunch dish, or holiday starter.

  • 1 sheet puff pastry
  • 1/2 cup fig jam
  • 2 ripe but firm bartlett pears
  • 4 oz. brie cheese 1/2 of the wheel cut into thin slices
  • 1/2 cup gorgonzola crumbles
  • a few sprigs of fresh thyme
  • 4 Tbsp. honey
  • 1 egg yolk + 1 Tbsp. of water
  1. Thaw one the puff pastry at room temperature while prepping the other ingredients. Thaw until it unfolds without cracking. Don’t let it get too warm or it will be harder to handle.

  2. Preheat your oven to 375- degrees line a baking sheet with parchment paper.
  3. Place your puff pastry on the prepared pan spread with the fig jam. To create a picture frame effect, fold the perimeter of the sheets over, , about 1/2 then press with a fork. Pierce the inner part of the pastry with a fork, like you would a piecrust.
  4. Begin alternating the pears than a slice of brie continue the process of layering the pears then the cheese with the rest of the pears and cheese.
  5. Brush the pear tart with the honey top with fresh thyme leaves then add the crumbled gorgonzola.
  6. Make an egg wash by combining the egg yolk with the 1 Tbsp. of water. Brush the egg mixture over the edges of the puff pastry.
  7. Bake in a 375- degree preheated oven for 18 -20 minutes. or until the pastry edges puff up and are golden brown.

Choose pears that are ripe but still firm. They should hold their shape while baking rather than becoming too soft. Arrange the pear slices slightly overlapping for a beautiful presentation, and add the honey after baking for the best flavor.

Appetizer
Italian, Mediterranean
Gorgonzola pear tart,