Summer Orzo Salad with Italian Vinaigrette (Easy & Fresh Recipe)

Summer Orzo Salad with Italian Vinaigrette (Easy & Fresh Recipe)This post may contain affiliate links, that help support this blog. If you make a purchase through these links, I may earn a commission—at no cost to you. For more information read my disclosure policy.

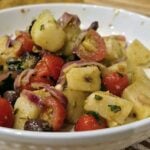
This is one of those “clean out the fridge but make it Italian” kind of meals. I love how the orzo soaks up the vinaigrette while still staying light, and the mix of crunchy cucumber, sweet tomatoes, and peppers keeps every bite interesting.

The mozzarella makes it feel a little more filling without weighing it down, and honestly, it’s one of those salads that tastes even better after it sits for a bit in the fridge.

Perfect for meal prep, BBQs, or just those nights when it’s too hot to cook anything complicated.


Things to know about Summer Orzo Salad with Italian Vinaigrette recipe

This orzo salad is one of those recipes that gets better as it sits. The pasta soaks up the Italian vinaigrette, so the flavor deepens after a little time in the fridge. If you’re making it ahead, I like to reserve a small splash of dressing to toss in right before serving to freshen it up.

You can also easily switch things up here—add grilled chicken, salami, chickpeas, or whatever vegetables you need to use up. It’s very flexible and forgiving.


Storage

Store leftovers in an airtight container in the refrigerator for up to 3–4 days.
If the salad feels a little dry after chilling, just drizzle in a bit of olive oil or extra vinaigrette and toss before serving.

I don’t recommend freezing this one—the texture of the vegetables and mozzarella won’t hold up well.


Serving Tips

Serve it cold or slightly chilled. It’s perfect for BBQs, picnics, meal prep lunches, or as a fresh side dish next to grilled chicken or fish.


If you loved this summer orzo salad, you’ll also love a few of my other fresh Italian-inspired favorites:

👉 Try my Italian Potato Salad (No Mayo) for another light and flavorful side dish
👉 Or my Zucchini Pasta with Tomatoes for an easy weeknight dinner
👉 And if you’re building a summer menu, don’t miss my 15 Light & Fresh Italian Summer Recipes roundup

For more recipes like this, make sure to check out the full blog and save this one for your next cookout—it’s a repeat all summer long.


Summer Orzo Salad with Italian Vinaigrette (Easy & Fresh Recipe)

This summer orzo salad is loaded with fresh cucumber, tomatoes, peppers, red onion, and mozzarella, all tossed in a simple Italian vinaigrette. Perfect for BBQs, meal prep, or a light summer lunch.

  • 2 cups dried orzo
  • 1 cup cucumbers cut into small dice
  • 1 cup cherry tomatoes cut into small dice
  • 1 cup green bell peppers cut into small dice
  • 1 cup red bell peppers cut into small dice
  • 1 cup mozzarella pearls (or cubed fresh mozzarella)
  • 1/2 cup red onion cut into small dice
  • salt and pepper to taste

Italian Vinaigrette

  • 1 cup extra virgin olive oil
  • 1/3 cup red wine vinegar
  • 1 Tbsp. dried oregano
  • 2 tsp. minced garlic
  • 2 tsp Dijon mustard
  • salt and pepper to taste
  1. Cook the orzo according to package directions until al dente. Drain and let cool

  2. While the orzo cools, prep all the vegetables.

  3. In a small bowl or jar, whisk together all vinaigrette ingredients until well combined.

  4. In a large bowl, combine the cooled orzo, cucumber, tomatoes, bell pepper, red onion, and mozzarella.

  5. Pour the vinaigrette over everything and toss until fully coated.

  6. Taste and adjust seasoning if needed. Chill for 15–30 minutes before serving if you want the flavors to really come together.

Side Dish
Italian
easy summer orzo salad with Italian dressing


Classic Italian Bruschetta Recipe (Easy Tomato Basil Bruschetta)

Classic Italian Bruschetta Recipe (Easy Tomato Basil Bruschetta)

This post may contain affiliate links, that help support this blog. If you make a purchase through these links, I may earn a commission—at no cost to you. For more information read my disclosure policy.

At the restaurant on Tuesday, we served a bruschette trio with five different toppings, and this classic tomato basil version was the clear favorite at the table. It’s one of those recipes that always disappears first—simple, fresh, and full of flavor from just a handful of quality ingredients.

In Italy, bruschetta is all about celebrating what’s in season. When tomatoes are at their peak, there’s nothing better than pairing them with fresh basil, garlic, good olive oil, and toasted rustic bread. It’s rustic, uncomplicated, and proof that the best recipes often come from the simplest ingredients.

This classic Italian bruschetta is perfect as an appetizer, snack, or part of a summer spread when you want something easy but impressive.

Things to know about this Classic Italian Bruschetta Recipe (Easy Tomato Basil Bruschetta)

Tips for the Best Bruschetta

Use Ripe Tomatoes

Fresh, ripe tomatoes are the most important part of this recipe. Roma tomatoes work well because they are flavorful and less watery.

Don’t Skip the Garlic Rub

Rubbing garlic directly onto warm toast gives authentic bruschetta flavor.

Serve Immediately

Bruschetta is best served fresh so the bread stays crisp.

Drain Excess Liquid

If your tomatoes release too much juice, spoon off a little before topping the bread to prevent sogginess.

Variations

While this version stays true to the classic Italian preparation, there are plenty of delicious ways to change it up.

  • Add ricotta for a creamy variation
  • Top with fresh mozzarella
  • Drizzle with balsamic glaze
  • Add chopped olives
  • Use grilled sourdough bread

What to Serve with Bruschetta

Bruschetta pairs perfectly with:

  • Italian pasta salad
  • Grilled chicken
  • Antipasto platters
  • Sicilian potato salad
  • Roasted vegetable dishes

It also makes a beautiful addition to summer gatherings and holiday appetizers.

Final Thoughts

Classic bruschetta proves that the simplest recipes are often the most memorable. With fresh tomatoes, good olive oil, basil, and crisp toasted bread, this traditional Italian appetizer is easy to make and full of fresh flavor.

Whether you’re serving it at a summer dinner party or enjoying it as a light snack, bruschetta is one of those timeless Italian recipes that never goes out of style.

If you’re building a full Italian-style spread, this classic bruschetta pairs beautifully with some of my other simple, fresh recipes.

Try serving it alongside my Italian Pasta Salad or this comforting Sicilian Potato Salad for a complete appetizer table.

For more easy Italian-inspired ideas, browse all my  my Summer Recipes Collection for more fresh, seasonal dishes.


Classic Italian Bruschetta Recipe (Easy Tomato Basil Bruschetta)

Fresh tomatoes, basil, garlic, and toasted bread come together in this classic Italian bruschetta recipe. An easy summer appetizer ready in minutes.

  • 4 medium Roma tomatoes diced
  • 1 clove garlic minced
  • 1/3 cup basil torn
  • 1/2 cup extra virgin olive oil
  • salt and pepper to taste

For the Bread

  • 1 baguette or rustic Italian bread, sliced
  • olive oil for brushing
  • 1 garlic clove, peeled and halved
  1. Prepare the Tomato Mixture

    Add the diced tomatoes, minced garlic, basil, olive oil, salt, and black pepper to a bowl.

    Gently stir everything together and let the mixture sit for about 10–15 minutes. This allows the tomatoes to release some of their juices and helps the flavors come together.

  2. Toast the Bread

    Brush both sides of the bread slices lightly with olive oil.

    Place them on a baking sheet and toast in a 400°F oven for about 5–7 minutes, or until golden and crisp. You can also grill the bread for extra flavor.

  3. Rub the Bread with Garlic

    While the bread is still warm, rub the cut side of the garlic clove over each slice.

    This simple step gives bruschetta its classic flavor without overpowering the tomatoes.

  4. Assemble the Bruschetta

    Spoon the tomato mixture over the toasted bread just before serving.

    Finish with an extra drizzle of olive oil and a sprinkle of flaky sea salt if desired.

    Serve immediately.

Appetizer
Italian
classic bruschetta recipe, Italian, tomato bruschetta


Easy Sicilian Potato Salad (No Mayo )

Sicilian Potato Salad ( no mayo)

This post may contain affiliate links, that help support this blog. If you make a purchase through these links, I may earn a commission—at no cost to you. For more information read my disclosure policy.

Although I come from Tuscany, Sicilian potato salad was something I grew up eating at so many family gatherings and summer meals. Italian cooking has a beautiful way of traveling from one region to another, and dishes like this become part of family traditions no matter where you’re from. This Sicilian potato salad is simple, rustic, and full of Mediterranean flavor — tender potatoes tossed with olive oil, capers, red onion, and fresh herbs instead of heavy mayonnaise. It’s the kind of dish that always appeared on warm-weather tables alongside grilled meats, seafood, and plenty of crusty bread.

Unlike the creamy American versions, Sicilian potato salad is bright, rustic, and made for warm weather tables. Tender potatoes are tossed with olive oil, red onion, fresh herbs, capers, and a splash of vinegar for a salad that tastes even better after it sits awhile. It’s the kind of dish you’d find at a summer gathering in Southern Italy — simple ingredients, bold flavor, and no mayonnaise in sight.

This Sicilian potato salad is perfect alongside grilled meats, seafood, or tucked into an antipasto spread. The combination of briny capers, fresh parsley, and oregano gives it that unmistakable Mediterranean flavor while the potatoes soak up every bit of the dressing.

.


Things to know about this Easy Sicilian Potato Salad (No Mayo) recipe

Tips for the Best Potato Salad

  • Use waxy potatoes like Yukon Golds for the best texture
  • Dress the potatoes while warm for maximum flavor
  • Let the salad rest before serving
  • Use good-quality olive oil — it makes a big difference
  • Add olives or anchovies for an even more Sicilian touch

Serving Suggestions

This salad pairs beautifully with grilled chicken, seafood, sausages, or roasted vegetables. It also makes a wonderful addition to an Italian-style picnic table with crusty bread and marinated vegetables.

Frequently Asked Questions

Can I make Sicilian potato salad ahead of time?

Yes. In fact, it tastes even better after a few hours in the refrigerator.

Does Sicilian potato salad contain mayonnaise?

Traditionally, no. Sicilian potato salad is olive oil-based with vinegar or lemon juice.

What potatoes work best?

Yukon Gold or red potatoes hold their shape well and have a creamy texture.

Final Thoughts

Sicilian potato salad is proof that the simplest ingredients often make the most memorable dishes. Fresh herbs, olive oil, tangy vinegar, and perfectly cooked potatoes come together in a salad that feels both comforting and refreshing — exactly the kind of food meant to be shared around a summer table.


If you try this Easy Sicilian Potato Salad (No Mayo), let me know how it turns out in the comments! I love seeing your versions.

For more simple Italian sides, check out my
👉 Roasted Potatoes
👉 Italian cold Pasta Salad

And if you’re building a full meal, this pairs perfectly with my
👉 Italian  Lemon Chicken

Full recipe is on the blog — don’t forget to save it for summer!


Easy Sicilian Potato Salad (No Mayo)

Easy Sicilian Potato Salad (No Mayo) is a light, authentic Italian side dish made with tender potatoes, olive oil, capers, and fresh herbs. Simple, flavorful, and perfect for summer gatherings, this traditional Mediterranean recipe is a fresh twist on classic potato salad.

  • 2 lbs. Yukon Gold potatoes, cut into chunks
  • 1 cup thinly sliced red onions
  • 1/2 cup capers
  • 1 cup cherry tomatoes cut in half
  • 1 cup pitted kalamata olives (whole or sliced your preference)
  • 1/3 cup chopped Italian parsley
  • 1/3 cup torn fresh basil
  • 1 Tbsp oregano fresh or dried
  • 1 cup extra virgin olive oil
  • 1/3 cup red wine vinegar
  • salt and pepper to taste
  1. Place the potatoes in a large pot and cover with cold salted water. Bring to a boil and cook until fork tender, about 12–15 minutes. Drain well.

  2. While the potatoes cook, make the dressing directly in a large serving bowl. Add the olive oil, red wine vinegar, salt, black pepper, basil, capers, sliced red onion, parsley, and oregano. Stir everything together.

  3. Add the warm potatoes to the bowl and gently toss until fully coated in the dressing.

  4. Let the salad sit for at least 20 minutes before serving so the potatoes absorb all the flavors.

Side Dish
Italian
no mayo potato salad,, pasta, Italian, Salad, Sicilian potato salad, sidedish


Light & Fresh Italian Recipes for Summer

Light & Fresh Italian Recipes for SummerThis post may contain affiliate links, that help support this blog. If you make a purchase through these links, I may earn a commission—at no cost to you. For more information read my disclosure policy.

When the weather warms up, the way I cook shifts right along with it. I’m not looking for anything heavy or overcomplicated—I want food that feels fresh, simple, and full of flavor without spending all day in the kitchen.

That’s what Italian cooking does best this time of year. A few good ingredients—olive oil, garlic, lemon, fresh herbs—come together to make something that feels complete without doing too much.

These are the light Italian recipes for warm weather that I come back to again and again.


Orzo with Summer vegetables

Some meals just feel easy—especially when they come together in one pan. This one-pan orzo with summer vegetables is one of those simple, feel-good recipes that checks all the boxes: quick to make, minimal cleanup, and full of fresh summer flavor.GO TO RECIPE

Shrimp Spaghetti with Tomato Basil Sauce

This Shrimp Spaghetti with Tomato Basil Sauce is a simple, fresh pasta dish made with sautéed shrimp, juicy summer tomatoes, garlic, and plenty of fragrant basil. The sauce is created right in the pan by combining the tomato juices with starchy pasta water and a generous handful of grated parmesan, giving you a light  flavorful coating that clings to the pasta.GO TO RECIPE

Authentic Pasta al Limone (Italian Lemon Pasta)

Authentic Pasta al Limone made the Italian way—no cream, just lemon, butter, cheese, and pasta water for a silky, bright, and easy lemon pasta recipe.

GO TO RECIPE

Authentic Pasta Portofino

Inspired by the coastal village of Portofino, this dish brings together the bold freshness of basil, the sweetness of ripe tomatoes, and the richness of good olive oil. It’s often described as a cross between a tomato sauce and Pesto alla Genovese—but simpler, looser, and meant to taste like summer.

No cream. No mozzarella. Just real ingredients, handled the right way.

GO TO RECIPE

Tubettini Pasta Salad (Italian pasta fredda)

This authentic Italian tubettini pasta salad is loaded with fresh mozzarella, tomatoes, and savory Italian meats, all tossed in a simple olive oil dressing. The perfect light and flavorful summer pasta fredda for gatherings, picnics, or easy weeknight meals.

GO TO RECIPE

Authentic Italian Stuffed Tomatoes with Rice and Potatoes (Roman Recipe)

Authentic Italian stuffed tomatoes filled with rice, garlic, and basil, roasted with potatoes until tender and flavorful—just like in Rome.

GO TO RECIPE

Best Cod Francese Recipe – in 30 Minutes

A lightly battered, pan-fried cod fillet in an elegant lemon, butter and  white wine sauce. It’s similar to chicken piccata—but without the capers and with a velvety, lemon-butter sauce. Ready in less than 30 minutes.GO TO RECIPE

Air fryer salmon Skewer Italian Spiedini

This air fryer salmon skewer Italian spiedini recipe uses simple ingredients you probably already have at home. Salmon is so versatile, it can be cooked in so many different ways. No air fryer? No problem, these salmon spiedini can be baked , grilled or pan-fried. And the best part is they can be on your table in minutes.GO TO RECIPE

Lemon Cod Piccata (Light Italian Seafood Dinner)

Light and flavorful Cod Lemon Piccata made with pan-seared cod, lemon, butter, capers, and white wine. A quick Italian seafood dinner ready in 30 minutes.GO TO RECIPE

Easy chicken piccata

This Easy Chicken Piccata Recipe is so easy and quick, its prefect for family weeknight meals, but fancy enough for weekend dinner with friends.

Melt in your mouth chicken breast in a light creamy, lemony sauce made this recipe a restaurant favorite, I simplified the recipe for the home cook, no worries none of the flavor is lostGO TO RECIPE

Caprese stuffed chicken breast

this caprese stuffed chicken breast with asparagus is a must-try. Juicy chicken breast are packed with the classic flavors of caprese- fresh mozzarella, ripe tomatoes and fragrant basil – along with tender asparagus for a wholesome . satisfying dish that’s easy to make and delicious.GO TO RECIPE

Italian roasted lemon chicken and potato

This Italian roasted lemon chicken dinner is incredibly easy to make because it requires minimal prep, simple ingredients and a hands – free cooking method. The seasoning is as straightforward as mixing olive oil. lemon juice. garlic and herbs, then rubbing it into the  chicken.  There’s no complicated  marinating or advanced techniques- just a few minutes of prep and the oven does the rest.GO TO RECIPE

Air fryer Chicken spiedini

Air fryer parmesan chicken spiedini are Italy’s version of skewers or kabobs. In this spiedini recipe boneless, skinless chicken thighs are marinated in a blend of Italian spices, cooked in the air fryer, and basted with a delicious garlic, parmesan butter sauce.GO TO RECIPE

Easy Italian Vinaigrette Recipe (Better Than Store-Bought)

Homemade Italian vinaigrette made with simple pantry ingredients. Fresh, budget-friendly, and better than store-bought—ready in minutes.


GO TO RECIPE

Watermelon Cucumber Feta Salad

 
When the weather warms up and watermelon starts showing up in every market bin, I can’t help but crave this bright and refreshing salad. This Watermelon  Cucumber, feta  salad with  and Lemon-Honey Dressing is one of my go-to dishes during the warmer months. It’s light, vibrant, and incredibly refreshing—with just the right balance of sweet, salty, and tangy.

GO TO RECIPE

If you’re looking for easy summer meals that don’t feel heavy, this is a great place to start. Mix a light pasta with a fresh salad or something grilled, and you have a complete meal without overthinking it.

You can find all the full recipes linked above, along with more Italian-inspired dishes on the blog to keep your summer cooking simple and full of flavor.


Tubettini Pasta Salad (Italian pasta fredda)

Tubettini Pasta Salad (Italian pasta fredda)

This post may contain affiliate links, that help support this blog. If you make a purchase through these links, I may earn a commission—at no cost to you. For more information read my disclosure policy.

This is the kind of pasta salad I always come back to once the weather warms up—simple, fresh, and made with whatever I have in the fridge. I like using tubettini because it catches all the little bits of salumi, cheese, and dressing in every bite, and it reminds me of the easy summer meals we’d throw together without overthinking it. It’s the kind of dish that gets better as it sits, perfect for making ahead and putting out for a relaxed lunch or casual get-together.


Things to know about this Tubettini Pasta Salad (Italian pasta fredda)

  • The meats are cut small, about the size of the pasta—nothing chunky
  • It’s olive oil based, never creamy
  • It should feel balanced, not heavy or overloaded
  • Served at room temp or slightly chilled, not ice cold
  • This is the kind of dish you’d see packed for a beach day or put out for a casual summer lunch. It’s flexible—everyone kind of makes their own version based on what they have.

Optional Add-Ins 

  • Cubed provolone for a sharper bite
  • Marinated artichokes
  • Roasted red peppers
  • A handful of arugula right before serving

Storage

Store any leftovers in an airtight container in the refrigerator for up to 3 days. Before serving, let it sit at room temperature for about 15–20 minutes and give it a quick toss with a drizzle of olive oil to refresh the flavors, as the pasta will absorb some of the dressing.

If you love simple, authentic Italian summer recipes like this, you’ll want to try a few more of my favorites. Check out my Italian lemon  pasta al limone,  or classic Italian pasta Portofino on the blog for more fresh, seasonal inspiration. And if you make this Tubettini Pasta Salad (Italian pasta fredda) please leave me a comment I love hearing from you . It’s my favorite part!!!!

Tubettini Pasta Salad (Italian Pasta Fredda)

This authentic Italian tubettini pasta salad is loaded with fresh mozzarella, tomatoes, and savory Italian meats, all tossed in a simple olive oil dressing. The perfect light and flavorful summer pasta fredda for gatherings, picnics, or easy weeknight meals.

  • 12 oz, Tubettini (You can use any small shaped pasta)
  • 1 cup cherry tomatoes (cut in half)
  • 1 cup fresh mozzarella ( cubed or pearls)
  • 1 cup each mixed Italian meats, diced: (salami mortadella prosciutto )
  • 1/2 cup pitted kalamata olives
  • 1/2 cup chopped red onion
  • 1/2 cup torn fresh basil leaves

EASY Italian vinaigrette

  • 1 cup extra virgin olive oil
  • 1/3 cup red wine vinegar
  • 1 Tsp lemon juice
  • 1 clove minced garlic
  • 1 Tbsp. dried oregano
  • 1 Tbsp. dried basil
  • 1 tsp. Dijon mustard
  • 1 Tsp. honey
  • salt and pepper to taste
  1. Cook the tubettini in salted water until al dente.

  2. Drain and spread it out so it cools completely.

  3. In a large bowl, combine tomatoes, mozzarella, meats, olives, and onion.

  4. Add the cooled pasta.

  5. Toss with the Italian vinaigrette

  6. Fold in basil at the end.

  7. Let it sit about 30 minutes before serving.

Instructions for the Vinaigrette

  1. Add all of the ingredients to a glass jar with a lid shake variously until dressing is emulsified

Main Course, Salad, Side Dish
Italian
pasta, Italian, Salad


Authentic Italian Stuffed Tomatoes with Rice and Potatoes (Roman Recipe)

Authentic Italian Stuffed Tomatoes with Rice and Potatoes (Roman Recipe)

This post may contain affiliate links, that help support this blog. If you make a purchase through these links, I may earn a commission—at no cost to you. For more information read my disclosure policy.

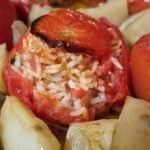
This dish goes back to Roman home cooking, where simplicity wasn’t a trend—it was survival and tradition. Pomodori Ripieni di Riso (stuffed tomatoes with rice) became especially popular in and around Rome and Lazio as a way to stretch seasonal summer produce into a full, satisfying meal.

Farmers and home cooks would hollow out ripe tomatoes at peak season, using every bit of the fruit—juice, pulp, and all—to season uncooked rice. As it baked slowly in the oven, the rice absorbed the tomato’s natural sweetness while olive oil, garlic, and basil built layers of flavor. Nothing was wasted, and nothing was complicated.

The addition of potatoes baked underneath is a classic Roman touch. They act almost like a built-in side dish, soaking up the tomato juices as everything roasts together into one unified pan.

What you get is a dish that feels humble but deeply intentional—rooted in old-world Italian cooking where seasonal ingredients and patience did all the work.


Things to know about this Authentic Italian Stuffed Tomatoes with Rice and Potatoes (Roman Recipe)

What to Look For

  • Rice fully cooked and fluffy inside
  • Tomatoes slightly wrinkled and jammy
  • Potatoes deeply golden and infused with tomato juices
  • How to Serve 

  • Best at room temperature (this is very Italian)
  • Drizzle with a little fresh olive oil before serving
  • Spoon those potatoes right alongside—don’t leave them behind
  • Pro Tips

  • Don’t skip the resting time for the rice
  • Use ripe but sturdy tomatoes so they hold their shape
  • If the pan looks dry halfway through, add a splash of water or more olive oil
  • Let them sit 10–15 minutes before serving so everything settles
  • Storage

  • Fridge: up to 3 days

  • Reheat gently or enjoy cold/room temp

  • Flavor actually gets better the next day

  • If you loved these authentic Roman stuffed tomatoes, you’ll want to explore more simple Italian dishes that let seasonal ingredients shine.
  • If you make this recipe, leave a comment and let me know how it turned out—or tag me so I can see your version straight from the oven 🍅


Authentic Italian Stuffed Tomatoes with Rice and Potatoes (Roman Recipe)

Authentic Italian stuffed tomatoes filled with rice, garlic, and basil, roasted with potatoes until tender and flavorful—just like in Rome.

  • 6 medium tomatoes (firm)
  • 1 cup uncooked short grain rice (Arborio )
  • 2 cloves garlic (minced)
  • 1/3 cup basil (torn)
  • 3 Tbsp olive oil
  • 2-3 medium potatoes (cut into medium dice)
  • salt and pepper to taste
  1. Prep the Tomatoes

    Cut the tops off and set aside. Scoop out the pulp and juices into a bowl.Salt the inside of each tomato and place them upside down for about 20 minutes to drain.

  2. Make the Rice Filling

    Crush or blend the tomato pulp until slightly smooth. Add:

    Mix and let it sit for at least 15 minutes.👉 This step is key—the rice absorbs all that tomato flavor before baking

  3. Prep the Potatoes

    Slice the potatoes thin or into medium dice Toss with:

    Spread them in the bottom of your baking dish.

  4. Stuff & Assemble

    Fill the tomatoes with the rice mixture (don’t pack tightly).Place them directly on top of the potatoes .Add the tomato tops back on and drizzle everything with a little more olive oil.

  5. Roast

    Bake at 375°F (190°C) for 50–60 minutes, until:

    the rice is tender the tomatoes are soft and slightly caramelizedthe potatoes are golden and crispy on the edges

Main Course
Italian
authentic Italian stuffed tomatoes with rice and potatoes”


Italian Spring Stew with Artichokes, Fava Beans & Peas (Vignarola Recipe)

Italian Spring Stew with Artichokes, Fava Beans & Peas (Vignarola Recipe)

This post may contain affiliate links, that help support this blog. If you make a purchase through these links, I may earn a commission—at no cost to you. For more information read my disclosure policy.

If you’ve ever wondered what to do with fresh fava beans, this Italian spring stew is the answer.

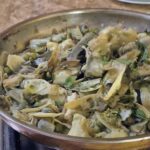
This dish, known as vignarola, comes from Rome and celebrates everything we love about spring cooking—simple ingredients, minimal fuss, and incredible flavor. Artichokes, sweet peas, and tender fava beans are gently simmered together until soft and silky, creating a light, brothy stew that feels both rustic and refined.

This vegetarian version keeps it fresh and vibrant while still full of classic Roman flavor.


Things to know about Italian Spring Stew with Artichokes, Fava Beans & Peas (Vignarola Recipe)

  • Fully vegetarian and naturally light.
  • Should be slightly brothy, not thick.
  • Fresh fava beans taste best, but frozen works in a pinch.
  • Artichokes take the longest—cook them first.
  • Variations

    Pasta Version
    Toss the finished vignarola with short pasta and a splash of pasta water for a simple spring pasta.

    Creamy Style
    Blend a small portion of the vegetables and stir back in for a silkier texture.

    No Fava Beans?
    Substitute with edamame or extra peas.

What to Serve with Vignarola

  • Grilled or roasted vegetables
  • Crusty bread for soaking up the broth
  • Or enjoy it as a light main dish on its own
  • Storage

    • Store in an airtight container in the fridge for up to 3 days.
    • Reheat gently on the stovetop with a splash of broth or water.
    • Freezing: This stew freezes well for up to 2 months. Thaw in the fridge overnight and reheat gently on the stove.

      If you love simple, seasonal Italian cooking, this spring stew is one to keep on repeat. Save it for later, and don’t forget to try it as a pasta—it’s a game changer.

      For more classic Italian recipes, check out:

Italian Spring Stew with Artichokes, Fava Beans & Peas (Vignarola Recipe)

A classic Italian spring stew made with artichokes, fava beans, and peas. This traditional Roman vignarola recipe is fresh, simple, and full of seasonal flavor.

  • 3 Tbsp. olive oil
  • 1 cup chopped onion (you can use Spring onions)
  • 2 Tbsp. minced garlic
  • 3 artichokes (cleaned & sliced)
  • 1 cup fava beans (peeled)
  • 1 cup peas (shelled)
  • 3 cups romaine lettuce (chopped)
  • 1 cup white wine
  • 1/2-1 cup vegetable stock
  • salt and pepper to taste
  1. Build the base Heat olive oil in a large pan. Add onions and garlic. Cook until soft and fragrant.

  2. Cook the artichokes Add sliced artichokes first and cook for 5–7 minutes until they begin to soften.

  3. Deglaze Pour in white wine (if using) and let it reduce slightly.

  4. Add the vegetables Stir in fava beans, peas, and chopped romaine.

  5. Simmer Add vegetable broth, cover, and cook on low for 15–20 minutes until everything is tender and silky.

  6. Finish Season with salt and pepper. Stir in fresh mint or parsley right before serving.

Cleaning Artichokes: Fresh artichokes are beautiful but a little tricky to prep. Start by trimming the tough outer leaves and cutting off the sharp tips. Remove the stem and peel away any fibrous layers until you reach the tender heart. Slice and cook immediately to prevent browning, or toss with a little lemon juice. If you’d rather skip the prep, many grocery stores now sell pre-cleaned, trimmed artichoke hearts—perfect for a quick, no-fuss vignarola.

Side Dish
Italian
Vignarola, Italian, stew, artichokes, fava , beans


Italian-Style Vegetable Scarpaccia Roll

Italian style vegetable scarpaccia roll

This post may contain affiliate links, that help support this blog. If you make a purchase through these links, I may earn a commission—at no cost to you. For more information read my disclosure policy.

There’s something about taking a traditional recipe and giving it your own twist that just feels right. This vegetable scarpaccia roll is exactly that—a rustic Italian-inspired bake that turns into something unexpectedly beautiful once it’s rolled, sliced, and served.

If you’ve ever had scarpaccia, you know it’s typically flat, crispy on the edges, and loaded with vegetables. But this version? We’re taking it a step further.

I bake it first until it’s set and lightly golden, then layer it with Italian ham and provolone, pop it back in the oven just until everything melts together, and roll it up while it’s still warm. Once it rests, it slices into the most perfect savory spirals.

It’s simple, comforting, and feels like something you’d find tucked into a small bakery case in Italy.


Things to know about this Italian-Style Vegetable Scarpaccia Roll

  • You can swap the vegetables depending on the season
  • Add herbs like basil or thyme for extra flavor
  • Make it vegetarian by skipping the ham or using grilled eggplant instead
  • It rolls best while warm—but slices best once slightly cooled
  • Serving Suggestions

    Slice the roll into 1-inch spirals and serve warm or at room temperature. It’s perfect as part of an antipasto spread with olives, roasted peppers, and a simple salad.

    This also works beautifully for:

    • Brunch boards
    • Light lunches with a side salad
    • Holiday appetizers (especially around Easter)

    If you love recipes like this, pair it with your Italian ricotta pie for a sweet finish or your asparagus frittata for a full Italian-style spread.

  • Storage

    • Refrigerator: Store leftovers in an airtight container for up to 3–4 days.
    • Reheating: Warm slices in the oven at 350°F for about 10 minutes, or enjoy at room temp.
    • Freezing: You can freeze it, but for best texture, freeze before slicing. Wrap tightly and freeze for up to 1 month. Thaw overnight in the fridge and reheat in the oven.

    More seasonal recipes to try

    These help turn this into a full menu your readers can come back to again and again 🤍

Italian-Style Vegetable Scarpaccia Roll

A rustic Italian-inspired vegetable scarpaccia roll layered with savory ham and melted provolone, baked to perfection and rolled into beautiful, sliceable spirals—easy, comforting, and perfect for entertaining.

  • 2 cups grated zucchini
  • 1 cup grated carrots
  • 1/2 cup grated onion
  • 1 – 11/2 cups water + water extract from the vegetables (Add the water extracted from the vegetables )
  • 2 tsp. salt (to help extract the liquid from the vegetables)
  • 4 – 6 slices Italian ham or prosciutto
  • 4-6 slices provolone cheese
  1. Prep the vegetables Grate the zucchini, onions, and carrots. Place them in a bowl, sprinkle with salt, and weigh them down (a plate with something heavy on top works well). Let sit for about 1 hour to draw out the liquid.

  2. Don’t waste the liquid After an hour, squeeze out the vegetables—but save that liquid. This is where all the flavor is. You’ll use it as part (or all) of the water for your batter.

  3. Make the batter In a bowl, combine the drained vegetables with flour, olive oil, pepper, and the reserved vegetable liquid (adding extra water only if needed) until you get a thin, pourable batter.

  4. First bake Pour onto a parchment-lined baking sheet, spread thin, and bake at 400°F until set and lightly golden, about 20–25 minutes.

  5. Add the filling Layer with Italian ham and provolone.

  6. Second bake Return to the oven just until the cheese melts, about 5–8 minutes.

  7. Roll and rest Roll it up while warm in a clean kitchen towel like a jelly roll, then let it rest 1 hour before slicing.

Appetizer
Italian
zucchini, vegetable, rolls, scarpaccia


Italian Kale and Potatoes

Italian Kale and PotatoesThis post may contain affiliate links, that help support this blog. If you make a purchase through these links, I may earn a commission—at no cost to you. For more information read my disclosure policy.

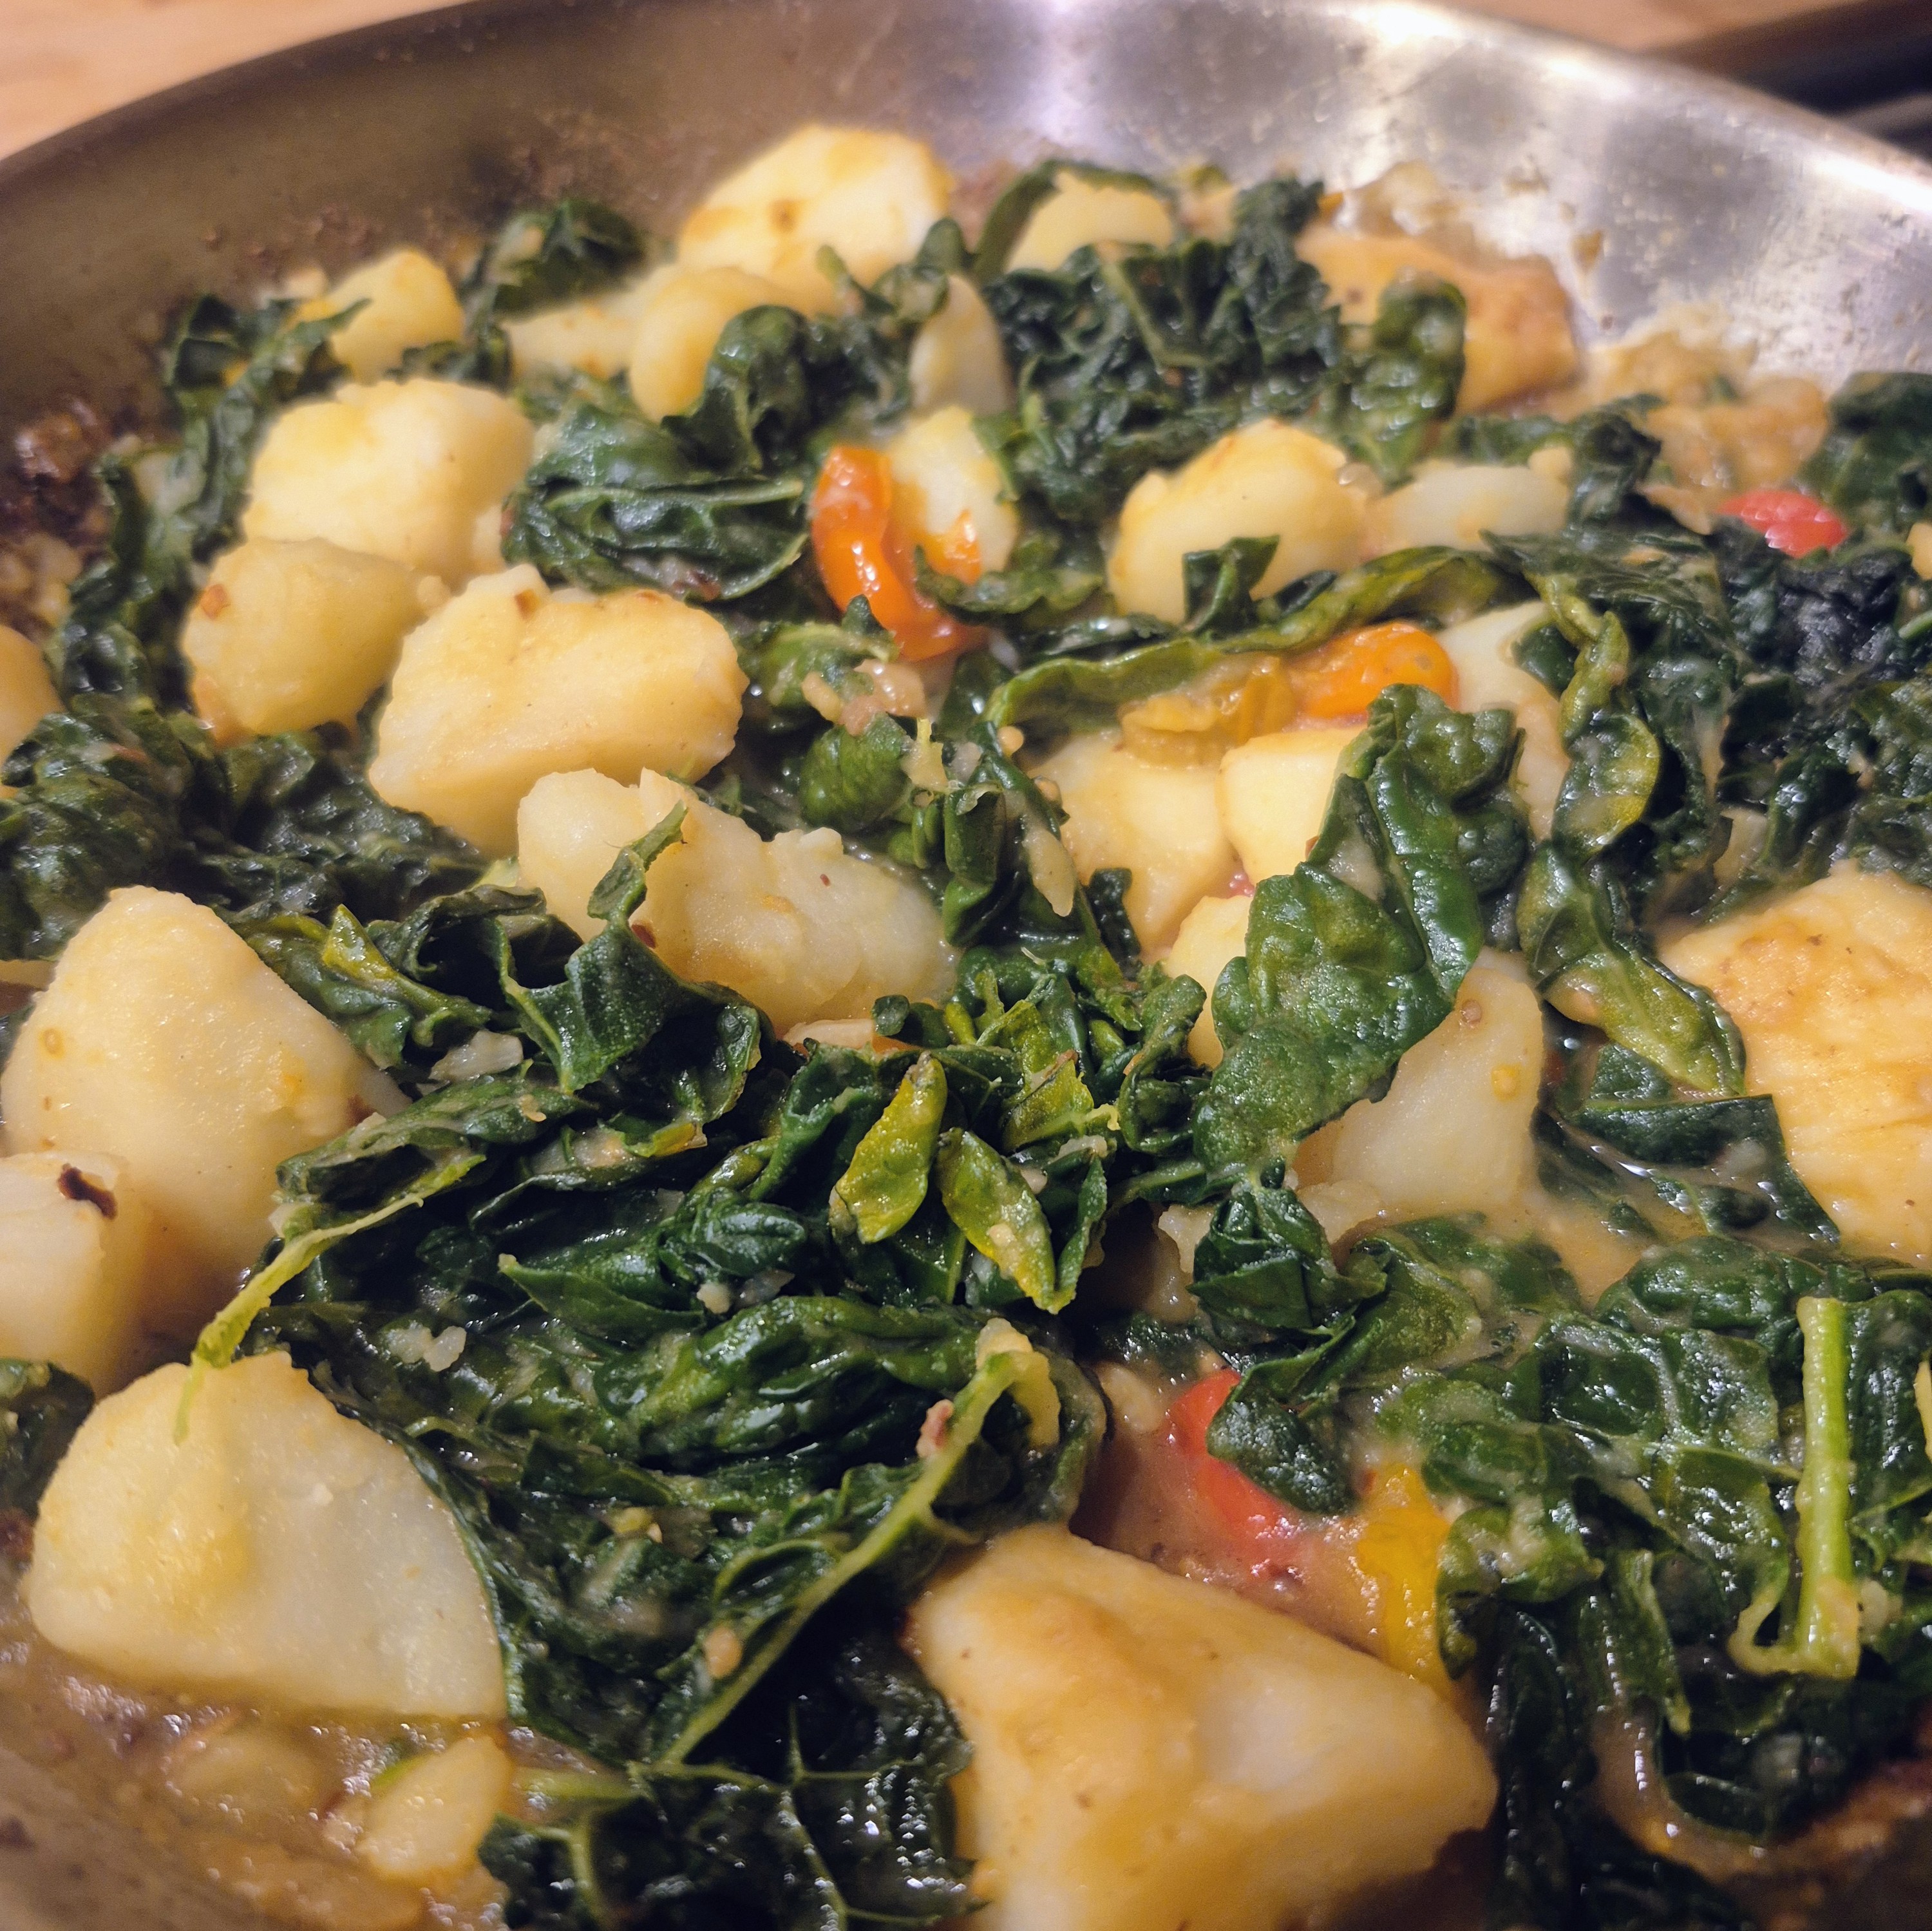
Tuscan Kale and Potatoes is one of those dishes that reminds us how beautiful simple food can be. In Tuscany, cooking has always been about making the most of what’s growing in the garden and what’s in the pantry. Hearty greens like Tuscan kale — often called lacinato or dinosaur kale — have been a staple in the region for centuries, especially in rustic, peasant-style cooking known as cucina povera.

Potatoes, introduced to Italy in the 16th century, eventually became a beloved part of country cooking because they were filling, affordable, and easy to grow. Pair them with sturdy kale, good olive oil, and garlic, and you have the foundation of countless traditional Tuscan dishes — simple, nourishing, and deeply satisfying.

This version adds blistered cherry tomatoes for a little sweetness and brightness, but the heart of the dish stays true to its roots: humble ingredients treated with care. It’s the kind of food that feels like it belongs on a farmhouse table, served family-style with warm bread and good conversation.


Things to know about this Italian kale and potatoes

  • Don’t skip parboiling — it ensures the potatoes are creamy inside and golden when sautéed.

  • Tuscan kale (also called lacinato or dinosaur kale) holds its texture beautifully in this dish.

  • Want to make it heartier? Add white beans or top with a fried egg.

  • This dish reheats beautifully the next day.


Serving Ideas

This pairs beautifully with:

  • Grilled chicken

  • Italian sausage

  • Pan-seared fish

  • Or simply warm crusty bread and good olive oil

It’s also delicious served at room temperature, making it perfect for gatherings.


Storage

Store leftovers in an airtight container in the refrigerator for up to 3 days. Reheat gently in a skillet with a drizzle of olive oil.


Final Thoughts

This is the kind of rustic Italian cooking that proves you don’t need complicated ingredients to create something deeply satisfying. Just good olive oil, fresh vegetables, and a little care.

If you make this Tuscan Kale and Potatoes, let me know in the comments — and don’t forget to share it with someone who loves simple Italian cooking 🤍

Bring Rustic Italian Cooking Home

If you loved this Tuscan Kale and Potatoes, you’re going to enjoy some of my other simple, rustic Italian dishes that celebrate humble ingredients and big flavor.

For another cozy vegetable-forward dish, try my Italian Spaghetti Frittata — it’s a beautiful way to transform simple ingredients into something special.

If you’re looking to make this a complete meal, serve it alongside my Italian Meatloaf with Potatoes for a hearty Sunday-style dinner.

Or keep things classic with my cod Francese

And if you love traditional pasta shapes, don’t miss my Southern Italian Cavatelli — perfect for pairing with greens and olive oil-based sauces.

Simple ingredients. Timeless recipes. Real Italian flavor.

If you make this dish, leave a comment below and let me know how you served it — I love seeing how these recipes come to life in your kitchen 🤍


Italian Kale and Potatoes

Golden potatoes, tender Tuscan kale, and juicy blistered cherry tomatoes tossed with garlic and a little heat . Simple ingredients, big Italian flavor.

  • 1 1/2 lbs. potatoes (cubed)
  • 1 large bunch Tuscan kale
  • 3 Tbsp extra virgin olive oil
  • 1 cup cherry tomatoes
  • 1 Tbsp. garlic (minced)
  • 1 tsp. red pepper flakes
  • 1 cup white wine
  • salt and pepper to taste
  1. Parboil the Potatoes

    Bring a large pot of salted water to a boil. Add the cubed potatoes and cook for about 8–10 minutes, just until fork-tender but not falling apart. Add the kale and cook 5 minutes longer Drain and set aside.

  2. Blister the Tomatoes

    In a large skillet over medium heat, add 1 tablespoon olive oil. Add the cherry tomatoes and cook undisturbed for 3–4 minutes until they begin to blister and burst.

  3. Sauté the Garlic and Kale

    In the same skillet, add the remaining olive oil. Add the sliced garlic and red pepper flakes, cooking for about 30 seconds until fragrant.

    Add the chopped Tuscan kale and a pinch of salt. Sauté for 4–5 minutes until wilted and tender. deglaze the pan with the white wine

  4. Bring It Together

    Add the drained potatoes back to the skillet. Gently toss everything together and cook for another 3–5 minutes to allow the flavors to meld.

    Fold in the blistered cherry tomatoes. Season with salt and black pepper to taste.

    Finish with freshly grated Pecorino Romano if desired.

Main Course
Italian
Italian, Tuscan, Kale


Farinata Italian Chickpeas Flatbread

Farinata Italian Chickpeas Flatbread

This post may contain affiliate links, that help support this blog. If you make a purchase through these links, I may earn a commission—at no cost to you. For more information read my disclosure policy.

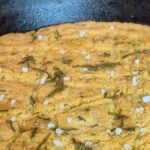
Farinata Italian chickpeas flatbread is one of those quietly iconic Italian foods — simple, humble, and deeply rooted in tradition. Originating in Liguria, this thin chickpea flatbread has been made for centuries using just chickpeas, water, olive oil, and salt. It began as street food, valued for being filling, affordable, and made entirely from pantry staples.

Traditionally, farinata is prepared with chickpea flour, but this version goes straight to the source by using whole dried chickpeas. After soaking and blending, the batter bakes into a flatbread with crisp, golden edges and a soft, creamy center. It’s rustic, naturally gluten-free, and a perfect example of how Italian cooking lets simple ingredients do the work.

Things to know about this Farinata Italian Chickpeas Flatbread

  • Farinata Italian chickpeas flatbread should always be thin — a thick batter will bake up dense instead of creamy.

  • Resting the batter improves both flavor and texture, so don’t skip it.

  • Using whole chickpeas creates a slightly more rustic result than chickpea flour, while staying true to tradition.

  • A hot cast iron or metal pan is key for proper browning and crisp edges.

  • Farinata is best enjoyed hot, straight from the oven, but leftovers reheat well in a hot pan.

Variation: Rustic Farinata (Unstrained Batter)

For a heartier, more rustic farinata, skip straining the blended chickpea batter. The finished flatbread will be slightly thicker with more texture, while still keeping the classic crispy edges and creamy center. Just be sure the batter remains thin enough to spread easily in the pan before baking.

Storage & Reheating

Farinata Italian chickpeas flatbread is best enjoyed fresh, but leftovers store well.

  • Refrigerator: Store cooled farinata in an airtight container for up to 3 days.

  • Reheating: Reheat in a hot skillet with a small drizzle of olive oil until warmed through and the edges crisp again.

  • Avoid the microwave if possible — it softens the texture and dulls the flavor.

Farinata does not freeze well, as the texture becomes grainy once thawed.

If you love simple Italian recipes made from pantry staples, be sure to explore more on the blog. Pair this farinata with my
Homemade Beef Bone Broth for a comforting meal, or serve it alongside my Italian and Italian-inspired soups for an easy, rustic spread.

And if you make this farinata Italian chickpeas flatbread, leave a comment below or tag me on social — I love seeing how you serve it and make it your own.

Farinata Italian Chickpeas Flatbread

  • 1 cup dried chickpeas, soaked overnight (12–24 hours)
  • 1 to 1¼ cups  fresh water (for blending)
  • ½ tsp fine sea salt
  • 3–4 tbsp extra virgin olive oil, divided
  • Freshly ground black pepper, to finish

Optional Toppings (add sparingly)

  1. Soak the chickpeas. Soak dried chickpeas in plenty of water overnight. Drain and rinse well.

  2. Optional (but recommended for texture): Simmer the soaked chickpeas in fresh water for 20–30 minutes, just until tender.Drain and let cool slightly.

  3. Blend the batter. Add chickpeas and 1 cup water to a high-speed blender.Blend until completely smooth.Add more water, a little at a time, if needed — the batter should be thin, like crêpe batter, not thick like hummus.

  4. Strain for smoothness. Strain the batter through a fine-mesh sieve for a smoother texture, or skip this step for a more rustic farinata

  5. Season and rest. Stir in the salt.Cover and let the batter rest at room temperature for at least 1 hour, preferably 2–3 hours.Skim off any foam that forms on top.

  6. Preheat oven and pan. Preheat oven to 425°F (Place a 12-inch cast iron skillet or metal baking pan in the oven to heat.

  7. Oil the pan

  8. Carefully remove the hot pan and add 2 tablespoons olive oil, swirling to coat evenly.

  9. Bake. Pour the rested batter into the pan (it should spread thinly).Drizzle the remaining olive oil over the top.Add rosemary or onions now, if using.

  10. Cook until set and golden. Bake for 18–25 minutes, until:

    • Edges are crisp and deeply golden

    • Top has light browning

    • Center is just set and creamy

  11. Optional: Broil for 2–3 minutes for extra char.

  12. Serve immediately. Finish with black pepper and any fresh toppings.Slice into wedges and serve hot.