Easy savory puff pastry twists

Easy Savory Puff Pastry Twists

This post may contain affiliate links, that help support this blog. If you make a purchase through these links, I may earn a commission—at no cost to you. For more information read my disclosure policy.

If there’s one thing I can guarantee about these Easy savory puff pastry twists, It’s that they are going to disappear fast, so be sure to put some aside for yourself first. layers of puff pastry , cheese , pesto and marinara all twisted into  golden deliciousness.  Forget about store-bought snacks: you have everything you need for a crowd – pleasing appetizer right here. Plus, it’s so easy to make!!!.Whether you ‘re hosting a party or need a quick finger food for game day, these golden, flaky twists are guaranteed to be a hit.

Why you will love these Easy savory puff pastry twists

Savory puff pastry twists are the ultimate crowd- pleasing appetizer because they combine bold flavors with a visually appealing presentation. The golden flaky layers of puff pastry offer a crunch that perfectly complements the rich pesto, tangy marinara and cheese. Their twist shape makes them look sophisticated while remaining so easy to make, making them a go-to choice for any host.

What makes these appetizers even more ideal is their versatility. They can be make ahead of time, allowing you to focus on enjoying your guests instead of being stuck in the kitchen. served warm or at room temperature, they hold their flavor and texture beautifully. Plus, their easy -to-hold, mess-free design makes them perfect for mingling and grazing.

These easy savory puff pastry twists with pesto, marinara and parmesan are the perfect combination of flavor, simplicity, and style. Whether your hosting a party, contributing to a potluck, or looking for a quick snack these twists will be a hit. Give them a try, and watch your family and friends come back for seconds (and thirds).

Storage

Room Temperature: Store completely cooled twists in an airtight container for up to 2 days.

Refrigerator: Store for up to 4 days, although the pastry is best when freshly baked.

Reheating: Warm in a 350°F oven for 5–8 minutes to bring back their crisp texture. Avoid the microwave, which can make them soft.

More Italian-Inspired Appetizers

Looking for more easy appetizers? Try my Gorgonzola and Brie Pear Tart,   Italian potato Croquettes, and classic Bruschetta with tomatoes and basil. For more ideas, browse my Appetizer Recipes.


Easy Savory Puff Pastry Twists

These easy savory puff pastry twists are crisp, golden, and packed with Italian-inspired flavor. Made with flaky puff pastry, cheese, and savory seasonings, they're the perfect appetizer, snack, or easy addition to any antipasto platter.

  • 2 puff pastry sheets
  • 1/2 cup marinara sauce
  • 1/2 cup pesto
  • 1 cup grated parmesan
  • 1 Tbsp. melted butter
  • 1 Tbsp. chopped Italian parsley
  1. Preheat your oven to 375-degees. Line a baking sheet with parchment paper.

  2. Bring the puff pastry to room temperature. Then on a lightly floured surface slightly roll out the dough.
  3. Spread one sheet with first the pesto and then the marinara a sauce. Sprinkle with the grated parmesan. Top with the remaining sheet of puff pastry. Press the edges to seal.
  4. Cut the puff pastry dough into 1 inch wide strips on the shorter side . You should have 16 strips. Then twist them. Brush with the the melted butter. Top with additional grated parmesan.
  5. Bake for 15 -20 minutes or until golden brown. Sprinkle with the chopped Italian parsley.

Keep the puff pastry cold. Work quickly and return the pastry to the refrigerator if it becomes too soft. Cold puff pastry will puff beautifully in the oven and give you crisp, flaky twists.

Appetizer
American, Italian, Mediterranean
savory puff pastry twists


Arancini Italian rice balls

Arancini Italian Rice Balls

This post may contain affiliate links, that help support this blog. If you make a purchase through these links, I may earn a commission—at no cost to you. For more information read my disclosure policy.

Golden and crispy on the outside, tender and flavorful on the inside, Arancini are one of Italy’s most beloved street foods. These delicious Italian rice balls are filled with a rich, savory meat sauce and creamy mozzarella, then coated and fried until perfectly golden.

The name arancini means “little oranges” in Italian, a reference to their round shape and beautiful golden color. While they originated in Sicily, these irresistible rice balls can now be found throughout Italy, with each region putting its own delicious spin on them.

The classic version is filled with meat sauce, peas, and mozzarella, but there are countless variations, from saffron-infused rice to vegetarian fillings and different cheeses. No matter the filling, the appeal is the same: a crisp, golden exterior giving way to warm, creamy, savory goodness inside.

Perfect as an appetizer, snack, or part of an Italian-style dinner, arancini are always a crowd-pleaser—and a delicious taste of Italy in every bite.

Arancini: Italian Rice Balls

Making arancini may seem like a project, but with a little preparation, they’re much easier than you might think. The key is to make the rice or risotto ahead of time and give yourself a little time to assemble everything before frying.

Steps to Make This Arancini Italian Rice Ball Recipe Easy

Step 1: Prepare the rice.
Make the risotto a day or two ahead and refrigerate it. Cold rice is much easier to work with and helps the arancini hold their shape.

Step 2: Set up your workstation.
When you’re ready to make the arancini, have everything prepared and within reach: the chilled risotto, cubed mozzarella, meat filling, seasoned breadcrumbs, and beaten eggs.

Step 3: Shape and bread the arancini.
Take a portion of the rice and gently flatten it in your hand. Add a little meat filling and a cube of mozzarella, then carefully shape the rice around the filling, sealing it completely. Dip each rice ball in beaten egg, then roll it in the breadcrumbs. Place the finished arancini on a parchment-lined baking sheet.

Step 4: Refrigerate until ready to cook.
The arancini can be made several hours ahead, or even the day before. Cover and refrigerate until you’re ready to cook them.

Step 5: Fry until golden.
Heat the oil and fry the arancini in batches until they’re beautifully golden and crisp on the outside. Don’t overcrowd the pan, or the oil temperature will drop and the arancini won’t crisp properly.

Short on time? You can also bake the arancini in the oven or cook them in an air fryer for a lighter option.

Serve them hot, while the outside is crisp and the mozzarella inside is warm and gooey. That’s when they’re at their best.

Storage

Refrigerator: Store cooked arancini in an airtight container for up to 3 days.

Freezer: Freeze cooked or uncooked arancini in a single layer until firm, then transfer to a freezer-safe container for up to 3 months. Cooked arancini can be reheated directly in a 375°F oven or air fryer until hot and crisp.

More Italian Appetizers

If you love classic Italian appetizers, try my Easy Savory Puff Pastry Twists, Gorgonzola and Brie Pear Tart, or my family’s favorite Italian sausage rolls with puffpastery .For more delicious ideas, browse my Appetizer Recipes.


Arancini Italian Rice Balls

Crispy, golden Italian rice balls made with creamy seasoned rice, filled with savory cheese and fried or baked until perfectly crisp. Arancini are a classic Italian appetizer and a delicious way to turn leftover risotto into something special.

  • 4 cups leftover rice or risotto
  • 1 cup grated parmesan cheese
  • 1 egg
  • 2 Tbsp. chopped Italian parsley

FOR THE MEAT FILLING

  • 2 Tbsp. olive oil
  • 1/2 cup chopped onion
  • 1 Tbsp. minced garlic
  • 1 cup chopped celery + 1 cup peeled and chopped carrot
  • 1 cup diced pancetta or bacon
  • 1/2 lb. ground beef + 1/2 lb. ground pork
  • 1/2 cup red wine
  • 2 cups crushed tomatoes
  • 2 Tbsp. tomato paste
  • 1 cup water
  • 1 Tbsp. dried Italian herbs
  • 1 cup peas (optional)
  • Ingredients to assemble:
  • 4 mozzarella sticks cut into 4 pieces

FOR THE COATING

  • 1 egg slightly beaten
  • 2 cups breadcrumbs
  • 1/2 cup grated parmesan
  • 1 Tbsp. chopped Italian parsley
  1. Mix the cooked rice with 1 egg , 1 cup of grated parmesan cheese and the Italian parsley, salt and pepper to taste. Set aside while preparing the meat filling.

  2. To make the meat sauce: Start in 2 Tbsp. of olive oil by cooking the pancetta or bacon until crisp, then add the celery, onion, garlic and carrots and cook until soft . Once the vegetables are soft add the meats and cook until browned breaking up the meat as it cooks.
  3. Add the wine and let it evaporate before adding the tomato paste and water. Bring to a boil, then turn down to a simmer cover and cook for one hour. If using peas add them to the meat sauce the last 10 minutes .
  4. This recipe uses about 3 cups of meat filling any leftovers can be used for pasta sauce.
  5. To assemble and fry; the rice should be warm for easier forming , if the rice has be in the fridge warm in the microwave.
  6. Wet your hands this will make forming the rice balls easier. Take about 1 Tbsp. of rice and flatten into your cupped hand. Place 1Tbsp. of the meat filling and 1 piece of the mozzarella in the center and roll into a ball making sure all the filling is covered .
  7. Then in a bowl mix the breadcrumbs with the parmesan cheese and Italian parsley. In another bowl whisk the egg slightly
  8. Dip the arancini balls first in the egg and then in the breadcrumb mixture. Now refrigerate for 30 minutes or even overnight.
  9. Then bring 3 cups of canola – olive oil blend to medium high heat and fry the rice balls until golden brown about 5 minutes.
  10. Drain on absorbent paper . serve hot.

Make sure the rice is completely chilled before forming the arancini. Cold rice is much easier to shape and will hold together better. Keep your hands slightly damp as you form the balls, and don’t overfill them—this helps prevent the filling from leaking out while cooking.
Tip text

Appetizer, Main Course, Side Dish
Italian
Arancini, Italian rice balls


Fuyu persimmon walnut salad

Fuyu Persimmon Walnut Salad

This post may contain affiliate links, that help support this blog. If you make a purchase through these links, I may earn a commission—at no cost to you. For more information read my disclosure policy.

This Fuyu Persimmon salad with toasted walnuts and grilled halloumi cheese is vibrant and a bright winter salad that combines the sweetness of ripe fuyu persimmons, the nuttiness of toasted walnuts, and the salty richness of grilled halloumi cheese. Persimmons are one of winters underrated gems. Their natural sweetness and velvety texture make them a star ingredients in both savory and sweet dishes. For this salad we use Fuyu persimmons, which are crisp and perfect for slicing. Paired with toasted walnuts, they bring a warm nutty crunch that contrasts deliciously with the juicy fruit.

This salad also has peppery mixed greens, salty halloumi and a citrusy vinaigrette that ties everything together.

Why this Fuyu persimmon walnut salad belongs on your table

This  fuyu  persimmon walnut salad is versatile enough for any occasion. It’s light yet satisfying, making it an excellent start to a holiday dinner or a refreshing side dish to roasted meats. The vibrant orange color of the persimmons and the ruby red pomegranate seeds add a festive touch to your winter table.

Growing up, persimmons were a wintertime treat in my household. My family would slice them up and enjoy them as a simple snack, but since then I’ve discovered how delicious they are paired with savory ingredients.

If your looking to impress family and friends or simple treat yourself to a seasonal delight this Fuyu persimmon walnut salad is the answer. Please don’t forget to snap a photo before diving in- the colors alone are worth celebrating.

Fuyu persimmons have a naturally sweet, crisp texture that pairs especially well with peppery greens, crunchy walnuts, and a tangy dressing. You can prepare the dressing ahead of time and toss the salad just before serving.

Storage

Store the salad and dressing separately in the refrigerator. Once dressed, the salad is best enjoyed the same day. Undressed salad ingredients can generally be refrigerated for up to 2 days.

What to Serve With It

This salad would be especially good alongside:

  • Roast chicken
  • Pork tenderloin
  • Roast turkey
  • Italian sausage dishes
  • Baked pasta

A simple soup and crusty Italian bread

Fuyu persimmons have a naturally sweet, crisp texture that pairs especially well with peppery greens, crunchy walnuts, and a tangy dressing. You can prepare the dressing ahead of time and toss the salad just before serving.

Storage

Store the salad and dressing separately in the refrigerator. Once dressed, the salad is best enjoyed the same day. Undressed salad ingredients can generally be refrigerated for up to 2 days.

What to Serve With It

This salad would be especially good alongside:

  • Roast chicken
  • Pork tenderloin
  • Roast turkey
  • Italian sausage dishes

Baked pasta

More Salad Recipes

  •  Tomato Salad — a simple fresh tomato salad that’s perfect for summer.
  • Italian Garden Salad — an easy everyday salad with Italian-inspired flavors.
  • Easy roasted zucchini Salad with feta — a delicious healthy  salad that works well as a side or light meal.
  • Easy Sicilian potato salad —  tender potatoes tossed with olive oil, capers, red onion, and fresh herbs instead of heavy mayonnaise.


Fuyu Persimmon Walnut Salad

A fresh and colorful fall salad made with sweet Fuyu persimmons, crunchy walnuts, greens, and a simple homemade dressing. This easy salad brings together sweet, savory, and nutty flavors and makes a beautiful side dish for holidays or everyday meals.

  • 3 thinly sliced Fuyu persimmon
  • 4 cups mixed greens
  • 1 cup toasted walnuts
  • 4 oz. halloumi cheese sliced medium thick
  • 1/2 cup pomegranate seeds
  • Dressing
  • 1 cup extra virgin olive oil
  • 1/3 cup white wine vinegar
  • 1 Tbsp. dijon mustard
  • 2 Tbsp. honey or maple syrup
  • salt and pepper to taste
  1. In a saute pan over medium high heat in 1 Tbsp. of olive oil cook the cheese until golden on all sides. Remove and in the same pan toast the walnuts until fragrant.

  2. Make the dressing in a bowl or jar whisk together the oil, vinegar, mustard, seasoning, salt and pepper. Adjust your seasonings to taste
  3. Assemble the salad arrange mixed greens on a platter, top with the persimmon slices, toasted walnuts and pomegranate seeds. Place the grilled cheese slices on top. Drizzle with the dressing.

Choose Fuyu persimmons that are firm but slightly soft to the touch. Unlike Hachiya persimmons, Fuyus can be eaten while still firm, making them perfect for slicing into salads.

Side Dish, Soup
Italian, Mediterranean
persimmon walnut salad, fall salad,


Crispy fried cabbage fritters

Crispy Fried Cabbage Fritters

This post may contain affiliate links, that help support this blog. If you make a purchase through these links, I may earn a commission—at no cost to you. For more information read my disclosure policy.

If you are a fan of turning humble ingredients into something delicious, this crispy fried cabbage fritter recipe is for you. Full of vibrant flavors and a golden crunch, these are the perfect blend of easy and delicious. Whether you’re looking for a quick snack, a satisfying appetizer or a different side dish these fritters deliver.

This recipe highlights the earthy sweetness of cabbage, enhanced by a seasoned batter and fried to crispy perfection. It’s a budget- friendly, crowd- pleasing dish that transforms pantry staples into a delicious treat. Pair these fritters with my spicy dipping sauce, and you’ve got a dish everyone will enjoy.

You are going to love these crispy fried cabbage fritters here’s why

These crispy fried cabbage fritters are:

Crispy on the outside and tender on the inside : A perfect blend of textures that keeps you wanting more

Full of flavor: Infused with spices and savory ingredients that highlight the natural sweetness of the cabbage

Versatile: Enjoy them as a snack, side dish , or even a meatless main course.

Quick and easy to make: Minimal prep and a simple batter make these fritters an effortless crowd-pleaser.

Budget friendly: Cabbage is  inexpensive, making this recipe as economical as it is delicious. Try them out and let  me how you like them.

These fritters are best served hot and crispy straight from the pan. A simple squeeze of lemon or your favorite dipping sauce makes a delicious finishing touch.

Storage

Store leftovers in an airtight container in the refrigerator for up to 3 days. Reheat in a skillet, oven, or air fryer to bring back some of their crispiness.

Freezing

Freeze cooked fritters in a single layer, then transfer to a freezer-safe container for up to 2 months. Reheat from frozen in the oven or air fryer.

What to Serve With It

  • Marinara sauce
  • Garlic aioli
  • Lemon wedges
  • Simple green salad
  • Roasted chicken
  • Italian sausage

    More Recipes to Try

Don’t forget to share your creations and tag me on Instagram. I love hearing from you. It’s my favorite part and it helps others. Thanks. 

Crispy Fried Cabbage Fritters

These crispy fried cabbage fritters are golden and crunchy on the outside, tender and flavorful inside, and an easy way to turn simple cabbage into something everyone will love. They make a delicious appetizer, side dish, or light vegetarian meal.

  • 4 cups shredded cabbage
  • 2 chopped onions
  • 3 eggs slightly beaten
  • 1 tbsp. olive oil
  • 1/2 cup flour
  • 1/2 cup grated parmesan cheese
  • 2 tsp. Italian herbs
  • 2 cups canola olive oil blend for frying
  • salt and pepper to taste
  1. Start by shredding the cabbage or you can use pre shredded. Then put it in a bowl and sprinkle with 2 tsp. of salt let sit for 30 minutes or overnight. then use your hands to squeeze out as much of the liquid as possible

  2. In a dry bowl add the eggs and whisk slightly then add in the rest of the ingredients mix well before adding the cabbage and mixing until all the ingredients are well combined.
  3. In a deep saute pan over medium high heat add 2 cups of canola olive oil blend.
  4. Use a tablespoon to drop the batter into the hot oil. Fry for 3-4 minutes on each side. Drain on paper towels. Serve with a spicy yogurt sauce.
  5. For the dipping sauce: 1 cup plain Greek yogurt. The juice and zest from one lemon. 1 tsp. finely minced garlic. 1 Tbsp. hot chili oil. 1 tsp. chili flakes.

The key to crispy fritters is removing as much moisture from the cabbage as possible before mixing the batter. This helps them brown beautifully instead of becoming soggy.

Appetizer, Side Dish
American, Italian, Mediterranean
cabbage fritter recipe


Savory sausage mushroom stuffing

Savory Sausage Mushroom Stuffing

This post may contain affiliate links, that help support this blog. If you make a purchase through these links, I may earn a commission—at no cost to you. For more information read my disclosure policy.

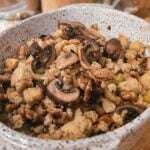
This holiday season make my savory sausage, mushroom sage stuffing. Full of seasonal herbs, hearty and full of classic Italian flavors it’s the ultimate Thanksgiving side dish. Whether you’re hosting or bringing a dish to the table, this savory stuffing is a guaranteed crowd-pleaser. Pair it with roasted turkey or enjoy it as a meal on it’s own.

Why you’re going to love this savory sausage mushroom stuffing recipe

This savory sausage and mushroom stuffing is a game- changer for your holiday table. With it’s perfect balance of earthy flavors and delicious texture, it’s everything you want in a classic side dish – and more. The combination of crumbled sausage and sauteed mushrooms infuses every bite with comfort. Add to that the golden , crisp edges of the corn bread cubes , and you have a dish that’s irresistible.

What truly sets this stuffing apart is the depth of flavor and versatility of this recipe. You can customize it with your favorite additions, like toasted nuts, dried cranberries, or even add in a splash of white wine to elevate the side dish even further. Plus , it’s easy to make ahead, so you can focus on entertaining and enjoying the day.  From the first bite ,this savory sausage mushroom stuffing will have everyone at the table asking for more- and the recipe!!!

Savory Sausage Mushroom Stuffing

  • 2 Tbsp. olive oil
  • 2 links Italian sausage casing removed
  • 1 cup chopped onion
  • 2 cups chopped celery
  • 3 cups sliced cremini sliced mushrooms
  • 4 cups corn bread for stuffing
  • 1/2 cup chopped sage
  • 2 cups chicken stock
  • salt and pepper to taste
  1. Start by adding the chicken stock to the corn bread.

  2. Then remove the casings from the sausage, in the 2 Tbsp. of olive oil saute the sausage until just beginning to brown breaking it up as you go.
  3. Add the onions and celery and cook until soft and translucent. Then add in the sliced mushrooms cook until they are golden. then add in the chopped sage. Salt and pepper to taste.
  4. Add the sausage mixture to the cornbread.
  5. Bake in a preheated 375-oven for 30 -40 minutes.


Holiday roasted vegetables side dish

Holiday Roasted Vegetable  Side Dish

This post may contain affiliate links, that help support this blog. If you make a purchase through these links, I may earn a commission—at no cost to you. For more information read my disclosure policy.

This holiday roasted vegetable  side dish is made with  carrots and Brussel sprouts. It is the  perfect side dish for fall and the holidays. These roasted vegetables are delicious with a crispy yet tender texture, with hints of caramelized sweetness from the honey and a spicy kick from the chili flakes, and the yogurt adds a touch of coolness.

Perfectly roasted this vegetable side dish pairs beautifully with a variety of main dishes, making it a versatile and crowd-pleasing addition to your holiday table.

Why you will love this holiday roasted vegetable  side dish

  1. versatile and crowd pleasing: This roasted vegetable holiday side dish pairs perfectly with any main course whether it’s turkey, ham or a roast. everyone at the table will enjoy it.
  2. bursting with flavor: Roasting vegetables caramelizes their natural sugars, creating a deliciously sweet and savory dish.
  3. Colorful and festive: a mix of vibrant vegetables like carrots and brussel sprouts, creates a  beautiful seasonal presentation.
  4. Easy to make: with minimal prep and hands -off roasting time, it’s the perfect side dish for a busy holiday schedule.
  5. Customizable: you can adjust the vegetables, seasonings or garnishes to fit your preferences. This holiday roasted vegetable  side dish is the perfect blend of easy, delicious and festive charm. It’s a colorful, crowd-pleasing addition to any holiday table, easy to prepare. If you make this recipe please leave me a comment with your experience with this side dish recipe. I love hearing from you and it helps others.

Holiday Roasted Vegetable Side Dish

  • 1 lb. carrots
  • 1 lb. brussels sprouts
  • 2 Tbsp. extra virgin olive oil
  • 2 cups plain Greek yogurt
  • 4 Tbsp. honey
  • 1 tsp. chili flakes
  • 1 tsp. each paprika + onion+ garlic powder
  • 1 garlic clove finely minced
  • pomegranate seeds
  1. preheat your oven to 400-degrees. line a baking sheet with parchment paper.

  2. wash the vegetables. peel the carrots and cut on a diagonal in equal pieces. cut the Brussel sprouts in half.
  3. in a bowl season the vegetables with salt, pepper, garlic, paprika and onion powder. Drizzle with olive oil and roast in a 400 -degree preheated oven for 25-30 minutes.
  4. In the meantime prepare the yogurt and the hot honey. For the yogurt add the minced garlic and lemon juice. for the hot honey add the hot pepper flakes to the 4 Tbsp. of honey.
  5. To assemble spread a pretty platter with the seasoned yogurt. drizzle the yogurt with the half the hot honey. Arrange the vegetables on top in a pretty design. Drizzle with the remaining hot honey . top with the pomegranates.


Parmesan scallop mashed potatoes

Parmesan Scallop Mashed Potatoes

This post may contain affiliate links, that help support this blog. If you make a purchase through these links, I may earn a commission—at no cost to you. For more information read my disclosure policy.

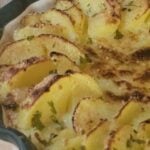
There is something about mashed potatoes that just says Thanksgiving. And when you take that classic and add parmesan cheese and dress it up with scallop sliced potatoes, and broil them it becomes magic. These  parmesan scallop mashed potatoes are creamy, rich, and buttery- prefect for pairing with just about any main dish any time of the year. If you have never done mashed potatoes like this or added parmesan to your potatoes, this recipe will become a game changer in the field of mashed potatoes.

Here are some tips for making parmesan scallop mashed potatoes

  1. Choose the right potatoes: Use starchy potatoes like russets or Yukon gold for creaminess and fluffiness. Yukon gold potatoes add a buttery flavor that pairs well with  parmesan.
  2. For the topping of scalloped potatoes: let the removed potatoes cool  then slice the potatoes thin.
  3. For the pretty scallop potato topping: Layer the potatoes in an overlapping pattern for a visually appealing and evenly cooked dish. Top with additional parmesan and fresh parsley for a burst of flavor and color.
  4. Allow the dish to rest for 5-10 minutes after baking for easier slicing. Parmesan scalloped mashed potatoes are the perfect combination of creamy, cheesy and comforting. By using quality ingredients and broiling to golden perfection you can create a side dish that’s as pretty as it is satisfying. Whether served as a holiday side or weeknight treat, this recipe is sure to become a family favorite.

Parmesan Scallop Mashed Potatoes

  • 3 lb. Yukon gold or russet potatoes
  • 1/2 stick of butter
  • 1 cup grated parmesan cheese
  • 1 cup whole milk
  • 1 Tbsp. chopped Italian parsley
  • Salt and pepper to taste
  1. Start by scrubbing the potatoes clean. Then peel the potatoes and cut in half

  2. Place the potatoes in a pot of cold water add 1 tsp. of salt.
  3. Place the pot over medium high heat and bring to a boil. Boil the potatoes for 7-10 minutes. Then remove 3 0f the potato half’s and set aside. Continue boiling the remaining potatoes for an additional 7-10 minutes or until the potatoes are fork tender. Transfer to a colander and drain well.
  4. Place the pot back over medium heat add the butter and the milk bring to low simmer . add the potatoes, parmesan cheese, parsley salt and pepper to taste.
  5. Use a potato masher to mash the potatoes. Then place the mashed potatoes in a lightly buttered pie pan.
  6. Cut the reserved potatoes into thin slices. Place then on the mashed potatoes in a pretty pattern. Sprinkle with more grated parmesan cheese and broil until just beginning to brown about 7-10 minutes. Sprinkle with Italian parsley.


Honey roasted holiday vegetables

Honey Roasted Holiday Vegetables

This post may contain affiliate links, that help support this blog. If you make a purchase through these links, I may earn a commission—at no cost to you. For more information read my disclosure policy.

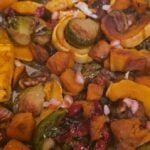
Honey roasted holiday vegetables are the colorful picture prefect side dish to go along side any main meal. Oven roasted vegetables are an easy winter side dish that adds color and a festive touch to your holiday table. This is such a prefect holiday recipe with classic holiday ingredients, such as cranberries and walnuts. The cranberries provide a sweet tangy contrast to the vegetables and the  walnuts provide a nice crunch. Honey -roasted holiday vegetables make a delicious side dish with natural sweetness and a caramelized finish.

Variations for this honey roasted holiday vegetable recipe

The vegetables: use any combination that fits your taste, the vegetables in this recipe can be customized. You can use carrots, parsnip or any any root vegetable.

Citrus zest: A bit of lemon or orange zest can add a fresh holiday inspired twist.

Control the sweetness: If you prefer less sweetness add a splash of balsamic vinegar when tossing the vegetables in the bowl.

Honey roasted vegetables bring warmth, color, and a festive flavor to any holiday table.

Honey Roasted Holiday Vegetables

  • 3 cups medium dice butternut squash
  • 1 medium sliced delicate squash
  • 4 cups brussel sprouts cut in half
  • 2 peeled medium diced sweet potatoes
  • 2 cups fresh cranberries
  • 2 cups walnuts
  • 1 Tbsp. Italian seasoning
  • 3 Tbsp. olive oil
  • 2 Tbsp. honey
  • salt and pepper to taste
  • crumbled gorgonzola
  1. Preheat your oven to 400- degrees. drizzle a baking sheet with olive oil.

  2. Add the all the vegetables salt and pepper to taste to a large bowl. Drizzle with the olive oil, sprinkle with the Italian seasoning. Salt and pepper to taste. Toss to combine
  3. Spread the vegetables on the prepared baking sheet. Add the walnuts and cranberries. Bake for 20 -25 minutes, or until the vegetables are starting to get tender. Turn and cook an additional 10 -15 minutes, or until fork tender and beginning to brown.
  4. Adjust your seasonings. Sprinkle with gorgonzola crumbles.


Baked gorgonzola stuffed pears

Baked Gorgonzola Stuffed Pears

This post may contain affiliate links, that help support this blog. If you make a purchase through these links, I may earn a commission—at no cost to you. For more information read my disclosure policy.

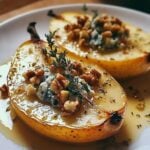
When it comes to creating an easy fall appetizer that’s as elegant as it easy to make. baked gorgonzola- stuffed pears are the perfect choice. The natural sweetness of ripe pears with the creamy bold creamy flavors of gorgonzola, and the crunch of walnuts resulting in an appetizer that’s delicious. When baked the pears become tender, while the gorgonzola melts into a creamy, tangy deliciousness.  Whether served as a starter or a elegant snack these baked gorgonzola stuffed pears  are sure to become a favorite for their simplicity and flavor.

What to use for this baked gorgonzola stuffed pear recipe

Choose slightly underripe pears and large ones. This recipe is perfect for those stone-hard pears. Roasting the pears softens them up without making them mushy. The best ones for roasting  are Anjou, bosc or my personal favorite Bartlett. They all retain their shape and flavor when baked.

Gorgonzola the star ingredient in this recipe adds a creamy, tangy flavor. You can use regular or dolce (a milder, creamier version) or blue cheese is a good substitute.

The walnuts add crunch and a nutty flavor i chop them fine you can also leave some whole to place on top of the pears.

The honey adds sweetness to balance the gorgonzola,  maple syrup does the same thing.

A sprinkle of fresh thyme or rosemary adds a hint of earthy flavor that complements the pears and cheese.

Baked Gorgonzola Stuffed Pears

  • 4 pears
  • 1 cup gorgonzola
  • 1 cup chopped walnuts
  • 1 Tbsp. thyme
  • 4 Tbsp. honey
  1. Set your oven to 375-degrees

  2. Start by washing the pears and drying. Then cut in half and scoop out the seeds.
  3. Mix the gorgonzola, chopped walnuts, thyme and 2 Tbsp. of the honey.
  4. Fill the cavities of the pears with the filling. Roast in the preheated oven for 20 -30 minutes. Then drizzle the pear halves remaining honey .


Roasted parmesan broccoli side dish

Roasted Parmesan Broccoli Side Dish

This post may contain affiliate links, that help support this blog. If you make a purchase through these links, I may earn a commission—at no cost to you. For more information read my disclosure policy.

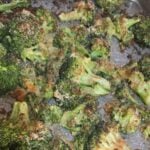
If your looking for a simple yet flavorful side dish that complements almost any meal, look no further than this oven roasted parmesan broccoli side dish. Roasting broccoli brings out it’s natural sweetness and adds a delicious crunch. The high heat caramelizes the edges, making it a far cry from the sometime soggy texture of steamed or boiled  broccoli. Once you try roasting broccoli with good quality parmesan,  breadcrumbs, and herbs, you’ll wonder why you ever cooked it any other way. It’s a game-changer in the world of side dish. Plus, it’s so easy to make!!!

Why you will love this  roasted parmesan broccoli side dish

Quick and easy: The prep time is minimal,  the oven does the work . leaving you hands free to focus on other parts of the meal.

Healthy and delicious: Broccoli is packed with fiber, vitamins, and antioxidants, and roasting it with olive oil and parmesan keeps it both nutritious and delicious.

Kid friendly: Even picky eaters will like this crispy, cheesy take on broccoli.

Pairing ideas: Oven roasted parmesan broccoli works  as a great side to many dishes. I served with crispy oven fried chicken cutlets. It’s also delicious  along side grilled chicken, steak or pasta dish.

If you make this super easy roasted parmesan broccoli side dish please leave me a comment on your experience with the recipe. I love hearing from you. It’s my favorite part!!!

Roasted Parmesan Broccoli Side Dish

  • 2 Lbs. broccoli florets
  • 2 Tbsp. extra virgin olive oil
  • 1 cup breadcrumbs
  • 1 cup grated parmesan cheese
  • 2 Tbsp. chopped Italian parsley
  • 2 Tbsp. finely minced garlic
  • salt and pepper to taste
  1. Start by washing and broccoli pat dry with paper towels then cut into equal pieces

  2. Place on a cookie sheet drizzle with the olive oil top the broccoli with the breadcrumbs, parmesan cheese, garlic and Italian parsley.
  3. Roast in a preheated 400 -degree oven for 20 to 30 minutes, or until beginning to brown with a crust form the breadcrumbs and cheese.