Easy Italian Vinaigrette Recipe (Better Than Store-Bought)

Easy Italian Vinaigrette Recipe (Better Than Store-Bought)This post may contain affiliate links, that help support this blog. If you make a purchase through these links, I may earn a commission—at no cost to you. For more information read my disclosure policy.

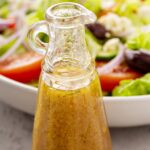
If there’s one thing every Italian kitchen gets right, it’s simplicity—and this Italian vinaigrette is proof. Made with pantry staples, it comes together in minutes, tastes brighter than anything from a bottle, and costs a fraction of store-bought dressings.

After years in the restaurant world, one thing became clear: the best dressings are always made in-house. Not just for flavor—but because you control the quality, freshness, and cost. Once you make this, you won’t go back.

This is the same Italian dressing we used in the restaurant—simple, bold, and incredibly versatile. It’s more than just a vinaigrette; it doubles as a flavorful marinade that brings out the best in chicken, seafood, and vegetables. That’s the kind of multitasking staple that saves time, money, and elevates everything it touches.

Things to know about this Easy Italian Vinaigrette Recipe (Better Than Store-Bought)

  • Oil matters: Use a good-quality olive oil—this is where most of the flavor comes from.
  • Balance is key: Traditional vinaigrette is a 3:1 oil-to-vinegar ratio, but adjust to your taste.
  • Fresh vs dried herbs: Dried herbs give that classic Italian-American flavor, but fresh herbs can elevate it even more.
  • It thickens in the fridge: Olive oil solidifies when cold—just let it sit at room temp for a few minutes and shake.
  • Multipurpose: Use it as a marinade for chicken, drizzle over roasted vegetables, or toss with pasta salad.

Why Make It at Home (Save Money + Better Taste)

Store-bought dressings are convenient—but you’re paying more for lower-quality oils, preservatives, and fillers. This homemade version:

  • Costs significantly less per batch
  • Uses clean, real ingredients
  • Tastes fresher, brighter, and more balanced
  • Can be customized to your exact preference

A bottle of dressing might cost $5–$8. This recipe? Pennies per serving—and a huge upgrade in flavor. Once you try this homemade Italian vinaigrette, you’ll never go back to bottled. It’s one of the easiest ways to upgrade your cooking while saving money.

Pair it with my [Italian Crispy Roasted Potatoes] or drizzle it over my [Rustic Grilled Pepper Salad] for a simple, flavor-packed meal.


Easy Italian Vinaigrette Recipe (Better Than Store-Bought)

Homemade Italian vinaigrette made with simple pantry ingredients. Fresh, budget-friendly, and better than store-bought—ready in minutes.

  • 2 cups extra virgin olive oil
  • 1/2 cup red wine vinegar
  • 2 cloves minced garlic
  • 2 tsp oregano ( dried)
  • 2 tsp basil (dried)
  • 2 tsp Dijon mustard
  • 2 tsp honey
  • salt and pepper to taste
  1. In a bowl or jar, combine vinegar, garlic, oregano, basil, salt, pepper, mustard, and honey.

  2. Slowly whisk in the olive oil until emulsified.

  3. Taste and adjust seasoning if needed.

  4. Store in a sealed jar in the refrigerator for up to 1 week. Shake well before using.

Salad
Italian
dressing, viniagretti, Italian, salad


Eggs Benedict Recipe with Blender Hollandaise | Easy Restaurant Style

Eggs Benedict Recipe with Blender Hollandaise | Easy Restaurant Style

This post may contain affiliate links, that help support this blog. If you make a purchase through these links, I may earn a commission—at no cost to you. For more information read my disclosure policy.

This is our classic diner-style Eggs Benedict—simple, rich, and made the way we actually serve it in our kitchen.

Perfectly toasted English muffins, thick-cut Canadian bacon, soft poached eggs, and a silky blender hollandaise that comes together in minutes. This is the kind of brunch that feels like restaurant food, but you can easily make at home.

If you’ve ever been intimidated by hollandaise sauce, this version changes everything.

 What is Eggs Benedict?

Eggs Benedict is a classic brunch dish made with:

  • toasted English muffin
  • Canadian bacon (or ham)
  • poached eggs
  • hollandaise sauce

It’s all about balance: crispy, creamy, rich, and bright from lemony hollandaise.


Things to know about this Eggs Benedict Recipe with Blender Hollandaise | Easy Restaurant Style

How to Assemble Eggs Benedict

  1. Toast English muffins until golden.
  2. Warm or lightly crisp Canadian bacon.
  3. Poach eggs until whites are set but yolks are soft.
  4. Layer: muffin → bacon → poached egg.
  5. Spoon over warm hollandaise sauce.
  6. Serve immediately.

Pro Tips (this is what makes it rank + feel premium)

  • Butter must be hot for proper emulsification
  • Add butter slowly to prevent splitting
  • Use fresh eggs for best poaching results
  • Hollandaise is best served immediately
  • 🍽️ Why This Version Works

    This is the same hollandaise we use in our diner kitchen—fast, consistent, and rich every time. The blender method removes the guesswork but keeps all the classic flavor.

  • If you loved this Eggs Benedict, don’t stop at brunch 🤍
    Try our Italian Breakfast Cookies (Biscotti da Colazione) for something lightly sweet to pair with your coffee, or treat yourself to our Ciambelle Italian unfilled Donuts  for a true bakery-style morning.


Eggs Benedict Recipe with Blender Hollandaise | Easy Restaurant Style

Easy Eggs Benedict recipe made diner-style with quick blender hollandaise sauce. Rich, creamy, and perfect for brunch at home.

  • 2 English muffins (split and toasted)
  • 4 slices Canadian bacon or ham (for the eggs benedict)
  • 4 large eggs (for the eggs benedict)
  • water for poaching (for the eggs benedict)
  • 1 Tbsp vinegar or lemon juice (for the eggs benedict)
  • 1 Stick butter (For the Blender Hollandaise:)
  • 3 egg yolks (For the Blender Hollandaise:)
  • 1 Tbsp lemon juice (For the Blender Hollandaise:)
  • 2 tsp. Dijon mustard (For the Blender Hollandaise:)
  • Pinch of salt (For the Blender Hollandaise:)
  • Optional: pinch of cayenne pepper (for serving)
  1. Start by making the hollandaise so it’s ready to go. Melt the butter until fully liquid and hot. In a blender, combine egg yolks, lemon juice, Dijon mustard, and salt. Blend for about 10–15 seconds until the mixture becomes slightly thick and pale. With the blender running on low, slowly drizzle in the hot melted butter in a thin stream until the sauce becomes thick, smooth, and creamy. Taste and adjust seasoning if needed. Keep warm

  2. For the poached eggs, bring a pot of water to a gentle simmer (not boiling). Add vinegar if using. Crack each egg into a small bowl first. Stir the water to create a gentle whirlpool, then carefully slide the egg into the center. Cook for about 3–4 minutes until the whites are set but the yolk remains soft. Remove with a slotted spoon and drain.

  3. While the eggs are poaching, warm the Canadian bacon in a pan until lightly browned and heat the English muffins until golden and crisp.

  4. To assemble, place the warm bacon on each toasted and buttered muffin half, top with a poached egg, and spoon generously with warm blender hollandaise sauce. Serve immediately.

💡 Chef Notes

  • Butter must be hot to properly emulsify the hollandaise
  • Fresh eggs give the best poached shape and texture
  • Hollandaise is best served immediately—do not reheat
  • Vinegar helps stabilize poached eggs but is optional
Breakfast
Italian
Hollandaise, eggs, benedict, breakfast, brunch


Italian Lemon Jam (Marmellata di Limoni)

Italian Lemon Jam (Marmellata di Limoni)This post may contain affiliate links, that help support this blog. If you make a purchase through these links, I may earn a commission—at no cost to you. For more information read my disclosure policy.

Bright, sweet, and slightly bitter in the best way, Marmellata di Limoni is a classic preserve made throughout southern Italy where lemons grow in abundance. In regions like the sun-soaked Amalfi Coast and across Sicily, families have long turned their extra citrus into homemade marmellata, preserving the flavor of the harvest to enjoy throughout the year. Unlike many jams, Italian lemon marmalade traditionally uses the whole fruit—peel and all—which gives it its signature balance of sweetness and gentle bitterness.

Making lemon jam at home is a simple, old-world process: fresh lemons are sliced thin, simmered slowly, and cooked with sugar until thick and glossy. The natural pectin in the citrus peel helps the jam set beautifully without any added pectin. Spread it over toasted bread, spoon it onto fresh ricotta, or tuck it into a buttery crostata—this bright Italian preserve brings a little taste of sunshine to any table.


Things to know about this Italian Lemon Jam (Marmellata di Limoni)

Making Marmellata di Limoni is simple, but a few traditional tips will help you get the best flavor and texture.

Tips for the Best Lemon Jam

  • Use unwaxed lemons if possible. Since the peel is used, organic or unwaxed lemons give the cleanest flavor.

  • Slice the lemons very thin. Thin slices help the peel soften faster and create a smoother jam texture. Use a sharp knife or mandolin

  • Remove the seeds. Lemon seeds can make the jam slightly bitter, though they do contain natural pectin.

  • Don’t rush the simmer. Cooking the lemons slowly helps soften the peel and release the natural pectin that thickens the jam.

  • Test before stopping the cook time. Use the cold plate test—if the jam wrinkles when pushed, it’s ready.

  • Jam thickens as it cools. It may seem loose in the pot but will set more once cooled.

Storage

  • Refrigerator: Store sealed jars in the refrigerator for up to 3–4 weeks.

  • Freezer: Lemon jam freezes well for up to 6 months. Leave a little space at the top of the container for expansion.

  • Canned (water bath): If properly sealed using a water-bath method, jars can last up to 1 year in a cool pantry.

How to Use It

This bright citrus jam is delicious:

  • spread on toast or biscuits

  • layered in a crostata

  • spooned over ricotta or yogurt

  • paired with soft cheeses for a sweet contrast

Homemade lemon jam captures the bright flavor of fresh lemons and is a wonderful way to preserve a big citrus harvest. 🍋

Ways to Use Italian Lemon Jam

This bright citrus preserve is incredibly versatile. Try it:

Homemade lemon jam is a beautiful way to preserve fresh lemons and bring a bright citrus flavor to many classic Italian recipes.


Italian Lemon Jam (Marmellata di Limoni)

Bright and citrusy Italian lemon jam (marmellata di limoni) made with fresh lemons, sugar, and water. A traditional homemade preserve perfect for toast, crostata, yogurt, or cheese boards.

  • 2 lbs. lemons (about 8-10 lemons)
  • 4 cups water
  • 3 cups sugar
  1. Wash the lemons well Since you’ll use the peel, scrub them thoroughly.

  2. Slice the lemons Cut them in half, remove the seeds, then slice very thin (peel and all).

  3. Soak overnight Place the sliced lemons in a bowl with the water. Cover and let sit 12–24 hours. This softens the peel and reduces bitterness.

  4. Cook the lemons Pour the lemons and soaking water into a pot. Bring to a boil, then simmer 25–30 minutes until the peel is very soft.

  5. Add the sugar Stir in the sugar and cook over medium heat 30–40 minutes, stirring occasionally, until thick and jammy..

  6. Test for doneness Place a small spoonful on a cold plate. If it wrinkles when pushed, it’s ready.

  7. Jar the jam Pour into sterilized jars and seal.

  8. Flavor tip: If you want a smoother jam, you can pulse part of it briefly with an immersion blender before jarring.

Appetizer
Italian


How to make Homemade Beef Bone Broth

How to make Homemade Beef Bone Broth

If there’s one thing every home cook should have in their kitchen, it’s a pot of homemade beef bone broth quietly simmering away. This is the kind of old‑school cooking that builds flavor from the ground up—deep, savory, and packed with goodness. Whether you sip it straight from a mug or use it as the base for soups, risotto, or sauces, homemade bone broth is a total game‑changer.

Why Make Beef Bone Broth at Home?

Sure, you can buy broth at the store—but homemade beef bone broth has:

  • Far better flavor (rich, meaty, and deeply savory)
  • Natural gelatin from slow‑simmered bones
  • No additives or preservatives
  • Better value—you get multiple quarts for the price of bones

This is the same kind of broth our grandmothers made: simple ingredients, slow cooking, and patience.

Things to know about this Beef Bone Broth recipe

  • A properly made bone broth will gel when cold—that’s a good thing.
  • Don’t let the broth boil aggressively; a gentle simmer keeps it clear and clean‑tasting.
  • You can reuse the bones once more for a lighter second batch.

How to Use Beef Bone Broth

  • Soup bases (vegetable, beef, or noodle soups)
  • Risotto or polenta instead of water
  • Braising meats
  • Sipping warm with a pinch of salt
  • Sauces and gravies
  • Storage

    • Refrigerator: up to 5 days in an airtight container
    • Freezer: up to 6 months (freeze in quart containers or silicone molds)
    • If you loved this homemade beef bone broth, here are a few ways to put it to work:
      • Use it as the base for my Italian Meatball Sauce
      • Swap it in for water in Polenta for extra depth
      • Build cozy bowls of Vegetable or Beef Soup
      • Freeze it and keep it on hand for weeknight cooking

    Final Thoughts

    Making beef bone broth this way is simple, intentional cooking—searing everything together, keeping the vegetables whole, and letting time do the work. The result is a clean, deeply flavored broth you can use across your kitchen all week.

Ingredients

  • 4–5 pounds beef bones (a mix of marrow bones, knuckle bones, and meaty bones is ideal)
  • 1 beef shank
  • 2 tablespoons olive oil
  • 1 whole onions, peeled
  • 2 whole carrots, peeled
  • 2 whole celery stalks
  • 4 cloves garlic 
  • 2 bay leaves
  • 1 teaspoon black peppercorns
  • Water, enough to cover
  • 1/3 cup apple cider vinegar
  • Salt to taste

Instructions

1. Sear the Meat

Heat olive oil in a large stock pot or Dutch oven over medium-high heat. Season the beef shank and any meaty bones lightly with salt. Add all the meat to the pot together and sear until deeply browned on all sides. Work in batches only if needed to avoid crowding.

This step builds the foundation of flavor directly in the pot—no roasting required.

2. Add the Aromatics

Add onions, carrots, celery, garlic, bay leaves, and peppercorns.

3. Add Water & Vinegar

Cover everything with cold water (about 12–14 cups). Stir in the apple cider vinegar—this helps extract collagen and minerals from the bones.

4. Simmer Low and Slow

Bring the pot just to a gentle boil, then immediately reduce to a low simmer. Skim off any foam that rises to the top during the first 30 minutes.

Simmer covered for 2 1/2 -3 hours

Add more water if needed to keep the bones submerged.

5. Strain the Broth

Remove the bones and vegetables. Strain the broth through a fine‑mesh sieve into a large bowl or container.

6. Cool & Store

Let the broth cool completely. Refrigerate overnight, then skim off any hardened fat from the top (save it for cooking—it’s gold).


The Ultimate Thanksgiving Dinner Guide

The Ultimate Thanksgiving Dinner Guide

We don’t celebrate Thanksgiving in Italy — at least, not in the traditional American sense. But we do celebrate the same spirit behind it: gathering with family, sharing food made from the heart, and being grateful for the simple joys of life. In Italy, that feeling comes alive during big Sunday lunches or holiday feasts — long meals that stretch into the afternoon, filled with laughter, stories, and too many delicious dishes to count.

When I moved to America, I instantly fell in love with Thanksgiving. It reminded me so much of those Italian family gatherings — the warmth, the noise, the joy of being together around a table overflowing with food. Over the years, I’ve blended a little bit of both worlds into my celebration: classic Thanksgiving dishes with touches of Italian flavor and comfort.

Whether you’re hosting for the first time or a seasoned cook looking to freshen up your holiday menu, this guide brings together my favorite recipes from the blog — from a perfectly roasted holiday turkey and cozy Italian-style soup, to flavorful side dishes that make the meal unforgettable. My goal is to help you create a Thanksgiving dinner that feels joyful, comforting, and wonderfully stress-free — the kind that leaves you with time to savor every bite and every moment.

Thanksgiving Planning 101

A stress-free Thanksgiving starts with a little planning. The secret? Do as much as you can ahead of time. I like to make my shopping list a week before and start prepping small things early — chopping herbs, mixing pie dough, or even setting the table the night before.

Here’s a simple plan to follow:

  • 1 Week Before: Finalize your menu and grocery list.

  • 3 Days Before:  If using a frozen turkey, set in the fridge to thaw. Prep vegetables, bake desserts, and make cranberry sauce.

  • 1 Day Before: Brine or season the turkey, assemble casseroles, and set the table.

  • Thanksgiving Day: Roast the turkey, warm the sides, and savor every moment.

    • Tip: Use large sheet pans or trays to organize ingredients for each dish — it keeps your prep area tidy and makes cooking so much smoother.

    • Defrosting Turkey

      How to Defrost a Turkey
      If you’re using a frozen turkey, be sure to give yourself plenty of time to thaw it safely in the refrigerator. The rule of thumb is 24 hours of thawing for every 4–5 pounds of turkey. Place the wrapped turkey on a rimmed baking sheet to catch any drips, and let it slowly defrost in the coldest part of your fridge. A large bird can take several days, so plan ahead — starting the thaw early is one of the biggest stress-savers of Thanksgiving week.

The Star of the Show — The Turkey

Every Thanksgiving table begins with the turkey, and my Best Holiday Turkey recipe is one I look forward to making each year. Roasted with garlic, herbs, and plenty of butter, it’s juicy, tender, and full of flavor.

Even though turkey isn’t something we often cooked in Italy, I’ve come to appreciate how it brings everyone together in the same way a big Italian roast might. The aroma fills the kitchen, the golden skin crackles as it roasts, and everyone hovers around waiting for that first slice.

  • Turkey Roasting Time and Temperature Guide

    Oven Temperature:

    • Roast at 325°F (165°C) — the perfect balance for even cooking and a juicy bird.

    Cook Time per Pound (Unstuffed Turkey):

    • 15–17 minutes per pound at 325°F

    Cook Time per Pound (Stuffed Turkey):

    • 16–18 minutes per pound at 325°F

    Example:

    • 12-lb unstuffed turkey → about 3 to 3.5 hours

    • 16-lb unstuffed turkey → about 4 to 4.5 hours

Pro Tips:

  • Let the turkey rest for at least 30 minutes before carving.

  • Always use a meat thermometer (165°F for the breast, 175°F for the thigh).

  • Save the carcass — it makes the most comforting broth for soup the next day.

Holiday Soup to Start the Meal

  • Before the main feast begins, I love starting with something warm and cozy. My Italian Holiday Chicken Soup is light but flavorful ,

    It reminds me of the simple soups my mother used to make in Italy before a big meal — meant to prepare your appetite and warm your heart. The best part? It can be made a day in advance and reheated just before serving, so it’s one less thing to worry about on Thanksgiving Day.

  • Get the recipe: Italian Holiday Chicken Soup

  • Favorite Thanksgiving Side Dishes

    No Thanksgiving table is complete without an array of sides — and in my kitchen, they often take center stage. I like mixing traditional favorites with Italian-inspired twists that bring a little Mediterranean flair to the holiday table.

    Try some of these delicious sides from the blog:

    • Savory Sausage and Mushroom Stuffing – hearty, rich, and full of flavor.

    • chicken apple stuffing – sweet, savory and full of fall flavors.

    • Easy Savory Mushroom Gravy – the perfect topping for turkey or mashed potatoes.

    • Balsamic glazed Brussel sprouts  quick, easy, and irresistible stovetop side dish that comes together in just minutes.

    • Easy homemade cranberry sauce You won’t believe how quick this Easy  Cranberry Sauce comes together.  It takes just minutes to make, and taste  better than store bought.
    • Parmesan scallop mashed potatoes There is something about mashed potatoes that just says Thanksgiving. And when you take that classic and add parmesan cheese it’s Italian!!
    • Sweet Endings — Desserts

      After the feast, dessert is where the celebration continues. Whether you’re a pumpkin pie traditionalist or love something a little different, these desserts bring warmth and a touch of sweetness to end the meal.

      Favorite desserts from my kitchen:

      Hosting Tips & Timeline

      A smooth Thanksgiving is all about timing and ambiance. I like to set my table the night before — candles, linens, serving pieces all ready — so I can focus on cooking and enjoying the day.

      Hosting checklist:

      • Create a serving plan (decide which dish goes in which pan or bowl). serving bowls

      • Warm your plates before serving set in the oven after removing the turkey and turning the oven off.  — it keeps the food hotter longer.

      • Set out appetizers and drinks early so guests can mingle while you finish cooking.

      • Keep a small pot of simmering citrus and herbs on the stove — it fills the house with the most wonderful scent.

      • Leftovers Reinvented

        If you ask me, the day after Thanksgiving might be even better than the holiday itself. Leftovers turn into comforting meals that carry the celebration into the weekend.

        Try these ideas:

        Tip: Store leftovers in clear containers so you can easily see what you have. It helps reduce waste and makes meal planning simple.

      • Thanksgiving might not be an Italian tradition, but its heart — gathering together in gratitude — feels beautifully familiar. It reminds me of home, of family tables overflowing with love, laughter, and food made with care.

        Whether your meal is big or small, traditional or a little Italian-inspired, I hope this guide helps you create a holiday that’s full of warmth, flavor, and joyful memories.


Squash Varieties + Easy Cooking Ideas

Squash Varieties + Easy Cooking Ideas

Every fall, I look forward to squash season. Growing up, it was a staple at the market, and even now I can’t resist filling my basket with all the different shapes and colors. Each variety has its own personality—some sweet and creamy, others nutty and hearty—and they all find their way into comforting dishes in my kitchen. From soups and pastas to stuffed squash dinners, these vegetables bring warmth to the table.

Why Squash is So Special

Squash is more than just pretty on the counter—it’s wholesome, versatile, and naturally comforting. Packed with fiber, vitamins, and antioxidants, it’s a vegetable that feels indulgent while being nourishing. And I love how it works in both savory dishes (like roasted squash with herbs or creamy risottos) and sweet recipes (cakes, muffins, even cookies).

Things to know about Squash Varieties + Easy Cooking Ideas

Common Types of Squash

  • Butternut Squash 
    Sweet, creamy, and one of the most popular varieties. Perfect for soups, roasting, or blending into a pasta sauce.

  • Acorn Squash 
    Mild and nutty with a tender texture. Its natural “bowl” shape makes it perfect for stuffing with sausage, rice, or grains.

  • Delicata Squash 
    Quick-cooking with edible skin, slightly sweet flavor, and beautiful striped skin. Great roasted in slices or tossed into salads.

  • Spaghetti Squash 
    Once baked, its flesh turns into golden strands that mimic pasta. A fun and lighter way to serve saucy dishes.

  • Easy Ways to Cook Squash

    • Roast with olive oil, garlic, and fresh herbs.

    • Stuff with sausage, rice, or seasonal vegetables.

    • Puree into soups, sauces, or risottos.

    • Toss into pasta or gnocchi.

    • Bake into breads, muffins, or cakes.

    • How to pick: Look for squash that feels heavy for its size, with firm skin and no soft spots.

    • Storage: Whole squash keeps well on the counter for 1–2 months. Once cut, store in the fridge and use within a week. Cooked squash can be frozen for up to 3 months.

    • Peeling tip: Microwave a whole squash for 2–3 minutes before peeling—it softens the skin and makes it easier to handle.

    • A Cozy Recipe to Try: Creamy Butternut Squash Pasta with Italian Sausage

      Now that we’ve explored the different types of squash and how versatile they can be, I wanted to share one of my favorite ways to enjoy butternut squash in the fall. It turns into the creamiest pasta sauce, and when paired with Italian sausage, it becomes the kind of hearty, comforting meal everyone loves.

    • If you’re ready to start cooking with squash, I’ve got a few more cozy recipes to get you inspired. My Italian sausage & spinach butternut squash stuffed  Roasted Butternut Squash Gnocch 

Creamy Butternut Squash Pasta with Italian sausage

Ingredients

  • 1 medium butternut squash (about 2 ½–3 lbs), peeled, seeded, and cubed

  • 3 tbsp olive oil, divided

  • Salt and black pepper, to taste

  • ½ tsp crushed red pepper flakes (optional)

  • 1 lb Italian sausage (mild or spicy), casings removed

  • 1 small onion, finely chopped

  • 3 garlic cloves, minced

  • ½ cup chicken broth (or vegetable broth)

  • ½ cup heavy cream

  • ½ cup grated Parmesan cheese

  • 12 oz short pasta (rigatoni, penne, or orecchiette work well)

  • Fresh sage or parsley, for garnish

Instructions

    1. Roast the Squash: Preheat oven to 400°F (200°C). Toss cubed butternut squash with 2 tbsp olive oil, salt, pepper, and crushed red pepper flakes. Spread on a baking sheet and roast for 25–30 minutes, until tender and caramelized.

    2. Cook the Pasta: While the squash roasts, bring a large pot of salted water to a boil. Cook pasta according to package directions until al dente. Reserve 1 cup pasta water, then drain.

    3. Cook the Sausage: In a large skillet, heat 1 tbsp olive oil over medium heat. Add Italian sausage, breaking it apart with a spoon, and cook until browned and cooked through. Remove sausage from the pan and set aside.

    4. Make the Sauce: In the same skillet, add onion and sauté until softened, about 5 minutes. Stir in garlic and cook 1 minute more. Add roasted squash and broth. Simmer for 3–4 minutes, then blend (with an immersion blender or carefully in a regular blender) until smooth and creamy. Stir in the heavy cream and Parmesan.

    5. Combine Everything: Return the sausage to the skillet. Add cooked pasta and toss, adding reserved pasta water as needed for a silky sauce.

    6. Serve: Garnish with fresh sage or parsley, extra Parmesan, and a drizzle of good olive oil. Serve warm.

    Storage

    Leftovers keep well in the fridge for 3 days. Reheat gently with a splash of broth or cream to loosen the sauce.


Italian Cod Puttanesca Recipe

Italian Cod Puttanesca Recipe

Cod Puttanesca is a delicious twist on the classic Italian pasta sauce known as sugo alla puttanesca. This bold, savory sauce originated in Naples in the mid-20th century and is famous for its briny mix of olives, capers, garlic, and anchovies simmered in tomatoes. Some say it was invented by resourceful cooks who threw together whatever pantry staples they had on hand, while others believe its name comes from the lively neighborhoods where it first became popular. Traditionally served with pasta, this rustic sauce also pairs beautifully with fresh fish. In this recipe, delicate cod fillets are gently simmered in puttanesca sauce, creating a light yet hearty meal that’s full of authentic Italian flavor.

Things to know about Italian Cod Puttanesca Recipe

  • Cod cooks quickly: Unlike salmon, cod is delicate and only needs a few minutes to finish in the sauce. Overcooking will make it dry.

  • Anchovies add depth: Even if you’re not an anchovy fan, they melt into the sauce and give it an authentic, savory flavor.

  • Best tomatoes to use: Whole San Marzano or high-quality canned tomatoes give the richest flavor.

  • Make it ahead: The puttanesca sauce can be made a day in advance; just add the cod when ready to serve.

More Recipes You’ll Love

If you enjoyed this Cod Puttanesca, try some of my other Italian favorites:

  • Serving ideas: Pair with crusty bread, spoon over pasta or orzo, or keep it light with a side of roasted vegetables.

Italian Cod Puttanesca Recipe

  • Serving Size: 4 servings

  • Cook Time: 25 minutes

Ingredients

  • 4 cod fillets (about 6 oz each, skinless)

  • 3 tbsp olive oil, divided

  • 3 garlic cloves, thinly sliced

  • 1 small onion, finely chopped

  • 1 can (28 oz) whole peeled tomatoes, crushed by hand

  • 1/2 cup pitted Kalamata olives, halved

  • 2 tbsp capers, rinsed

  • 4–5 anchovy fillets, chopped (optional but traditional)

  • 1 tsp red pepper flakes (adjust to taste)

  • 1/2 cup dry white wine (optional, for deglazing)

  • Fresh parsley, chopped (for garnish)

  • Salt and freshly ground black pepper, to taste

Instructions

  1. Prepare the cod

    • Pat cod fillets dry and season lightly with salt and pepper.

    • Heat 2 tbsp olive oil in a large skillet over medium-high heat.

    • Sear cod on each side for about 2–3 minutes, until golden. Remove to a plate (it will finish cooking in the sauce).

  2. Make the sauce

    • In the same skillet, add remaining 1 tbsp olive oil.

    • Sauté garlic and onion until fragrant and softened, about 3 minutes.

    • Add anchovies (if using) and cook until they melt into the oil.

    • Stir in red pepper flakes, capers, and olives. Cook 1–2 minutes.

    • Deglaze with white wine (optional), scraping up any browned bits.

    • Add crushed tomatoes, stir, and simmer uncovered for about 10 minutes until slightly thickened.

    • Finish with the cod

      • Nestle the cod fillets into the sauce.

      • Spoon some sauce over the top, reduce heat to low, and cover.

      • Cook 5–7 minutes, until cod is opaque and flakes easily with a fork.

    • Serve

      • Garnish with fresh parsley.

      • Serve with crusty bread, pasta, or over a bed of orzo to soak up the sauce.


Italian Braciole in Tomato Sauce

 Italian Braciole in Tomato Sauce

The first day of September always feels like the true start of my fall cooking. The air turns a little cooler, and I naturally begin to crave those cozy Italian dishes that remind me of home.

When I was growing up, Sundays meant sauce simmering on the stove. My mom usually made it with meatballs, ribs, sausage — or sometimes all three. But every once in a while, she added braciole, and that made the meal extra special. She would pound slices of beef thin, fill them with cheese, herbs, and breadcrumbs, then roll them up tightly. After slowly cooking in the sauce until tender, they became the kind of dish that felt like a celebration.

For me, braciole will always mark the beginning of hearty, comforting meals — perfect for the cooler season ahead.

Things to Know About Italian Braciole

What is Braciole?
Braciole (pronounced brah-cho-lee) is a classic Italian dish made with thin slices of beef rolled around a savory filling, then simmered slowly in tomato sauce until tender. Once cooked, the rolls are sliced and served with the rich sauce over pasta or alongside crusty bread.

Regional Variations
Every Italian family makes braciole a little differently. In Southern Italy, you’ll often find fillings with raisins and pine nuts for a sweet-and-savory touch. In other regions, it’s kept simple with just breadcrumbs, garlic, parsley, and cheese. Some families also prepare braciole with pork or veal instead of beef.

Cooking Low and Slow
The key to tender braciole is patience. The beef needs time to soften as it gently simmers in the sauce, soaking up all that flavor. A heavy pot or Dutch oven works best for even cooking.

Perfect for Sunday Dinner
Braciole has always been considered a special occasion dish, often reserved for Sunday dinners or holidays. Making it on the first cool days of fall captures that same cozy sense of comfort and tradition.

Make-Ahead Friendly
Like many Italian dishes, braciole tastes even better the next day after the flavors have had time to meld. It’s the perfect make-ahead meal — impressive for guests yet easy to reheat and serve

Servings: 4
Cook Time: About 2 hours (hands-on 30 minutes)

Ingredients

For the Braciole:

  • 4-6 thin slices beef top round (about 6–8 ounces each, pounded to ¼-inch thickness)

  • 1/2 cup grated Parmesan or Pecorino Romano

  • ½ cup breadcrumbs (preferably Italian seasoned)

  • 2 garlic cloves, finely minced

  • 1/2 cup fresh parsley, chopped

  • 2 tablespoons pine nuts (optional, but traditional in many regions)

  • Salt & freshly ground black pepper
  • Olive oil, for searing

  • Butcher’s twine or toothpicks for tying

For the Sauce:

  • 3 tablespoons olive oil

  • 1 small onion, finely chopped

  • 2 garlic cloves, minced

  • 1/2 cup chopped parsley
  • 1 can (28 ounces) crushed tomatoes

  • 1 can 14 ounces tomato sauce
  • ½ cup red wine

  • 1 teaspoon dried oregano (or 2 teaspoons fresh)

  • ½ teaspoon red pepper flakes (optional)

  • 1 bay leaf

  • Salt & pepper to taste

  • Fresh basil, for finishing

Instructions

  1. Prepare the filling – In a small bowl, combine breadcrumbs, Parmesan, garlic, parsley, and pine nuts. Season lightly with salt and pepper.

  2. Assemble the rolls – Lay each beef slice flat. cover with plastic wrap and pound thin divide  the filling evenly in the center of each slice. Roll the beef tightly into a log and secure with twine or toothpicks.

  3. Brown the braciole – Heat olive oil in a large heavy pot or Dutch oven over medium-high heat. Sear the beef rolls on all sides until browned, 6–8 minutes. Transfer to a plate.

  4. Make the sauce – In the same pot, add more olive oil if needed. Sauté onion until soft, about 5 minutes, then stir in garlic and parsley. Deglaze with red wine, scraping up any browned bits. Add crushed tomatoes and the sauce,  oregano, red pepper flakes, bay leaf, salt, and pepper. and stir well, Simmer covered for 1 hour

  5.  Return the braciole to the pot, nestling them into the sauce. Cover with a lid and simmer gently on low for about 1 hour, or until the beef is tender. Stir occasionally and add a splash of water if sauce thickens too much.

  6. Serve – Remove the twine or toothpicks, slice the braciole into rounds, and serve topped with sauce. Garnish with fresh basil and more grated cheese.

  7.  More Serving Suggestions for Braciole

    • Over Pasta – Toss the rich tomato sauce with spaghetti, rigatoni, or ziti, then serve the sliced braciole on top.

    • With Polenta – Creamy polenta is a classic Italian pairing that soaks up all the delicious sauce.

    • Crusty Bread – A warm loaf is a must for dipping into the sauce.

    • Vegetable Sides – Pair with roasted broccoli, garlicky green beans, or a simple side salad for balance.

    • Wine Pairing – A medium-bodied red like Chianti or Montepulciano complements the richness perfectly.


Pork Medallions Marsala with Mushrooms

Pork Medallions Marsala with Mushrooms

When the weather turns crisp, I crave meals that feel rustic yet refined. Pork Medallions Marsala is one of those dishes that instantly brings me back to my restaurant days. It was a customer favorite on our fall menu — tender rounds of pork seared until golden, then simmered in a silky Marsala wine sauce with mushrooms.

The dish had just the right balance of comfort and elegance, which made it perfect for both a weeknight dinner and a special occasion. I remember guests telling us it felt like something you’d order in a little Italian trattoria, yet it came together so simply in our kitchen.

Now, I make it at home for my family. The earthy mushrooms, sweet Marsala, and tender pork remind me of those busy fall nights at the restaurant, when the dining room was full and this dish was always on repeat. It’s still just as cozy, comforting, and elegant — but now it’s a recipe you can bring to your own table.

Restaurant Memory
This dish first appeared on our fall menu when the cooler evenings started calling for something heartier. We wanted a dish that felt warm and comforting, yet still had a touch of elegance — something our guests could enjoy with a glass of red wine. Pork Medallions Marsala checked every box.

I still remember how quickly it became a customer favorite. Tables would order it again and again, sometimes even requesting extra sauce to soak up with bread. For me, it was always a joy to watch a recipe created in our kitchen turn into a signature dish that brought people back. Today, I love recreating that same feeling at home.

Things to know about this Pork Medallions Marsala with Mushrooms

You said:
  •   Marsala Wine Choices – Sweet Marsala gives the sauce a richer, caramelized flavor, while dry Marsala leans more savory. Both work — it’s simply personal preference.
  • No Marsala? – If you can’t find Marsala wine, a dry sherry or Madeira makes a good substitute. Even a dry white wine with a splash of brandy works in a pinch.

  • The Right Cut – Pork tenderloin is best here since it stays juicy and tender when sliced into medallions. Pork loin can work, but may need a slightly longer cooking time.

  • Don’t Overcook the Pork – Pork is perfectly done at 145°F with a slight blush in the center. Overcooking will make the medallions tough.

  • Mushroom Options – Cremini, button, or baby bella mushrooms are classic, but feel free to try wild mushrooms for deeper flavor.

  • Make It Creamy (Optional) – Adding a splash of heavy cream gives the sauce a velvety richness, but it’s just as delicious without.

  • What to Serve It With – Mashed potatoes, creamy polenta, or buttered noodles are perfect for soaking up the sauce. For a lighter option, try roasted green beans or a simple arugula salad.

  • Meal Prep Friendly – The sauce reheats beautifully, so you can make it ahead and gently warm before serving.

Ingredients

 Pork Medallions Marsala with Mushrooms

Servings: 4
Prep Time: 15 minutes
Cook Time: 25 minutes
Total Time: 40 minutes

Ingredients

  • 2 pork tenderloins (about 1 ½ lbs total), trimmed and cut into 1-inch medallions

  • Salt and freshly ground black pepper

  • ½ cup all-purpose flour (for dredging)

  • 3 tablespoons olive oil (divided)

  • 2 tablespoons unsalted butter

  • 8 ounces cremini or button mushrooms, sliced

  • 2 cloves garlic, minced

  • 1 cup Marsala wine (sweet or dry)

  • 1 cup chicken stock (low-sodium)

  • ½ cup heavy cream (optional, for a richer sauce)

  • 2 teaspoons fresh thyme or chopped parsley (for garnish)

Instructions

  1. Prep the pork: Slice pork tenderloin into medallions, about 1-inch thick. Season generously with salt and pepper. Lightly dredge in flour, shaking off excess.

  2. Sear: Heat 2 tablespoons olive oil in a large skillet over medium-high. Sear pork medallions in batches, about 2–3 minutes per side, until golden but not fully cooked. Transfer to a plate.

  3. Cook the mushrooms: Add remaining olive oil and butter to the skillet. Sauté mushrooms until browned, about 5–6 minutes. Add garlic and cook 1 minute more.

  4. Deglaze with Marsala: Pour in the Marsala wine, scraping up any browned bits. Let simmer 2 minutes to reduce slightly.

  5. Finish the sauce: Add chicken stock and optional cream. Return pork medallions to the skillet, nestling into the sauce. Simmer gently 5–7 minutes, until pork is cooked through (145°F internal temperature).

  6. Serve: Garnish with thyme or parsley. Serve over mashed potatoes, polenta, or buttered pasta


Salmon alla Puttanesca – Rustic Italian Salmon

Salmon alla Puttanesca – Rustic Italian Salmon

When I think of bold Italian flavors, puttanesca sauce immediately comes to mind. In our restaurant, we loved taking this rustic southern Italian classic and pairing it with tender salmon fillets for something a little different from the usual pasta. The briny olives, salty capers, and anchovies simmer into a rich tomato sauce that clings beautifully to the fish. Served with pasta or just some crusty bread on the side, this Salmon alla Puttanesca always brought the taste of the Mediterranean right to the table — and it’s just as easy to make at home.

Things to know about this Salmon alla Puttanesca – Rustic Italian Salmon

  • Origin of the sauce: Puttanesca sauce comes from southern Italy, most often Naples, and is famous for its bold mix of tomatoes, olives, capers, and anchovies.

  • Quick to make: This dish comes together in about 30 minutes, making it perfect for a weeknight dinner with a restaurant-quality feel.

  • Not overly “fishy”: The anchovies melt into the sauce, adding a savory depth without overpowering the salmon.

  • Flexible serving options: Serve over spaghetti for a classic Italian pairing, or keep it lighter with roasted vegetables or crusty bread.

  • Fresh or pantry-friendly: The sauce relies on pantry staples like canned tomatoes, capers, and olives, so you can whip it up anytime.

  • Restaurant-style at home: We used to serve this in the restaurant, and it was always a favorite because it’s elegant, flavorful, and satisfying without being fussy.

  • If you love Italian salmon recipes, don’t miss my quick and easy creamy Salmon Piccata — a lighter, lemony dish that’s just as easy and full of flavor! or salmon spiedini tender, flavorful salmon skewers with a hint of lemon and herbs, perfect for a simple weeknight dinner or a summer grill!

Ingredients

Prep Time: 10 minutes
 Cook Time: 20 minutes
 Servings: 4

  • 4 salmon fillets (about 6 oz each, skin on or off)

  • 3 tbsp olive oil, divided

  • 3 garlic cloves, thinly sliced

  • 1 tsp red pepper flakes (optional, for heat)

  • 1 can (14 oz) crushed tomatoes

  • ½ cup Kalamata olives, pitted and halved

  • 2 tbsp capers

  • 4 anchovy fillets (or 1 tsp anchovy paste)

  • 1 tsp dried oregano

  • 1 cup cherry tomatoes, halved (optional for freshness)

  • 1 cup white wine
  • Salt and black pepper to taste

  • 2 tbsp fresh parsley, chopped

  • Lemon wedges, for serving

Instructions

  1. Sear the Salmon

    • Pat salmon dry, season with salt and pepper.

    • Heat 2 tbsp olive oil in a large skillet over medium-high heat.

    • Sear salmon skin-side down for 3–4 minutes, then flip and cook another 2–3 minutes until just cooked through. Remove and set aside.

  2. Make the Puttanesca Sauce

    • In the same pan, add remaining 1 tbsp olive oil and garlic. Sauté until fragrant.

    • Stir in red pepper flakes, anchovies, and oregano. Cook until anchovies melt into the oil. deglaze the pan with the wine , waiting until fully evaporated before proceeding.

    • Add crushed tomatoes, olives, capers, and cherry tomatoes. Simmer 10 minutes until sauce thickens slightly. Taste and adjust seasoning.

  3. Finish the Dish

    • Nestle salmon fillets into the sauce and spoon sauce over the top. Simmer gently 2 minutes to warm through.

    • Garnish with parsley and serve with lemon wedges