Classic Italian Meatball Subs
Classic Italian Meatball Subs
There are certain sandwiches that feel like home, and a good meatball sub is one of them. For us, this one goes all the way back to our very first eatery—a true hole-in-the-wall submarine shop where the subs were big, the sauce simmered all day, and nothing was fancy except the flavor.
Those meatball subs were messy, comforting, and unforgettable. They were built with tender meatballs, rich tomato sauce, crusty rolls, and just enough melted cheese to make you lean over the counter when you took that first bite. This recipe is inspired by those early days, when good food and loyal customers were all that mattered.
Things to know about Classic Italian Meatball Subs
- The meatballs are baked first at 375°F for 10–15 minutes to develop a light crust before simmering in sauce. This keeps them tender and flavorful.
- This recipe is all about assembly. The flavor comes from using well-made meatballs and a slow-simmered sauce.
- Toast the rolls lightly. Just enough to create a barrier so the bread doesn’t soak through.
- Don’t overload. A few well-sauced meatballs beat an overstuffed, falling-apart sub.
- Broiler watch. Cheese melts fast—stay close.
-
Storage & Make-Ahead Tips
- Meatballs & Sauce: Store together in an airtight container in the refrigerator for up to 4 days.
- Freezing: Meatballs in sauce freeze beautifully for up to 3 months.
- Reheating: Warm gently on the stovetop or microwave before assembling subs.
- Assembled Subs: Best eaten fresh; store components separately if prepping ahead.
-
Serving Ideas
- Pair with a simple green salad
- Serve with crispy fries or roasted potatoes
- Cut into smaller portions for game day or parties
Final Thoughts
A great meatball sub isn’t fancy—it’s familiar, comforting, and full of love. Whether you’re feeding a crowd or just craving something cozy, this is one of those recipes that never lets you down.
If you make these meatball subs, let me know how you do your meatballs—fried, baked, or straight into the sauce. I love hearing everyone’s version.
Talk more about your recipe here. Make sure you’re not repeating anything you said in the first section.
DO NOT PUT IMAGES IN THIS TEXT BLOCK!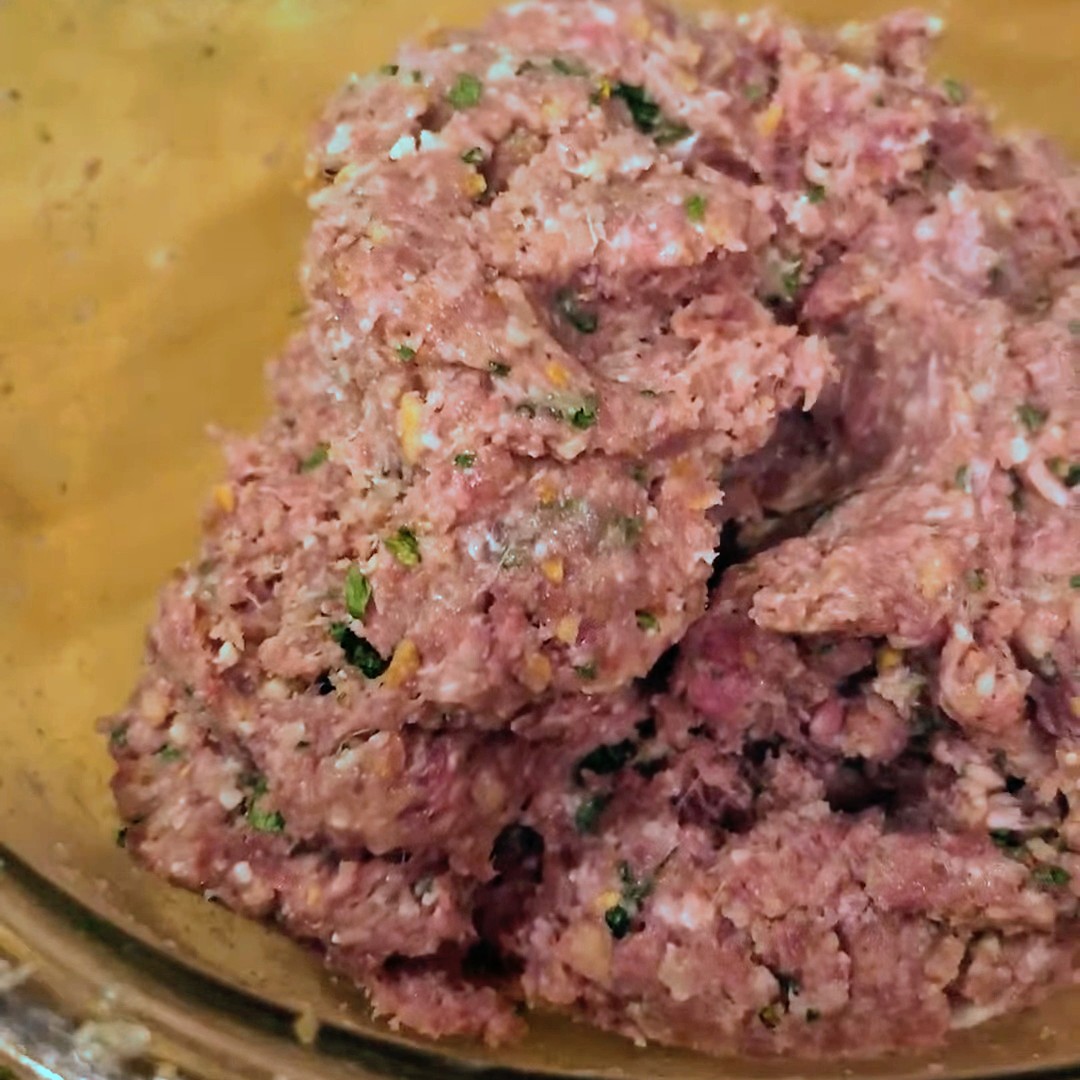
Ingredients
- Instead of repeating recipes you may already know and love, this meatball sub uses our original house meatballs and classic tomato sauce—the same ones we served back in our first submarine shop.
- 👉 Classic Italian Meatballs (link to recipe)
- 👉 Homemade tomato Sauce (link to recipe)
Both recipes can be made ahead and actually taste even better the next day, which is exactly how we did it in the shop.
How to Make Meatball Subs
1. Make the Meatballs
In a large bowl, combine breadcrumbs and milk and let it soak for a minute. Add eggs, garlic, parsley, grated cheese, salt, and pepper. Gently mix in the ground meats until just combined—don’t overwork it. Roll into evenly sized meatballs.
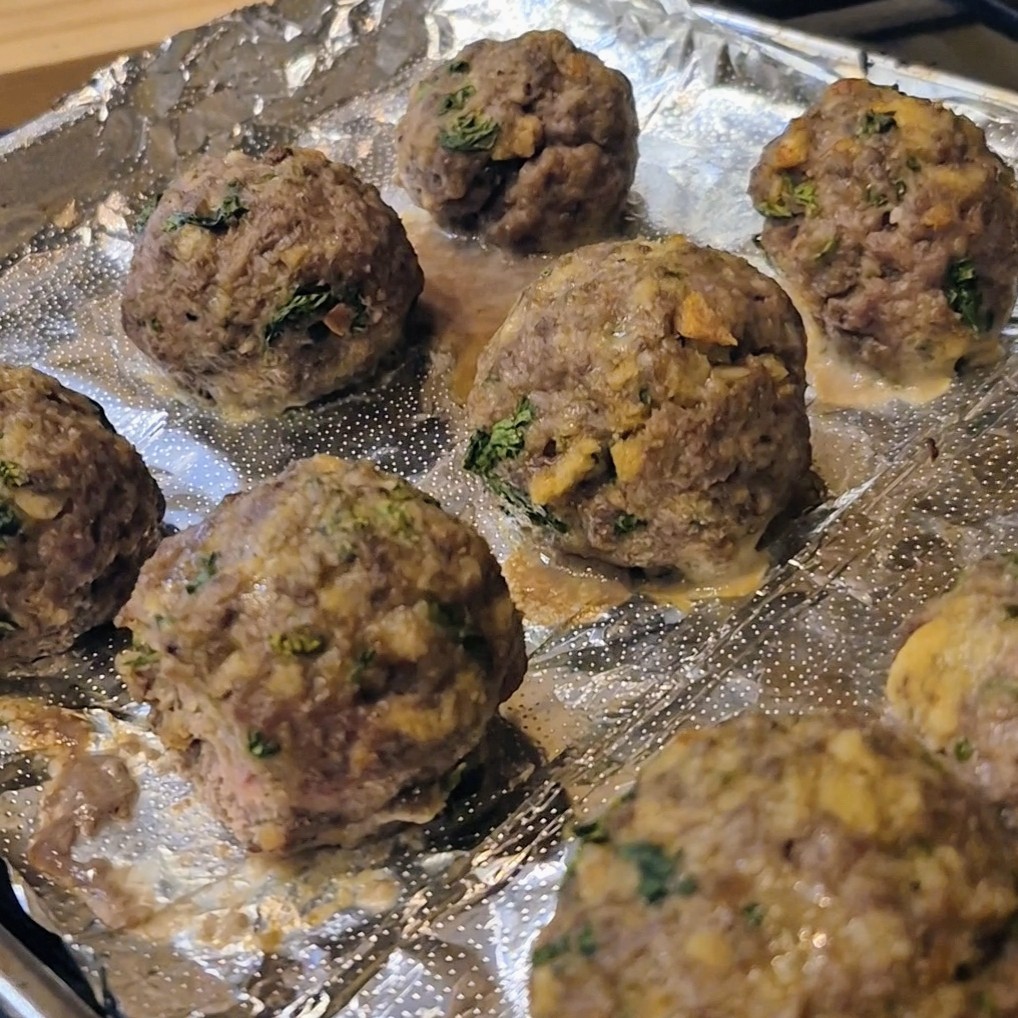
2. Brown the Meatballs
preheat the oven to 375-degrees, bake the meatballs 10 -15 minutes. You’re not cooking them through—just building flavor. set aside while making the sauce.
3. Simmer the Sauce
In the same pan, add olive oil and garlic. Once fragrant, stir in tomato paste, then crushed tomatoes, salt, pepper, and herbs. Nestle the meatballs into the sauce and simmer gently until the meatballs are cooked through and tender. (30- 45 minutes)
4. Build the Subs
Split the rolls and lightly toast if desired. Add meatballs and plenty of sauce, top with sliced cheese, and place under the broiler just until melted and bubbly.
5. Serve
Finish with grated cheese and fresh herbs. Serve hot—napkins required
 In that version we used rib eye steak, provolone cheese, and green bell peppers and severed it on sub rolls.