Italian Broccoli Rabe Pizza
Italian Broccoli Rabe Pizza
This post may contain affiliate links, that help support this blog. If you make a purchase through these links, I may earn a commission—at no cost to you. For more information read my disclosure policy.
In Southern Italy, pizza is often simple. It starts with good dough, olive oil, and what is in season. Italian broccoli rabe pizza (Cime di rapa), is a common topping and is loved for its slightly bitter flavor.
This is the kind of pizza I make at home. After many years working in restaurant kitchens, I learned that Italian cooking does not need a lot of ingredients. It needs balance. For this pizza, Italian sausage adds flavor, while cannellini beans make it hearty without feeling heavy.
Everything is cooked together in one pan before going on the pizza. The result is a rustic, olive oil–based pizza that is simple, comforting, and very Italian.
Things to know about this Italian Broccoli Rabe Pizza
-
Blanching the broccoli rabe matters
A quick blanch removes excess bitterness while keeping its signature flavor intact. -
Everything cooks in one pan
Cooking the garlic, sausage, broccoli rabe, and cannellini beans together allows the flavors to layer naturally—no need to remove ingredients or overcomplicate the process -
Cannellini beans are traditional, not modern
Beans have long been used in Southern Italy to stretch meals and add body. Lightly mashing a few into the pan creates a natural creaminess without sauce.
(If you enjoy beans on pizza, you may also like my Italian Escarole and Beans with Sausage post.) -
Minimal cheese is intentional
This pizza is olive-oil based. If you use cheese, keep it light—just enough to enhance, not dominate.
(For dough texture that works best with oil-based toppings, use my over night Pizza Dough Recipe
Italian Broccoli Rabe Pizza
- 1 lb. 450 g broccoli rabe, trimmed
- 3 tbsp olive oil (plus more for brushing)
- 3 cloves garlic (thinly sliced)
- 1/2 tsp red pepper flakes (optional)
- 6 oz 170 g Italian sausage, casings removed
- ½ cup cannellini beans (drained and rinsed)
- Salt (to taste)
- 12 oz 340 g pizza dough (homemade or store-bought — use my [Pizza Dough Recipe] for best results)
- 2 tbsp grated Pecorino Romano
-
Blanch the Broccoli Rabe
Bring a pot of salted water to a boil.Blanch broccoli rabe 2–3 minutes until bright green.Drain well and gently squeeze out excess water.
-
Build the Topping
Heat olive oil in a skillet over medium heat.Add garlic and red pepper flakes; sauté 30–60 seconds until fragrant.
Add sausage directly to the pan and cook, breaking it up, until browned and cooked through (5–6 minutes).
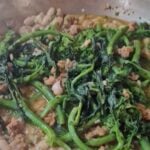
Add broccoli rabe and cannellini beans directly into the same pan.Toss and sauté 2–3 minutes, lightly mashing a few beans so they cream into the oil and sausage fat.Season lightly with salt. Remove from heat.
-
Prepare the Dough
Preheat oven to 500°F (260°C) with a pizza stone or baking sheet inside.Stretch dough into a 12-inch round on parchment paper.Brush lightly with olive oil.
-
Assemble
Evenly distribute the broccoli rabe, sausage, and bean mixture over the dough.Optional: finish with a very light sprinkle of Pecorino Romano.Drizzle with a touch more olive oil.
-
Bake
Slide pizza onto the hot stone or pan.Bake 12–15 minutes, until crust is golden and crisp.Rest 2–3 minutes before slicing.