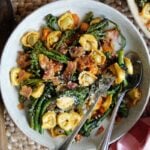
Scallop Orzo Risotto

Scallop Orzo Risotto

This post may contain affiliate links, that help support this blog. If you make a purchase through these links, I may earn a commission—at no cost to you. For more information read my disclosure policy.

When it comes to Pasta, Summer is all about lighter ingredients, vibrant color and just picked freshness.

You’ll find all those flavors in this delicious  Scallops Orzo Risotto  with seared scallops. The beginning of June always makes me crave Pasta salads.

I know that pasta salads are normally a side dish, but add some protein and you have a complete satisfy dinner your whole family will love.

Pasta is my favorite go to when am stuck for a meal idea, it’s so versatile you can keep it simple for easy, quick weeknight family dinners or dress it up for Saturday night dinner with friends.

This toasted,  Scallop Orzo Risotto can be served hot, cold or at room temperature, making it an easy hands free meal, that  can be prepped ahead of time. You need dinner quick, on those busy weeknights, you have unexpected guests coming Pasta to the rescue.

That’s all it takes, adding  seared scallops to this  cold pasta recipe, to make a meal that is cause for celebration. and it can  made ahead of time in less than 30 minutes,but your family and friends will think it took hours

How to Make Scallop Orzo Risotto

Start by  searing the scallops then after removing the scallops toast the orzo in the same pan the scallops were sauteed in. If it needs more oil add 1 tablespoon of oil and 1 tablespoon of butter. Stir the orzo to brown it evenly,

then add all the liquid ingredients, cover the pan and cook the orzo until bite tender, fluff with a fork and refrigerate for a few hours. Mean while make the raw( crudo) sauce dip the scallops in the sauce remove, then mix in the cold orzo pasta.

Plate by laying the scallops over the Orzo, sprinkle with lemon zest, and Italian parsley.

If you make this recipe please leave me a comment and don’t forget to tag me on Instagram. Hearing for you guys is my favorite part, 

Scallop Orzo Risotto

Perfectly seared scallops are served over creamy Parmesan orzo with fresh spinach for an elegant yet comforting meal that's packed with rich, buttery flavor.

  • ½ lb orzo pasta
  • ½ lb large scallops
  • 8 oz chopped spinach
  • 1 pint cherry tomatoes
  • 1 cup parmesan cheese
  • 1 cup chicken stock
  • ⅓ cup fresh lemon juice
  • 2 tbsp lemon zest
  • 1 cup reserved pasta water
  • 2 tbsp each butter and olive oil
  • 3 tbsp chopped garlic
  • ½ yellow onion chopped
  • Salt and pepper to taste
  1. Salt, pepper and pat scallops dry

  2. In a large saute pan on medium heat the butter and olive oil

  3. Saute the scallops until golden brown 3 minutes per side Remove set aside

  4. In the same saute pan add the garlic and onion cook until tender and just beginning to brown

  5. Add the orzo  and brown stirring

  6. Add the chicken stock and reserved pasta water

  7. Simmer covered 10 minutes

  8. Cool completely

  9. In a bowl mix the   spinach, tomatoes  Italian parsley,  lemon zest, lemon juice, and parmesan cheese

  10. Toss cooled orzo with the dressing mixture

  11. Top with seared scallops

  12. Sprinkle with additional Parmesan and Italian parsley


Roasted Vegetable Pasta Salad

Roasted Vegetable Pasta Salad

This post may contain affiliate links, that help support this blog. If you make a purchase through these links, I may earn a commission—at no cost to you. For more information read my disclosure policy.

Memorial day has always been the unofficial start of Summer for me, and Am kicking it off with this roasted vegetable pasta salad.

This Italian pasta salad is full of good for you ingredients and everyone’s favorite one Pasta. It’s no secret I love pasta, I grew up with my mother making fresh pasta almost daily. We lived on a farm in the hills of Tuscany, my mother and father worked the land and we reaped the rewards in the most fresh, delicious food.

I can remember my Mama up before dawn dressed and standing at the counter rolling out the pasta dough on a wooden board my father make for her.

Yes, there’s nothing better then fresh pasta, but if your looking for quick and easy then store bought is the way to go. With thousands of shapes and brands you can find any kind your looking for, from fresh to dry and everything in between. At the restaurants the raviolis, gnocchi and lasagna are made by hand the rest are store bought and delicious.


Make this roasted vegetable pasta salad your own

In this vegetable pesto pasta salad I used fusilli, the funny corkscrew shape pasta. But any shape pasta works in this recipe, even gluten free or whole wheat. What ever pasta you choose be sure not to over cook it .

Stop the cooking process by running cold water over the pasta. This whole recipe is customizable from the pasta shape to what kind of vegetables you use.

I  use what ever vegetables I have on hand in this recipe I put in a can drained chickpeas for crunch. The one thing I wouldn’t change in this recipe is the dressing,

the pesto vinaigrette makes the dish burst with vibrant color and fresh Summer flavors. This pasta salad is prefect for the warmer weather as a side dish or add some grilled shrimp or chicken and you have a prefect dinner any night of the night.

If you make this please leave me a comment and don’t forget to tag me on Instagram hearing from you is my favorite thing. 

Roasted Vegetable Pasta Salad

Roasted vegetables, tender pasta, chickpeas, and Parmesan are tossed with pesto and Italian dressing for a colorful pasta salad that's fresh, flavorful, and perfect for picnics, potlucks, or meal prep.

  • ½ lb fusilli
  • 1 zucchini sliced
  • 1 red and green bell pepper
  • 2 ears of corn
  • 1 can chickpeas drained
  • 1 red onion
  • 3 tbsp chopped garlic
  • 1 cup parmesan cheese
  • 1 cup Italian dressing divided
  • 1 cup prepared pesto sauce my walnut pesto sauce or your favorite store- bought pesto 
  • salt and pepper to taste
  1. Cook pasta according to package direction run under cold water

  2. Preheat oven to 375

  3. Mix Pesto sauce with the Italian dressing

  4. Mix all of the ingredients with 1/2 cup of the Italian pesto dressing

  5. Roast vegetables 20 minutes

  6. Toss pasta and  vegetables with the resevered Italian pesto dressing

  7. Sprinkle with Additional parmesan and 2 tablespoons chopped Italian parsley


30 minute Red Snapper Piccata

30 Minute Red Snapper Piccata

This post may contain affiliate links, that help support this blog. If you make a purchase through these links, I may earn a commission—at no cost to you. For more information read my disclosure policy.

This  30 minute Red Snapper piccata has all the flavors of a traditional piccata with a few add – ins. Traditional piccata is a sauce of lemon, parsley, butter and capers. In this recipeh

It’s a restaurant quality meal, that was on special at the restaurant, whenever the fresh red snapper and garden tomatoes were available.

If you know me I can’t get enough of easy meals that require simple ingredients with minimal prep and clean up, recipes like this one, it comes together in less than 30 minutes, and the best part you only need one pan.

It’s the prefect balance between savory, salty and tangy, flavors that make this fish dinner prefect for weeknight family meals or Friday night dinner with friends.


Things to know about this 30 minute red snapper picatta recipe

In this recipe I used red snapper. I have made it using tilapia and I like them both. You can use any firm white fish you like. Be sure not to over cook it , fish cooks quickly over cooking dry’s it out.

The fish in this recipe took three minutes on each side to cook, then I removed it from the pan while making the tomato piccata sauce. Here too you can adjust the constituency and flavor of the sauce to your liking by how long you cook it.

For a fresher, lighter sauce for warmer weather I only cook it about ten minutes retaining the fresh taste of the lemon and tomatoes.

If am going to reheat the fish for later serve a under cook it just a tat. Another thing I like to do when I make this is add one sliced lemon to the sauce for extra lemon flavor.

Please leave me a comment if you make this recipe and don’t forget to tag me on Instagram, hearing your experiences with my recipes is my favorite part!!! 

30 Minute Red Snapper Piccata

Flaky red snapper is simmered in a bright lemon, tomato, and caper sauce with fresh herbs for a light, elegant dinner that's bursting with fresh Italian flavor.

  • 1 lb red snapper
  • ½ lb cherry tomatoes cut in half
  • 1 cup chicken stock
  • 2 tbsp lemon zest
  • ¼ cup lemon juice
  • ½ cup capers
  • 1 cup chopped spinach
  • 2 anchovies
  • ¼ cup flour
  • 2 tbsp each butter and olive oil
  • 1 tbsp minced garlic
  • ½ cup chopped onion
  • 2 tbsp each chopped Italian parsley,  and basil
  • Salt and pepper to taste
  1. Salt, pepper and lightly coat fish with the 1/4 cup flour

  2. In a large saute pan bring oil and butter to medium high heat

  3. Add fish cook 3 to 4 minutes per side

  4. Remove fish

  5. Add onions and garlic cook until tender and just beginning to brown

  6. Add tomatoes cook covered 10 minutes

  7. Add spinach and herbs cook 5 minutes longer

  8. Return Red Snapper to pan just to heat through

  9. Plate fish Pour tomato picatta sauce over fish

  10. Garnish with lemon slices and Italian parsley


Garden Fritatta

Garden Fritatta

This post may contain affiliate links, that help support this blog. If you make a purchase through these links, I may earn a commission—at no cost to you. For more information read my disclosure policy.

This Garden Fritatta is one of those recipes like minestrone soup, it’s never the same twice. The recipe takes advantage of what”s in the refrigerator the only must have ingredient is eggs, after  eggs than it’s pretty much what you have on hand.

That’s one of the best things about frittatas,  you can make them different depending on your life style and taste. If your worried about high cholesterol, egg whites work in this recipe

I cooked this the old fashion way on the stove top. You can start the frittata on the stove top and transfer it to a 350 degree oven for 20 minutes. Be sure the pan has heat proof handles , if not wrap tin foil around the pan handle.

What Is a Garden Fritatta

Frittata is an egg- based Italian dish similar to an omelette or crust less quiche. Growing up this Garden frittata was a staple in our house, it was what my mother made for us and any gathering where a food was required, and food is required at every Italian gathering. It was called  Frittata of the Day on the menu, and that’s just  what it meant, I did have my favorites though.

I have to admit am not a fan of runny yolks, I like my eggs  scrambled. fritatta’s are like scrambled eggs, enriched with added ingredients, like meat, cheese, or vegetables.

A frittata is is like an unfolded omelet, It is cooked slowly over over low heat, while an omelet is cooked quickly over higher heat.

One important thing the right size pan is important when your cooking a fritatta or an omelet. Here is  a link to a beautiful  8 inch saute pan prefect  for an omelet or for this Garden Fritatta recipe.

Whereas omelets are served hot straight from the stove, frittata’s are often times served at room temperature.  Making them  prefect to make ahead for bunches, gatherings, picnics or anytime you want quick, easy and delicious.

If you make this Garden Frittata please leave me a comment and don’t forget to tag me on Instagram hearing from you is my favorite part!!!


Garden Fritatta

Fluffy eggs, colorful vegetables, fresh herbs, and Parmesan come together in this versatile frittata that's perfect for breakfast, brunch, or a light meal any time of day.

  • 8 eggs
  • 1 cup parmesan cheese
  • 2 tbsp butter
  • ½ cup each chopped red and green peppers, spinach, onions and halved cherry tomatoes
  • 1 tbsp chopped garlic
  • 2 tbsp each chopped Italian parsley, sage and thyme
  • Salt and pepper to taste
  1. In a 8 inch  unstick saute pan melt the butter

  2. Add the peppers, onion, tomatoes, spinach saute until tender and beginning to brown  about 10 minutes

  3. Add the garlic

  4. Beat the eggs until light

  5. Add the parmesan, herbs, salt and pepper to egg mixture

  6. Add egg mixture to medium heat pan cook covered 5 minutes lower heat and continuing cooking 10 minutes

  7. Turn the flame off while placing a plate over the saute pan invert on to plate slide the fritatta back into pan cook covered on low heat  10 to 15 minutes

  8. Sprinkle  with additional  Italian parsley and Slice into triangles.


Salmon Broccoli Fettucini

Salmon Broccoli Fettucini

This post may contain affiliate links, that help support this blog. If you make a purchase through these links, I may earn a commission—at no cost to you. For more information read my disclosure policy.

This salmon, broccoli fettucini is the best recipe when your craving Italian, and want quick and easy too. Pasta, salmon and broccoli tossed in a light creamy, lemony sauce, full of delicious summer flavors.

When you need an easy 30 minute dinner make this pasta. It’s comfort food with a light and summery taste.

OK, so I know I post a lot of pasta recipes, but pasta is so versatile, you could have hundreds of combinations. At the restaurant on the menu, you pick, your pasta shape, sauce,and any extra add-ins.

By some estimates there are 600 distinct commercial brands of pasta shape, hundreds of sauces, endless vegetables and protein combinations.

That’s why I post a lot of pasta recipes, when am stuck for a dinner idea it’s Pasta to the rescue. It’s not often you find a meal the whole family will like, when you do you’ll want to make it often.


Making Salmon Broccoli Fettucini

Start by cooking the pasta according to package direction, adding the broccoli the last few minutes of cooking. Drain the pasta and broccoli reserving two cups of the magical pasta water.

YES, pasta water is magical when added to pasta sauces, is’t natural starch thickens the sauce and adds flavor eliminating the need for added creams. Salt and pepper the salmon then cut it into cubes.

Brown the salmon then remove it from the pan to prevent overcooking, set it aside while making the sauce.

Put the rest of the ingredients in the pan scraping up all the brown bites, simmer for 10 minutes. Return salmon, broccoli and pasta to saute pan heat through, sprinkle with parsley and thyme….ENJOY If you make this recipe please leave me a comment and don’t forget to tag me on Instagram hearing from you is my favorite part. If you like salmon, you may want to try my Citrus Salmon


Salmon Broccoli Fettucini

Tender salmon, fresh broccoli, and fettuccine are tossed in a creamy Parmesan sauce for a comforting pasta that's rich, fresh, and perfect for an easy weeknight dinner.

  • ½ lb Fettuccine
  • 2 cups broccoli florets
  • ½ lb skinless salmon cut in medium chunks
  • 2 tbs butter and extra virgin olive oil
  • 2 cups pasta water
  • 1 cup manufacturing cream
  • 1 cup grated parmesan cheese
  • 3 tbs chopped garlic
  • 2 tbs grated lemon peel
  • 1 Juice from 2 lemons
  • 2 tbs each Italian parsley and Thyme
  • Pinch of nutmeg
  • Salt and pepper to taste
  1. Cook fettuccine according to package directions  Add broccoli last 5 minutes and reserving two cups of the water

  2. Salt and pepper the salmon pieces

  3. In a saute pan bring oil and butter to a medium heat

  4. Add onion and garlic saute until tender and just beginning to brown

  5. Add salmon cook 5 minutes brown slightly and remove set aside

  6. Add resevered pasta water, cream, parmesan, lemon juice, and lemon peel

  7. Simmer 10 minutes

  8. Toss, pasta, broccoli, salmon and herbs in the sauce


Pan seared Citrus Salmon

Pan Seared Citrus Salmon

This post may contain affiliate links, that help support this blog. If you make a purchase through these links, I may earn a commission—at no cost to you. For more information read my disclosure policy.

Don’t let the looks of this pan seared Citrus Salmon dinner intimidate you. This salmon meal may look intimidating, but it’s not, it’s quick and easy too. It’s all made in one pan, with salmon, garlic, onion and the fresh taste of orange and lemon.

Not only is this citrus salmon easy and delicious, it looks and feels fancy. Best part? It comes together in less than 30 minutes. You’ll want to make this healthy meal often. It’s prefect for family week night dinners and decant enough for Saturday night dinner with friends.

This is a restaurant quality meal you can make in your kitchen, to show off what a great chef you are.


Things to know about this pan seared citrus salmon recipe

Start by cutting the salmon into equal parts. The measurements in this recipe are for two, if you want four meals double the recipe. Salt and pepper the salmon, in a large saute pan bring the olive oil and butter to medium heat.

Brown salmon 3 to 4 minutes per side then remove fish, add the onions and garlic to the saute pan cook until tender and just beginning to brown.

Now add the lemon, orange juice. lemon,  orange sections, herbs  and one pat of butter coated in flour to thicken the sauce, simmer for five minutes, return fish to pan only to heat through.

Plate salmon pour sauce over sprinkle with additional Italian parsley and rosemary and enjoy a restaurant quality meal, made by you.

If you like salmon recipes that are easy to make and delicious try my quick and easy salmon piccata

If you made this recipe please leave me a comment and don’t forget to tag me on Instagram that’s my favorite part!!!! 

Pan Seared Citrus Salmon

Perfectly seared salmon is finished with a bright citrus sauce made with fresh orange, lemon, and herbs for an elegant meal that's light, fresh, and full of vibrant flavor.

  • 2 6 oz. skinless salmon fillet
  • 2 tbsp each butter and extra virgin olive oil
  • 3 tbsp chopped garlic
  • ½ chopped onion
  • 1 cup orange juice
  • 2 tbsp lemon juice
  • 2 mandarin oranges sectioned
  • 1 lemon sliced
  • 2 tbsp each lemon and mandarin rind
  • 2 tbsp honey
  • 2 tbsp each chopped rosemary and Italian parsley
  • Salt and pepper to taste
  1. Salt and pepper salmon

  2. In a large saute pan melt the butter and olive oil bring to medium high heat

  3. Add salmon saute until brown 3 to 4 minutes per side

  4. Remove salmon set aside

  5. Add onion and garlic saute until tender and just beginning to brown

  6. Add orange juice, lemon juice,  sliced lemons, mandarin oranges, honey, herbs and one tablespoon of butter coated in flour

  7. Cook until sauce thickens about 5 minutes

  8. Return salmon to pan heat through

  9. Plate salmon pour sauce over sprinkle with additional rosemary and Italian parsley


Pesto Pasta Primavera

Pesto Pasta Primavera

This post may contain affiliate links, that help support this blog. If you make a purchase through these links, I may earn a commission—at no cost to you. For more information read my disclosure policy.

This pesto, pasta, primavera is ever-changing, depending on what fresh vegetables you have on hand. The most important ingredient is fresh vegetables and good pesto sauce

You can use store bought or homemade pesto, I used homemade. There are a few staples in my kitchen I almost always have, one is marinara, the other is pesto.

The recipe for the pesto is easy in a blender mix 1 bunch of washed basil stems removed, add 1 cup parmesan, 1 cup toasted pine nuts pour in 2 cups extra virgin olive oil.

Quick, easy, delicious and versatile is what make this healthy vegetarian meal prefect for weeknight family meals and it’s decant enough for Saturday night dinner with friends.

If you want a hearty meal add chicken, shrimp or mix in any left overs. Change the shape of the pasta and the combination of add ins and you wouldn’t repeat the same meal for aleast a week.


You’LL Love this Pesto Pasta Primavera

Sure there’s a time for fancy plated, layered creations, that take hours to prepare, but for me, quick, easy, and delicious is what am looking for.

I want recipes that come together in less than an hour, most times less then 30 minutes. This pesto, pasta primavera comes together in less than 30 minutes , but your family and friends will think it took much longer.

When am stuck for dinner ideas or company’s coming it’s pasta I turn to. You are going to love this pasta, it’s vibrant colors and fresh flavors make this one of those meals you’ll want to make often.

If you make this please leave me a comment and don’t forget to tag me on Instagram, hearing from you is my favorite part!!!

Pesto Pasta Primavera

Fresh vegetables are tossed with fettuccine in a vibrant pesto sauce, then finished with Parmesan and fresh herbs for a light, colorful pasta that's bursting with garden-fresh flavor.

  • ½ lb Fettuccine
  • 1 cup broccoli florets
  • 1 cup cherry tomatoes cut in half
  • 1 cup fresh corn
  • 1 onion chopped
  • 2 cups chopped spinach
  • 2 cups prepared pesto sauce
  • 2 cups reserved pasta wate
  • 3 tbsp chopped garlic
  • 3 tbsp each chopped Italian parsley and basil
  • ¼ cup parmesan cheese
  1. Cook pasta according to package directions reserving 2 cups of pasta water

  2. In a large saute pan in 2 tablespoons of  olive oil and 2 tablespoons of butter saute the onion and garlic until tender and just starting to brown

  3. Add the vegetables salt and pepper now saute 5 minutes

  4. Add pesto and pasta water simmer 5 minutes longer

  5. Toss pasta in pesto sauce add herbs

  6. Sprinkle with the parmesan cheese


Vegetarian Cauliflower Risotto

Vegetarian Cauliflower Risotto

This post may contain affiliate links, that help support this blog. If you make a purchase through these links, I may earn a commission—at no cost to you. For more information read my disclosure policy.

This flavorful vegetarian cauliflower risotto is a vibrant and easy meatless meal you can enjoy any day of the week. Made with one head of cauliflower, hearty chickpeas, baby spinach, crunchy walnuts, and sweet dried apricots, it’s a colorful, satisfying dish that’s both nutritious and filling.

Looking for a healthy lunch or dinner idea? This cauliflower risotto is the perfect choice. And if you’re not strictly vegetarian, feel free to top it with some grilled chicken for extra protein.

The inspiration? I was craving risotto—but didn’t have any rice. What I did have was a beautiful head of cauliflower, and that’s when the lightbulb moment happened. Cauliflower has evolved from a basic side dish to a star ingredient in everything from pizza crusts to hearty steaks—so why not risotto?

I wasn’t sure exactly how it would turn out, but I trusted the flavors—and the result was absolutely delicious. Creamy, satisfying, and full of texture, this cauliflower risotto is a fresh way to rethink dinner.


Things to know about this vegetarian Cauliflower Risotto

Start by prepping your cauliflower. Pulse it raw in a food processor in batches until it reaches a rice-like texture. Be careful not to over-process—otherwise, you’ll end up with mashed cauliflower. For added texture and bite, chop a handful of small florets by hand and mix them in with the riced cauliflower.

This step is key. To create a satisfying cauliflower risotto, you want the base to mimic real risotto—light, tender, and not mushy.

Heat a large sauté pan over medium heat. Cook the onions and garlic in a bit of olive oil until soft and fragrant. Then, add the cauliflower rice in batches to avoid overcrowding the pan. Let it brown slightly to deepen the flavor.

Unlike traditional risotto, you won’t need to stir in liquid gradually. Unless you prefer a looser, more “creamy” texture—then feel free to add up to 1 cup of vegetable broth.

Let me just say—I’m not a vegetarian, and I used to find cauliflower a bit bland. But this cauliflower risotto is genuinely delicious. It’s a flavorful, satisfying way to turn simple vegetables into something special.

If you try this recipe, I’d love to hear what you think! Leave a comment below and tag me on Instagram so I can see your beautiful creations—it’s truly the best part of sharing these recipes.


Vegetarian Cauliflower Risotto

Riced cauliflower, spinach, chickpeas, walnuts, and Parmesan come together in this wholesome twist on risotto that's hearty, satisfying, and packed with fresh, vibrant flavor.

  • 1 medium head of cauliflower, chopped
  • 1 medium onion, finely chopped
  • 1 tbsp minced garlic
  • 3 cups fresh spinach, chopped
  • 1 (15 oz) can chickpeas, rinsed and drained
  • 1 cup grated Parmesan cheese
  • 1 cup chopped walnuts
  • 1 cup chopped dried apricots
  • ¼ cup chopped fresh Italian parsley
  • Salt and freshly ground black pepper, to taste
  1. Place the cauliflower in a food processor and pulse in batches until it resembles coarse rice.

  2. In a large sauté pan, heat the olive oil and butter over medium heat. Add the onion and garlic, and sauté until tender and just beginning to brown.

  3. Stir in the riced cauliflower and cook, stirring occasionally, until golden brown—about 10 minutes.

  4. Add the remaining ingredients and cook for another 5 minutes, until everything is well combined and heated through.

  5. Finish with a sprinkle of extra Parmesan and fresh Italian parsley before serving.


Baked Chicken Rigatoni Pasta

Baked Chicken Rigatoni Pasta

This post may contain affiliate links, that help support this blog. If you make a purchase through these links, I may earn a commission—at no cost to you. For more information read my disclosure policy.

This baked chicken rigatoni pasta dinner will let us know what Italians knew all along, that pasta is easy to prepare, versatile and good for you.

By having just a few basics, you can trow together a satisfying dinner ready to serve in less than a hour.

Virtually anything, yesterdays left over chicken, that’s what I used, some fresh vegetables, a handful of cheese can be turned into a simple quick pasta dinner.

Pasta is an ideal main course it’s high in complex carbohydrates and low in fat, making it a staple in our house two to three times a week.

It’s not often you find a meal the whole family will like, when you do you’ll want to make it often. And because pasta is so versatile you can serve it two to threes a week, without repeating the same dish. What’s not to love? Nothing!!!!


Things to know about this baked chicken rigatoni pasta recipe

This chicken baked rigatoni recipe uses pantry and refrigerator staples, that I had on hand. Pasta is so versatile, you can change this recipe up by leaving the mushrooms or the spinach out, or changing the pasta shape, without changing the flavor much.

Talk about different shape pasta, did you know there are more than 500 distinct commercial pasta shapes.

Pastas are now made in a variety of flavors and made with many different flours. The most important thing to remember when selecting, cooking and serving dried  pasta is that they are interchangeable.

If you can’t find a particular type called for in the recipe, simply use a pasta of similar size and shape.

If you make this recipe please leave me a comment, let me know your experience with the recipe, and don’t forget to tag me on Instagram, Hearing from you is my favorite part. 

Baked Chicken Rigatoni

Tender chicken, mushrooms, and spinach are baked with rigatoni in a creamy Swiss and Parmesan cheese sauce until hot, bubbly, and irresistibly comforting.

  • ½ lb rigatoni
  • 2 skinless, boneless, chicken breasts, cut into thin strips
  • ½ lb sliced mushrooms
  • 2 cups chopped spinach
  • ¼ cup flour
  • 2 cups low fat milk
  • 1 cup diced swiss cheese
  • 1 cup parmesan cheese
  • pinch of nutmeg
  • Salt and pepper to taste
  1. Cook pasta el dente reserve 1 cup of pasta water

  2. Preheat oven to 350 degrees

  3. In a sauce pan in 2 tablespoons of butter and olive oil saute chicken until brown

  4. Push chicken to side of pan, add Mushrooms and garlic saute until golden…..salt and pepper now.

  5. Mix the flour with 1 cup of the milk whisk until smooth

  6. Slowly add the flour/milk mixture to simmering pan

  7. Add remaining milk, cheeses, spinach, nutmeg and drained pasta and re severed pasta water

  8. Transfer to a heat proof casserole dish, sprinkle with additional cheese and Italian Parsley

  9. Bake covered for 20 minutes uncover and bake 10 minutes longer


Italian Eggplant Parmesan

Italian Eggplant Parmesan

This post may contain affiliate links, that help support this blog. If you make a purchase through these links, I may earn a commission—at no cost to you. For more information read my disclosure policy.

This is a classic Italian baked eggplant parmesan, bursting with robust Italian flavors. It’s a lightened up version with air fried breadcrumb crusted eggplant and layered with marinara, cheeses and herbs.

It starts with unpeeled eggplant, sliced into 1/2 inch rounds, dipped in egg, coated with Italian flavored breadcrumbs, layered with marinara and oozing cheeses. Am telling you this is the best eggplant recipe ever.

My family who doesn’t have the same fondness for eggplant as I do, loves IT, that makes it a WIN-WIN because it’s one of me very favorites.

Italian Eggplant Parmesan Tips

Start by choosing shiny, firm small eggplant. When choosing eggplant small is better, larger ones tend to have more seeds and less flavor.

Then there’s the debate about breading the eggplant or not, I have made it both ways, if you want a lighter version omit the breadcrumb crust and follow the rest of the recipe.

In this recipe I didn’t peel the eggplant, if using larger eggplant I recommend peeling them, the skin on larger eggplants tends to be tough and more bitter then smaller ones.

I used the air fryer option on my toaster oven to fry the eggplant, using no oil, the finished Italian eggplant parmesan was so delicious with no oil taste.

If you don’t have an air fryer you can fry the eggplant slices in 4 Tablespoons for 2 minutes on each side in hot vegetable oil, drain on paper towels before layer.

Homemade marinara is a stable in my kitchen, I use it in so many recipes, when I make it I always made more and freeze it. That’s what I used in this recipe,

you can use your favorite one. It’s also good to let the baked eggplant cool a bit before serving for easier slicing.

If you make this recipe please leave me a comment and don’t forget to tag me on Instagram, that’s my favorite part.


Italian Eggplant Parmesan

Crispy breaded eggplant is layered with creamy ricotta, rich marinara, melted mozzarella, and Parmesan, then baked until hot, bubbly, and irresistibly cheesy.

  • 2 medium eggplants
  • 2 eggs slightly beaten + 1 for the ricotta
  • 2 cups Italian seasoned bread crumbs
  • 2 cups shredded mozzarella
  • 2 cups grated parmesan
  • 2 cups ricotta cheese
  • 1 cup chopped spinach
  • 4 cups prepared marinara
  • 2 tbsp chopped Italian parsley
  • Salt and pepper to taste
  1. Cut unpeeled eggplant into 1/2 inch slices

  2. Salt eggplant slices

  3. Put salted eggplant slices in a colander placed over a bowl

  4. Place paper towels over eggplant and place a few heavy cans on top of it leave for a few hours over overnight

  5. If air fryer turn temperature to 375

  6. Mix ricotta with the spinach, one egg and 1/2 cup of the parmesan salt and pepper to taste

  7. Mix 1/2 cup of the parmesan and 1 tablespoon Italian parsley to the bread crumbs

  8. Dip eggplant in egg mixture, then in bread crumb mixture

  9. Air fry or conventionally fry eggplant until golden 10 minutes in air fryer

  10. Begin layering eggplant casserole beginning with marinara sauce then eggplant then ricotta, mozzarella and parmesan , repeating ending with mozzarella

  11. Bake in a 375 degree oven for 45 minutes or until brown and bubbly

  12. Cool slightly before serving