One Pan Ravioli Recipe

One Pan Ravioli Recipe

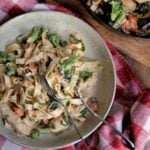
This One Pan Ravioli recipe is so easy when you use store bought ravioli. Sure there’s nothing better than homemade, but if your craving Italian and also want quick and easy, than store bought is the way to go.

There are so many varieties and good quality commercial ravioli  brands you won’t have have problem finding a brand that fits your lifestyle and taste. 

What could be easier than a delicious Italian dinner that comes together in less than 30 minutes? Oh I know what’s even better it’s all made in one pan!!!!

For one pan cooking, there’s one important thing the pan needs to be big and deep enough to hold all the ingredients.

Here is a link to my most used deep saute pan when I use the one pan method.

If you make this recipe please leave me a comment and please don’t forget to tag me on Instagram with your creations. I love hearing from you!!!!

Ingredients

  • 1 package store bought cheese and spinach ravioli
  • 2 cups vegetable stock
  • 2 cups heavy cream
  • 2 cups chopped spinach
  • 8 oz. sliced cremini mushrooms
  • 1 cup grated parmesan cheese
  • 2 Tablespoons butter
  • 2 Tablespoons chopped garlic
  • 1/2 chopped onion
  • 2 Tablespoons chopped Italian parsley
  • Salt and pepper to taste

Instructions

  1. In a large saute pan melt the butter over medium heat
  2. Saute the onion and garlic until tender and just beginning to brown
  3. Add the mushrooms saute until golden salt and pepper now
  4. Deglaze the pan with the vegetable stock scraping up the brown bits at the bottom of the pan
  5. Add the cream and half of the parmesan cheese simmer covered on low heat until sauce thickens about 10 minutes
  6. Add the raviolis and  spinach cook 10 minutes longer
  7. Sprinkle with additional parmesan and Italian parsley



Sheet Pan Baked Cod

Sheet Pan Baked Cod

If you like easy, your going to love this Sheet Pan Baked Cod. Not only is it easy it’s delicious, quick and you only need one pan.

Fresh off the boat Alaskan Cod, crisp asparagus covered in a creamy, lemony sauce make this restaurant quality meal a family favorite and it’s decadent enough for Saturday night dinner with friends.

Why I love this Sheet Pan Baked Cod Recipe

It’s the time of year that I really lean towards easy recipes.  This Sheet Pan Baked Cod recipe is not only easy , it’s customizable too!!

I used Alaskan Cod, but any firm white fish works in this recipe. And if you don’t like asparagus broccoli is delicious with fish.

What’s not to love about a recipe that’s, healthy, easy, delicious and customizable to fit your lifestyle and taste?

If that wasn’t enough for me to love this recipe, here’s another I baked this Sheet pan Cod in my Cuisinart toaster oven/ air fryer.

I’ve said it before  and I’ll say it again the most used appliance in my kitchen is my Toaster oven/ air fryer. I don’t like turning on my large ovens for small bakes and I rarely deep fry anymore.

If you make this please leave me a comment and please don’t forge to tag me on Instagram with your creations. I love hearing from you that’s my favorite part.

Ingredients

  • 1 lb. Alaskan Cod
  • 1 bunch trimmed asparagus
  • 1/2 stick butter
  • 1 cup heavy cream
  • Juice from 2 lemons
  • 1 Tablespoon lemon rind
  • 1 Tablespoon chopped garlic
  • 2 Tablespoons chopped shallots
  • 1 Tablespoon each chopped sage and Italian parsley
  • salt and pepper to taste

Instructions

  1. Preheat oven to 375
  2. Salt and pepper the fish and asparagus
  3. Meanwhile in a small saucepan make the sauce
  4. Melt the butter over medium low heat, add the garlic, shallots, and sage saute until tender and just beginning to brown
  5. Add the cream, lemon juice and rind
  6. Simmer until sauce thickens about 10 minutes
  7. Place the Cod and Asparagus on a sheet pan pour the lemon sauce over it
  8. Bake in a preheated oven for 15 minutes
  9. Sprinkle with chopped Italian parsley serve with lemon slices


Roasted Butternut Squash Rigatoni

Roasted Butternut Squash Rigatoni


One of my favorite Fall pasta recipes is this Roasted Butternut Squash Rigatoni recipe. The butternut squash is roasted to a golden caramel color, then  pureed to a smooth constancy.

Loaded with toasted walnuts, sage, bacon and the pungent taste of gorgonzola. this recipe is easy enough for weeknight family meals  and fancy enough for weekend dinners with friends.

I’ve done all kinds of butternut squash recipes. changing from sautéing the butternut squash to roasting it. I have to say I like the roasted version better.

You don’t even have to use your large oven to roast the butternut squash, I don’t. I use my Cuisinart toaster oven/air fryer. 

Customize Roasted Butternut Squash Rigatoni


You can make this Roasted Butternut Squash Rigatoni recipe fit your lifestyle and taste. For instance if you don’t like rigatoni use

any shape pasta you like. If you want to go the vegetarian route leave out the bacon. And if you don’t like gorgonzola use blue cheese.

My recipes are customizable, It’s more about technique. If you learn the technique in cooking you wouldn’t need to look at recipes every time you cook.

IF you make this recipe please leave me a comment and don’t forget to tag me on Instagram. I love hearing from you , It’s my favorite part!!!!

Ingredients

  • 1 Lb. Rigatoni
  • 1 small butternut squash peeled and cut into cubes
  • 4 slices chopped bacon
  • 2 cups chopped spinach
  • 2 cups reserved pasta water
  • 1 cup chicken stock
  • 1 cup heavy cream
  • 1/2 cup milk
  • 1 cup gorgonzola cheese
  • 1 cup chopped walnuts
  • 1/4 cup chopped sage
  • 1/2 chopped onion
  • 2 Tablespoon  chopped garlic
  • 5 sprigs thyme

Instructions

  1. Heat oven to 375
  2.  Drizzle the butternut squash with 2 tablespoons olive oil, 1 tablespoon of the chopped, thyme, salt and pepper
  3. Roast butternut squash and walnuts until squash is tender and walnuts are tosted about 20 minutes
  4. Meanwhile cook pasta according to package directions resevering 2 cups of the pasta water before draining
  5. While the pasta is cooking in a large saute pan cook the bacon in 1 tablespoon of butter until crispy
  6. Add the onion and garlic continue cooking until tender and just beginning to brown
  7. Add the chicken broth, cream and reserved pasta water simmer covered 15 minutes
  8. Add 3/4 of the butternut  squash to a blender with 1/2 cup milk blend until smooth
  9. Add the butternut squash puree, sage, thyme, walnuts, spinach and gorgonzola cheese to the pan simmer 10 minutes longer
  10. Toss the cooked rigatoni to the butternut squash sauce top with additional gorgonzola and ENJOY!!!!


Creamy Chicken Gnocchi

Creamy Chicken Gnocchi

Don’t let the looks of this  Creamy Chicken Gnocchi intimidate you. It’s an easy recipe when you use store bought potato gnocchi.

If you want to go the all home made route you can make my Easy Ricotta Gnocchi. But if you decide to make your owe they need to be cooked in a separate pot of rapidly boiling water until they come to the surface, about 7 minutes and than tossed in the sauce. The same is true with the marinara but marinara sauce is so easy and is one of the sauces I always have on hand. I have linked the recipes for the gnocchi and the marinara. The most important thing about marinara is to use the best tomato products, since tomatoes are the main ingredient.

My absolute favorite is La San Marzano, you can’t always find it in the supermarkets but here is the link to find it on Amazon.


Three Tips When Making Creamy Chicken Gnocchi

Size matters!!! when we’re one pan cooking. The sauté pan has to be big enough and deep enough to hold in this case both the pasta and the sauce. Here’s a link to a good all around one pan cooking pot.

Another thing that’s important is to be sure the oil and butter is hot enough to sear the chicken without burning it.

One more thing, if the sauce is to thick add a little milk if it’s too thick coat a pat of butter with flour and put it in the sauce, the last few minutes.

Ingredients

  • 3 boneless, skinless chicken breast cut in cubes
  • 1/2 LB. store bought or my easy ricotta gnocchi
  • 3 cups prepared  marinara sauce
  • 1 cup heavy cream
  • 2 cups chopped spinach
  • 2 tablespoons each olive oil and butter
  • 2 Tablespoons chopped garlic
  • 1/2 small onion chopped
  • 1 cup parmesan cheese
  • 2 Tablespoons chopped Italian parsley

Instructions

  1. In a large sauté pan heat olive oil and butter to medium heat
  2. salt and pepper the chicken and sauté until lightly browned
  3. Add the garlic and onion sauté until tender and just beginning to brown
  4. Add the prepared marinara and cream simmer 15 minutes or until sauce thickens
  5. Add the gnocchi and spinach
  6. Simmer covered 7 to 10 minutes
  7. Sprinkle with the parmesan cheese and Italian parsley


Saucy Pesto Pasta

 Saucy Pesto Pasta


This 30 minute Saucy Pesto Pasta recipe with sundried tomatoes, spinach, cream in a basil pesto sauce is great when you’re craving Italian but you want a vegetarian dinner.

I’ve said it before ad I’ll say it again I am not vegetarian, but it seems that 3 to 4 meals a week are meat free.

Pasta is prefect with or without meat. I know I post a lot of pasta recipes, but pasta is so versatile, easy and delicious you can have pasta often

without repeating the same recipe, plus who doesn’t love pasta!!!

Make The Pesto For Saucy Pesto Pasta

Making your own Pesto sauce for this Saucy Pesto Pasta is so easy. In a food processor blend 4 cups fresh basil with 2 tablespoons of garlic, 1 cup pine nuts and  1 cup parmesan cheese.

Process until blended then with the food processor running slowly add 2 cups extra virgin olive oil.

That’s it!! Homemade pesto!!! If you make this Recipe Please tag me on Instagram with your creations. And please don’t forget to leave me a comment I love hearing from you, It’s my favorite Part!!!

Ingredients

  • 1 Lbs. penne pasta
  • 1 cup sundried tomatoes chopped
  • 2 cups chopped spinach
  • 2 cups reserved pasta water
  • 2 cups heavy cream
  • 2 cups prepared pesto
  • 1 cup grated parmesan cheese
  • 1/2 chopped onion
  • 2 tablespoons chopped garlic
  • 2 tablespoons each olive oil and butter

Instructions

  1. Cook pasta according to package directions reserving 2 cups of the pasta water
  2. In a large sauté pan heat the oil and butter to medium
  3. Add the onion and garlic sauté until tender and just beginning to brown
  4. Add the sundried tomatoes sauté 5 minutes longer
  5. Add the cream and resevered pasta water simmer covered on low for 15 minutes or until sauce thickens
  6. Add the spinach, pesto sauce and parmesan cheese simmer 10 minutes longer
  7. Toss the drained penne with the sauce sprinkle with additional parmesan and fresh chopped Italian Parsley and ENJOY!!!


White Chicken Chili

White Chicken Chili

White Chicken Chili is the ultimate comfort food when your looking for a healthier version on the old classic.

Full of  tender chicken breast and white beans in a creamy, cheesy sauce will have your family and friends coming back for seconds.

You won’t have leftovers, but if you do this is one of those freezer friendly recipe for a ready made meal.

actually make a double batch purposely to freeze. These containers from Amazon they store easily, come in different sizes

are freezer and microwave friendly, don’t freeze the Chili with the toppings, add them just before serving.

Topping White Chicken Chili

white chicken chili like all chilis it’s about the toppings. I topped this one with sour cream, lime, cheese and tortilla chips, that I cut into ribbons and air fried in my Cuisinart  toaster/air fryer.

If you don’t have an air fryer all I can say is, of all of the appliances in my kitchen it is the one I use the most. It fries, bakes, roasts and toast all in one toaster/air fryer.

Back to the topping the Chili there are as many possibilities as there are different types of chili. Experiment with different combinations find want fits your lifestyle and taste. 

One more thing if you make  this recipe, please me a comment and don’t forget to tag me on Instagram. I love hearing from you that’s my favorite part!!!

Ingredients

  • 3 boneless skinless chicken breast
  • 2 tablespoon olive oil
  • 1 onion
  • 2 Tablespoons chopped garlic
  • 1 Jalapeno seeded and minced
  • 1 Tablespoon each cumin, oregano, coriander and smoky paprika
  • 2 15 oz. cans white beans
  • 4 cups chicken
  • 2 4.5 oz. green chilies
  • 1/2 cup each  monetary Jack and sharp cheddar
  • 1/2 cup sour cream
  • 1/2 cup crushed tortilla chips
  • 1/2 cup chopped cilantro
  • Salt and pepper to taste

Instructions

  1. In a large pot over medium heat, heat oil.
  2. Add the chicken cook until lightly brown remove and set aside
  3. Add the the onion, garlic and jalapeno cook until tender and just beginning to brown about 5 minutes
  4. Add all the spices cook until fragrant
  5. Add the green chilis, chicken broth, and chicken season with salt and pepper
  6. bring to a boil, reduce heat and simmer covered 15 minutes
  7. Remove chicken,  shred between two forks
  8. Return chicken to pan add white beans
  9. Simmer 5 minutes more
  10. Garnish with the Monterey jack, sour cream,  tortilla chips, lime and cilantro


Easy tuna puttanesca spaghetti

Easy Tuna Puttanesca spaghetti

This easy Tuna Puttanesca Spaghetti is a fast and flavorful Italian pasta recipe perfect for busy weeknights. Made with pantry staples like canned tuna, anchovies, olives, and capers, this classic puttanesca sauce comes together in under 30 minutes.

Puttanesca has a rich and colorful history—said to be created by Italian prostitutes to lure customers with its irresistible aroma. Whether legend or truth, this spicy, briny sauce still draws everyone to the kitchen today.

Cooked in one deep sauté pan and tossed with spaghetti, this tuna pasta is a bold, satisfying dish full of robust Mediterranean flavor.

 Things to know about this Easy Tuna Puttanesca spaghetti recipe

I used spaghetti for this dish, but feel free to choose any pasta that fits your lifestyle and taste—long or short shapes both work beautifully. If the sauce feels a little dry, just add more pasta water. That starchy liquid not only adds body, but acts as a natural thickener that binds everything together.

For the olives, I went with kalamata because I love their bold, briny flavor. Growing up, my mother used olives from our family farm in Tuscany. She cured them the traditional way—soaking them in a salt water solution and changing it every few days for weeks until the bitterness was gone. They transformed from glossy purple to wrinkled and rich, then were marinated in olive oil, garlic, orange peel, and red pepper flakes. Time-consuming, yes—but unforgettable in flavor.

So for this simple sauce, don’t skip out on the quality olives—they’re key to the depth of flavor in this rustic, vibrant dish.

I hope you give this recipe a try, and the part I love most? Hearing what you think! Enjoy a little restaurant-style cooking in your own kitchen—and don’t forget to tag me on Instagram so I can see your delicious creations!

Ingredients

  1.  1/2 lb. Spaghetti pasta cooked according to package direction reserving 2 cups of the water before draining
  2. 1 small chopped onion
  3. 1 Tbs. minced garlic
  4. 4 anchovy fillets
  5. 2 cans albacore tuna in olive oil
  6. 1/2 cup capers
  7. 1 cup chopped kalamata olives
  8. 1 15 oz. can chopped tomatoes
  9. 1 15 oz. tomato sauce
  10. 1 cup reserved pasta water
  11. 1 Tbs. each chopped Italian parsley, basil,  thyme and red pepper flakes
  12. 2 Tbs. each olive oil and butter

Instruction

1.Cook pasta according to package directions reserving 1 cup pasta water

2.Mean while prepare your sauce by heating oil and butter in a large deep saute pan, add onion and garlic, cook until tender and just begining to brown

3.Add the anchovy fillets stir until anchovies disintegrate, then add both cans of tomatoes not drained and reserved pasta water.

4.Simmer covered for 20 minutes, add the Tuna, olives, spinach, capers, red pepper flecks and herbs, simmer 10 minutes longer,

5.Always salt and pepper to taste

6.Toss with the drained spaghetti pasta, ………ENJOY


Best Ever Crispy Fish and Chips Recipe

Best Ever Crispy Fish and Chips Recipe

Not Only is this Best Ever Crispy Fish and Chips Recipe delicious, it’s an easy recipe for New England’s favorite dish fish and chips. You don’t have to be from New England for this recipe to become one of your favorites too!

I was always on the look out for a fish and chip recipe like the one we used to get at the local tavern where we lived, in up state New York.

Well friends, I think I found it. Not only is it quick and simple, the batter is prefect. It might just be better than the one I remember in my youth, in up state New York.

In my old recipes I used a non alcoholic beer batter, in this recipe using milk, the crust was light and crispy, not doughy as  the beer batter, what really got me excited

the crust stayed on the fish!!!

Things to know about this best ever crispy fish & chips recipe

When making the Best Fish & chips I use olive oil and be sure the oil is at the right temperature before dropping in the fish. If the oil is not hot enough, you end up with a soggy crust. If the oil is too hot, you end up with a burnt crust and under cooked fish. I added  cayenne pepper for a subtle kick, if you want more of a kick add 1 tablespoon of Tabasco sauce to the batter, it will watch up your taste buds.

The tartar sauce recipe comes together quickly. to me it taste better if  it’s refrigerated for a few hours. you can make it the night before.

I made fish sandwiches, with fish I had left over, spread the tartar sauce on a brioche bun, layered it with the fish, topped it with Cole slaw and let me tell you it was delicious, as good as the day before…….ENJOY!!! If you want to try to add more  fish to your meal planning try another one of my personal favorites quick and easy creamy salmon piccata 

Ingredients

  1. 1 quart olive oil for frying oil
  2. 4 russets potatoes
  3. 11/2 Lbs. Cod
  4. 1 cup flour
  5. 1 teas. baking power
  6. 1 cup milk
  7. 1 tsp. cayenne pepper

Salt and pepper to taste

Instruction

1.Peel and cut potatoes into sticks place in ice water

2.Heat oil to 350 degrees

3.Add baking powder and cayenne pepper to flour

4.Whisk egg and milk together

5.Add  flour mixture slowly

6.Fry potatoes in hot oil until golden drain on paper towels Salt to taste

7.Salt and pepper fish

8.Dip cod fillet in batter fry until golden

9.Return  potatoes to oil to crisp

Serve with tartar sauce and lemon wedges …….Enjoy!!!!

Tartar sauce

1 cup mayonnaise

2 Tablespoon chopped sweet pickle

1 Tablespoon yellow mustard

1/3 cup lemon juice

salt and pepper

Instructions

mix all ingredients

Serve with fish and chips ……………ENJOY!!!!


Easy Shrimp Fettuccine

Easy Shrimp Fettuccine

This post may contain affiliate links, that help support this blog. If you make a purchase through these links, I may earn a commission—at no cost to you. For more information read my disclosure policy.

What could be more prefect for a quick light dinner than a meal that comes together in 30 minutes and a family favorite?

I like quick recipes for family dinners that doesn’t have me running to the store for ingredients only used in one or two recipes.

This Easy Shrimp Fettuccine recipe is one of my favorites, not only does it have a lot of my favorite flavors it’s super easy.

It’s similar to the old classic shrimp fettuccine in marinara, using fresh garden tomatoes as the main sauce ingredient, for a fresh light Summer meal, that’s prefect any day of the week.

A few Tips When Making Easy Shrimp Fettuccine

When cooking the pasta for this Easy Shrimp Fettuccine salt the water before bringing the water to a boil. The water should be boiling rapidly before dropping the pasta.

I used Fettuccine , you can use any  shape pasta or flavor pasta you like, and don’t forget to save the pasta water, an important step that’s easy to forget. It’s also easier if the pasta water pan is on the back burner and the saute pan on the front one.

I  like this 8 quart stock pot for pasta and soups. Use a large enough saute pan  so you don’t crowd the fish, if your sauteing the shrimp

In the restaurant we precooked our pasta halfway and ran it under cold water to stop the cooking process,

when we had an order we put the pasta in a strainer, dropped in boiling water, it taste like it was just cooked .

You can use the same process at home, if you cooked to much it stays fresh for 1 to 2 days.

The whole idea behind food and creating recipes is to experiment and have fun doing it…..!!!!!Happy day

If you make this recipe let me know your experience, comments, feedback whatever you feel like talking about.

That’s my favorite part and please don’t forget to tag me on Instagram

Easy Shrimp Fettuccine

Tender shrimp, fresh tomatoes, spinach, and fettuccine are tossed in a creamy Parmesan sauce with garlic and herbs for a comforting Italian pasta bursting with fresh flavor.

  • 1 lb Fettuccine
  • 1 lb large shrimp cleaned
  • 1 lb garden tomatoes
  • 2 cups chopped spinach
  • 1 cup reserved pasta water
  • 1 cup cream
  • 1 cup parmesan cheese
  • 2 tbsp olive oil
  • 2 tbsp chopped garlic
  • ½ chopped onion
  • ½ cup each Italian parsley and basil
  • Salt and pepper to taste
  1. Cook pasta according to package directions saving 2 cups of the water before draining

  2. Meanwhile in a large saute pan on medium high heat salt and saute the shrimp until pink remove and set aside

  3. Add the onion and garlic saute until tender and just beginning to brown

  4. Add the tomatoes saute until tomatoes are blistered and soft

  5. Add the heavy cream and reserved pasta water simmer until thickens about 15 minutes add spinach and herbs last 5 minutes

  6. Return shrimp to pan just to heat through

  7. Toss cooked Buctani in sauce Top with additional parmesan


Cod And Tomatoes

Cod And Tomatoes

This post may contain affiliate links, that help support this blog. If you make a purchase through these links, I may earn a commission—at no cost to you. For more information read my disclosure policy.

Who doesn’t like one pan cooking? I love, love one pan cooking. not only are there less pots and pans to clean up, It’s quicker. This off the boat fresh Ling Cod with blistered garden tomatoes recipe comes together using one pan, is quick and delicious. First you brown the fish then remove it while you make the fresh tomato sauce, it’s that simple to have a restaurant quality meal at home.

If you have the right pots and pans not only is one pan cooking easier, everything you make cook is easier. here is a link to a starter pot and pan set.

A few Options When Making Cod And Tomatoes

I used Ling cod. If you don’t like cod use another firm fish. I’ve made it with red snapper and halibut both delicious. The capers add a bit of tang which I like paired with fish dishes that also use tomatoes.

If you don’t like the idea of frying the tomatoes, spread them on a cookie sheet, drizzle with olive oil, garlic, salt and pepper and roast on a high 400 degree oven until blistered, and adding them back to the pan along with the fish.

When Which ever method you prefer this recipe is sure to become a family favorite and crowd pleaser.

If you make this Cod And Tomato recipe please leave me a comment and please tag me on Instagram. I love hearing from you It’s my favorite  part.

It’s a prefect meal when you’re looking to incorporate more fish into your weekly meal plan, and it’s decant enough for Saturday night dinner with friends

Cod and Tomatoes

Tender cod is simmered with blistered cherry tomatoes, spinach, and capers in a creamy herb sauce for a light Italian seafood dish that's rich, fresh, and full of flavor.

  • 1 lb Cod
  • ½ cup flour
  • Salt and pepper to taste
  • 1 lb cherry tomatoes cut in half
  • 1 cup chopped spinach
  • 1 cup heavy whipping cream
  • 1 cup chicken stock
  • 2 tbsp chopped garlic
  • ½ cup chopped onion
  • ½ cup capers
  • 1 tbsp each chopped Italian parsley, basil, and thyme
  • 2 tbsp each olive oil and butter
  1. Salt and pepper fish

  2. Coat with flour shaking off excess

  3. Heat oil and butter add onion and garlic saute until opaque

  4. Add tomatoes fry until blistered add herbs push to one side of pan

  5. Add Cod brown on both sides remove from skillet

  6. Add heavy whipping cream and chicken stock

  7. Simmer until thickens about 10 minutes

  8. Add spinach and capers

  9. Return fish to pan

  10. Simmer 5 minutes more