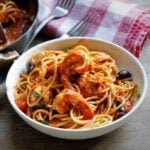
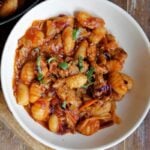
Linguini With Seared Scallop

Linguini With Seared Scallops

This  Linguini With Seared Scallop  recipe  is easy and quick. It can be on your table in 30 minutes, and  it’s the prefect way to show off what a great “home chef” you are.

Simple yet impressive, this scallop pasta recipe is  prefect for a quite date night at home or a louder time with family and friends.

This scallop dinner looks pretty on any table, served on pretty plates or serve it family style in one bowl it’s decade enough for any celebration dinner.

This recipe was inspired by my love of seafood pasta, one of my top restaurant’ luxury’ meals, I simplified the recipe  for the” home chef”.Things to Know When Making This Linguini With Seared Scallop  Recipe

First thing to know when you make this Linguini With Seared Scallop  Recipe is,  to get the prefect sear on scallops you saute the scallops in a mixture of butter and olive oil and you don’t over crowd the pan, or you end up with scallops that look boiled……YIKES!!!!

The butter is the browning agent, the oil keeps the butter from burning, this process produces beautifully seared golden scallops, cooked to perfection.

The second is, Scallops can be expensive, if you add them to pasta, it’s  an affordable meal you can have on your weekly menu.

Third I don’t drink alcohol, so I give you options in all my recipes to use wine or stock, use whatever fits your lifestyle and taste.

One more thing I always have my homemade marinara on hand, if you don’t you can use store bought marinara.

And lastly if you make this restaurant quality  Linguini With Seared Scallop recipe please leave me a comment and please don’t forget to tag me on Instagram. I love hearing from you, it’s my favorite part!!

Ingredients

  • 1 Lbs.  linguine
  • 1 lb large scallops
  • 2 cups chopped spinach
  • 1/2 cup chopped onion
  • 2 tablespoons chopped garlic
  • 2 tablespoons flour
  • 1 cup prepared marinara sauce
  • 1 cup heavy whipping cream
  • 1 cup chicken stock or white wine
  • 1 Tbs. each chopped Italian parsley, basil, and thyme
  • 2 Tbs. each olive oil and butter
  • Instruction
  • Cook pasta according to package directions reserving 1 cup of the pasta water
  • Meanwhile salt, pepper and coat scallops lightly with flour
  • Heat oil and butter to medium high
  • Saute scallops until golden about 3 minutes per side
  • Remove scallops set aside
  • In the same pan saute  the onion and garlic until tender and just beginning to brown
  • De glaze pan with chicken stock or white wine
  • Add heavy whipping cream, resevered pasta water and marinara sauce
  • Simmer until sauce thickens about 10 minutes
  • Add spinach, ,  and herbs last 5 minutes
  • Add Scallops just to heat through
  • Drain pasta toss in sauce
  • Top with seared scallops, parmesan and chopped Italian parsley……ENJOY!!!!
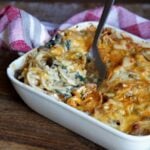


Easy Classic Chicken Potpies

Easy Classic Chicken Potpies

These Easy Classic Chicken Potpies are made real easy by using store bought pie crusts Sure homemade everything is almost always better. But if you don’t have the time or the patience for homemade piecrust there is nothing wrong with going the semi homemade route.

In this chicken potpie recipe I used the frozen pie crust from Trader Joes. You can use whatever brand you like or go homemade if you want. Precooking the pie crust is always a good idea, if you don’t want a soggy bottom crust.

This Easy Classic Chicken Potpie recipe is full of tender chicken breast and good for you ingredients full of comforting familiar flavors everyone loves!!!

Things To Know About this Easy classic Chicken Potpie Recipe

First you don’t have to use chicken breast in this Easy Classic Chicken pot pie recipe.  You can use skinless, boneless chicken thighs if that’s what you prefer.

Second I baked these chicken potpies in oven proof soup bowls for individual servings.

I love this soup bowls they go from oven to table to dishwasher OOHHH happy day with less dishes to wash and they are the prefect size for soups and cereal too!!!

The other thing is you need the right size saute pan hold all the ingredients. There’s nothing worst than having a pan that doesn’t hold the ingredients.

Not only do you end up with ingredients  stilling out of the pan onto your stovetop but the food doesn’t cook right. A too small saute pan produces boiled ingredients instead of the distinct flavor of sautéed food. A 12 inch nonstick covered saute pan is essential in any kitchen.

Just one more thing if you make this Easy Classic Chicken Potpie recipe please leave e a comment and please tag me on Instagram with your creations. I love hearing from you it’s my favorite part!!!

Ingredients

  • 2 prepared pie crust
  • 2 boneless skinless chicken breast cut into small dice
  • 2 Tbs. each butter and olive oil
  • 1/2  chopped yellow onion
  • 2 Tbs. chopped garlic
  • 1 cup each diced potatoes, carrots, celery and frozen peas
  • 1 cup whole milk
  • 1 cup chicken stock
  • 2 Tbs. each chopped Italian parsley and thyme
  • 1 egg slightly beaten to brush crust
  • 1 /2 cup  grated parmesan cheese for sprinkling
  • Salt and pepper to taste

Instructions

  1. Preheat oven to 375
  2. Roll out pie crust using a inverted 10 inch soup bowl as a guide to cut 4 circles in each sheet of pie crust for a total of 8 circles
  3. line the bottom and up the sides of 4 oven proof  soup bowls 4 of the pie crust circles pick the crust with a fork
  4. Precook the bottom crusts for 10 minutes or until just beginning to brown set aside
  5. Meanwhile in a large skillet bring the butter and oil to medium heat
  6. Salt and pepper the chicken, saute until just beginning to brown
  7. Add the onions and garlic saute until tender and just beginning to brown
  8. Add the carrots, celery and potatoes simmer covered for 10 minutes add the peas and herbs last 5 minutes
  9. Fill the precooked pie crusts with the chicken mixture
  10. Top the pot pies with the top crust brush with egg wash sprinkle with parmesan cheese return to oven, bake 15 minutes or until top crust is golden brown


Bell Pepper Pasta Bake

Bell Pepper Pasta Bake

This creamy bell pepper pasta bake is the ultimate comfort food, when you want Italian and vegetarian too.

Red and green bell peppers, spinach, onions and garlic in a creamy, cheesy rose sauce full of Italian flavors.

This  baked pasta meal is easy to make, if you have a prep plan. If you have the vegetables cut before hand and have marinara sauce on hand, this recipe seems effortless!!!


3 Ways to Customize This Bell Pepper Pasta Bake

The first and easiest way to customize this Bell Pepper Pasta Bake recipe is to use whatever pasta shape you like . I used a short rigatoni shape pasta, you can use any shape pasta you like.

I always have homemade marinara on hand, if you don’t you can use your favorite store bought. One more thing if you prefer one color of pepper over an other use more of want you like.


Ingredients

  • 1 lbs. dry pasta
  • 1 red and 1 green bell pepper chopped
  • 2 cups chopped spinach
  • 1 chopped onion
  • 2 Tbls. chopped garlic
  • 2 Tbs. butter
  • 1 Tb. olive oil
  • 1 cup reserved pasta water
  • 1 cup heavy cream
  • 2 cups prepared marinara
  • 1 cup shredded mozzarella
  • 1 cup grated parmesan
  • Salt and pepper to taste

Instructions

  1. Cook pasta according to package directions undercooking the pasta el dente resevering 1 cup of the water before draining
  2. In a large skillet  bring the butter and oil to moderate heat
  3. Add the onions and garlic saute until tender and just beginning to brown
  4. Add the bell peppers saute until tender
  5. Add the cream, marinara and reserved pasta water
  6. Simmer covered for 15 minutes
  7. Add the cheeses and spinach the last 5 minutes
  8. Toss pasta in sauce
  9. Transfer to a 375 degree oven top with additional mozzarella bake for 45 minutes
  10. Enjoy


Complete Sheet Pan Salmon Dinner

Complete Sheet Pan Salmon Dinner

This Complete Sheet Pan Salmon Dinner is your answer for an easy quick-cooking dinner that tastes extremely delicious. It’s made with few ingredients and in less than 30 minutes.

Tender, juicy, superbly seasoned salmon, crisp tender green beans, and baby new potatoes in a lemon and orange citrus sauce make this complete salmon dinner recipe fancy enough for Saturday date night, and because it’s super quick it’s prefect for weeknight family dinners too.

While salmon can be pricy, it allows you to serve your family and friends a restaurant quality meal at a fraction of the price, from the comfort  of your own kitchen.

And the best part is, this complete salmon dinner is all make in one pan and baked for a hands-free meal everyone loves!!!

3 Ways To Customize This Complete Sheet Pan Salmon Dinner

The first and easy way to customize this complete Sheet pan Salmon Dinner is to change the green beans. This recipe works well with a variety of vegetables.

If you don’t like green beans broccoli works in this recipe as well as other vegetables, experiment to find the combination that fits your lifestyle and taste

Second I used very small new potatoes if you don’t have small potatoes cut what potatoes you have into small pieces, for even and quick cooking.

Third I baked this whole dinner in my Cuisinart Toaster oven/ air fryer in less than 30 minutes in a sheet pan lined with tin foil for easy clean up!!

Lastly if you made this super easy Salmon recipe please leave me a comment. And please don’t forget to tag me on Instagram. I love hearing from you It’s my favorite part!!!!

Ingredients

  • 4 6oz. Salmon fillet
  • 1 lb. small new potatoes
  • 1 lb. trimmed green beans
  • 2 lemons
  • 1 Orange
  • 4 Tbs. chopped garlic
  • 1 sliced red onion
  • 1/4 cup olive oil
  • 2 Tbs. each chopped Italian parsley and thyme
  • salt and pepper to taste

Instructions

  1. Preheat oven to 375
  2. Mix the olive oil with the juice and grated rinds of the lemons and orange
  3. Add in the garlic, Italian parsley, thyme salt and pepper
  4.  Divide the dressing in half use half to marinate the salmon and the other half to toss the potatoes and green beans in
  5. Marinade the salmon for a few hours or overnight
  6. Cover a 9 X 12 sheet pan with foil
  7. Roast the marinated potatoes and green beans in the preheated oven for 15 minutes
  8. Add the Salmon top with thinly sliced lemons and roast 7 to 10 minutes longer or until salmon is flaky but still opaque in the center


Roasted Grape Pizza

Roasted Grape Pizza

Pizza has came a long way since our days in the Pizza business. Back then Canadian bacon and pineapple toppings on pizza were a novelty.

Now there are as many different pizza toppings and combinations as there  are people who love pizza.

This Roasted Grape Pizza may sound like an unusually mix of ingredients but it all comes together with the most delicious flavor.

Roasting the grapes sweetens them and releases their juices producing a sweet, syrupy pizza sauce. Mix the sharp bite of the gorgonzola with the mild taste of grapes, honey and thyme, add crunchy walnuts and you a recipe for delicious results.

3 things to know About this Roasted Grape Pizza Recipe

The first thing to know about this Roasted Grape Pizza is I used The pizza dough from Trader Joe’s you can use any pizza dough you like.

Second any grape works with this recipe, I’ve used white and it was just as delicious as using the red grapes. Third and one step not to miss is to prebake the crust, so you don’t end up with a soggy crust. One more thing I  baked this this pizza in my Cuisinart Toaster Oven/ Air fryer my most used small appliance.

And lastly please leave me a comment if you make this Roasted Grape Pizza and please don’t forget to tag me on Instagram with your creations.

I love hearing from you, it’s my favorite  part!!!!


Ingredients

  •  1 lb. prepared pizza dough
  • 3 cups red grapes
  • 2 cups gorgonzola cheese
  • 1 cup grated parmesan
  • 2 cups coarsely chopped walnuts
  • 2 Tbs. thyme leaves
  • 4 Tbs. honey
  • 3 Tbs. olive oil
  • Salt and pepper to taste

Instructions

  1. Preheat oven to 400
  2. Stretch dough into thin 12 inch circle let rise for 15 minutes
  3. Meanwhile drizzle cleaned and separated whole grapes  and walnuts with olive oil, salt and thyme
  4. Roast grapes and walnuts on a small cookie sheet in  the preheated oven for 15 minutes set aside
  5.  Brush the crust with olive oil Pre bake the pizza crust for ten minutes or until crust is lightly golden
  6.  Top pre baked pizza crust with the roasted undrained grapes, gorgonzola and parmesan
  7. Return to oven and bake 15 minutes or until cheese is melted ……ENJOY!!!!


Cheesy broccoli Fusilli

Cheesy Broccoli Fusilli

This Cheesy Broccoli Fusilli is easy and delicious, and the best part it can be on your table in 30 minutes, making it a prefect weeknight family dinner.

Tender good for you broccoli, in a sauce full of cheesy goodness tossed with corkscrew shape pasta make this a family favorite, and makes me happy to serve them a delicious healthy meal.

I  know I post a lot of pasta recipes, but when am stuck for dinner ideas, pasta is my go to ingredient. Pasta is easy, versatile and affordable, and almost everyone loves pasta in one from or another!! 

Customize This Cheesy Broccoli Fusilli recipe in 3 ways

You can customize this Cheesy Broccoli Fusilli recipe in 3 easy ways. 1. I used fusilli I like the way the shape holds the sauce.

You can use any pasta shape you like  or have on hand, in this recipe. 2. If you like one type of cheese more than other, use more of what you like.

And 3. If you love broccoli but hate spinach leave the spinach out, and extra broccoli.  One more thing, be sure to use a large enough saute pan to hold all the ingredients.

Ingredients

  • 1 lb. Fusilli
  • 1 lb. broccoli flowerets
  • 2 cups chopped spinach
  • 2 cups heavy cream
  • 2 cups reserved pasta water
  • 1 cup each shredded sharp cheddar, mozzarella and parmesan
  • 2 Tbs. each butter and olive oil
  • 1 chopped yellow onion
  • 2 Tbs. chopped garlic
  • 2 Tbs. chopped Italian parsley
  • Salt and pepper to taste

Instructions

  1. Cook pasta according to package directions resevering 2 cups of the water before draining
  2. Meanwhile in a large saute pan bring the butter and oil to medium heat
  3. Add the onion and garlic saute until tender and just beginning to brown
  4. Add the broccoli salt and pepper the broccoli now mixing well with the onions and garlic mixture
  5. Add the cream and reserved pasta water simmer covered for 10 minutes
  6. Add the cheeses simmer 10 minutes longer until cheese is melted and sauce is thick
  7. Toss the pasta in the cheesy broccoli sauce adjust seasonings Add the Italian parsley
  8. Sprinkle with additional parmesan and ENJOY!!!!!


Air fryer Chicken Parmesan Sliders

Air fryer Chicken Parmesan Sliders

These  Air Fryer Chicken Parmesan sliders are not your typical sandwiches. No, this little sandwiches are bursting with melt in your mouth parmesan chicken tenders, marinara, and oozing with cheese.  Our first eatery was a hole in the wall submarine sandwich sub, and this chicken parmesan sandwich was one of the top sellers.

Many years later it’s still the same ingredients, but I’ve lightened it up by using my air fryer, instead of frying the chicken in oil. Like I said many times before my Toaster Oven/ Air fryer is my most used small kitchen appliance.

3 Tips When Making Air fryer Chicken Parmesan Sliders

When making these Air fryer Chicken Parmesan Sliders you can use chicken tenders or the less expensive whole chicken breast.

But if you  are using the full breast be sure to cut them the same size for even cooking. Second, don’t crowd the fryer basket, leave enough room  between the chicken for the air to circulate for even browning.

Third,  if you want a crisper crust spray the chicken with oil spay. I didn’t use any oil spray in this recipe. Just one more thing ,

please leave me a comment if you make this recipe and please don’t forget to tag me on Instagram. I love hearing from you, it’s my favorite part!!!!

Ingredients

  • 1 Lb. chicken tenders
  • 4 crusty Italian rolls
  • 2 cup grated bread crumbs
  • 1 cup grated parmesan cheese
  • 2 Tbls. chopped Italian parsley
  • 1 egg slightly beaten
  • 2 Tbs. milk
  • 2 cups prepared marinara sauce
  • 2 cups shredded mozzarella
  • 1/2 cup grated parmesan
  • Salt and pepper to taste

Instructions

  1. Salt and pepper the chicken
  2. Mix the bread crumbs, parmesan cheese and Italian parsley together
  3. In a separate bowl mix the egg and milk together
  4. Dip the chicken first in the egg mixture than the bread crumbs pressing breadcrumbs into the chicken
  5. Turn air fryer to 400  set timer for 12 to 15 minutes
  6. In the air fryer basket lay the chicken tenders flat being sure not to overcrowd them
  7. Air fry the chicken tenders 5 to 7 minutes per side
  8. Turn air fryer to bake option set at 350  toast the buns until warm and crisp
  9. Meanwhile warm the prepared marinara sauce
  10. Top the toasted buns with the chicken then the marinara sauce and mozzarella
  11. Return to oven and toast just until the cheese melts


Cheesy Baked Chicken Spaghetti

Cheesy Baked Chicken Spaghetti

This post may contain affiliate links, that help support this blog. If you make a purchase through these links, I may earn a commission—at no cost to you. For more information read my disclosure policy.

This cheesy Baked Chicken Spaghetti is the ultimate comfort food. Tender chicken breast, crispy bacon, and spinach in a creamy,  cheese sauce will have your family wanting seconds.

We had this for dinner than and had the leftovers for lunch during the week. It is equally delicious reheated. This recipe makes a lot of food, it is great for potlucks or when you want to feed a crowd or you can freeze it for ready meals.

All you need is a prep plan and a casserole dish to make this delicious meal your family and friends will love.

3 Ways to Customize This Cheesy baked Chicken Spaghetti recipe

It’s easy to customize this Cheesy Baked Chicken Spaghetti recipe. For instance if you don’t like bacon you can leave it out.

Or if you really love the smoky goodness of bacon add more. And if you don’t like spinach, no worries leave it out.

Although I like using spaghetti in this recipe, you don’t have to, you can use whatever shape you like. I do recommend whenever using pasta in a baked dish under cook it a bit, because your going to cook it twice.

Cheesy Baked Chicken Spaghetti

Spaghetti is tossed with tender chicken, crispy bacon, spinach, and a creamy three-cheese sauce, then baked until golden and bubbly for a comforting family favorite.

  • 1 lb spaghetti
  • 2 cubed skinless boneless chicken breast
  • 4 slices diced bacon
  • 1 cup each grated parmesan (cheddar and mozzarella)
  • 1 cup heavy cream
  • 1 cup reserved pasta water
  • 1 cup chicken broth
  • 2 cups chopped spinach
  • 1 tbsp each butter and olive oil
  • 2 tbsp chopped garlic
  • ½ cup chopped yellow onion
  • Salt and Pepper to taste
  1. Cook Spaghetti according to package under cooking by 3 minutes and reserving 1 cup of the water before draining
  2. Preheat oven to 375°

  3. Meanwhile in a large saute pan bring the butter and oil to medium heat add the diced bacon cook until almost crispy
  4. Salt and pepper the chicken add to the saute pan, cook until golden brown
  5. Deglaze the pan with the chicken broth scraping up the brown bits at the bottom of the pan
  6. Add the heavy cream, pasta water simmer until slightly thicken about 10 minutes
  7. Add the spinach and cheeses simmer until melted about 5 minutes
  8. Toss the spaghetti with the cheese sauce Add parsley
  9. Transfer the spaghetti into an oven proof casserole dish
  10. Bake in a preheated oven 45 minutes
  11. Sprinkle with additional parsley and parmesan


Spicy Spaghetti Shrimp

Spicy Spaghetti Shrimp

This post may contain affiliate links, that help support this blog. If you make a purchase through these links, I may earn a commission—at no cost to you. For more information read my disclosure policy.

Transform shrimp into a flavorful date- night worthy dinner with this Spicy Spaghetti Shrimp recipe, in less than 30 minutes!!

Chunky with capers, olives and tomatoes this quick tomato sauce taste much like the familiar puttanesca sauce that is usually served over pasta .

In this easy recipe I used this delicious sauce to coat the shrimp as well as the spaghetti to produce a meal that will have family and friends coming back for seconds.

Why I love this Spicy Shrimp Spaghetti recipe

There are more than a few reasons why I love This Spicy Shrimp Spaghetti recipe.

First and most importantly its easy peasy. It really is one of those recipes that comes together in less than 30 minutes but your friends and family will think it took much longer, who doesn’t like that?

Not only is this recipe easy, this pretty pasta is one my family loves and I love that they eating a healthy meal. If that isn’t enough this recipe is affordable when you serve the shrimp sauce over pasta.

If you make this easy recipe please leave me a comment and please don’t forget to tag me on Instagram with your creations. I love hearing from you!

Spicy Spaghetti Shrimp

Spaghetti is tossed with tender shrimp, tomatoes, capers, black olives, garlic, and red pepper flakes for a bold, spicy pasta bursting with Mediterranean flavor.

  • 1 lb large peeled and deveined shrimp
  • ½ lb Spaghetti
  • 1 tbsp each olive oil and butter
  • 2 tbsp minced garlic
  • 1 tbsp dried hot pepper flakes
  • 14.5 oz can crushed tomatoes in thick puree
  • 2 chopped fresh tomatoes
  • 2 tbsp drained capers
  • ½ cup pitted chopped black olives
  • 1 tbsp each chopped rosemary (Italian parsley and basil)
  • Salt and pepper to taste
  1. Cook pasta according to package directions resevering 1 cup of the water before draining

  2. Meanwhile in a large nonstick saute pan heat the oil and butter to medium heat
  3. Add the shrimp, garlic, red pepper flakes salt and pepper the shrimp now
  4. Sautee stirring occasionally until the shrimp are just done about 5 minutes
  5. Remove the shrimp with a slotted spoon and set aside
  6. Add the fresh tomatoes, canned tomatoes, reserved pasta water, herbs, capers and olives to the saute pan
  7. Simmer covered for 15 minutes
  8. Return shrimp to saute pan just to heat through
  9. Toss the shrimp with the pasta
  10. Sprinkle with additional chopped Italian parsley


Sausage Cabbage Gnocchi

Sausage Cabbage Gnocchi

This post may contain affiliate links, that help support this blog. If you make a purchase through these links, I may earn a commission—at no cost to you. For more information read my disclosure policy.

This Sausage cabbage gnocchi recipe is so easy when you use store bought potato gnocchi. Gnocchi, who doesn’t like them? Anyone ?

These little dumpling of comfort and joy are a favorite in my house, pair them with a delicious sauce of healthier chicken sausage and cabbage in a light tomato sauce and you have a meal everyone will love and you’ll feel good about serving it.

3 Tips when making Sausage Cabbage Gnocchi

First be sure to use  good quality gnocchi, since that’s the main ingredient in this Sausage Cabbage Gnocchi  Recipe. Second, I used chicken Italian sausage for a healthier alternative, but you can use any flavor sausage you like, be sure to remove the casings before cooking.

And third be sure the saute pan is big enough to hold all the ingredients and the sauce is simmering and hot before adding the gnocchi, and keep the pan covered.

This Sausage Cabbage Gnocchi recipe is easy, delicious and it can be on your table in less than 30 minutes.

If you make this recipe please leave me a comment, and don’t forget to tag me on Instagram. I love hearing from you, it’s my favorite part!

Sausage Cabbage Gnocchi

Tender potato gnocchi and Italian chicken sausage simmer with cabbage, marinara, garlic, and herbs for a hearty one-pan meal finished with Parmesan.

  • 1 lb store bought potato
  • ½ lb shredded red and green cabbage
  • 1 lb chicken Italian sausage
  • 1 chopped red onion
  • 2 tbsp chopped garlic
  • 2 cups prepared marinara sauce
  • 1 cup water
  • 1 cup grated parmesan cheese
  • ¼ cup chopped Italian parsley
  • 2 tbsp butter
  • Salt and pepper to taste
  1. In a large saute pan bring the butter to medium heat

  2. Add the onion and garlic saute until tender and just beginning to brown
  3. Remove casings from sausage add to the saute pan saute until golden breaking up the pieces with a spoon
  4. Add the cabbage saute until limp salt and pepper the cabbage
  5. Add the prepared marinara and water bring to a simmer add the gnocchi
  6. Simmer on low covered for 1o minutes add the Italian parsley and parmesan cheese the last 5 minutes
  7. Sprinkle with parmesan