Pan seared salmon orzo

Pan Seared Salmon Orzo

This post may contain affiliate links, that help support this blog. If you make a purchase through these links, I may earn a commission—at no cost to you. For more information read my disclosure policy.

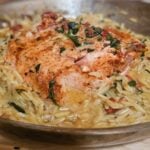
If your looking for a weeknight dinner that’s both both easy for weeknight  family meals and fancy enough Saturday night dinner with friends, my pan seared salmon with Tuscan orzo is the perfect meal choice. This dish combines crispy, flaky salmon with a creamy spinach and sundried tomatoes orzo inspired by the rustic flavors of Tuscany. Not only is it easy to make, but it’s also a complete meal full of vibrant colors and good for you ingredients, that will impress family and friends.

Why you will love this pan-seared salmon orzo recipe

This recipe brings together two of the best ingredients a rich, comforting pasta dish and perfectly cooked salmon. The orzo , in a garlicky, creamy sauce gets extra flavor from the sundried tomatoes and spinach, and the salmon provides a delicious crispy contrast. It’s the perfect balance of comfort food and the fresh ingredients makes it an ideal recipe for any time of the year.

Let me know how your pan-seared salmon with Tuscan orzo turns out! !!!

Pan Seared Salmon Orzo
  • 2 lb. cleaned skinless salmon
  • 1 Tbsp. garlic (onion and paprika powder)
  • salt and pepper to taste
  • 2 Tbsp. extra virgin olive oil
  • 2 Tbsp. butter
  • 2 Tbsp. finely minced garlic
  • 1/2 cup chopped sundried tomatoes
  • 1 cup white wine
  • 2 cups chicken stock
  • 1 cup heavy cream
  • 1 cup water
  • 3 cups orzo
  • 1 cup grated parmesan cheese
  • 2 cups chopped spinach
  1. Start by cleaning the fish then pat dry cut into equal parts. salt and pepper to taste. Combine the garlic, onion and paprika massage the rub into the fish.

  2. In a 12 inch saute pan in the 2 Tbsp. of oil over medium high heat sear the fish on both sides until beginning to brown about 5 minutes per side. Remove cover with alumni foil set aside while making the orzo.
  3. In the same pan add the 2 Tbsp. of butter. Add the garlic and saute until soft and translucent. Then add the sundried tomatoes, cook until the tomatoes are soft and fragrant. Deglaze the pan with the wine , waiting until evaporated before adding the chicken stock, cream and water. Add in the orzo lower the heat to a simmer and cook until the orzo is fork tender but firm. About 7 minutes. Then add the grated parmesan and chopped spinach and cook 5 minutes longer.



oven fried lemon chicken cutlets

Oven Fried Lemon Chicken Cutlets

This post may contain affiliate links, that help support this blog. If you make a purchase through these links, I may earn a commission—at no cost to you. For more information read my disclosure policy.

These Oven -fried lemon chicken cutlets are crispy, delicious and easy to make. There’s something irresistible about a crispy chicken cutlet, golden on the outside , juicy on the inside and packed with flavor. What makes it even better? When it’s oven-fried with a zesty lemon, wine sauce. Oven- fried lemon chicken cutlets give you the crunch of traditional frying , without the extra grease. They’re a lighter, healthier alternative without sacrificing any of that delicious flavor and texture. Perfect  for weeknight family meals or social gatherings.

Things to know about this oven fried lemon chicken cutlet recipe

Oven- frying allows you to achieve the crispy texture we love without deep-frying. By baking the cutlets at a high temperature, you get a crunchy coating that’s healthier and less messy than pan- frying. Plus it’s easier to cook a large batch of cutlets in the oven, making this  the perfect method to feed a crowd or meal prep.

I always make more than I need for one meal these chicken cutlets can be kept in the fridge for 3 days after baking or make them up to frying point and refrigerate for one day. I recommend  refrigerating the cutlets before frying this helps the breadcrumb coating adhere to the chicken. These cutlets are freezer friendly, after breading and before frying or after frying. Spread the cutlets on a cookie sheet covered in the freezer. After frozen they can be stored in zip lock bags until ready to serve.

As always if you make these oven-fried lemon chicken cutlets please leave me a comment on your experience with this recipe. I love hearing from you, and it helps others.

Oven Fried Lemon Chicken Cutlets

  • 3 skinless boneless chicken breast (2 lbs.)
  • 2 eggs slightly beaten
  • 2 cups breadcrumbs
  • 1 cup grated parmesan
  • 2 Tbsp. finely chopped Italian parsley
  • 1 Tbsp. each onion (garlic and paprika powder)
  • 1/2 cup extra virgin olive oil
  • 2 lemons sliced
  • 1 cup white wine
  • 1 cup chicken stock
  • salt and pepper to taste
  1. Preheat your oven to 400-degrees

  2. Start by slicing the chicken breast into as thin as possible slices. Then cover with plastic wrap and pound thin with a meat mallet, salt and pepper to taste.
  3. Mix the breadcrumbs, parmesan, Italian parsley , onion, garlic, and paprika powder together until well combined. In a separate bowl beat the two eggs slightly.
  4. Dip the chicken first in the egg then in the breadcrumb mixture. Use your hands to coat the chicken well.
  5. Add the extra virgin olive oil to a 12 x 9 sheet pan place in the preheated oven until smoking hot. about 5 to 10 minutes . remove from the oven.
  6. Place the chicken on the sheet pan return to the hot oven and bake until golden brown about 10 minutes. Turn over and cook the other side until golden.
  7. Remove the chicken from the pan tent with alumni foil set aside while making the sauce. Add one thinly sliced lemon the white wine and chicken broth, return to the hot oven and cook the sauce for 10 minutes, or until emulsified.
  8. Pour the sauce over the chicken serve with the remaining lemon slices.


Roasted parmesan broccoli side dish

Roasted Parmesan Broccoli Side Dish

This post may contain affiliate links, that help support this blog. If you make a purchase through these links, I may earn a commission—at no cost to you. For more information read my disclosure policy.

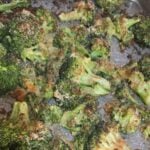
If your looking for a simple yet flavorful side dish that complements almost any meal, look no further than this oven roasted parmesan broccoli side dish. Roasting broccoli brings out it’s natural sweetness and adds a delicious crunch. The high heat caramelizes the edges, making it a far cry from the sometime soggy texture of steamed or boiled  broccoli. Once you try roasting broccoli with good quality parmesan,  breadcrumbs, and herbs, you’ll wonder why you ever cooked it any other way. It’s a game-changer in the world of side dish. Plus, it’s so easy to make!!!

Why you will love this  roasted parmesan broccoli side dish

Quick and easy: The prep time is minimal,  the oven does the work . leaving you hands free to focus on other parts of the meal.

Healthy and delicious: Broccoli is packed with fiber, vitamins, and antioxidants, and roasting it with olive oil and parmesan keeps it both nutritious and delicious.

Kid friendly: Even picky eaters will like this crispy, cheesy take on broccoli.

Pairing ideas: Oven roasted parmesan broccoli works  as a great side to many dishes. I served with crispy oven fried chicken cutlets. It’s also delicious  along side grilled chicken, steak or pasta dish.

If you make this super easy roasted parmesan broccoli side dish please leave me a comment on your experience with the recipe. I love hearing from you. It’s my favorite part!!!

Roasted Parmesan Broccoli Side Dish

  • 2 Lbs. broccoli florets
  • 2 Tbsp. extra virgin olive oil
  • 1 cup breadcrumbs
  • 1 cup grated parmesan cheese
  • 2 Tbsp. chopped Italian parsley
  • 2 Tbsp. finely minced garlic
  • salt and pepper to taste
  1. Start by washing and broccoli pat dry with paper towels then cut into equal pieces

  2. Place on a cookie sheet drizzle with the olive oil top the broccoli with the breadcrumbs, parmesan cheese, garlic and Italian parsley.
  3. Roast in a preheated 400 -degree oven for 20 to 30 minutes, or until beginning to brown with a crust form the breadcrumbs and cheese.


Classic Italian wedding soup

Classic Italian wedding soup

This post may contain affiliate links, that help support this blog. If you make a purchase through these links, I may earn a commission—at no cost to you. For more information read my disclosure policy.

Classic Italian wedding soup is a comforting and flavorful dish that brings together tender little meatballs, fresh vegetables and pasta in a light, savory broth.

Despite it’s name. this classic soup isn’t served at Italian weddings, but rather gets it’s name from the “marriage” of  flavors from the ingredients. It’s the perfect balance of flavors wholesome and satisfying, making it a family favorite for any occasion.

Prep ahead for classic Italian wedding soup recipe

Make the meatball mixture a day before. Or form the meatballs and  place them on a baking sheet and bake, You can either refrigerate the meatballs if using soon. or freeze them up to three months, in a single layer and then transfer to a freezer friendly bag or container once solid.

If you want to use home made chicken stock prepare the stock in advance  and refrigerate for up to three days or freeze for up to three months. You can also skim off any fat once it’s chilled.

Wash , chop and store the celery, onions and carrots and spinach in airtight containers in the fridge. These can be prepped 1-2 days before.

On the day you’re serving simply cook the prepped onions, carrots and  celery in the olive oil, add the prepared stock, pasta  baked meatballs, and spinach.

These prep steps will allow you to quickly put together the soup with minimal effort when your ready to serve.

If you make this Italian soup recipe please leave me a comment on your experience with this classic wedding soup recipe. I love hearing from you it’s my favorite part.

Classic Italian Wedding Soup

FOR THE MEATBALLS

  • 1/2 lb. lean ground beef
  • 1/2 lb. ground pork
  • 1 cup breadcrumbs
  • 1/2 cup grated parmesan
  • 1/3 cup chopped Italian parsley
  • 2 eggs slightly beaten
  • salt and pepper to taste

FOR THE SOUP

  • 3 Tbsp. olive oil
  • 1 cup each chopped onion+ celery + carrots
  • 8 cups chicken stock
  • 1 cup acini de pepe or orzo pasta
  • 4 cups chopped spinach
  • salt and pepper to taste
  • grated parmesan cheese for serving
  1. 3 Tbsp. olive oil

  2. 1 cup each chopped onion+ celery + carrots
  3. 8 cups chicken stock
  4. 1 cup acini de pepe or orzo pasta
  5. 4 cups chopped spinach
  6. salt and pepper to taste
  7. grated parmesan cheese for serving


Oven baked Mediterranean cod dinner

Oven Baked Mediterranean Cod Dinner

This post may contain affiliate links, that help support this blog. If you make a purchase through these links, I may earn a commission—at no cost to you. For more information read my disclosure policy.

This oven baked Mediterranean cod dinner is a flavorful and healthy option.  It really is the best baked cod. The fish is cooked with potatoes and tomato in a rich wine sauce. This complete cod dinner is ready in less than thirty minutes, is made in one pan and the fish comes out perfectly tender with a golden flaky exterior while the inside remains moist and flavorful.  The seasonings enhances the natural taste, and the fish practically falls apart at the touch of a fork.

Tips for making this oven baked Mediterranean cod dinner

  1. Season generously. Mediterranean flavors thrive on bold seasonings. Use plenty of a good quality olive oil, and a mixture of fresh and dry  herbs. Be sure to season the fish generously fish can be bland and needs to be seasoned well.
  2. Don’t overcook the fish. Cod  can dry out easily if overbaked. that’s why we cook the potatoes and tomatoes first before adding the fish.
  3. Add different vegetables. Mediterranean dishes often incorporate vegetables roasting them alongside the cod. I used potatoes and tomatoes. You can add zucchini or broccoli. Roasting them with the fish allows them to absorb the same flavors, creating a delicious and healthy  well-flavored dish. If you make this oven-baked Mediterranean cod dinner please leave me a comment on your experience with this fish recipe. I love hearing from you. IT’s my favorite part

Oven Baked Mediterranean Cod Dinner

  • 1 1/2 lb. Alaskan cod
  • 2 tsp. each onion+ garlic + paprika powder
  • 3 medium peeled and thinly sliced potatoes
  • 1 Tbsp. thyme and 1 Tbsp. rosemary
  • 2 Tbsp. minced garlic
  • 1 cup white wine
  • 2 cups cherry tomatoes
  • 1 cup pitted kalamata olives
  • 1/2 cup capers
  • salt and pepper to taste
  1. Start by cutting the fish in equal parts salt and pepper to taste

  2. Peel the potatoes and slice lay on an oven poof pan add the tomatoes, olives, capers and white wine drizzle with the olive oil sprinkle with the thyme, garlic and rosemary. Salt and pepper to taste. bake in a preheated 375-degree oven for 15 minutes or until potatoes are tender and the tomatoes blistered
  3. salt and pepper the fish Combine the onion, garlic and paprika and rub on the fish fillets
  4. Place the fish on top of the potatoes and tomatoes and bake for 10 t0 15 minutes longer.


Tuscan ribollita bean and bread soup

 Tuscan Ribollita bean and bread soup

Tuscan Ribollita soup which literally means reboiled in Italian is a hearty and comforting kale and bean Italian soup made with stale bread. The bread thickens the soup into a delicious stew like consistency. It’s easy to make and can be changed up with many ingredients to fit your lifestyle and taste. Maybe you like more beans or less kale it’s all good in this recipe.  The texture of ribollita will vary based on whether you have it the next day “reboiled” as the name implies. When it’s reboiled and cooked with a lot of bread the consistency will be dense almost like a stew.

 Variations and tips for Tuscan ribollita bean and bread soup

The vegetables: kale is the base you can increase the amount in your soup. Spinach or swiss chard can be used in place of kale or add  them all. If you want to add more vegetables you can also add in a diced zucchini.

The Beans: One of my favorite addition  to this ribolleta soup is cannellini beans. If you want to try different beans butter beans works in this recipe. They are basically a bigger cannellini bean and look so nice in the soup. Chickpeas are also very good in this soup.

The ribollita soup keeps well in the fridge for a few days and is great to freeze for a ready made meal. It tastes even better reheated and will have a more robust flavor and a thicker consistency. If too thick thin the soup out with some water or stock. If you want a more stew like consistency Ribollita soup can be day-old bread or any bread for that matter, but breadcrumbs  are a great way too. Lightly toasting a cup or two of breadcrumbs and serving them on the table like grated cheese is a nice addition.

If you have enjoyed this ribollita bread and bean soup, or any recipes on this site, please let me know in the comments. I would love to hear how you did and it’s good to show others. THANKS!!!!

Ingredients

  • 4Tbsp. olive oil
  • 2 Tbsp. minced garlic
  • 1 Tbsp. red pepper flakes
  • 1 cup each chopped onion + celery+ carrots
  • 1 cup white wine
  • 28 ounce can crushed tomatoes
  • 8 cups vegetable or chicken stock
  • 2 tsp. each dried thyme and oregano
  • a few bay leaves
  • parmesan rind
  • 2 cups diced potatoes
  • 2 15-ounce drained and rinsed cannellini beans
  • 1 bunch of kale de-ribbed and roughly chopped
  • 4 cups stale Italian bread
  • Parmesan cheese for serving

Instructions

  1. Start by sautéing the onion, garlic and red pepper flakes until soft and just beginning to brown. Then add the celery and carrots  saute until soft.
  2. Add the wine cook until absorbed
  3. Add the crushed tomatoes, broth, thyme, oregano, bay leaves and parmesan rind. Bring the soup to a simmer add the potatoes, cover and cook until the potatoes are fork tender. Then remove the parmesan rind and bay leaves. Transfer 2 cups of the soup along with one cup of the beans to a blender. Blend until smooth. Then add the puree back to the soup along with the remaining cannellini beans and kale. cook until the kale is wilted and the beans are tender about 10 -15 minutes, taste the soup and adjust your salt and pepper seasonings.
  4. To serve cut or tear the bread into bite size pieces add  a handful of the bread to the bottoms of each bowl. Ladle the soup over the bread top with a drizzle of extra virgin olive oil and freshly grated parmesan cheese. ENJOY!!!


Italian Pasta e ceci soup

Italian Pasta e ceci Soup

Pasta e ceci Italian chickpea soup is a classic Roman dish that is made in one pot. It is made with chickpeas and pasta in a rich tomato sauce. Pasta and chickpeas are both staples in Italian cooking, and depending on who you ask pasta e ceci can be referred to as a soup, a stew or a pasta dish. Some version are soupy while others resemble pasta in chickpea sauce.

Good to know when making Italian Pasta e ceci soup

I am using dry chickpeas and soaking them. This method  takes a longer cooking time.  Canned chickpeas work well in this recipe that will make this recipe ready in less than 30 minutes. Mashing some of cooked chickpeas before adding the pasta makes a perfectly thick stew -like base for the dish. It is important for the chickpea- broth be loose enough that the dried pasta can be cooked in the same pot, and not leave the dish looking dry.

Ingredients

  • 3 cups dry chickpeas
  • 4 Tbsp. olive oil
  • 1 cup chopped onion
  • 2 Tbsp. minced garlic
  • 1 cup chopped celery
  • 1 cup sliced carrots
  • 3 cups chopped tomatoes
  • 2 cups vegetable stock
  • 2 cups small tubular pasta

Instructions

  1. Start by rinsing and the soaking he chickpeas overnight
  2. In a stock pot in the olive oil over medium high heat saute the onion and garlic until soft and fragrant then add the carrots and celery and saute until soft. Then add in the tomatoes and salt and pepper. Add in  the vegetable stock and the drained soaked chickpeas. Cover and simmer for 45 minutes or until the chickpeas are fork tender. Add the pasta and simmer for 10 minutes longer. Top with freshly grated parmesan cheese. ENJOY!!!!


Italian Broccoli Beef pasta

Italian Broccoli Beef pasta

This Italian Broccoli Beef pasta is a simple recipe that comes together in about thirty minutes and versatile too. If can work with different combinations of ingredients

For instance if you don’t like beef you can use chicken and if you hate broccoli you can use spinach . You  can also  use white wine, chicken or vegetable broth for a another depth of flavor, customize the ingredients to fit your life style and taste.

My favorite has always been the combination of broccoli beef. Tender strips of thinly sliced sirloin sauteed in a  simply garlicky, olive oil sauce then tossed with crisp tender broccoli makes this a recipe your going to love.

Delicious on it’s own with a simply salad or toss in some pasta or rice for a complete meal everyone will love.

 Tips When Making Italian Broccoli Beef pasta

When sauteing the beef  for this Italian Broccoli beef the  pan and oil need to be smoking hot, you need to hear the sizzle.

If your using pasta save some of the pasta water  is a flavor and thickening agent, because of it’s starch content You can use white wine, chicken or vegetable broth for a another depth of flavor, always options  my recipes to fit your life style and taste

The idea is to have fun experimenting with different ingredients until you come up with something that taste good to you. Everyone has different taste buds, that is why i don’t give you measurements for salt and pepper.  I personal don’t like a lot of salt and I am of the mind set that you can always add more but it’s difficult to correct over salting. It can be done in soups and other foods that have a liquid base.

Here’s how you correct over salting, add a potato cut in half to the pot. The potato absorbs some of the salt but doesn’t correct it completely. So when it comes to salt less is always better.

Unless your talking about basil and garlic, then there is no set amount that’s something you measure with your heart…Happy cooking!!!!!

If you make this please leave me a comment and don’t forget to tag me on Instagram I love seeing your creations and hearing your experience , It’s my favorite part!!!!

Ingredients

  • 1/2 lb papparadella
  • 1/2 lb sirloin strips
  • 1/2 lb broccoli florets
  • 1 chopped onion
  • 3 Tablespoons chopped garlic
  • 1 15 oz. can tomato sauce
  • 1 15 oz. can chopped tomatoes
  • 1 cup reserved pasta water
  • 2 Tablespoons each Italian parsley, basil and thyme
  • 1/2 cup parmesan
  • Salt and pepper to taste

Instructions

  1. Cook Pasta according to package directions reserving 1 cup of the water before draining
  2. In a large saute pan  with 2 tablespoons each of butter and olive oil  on medium high heat  saute the inion and garlic until tender and just beginning to brown
  3. Salt and pepper  the steak add to the saute pan and cook until golden brown
  4. Add both cans of the tomatoes,  and resevered pasta water
  5. Simmer covered 20 minutes
  6. Add the broccoli and herbs simmer 10 minutes longer
  7. Toss the Papparadella with the broccoli beef sauce
  8. Sprinkle with the grated Parmesan and ENJOY!!!!


Crispy fried Buffalo Chicken strips

Crispy fried Buffalo chicken Strips

These homemade pepperoncini juice marinated crispy fried Buffalo chicken strips are a take on the famous bone in Buffalo chicken wings that originated at the Anchor bar in Buffalo. The anchor bar is also where I met my husband . They are melt in your mouth tender and guaranteed to become a family favorite.

The first place we had was a hole in the wall submarine sandwich and chicken wing  shop, that was literarily held together with duct tape. But the food was good and the lines long. We sold chicken wings by the dozen all the way up to buckets of wings in a spicy, medium or mild buffalo sauce.

What I use to made these crispy fried Buffalo chicken strips

I use skinless boneless chicken breast and slice them into strips when I make these crispy  fried Buffalo chicken strips. You can use chicken tenders. Then I let them marinate in pepperoncini juice. You can use pickle juice if that’s what you have on hand. Then I dip the chicken first in the egg  then in the bread crumb mixture. There is no need to flour the chicken, this is an unnecessary step.

I use canola oil for frying, you can use vegetable or peanut oil or combinations of these oils . Fill your pan with about 2 to 3 inches of oil for deep frying.  For the hot sauce I have always used Frank’s Hot Sauce.

Enjoy your crispy golden fried Buffalo chicken strips!!! If you are craving more crispy things try my crispy pan fried chicken cutlets

Ingredients

  • 2 skinless boneless chicken breast
  • 1 cup pepperoncini juice
  • 2 eggs
  • 2 cups bread crumbs
  • 1 cup grated parmesan cheese
  • 4 cups olive oil canola oil for frying
  • 1 stick of butter
  • 1 cup franks hot sauce
  • 2 tsp. each garlic + onion + and paprika powder
  • Chopped Italian parsley
  • Ranch dressing for dipping

Instructions

  1. Start by cleaning your chicken pat dry. Salt and pepper to taste. Cut into strips of equal size. Then marinate in the pepperoncini juice for at least one hour.
  2. Add the bread crumbs, parmesan and Italian parsley to one bowl mix to combine and the eggs to another wisk to blend
  3. Remove the chicken from the marinate and pat dry. Dip first in the egg then in the bread crumb mixture. repeat the process with all the chicken pieces.
  4. Bring the oil yo medium high heat, Fry the chicken fingers until golden brown. About five minutes. being sure not to over crowd the pan, Repeat the frying for all the chicken. Drain on paper towels.
  5. Meanwhile make the hot sauce. In a small saucepan melt the butter. Add the hot sauce, garlic, onion and paprika, simmer on low for 5 minutes
  6.  Toss the chicken in the hot sauce top with more hot sauce and Italian parsley. ENJOY!!!


Roasted Butternut squash orzo

Roasted butternut squash orzo

This creamy roasted butternut squash orzo is healthy and delicious. The rich, nutty sauce gets warm fall flavors by roasting the butternut squash with sage and garlic. Roasting the squash brings out its natural sweetness and adds another depth of flavor. And when you mix it with stock, cream and parmesan cheese, it becomes an irresistible rich and savory sauce . This simple recipe is not only delicious it is also affordable!!! Just a handful of ingredients you probably already have on hand.

  Roasted butternut squash orzo Variations

Protein: This is a vegetarian recipe if you want to add protein you can saute some Italian sausage spicy or mild along with the garlic. If you want a healthier protein try chicken apple or turkey sage  sausage.

Vegetables: you can replace the spinach with Swiss chard or kale and add other vegetables like diced zucchini or mushrooms.

Gluten free: I am using orzo a small shaped rice looking pasta. You can use any shape pasta you like or gluten free.

I recommend roasting the butternut squash in advance. This will reduce your actual cooking time.  You could prepare the whole sauce recipe the day before. Than bring it to the stove top and add the orzo when your ready to serve. You can keep the cooked pasta sauce in your fridge for up to 4 days.

Ingredients

  • 4 cups peeled and cubed butternut squash
  • 4 garlic cloves
  • 4 to 5 sage leaves
  • 4 Tbsp/ olive oil
  • 1 cup heavy cream
  • 2 cups vegetable or chicken stock
  • 3 cups orzo
  • 3 cups chopped spinach
  • 1 cup grated parmesan
  • 1 cup gorgonzola

Instructions

  1.  Preheat your oven to 375- degrees. Start by peeling and cutting the butternut squash into medium size dice.  Place  the squash on a cookie sheet, add the garlic and sage leaves, salt and pepper to taste, drizzle with the olive oil and roast for 15 to 20 minutes or until soft.
  2. Then add the  squash to a pan over medium high heat on the stove top. Add the cream , stock and orzo. Simmer until the orzo is cooked el dent about 10 minutes. Add the spinach and grated parmesan cheese and simmer just a few minutes until the spinach is wilted.
  3. Plate top with the gorgonzola and Italian parsley . ENJOY!!!