Arancini Italian rice balls

Arancini Italian Rice Balls

This post may contain affiliate links, that help support this blog. If you make a purchase through these links, I may earn a commission—at no cost to you. For more information read my disclosure policy.

Golden and crispy on the outside, tender and flavorful on the inside, Arancini are one of Italy’s most beloved street foods. These delicious Italian rice balls are filled with a rich, savory meat sauce and creamy mozzarella, then coated and fried until perfectly golden.

The name arancini means “little oranges” in Italian, a reference to their round shape and beautiful golden color. While they originated in Sicily, these irresistible rice balls can now be found throughout Italy, with each region putting its own delicious spin on them.

The classic version is filled with meat sauce, peas, and mozzarella, but there are countless variations, from saffron-infused rice to vegetarian fillings and different cheeses. No matter the filling, the appeal is the same: a crisp, golden exterior giving way to warm, creamy, savory goodness inside.

Perfect as an appetizer, snack, or part of an Italian-style dinner, arancini are always a crowd-pleaser—and a delicious taste of Italy in every bite.

Arancini: Italian Rice Balls

Making arancini may seem like a project, but with a little preparation, they’re much easier than you might think. The key is to make the rice or risotto ahead of time and give yourself a little time to assemble everything before frying.

Steps to Make This Arancini Italian Rice Ball Recipe Easy

Step 1: Prepare the rice.
Make the risotto a day or two ahead and refrigerate it. Cold rice is much easier to work with and helps the arancini hold their shape.

Step 2: Set up your workstation.
When you’re ready to make the arancini, have everything prepared and within reach: the chilled risotto, cubed mozzarella, meat filling, seasoned breadcrumbs, and beaten eggs.

Step 3: Shape and bread the arancini.
Take a portion of the rice and gently flatten it in your hand. Add a little meat filling and a cube of mozzarella, then carefully shape the rice around the filling, sealing it completely. Dip each rice ball in beaten egg, then roll it in the breadcrumbs. Place the finished arancini on a parchment-lined baking sheet.

Step 4: Refrigerate until ready to cook.
The arancini can be made several hours ahead, or even the day before. Cover and refrigerate until you’re ready to cook them.

Step 5: Fry until golden.
Heat the oil and fry the arancini in batches until they’re beautifully golden and crisp on the outside. Don’t overcrowd the pan, or the oil temperature will drop and the arancini won’t crisp properly.

Short on time? You can also bake the arancini in the oven or cook them in an air fryer for a lighter option.

Serve them hot, while the outside is crisp and the mozzarella inside is warm and gooey. That’s when they’re at their best.

Storage

Refrigerator: Store cooked arancini in an airtight container for up to 3 days.

Freezer: Freeze cooked or uncooked arancini in a single layer until firm, then transfer to a freezer-safe container for up to 3 months. Cooked arancini can be reheated directly in a 375°F oven or air fryer until hot and crisp.

More Italian Appetizers

If you love classic Italian appetizers, try my Easy Savory Puff Pastry Twists, Gorgonzola and Brie Pear Tart, or my family’s favorite Italian sausage rolls with puffpastery .For more delicious ideas, browse my Appetizer Recipes.


Arancini Italian Rice Balls

Crispy, golden Italian rice balls made with creamy seasoned rice, filled with savory cheese and fried or baked until perfectly crisp. Arancini are a classic Italian appetizer and a delicious way to turn leftover risotto into something special.

  • 4 cups leftover rice or risotto
  • 1 cup grated parmesan cheese
  • 1 egg
  • 2 Tbsp. chopped Italian parsley

FOR THE MEAT FILLING

  • 2 Tbsp. olive oil
  • 1/2 cup chopped onion
  • 1 Tbsp. minced garlic
  • 1 cup chopped celery + 1 cup peeled and chopped carrot
  • 1 cup diced pancetta or bacon
  • 1/2 lb. ground beef + 1/2 lb. ground pork
  • 1/2 cup red wine
  • 2 cups crushed tomatoes
  • 2 Tbsp. tomato paste
  • 1 cup water
  • 1 Tbsp. dried Italian herbs
  • 1 cup peas (optional)
  • Ingredients to assemble:
  • 4 mozzarella sticks cut into 4 pieces

FOR THE COATING

  • 1 egg slightly beaten
  • 2 cups breadcrumbs
  • 1/2 cup grated parmesan
  • 1 Tbsp. chopped Italian parsley
  1. Mix the cooked rice with 1 egg , 1 cup of grated parmesan cheese and the Italian parsley, salt and pepper to taste. Set aside while preparing the meat filling.

  2. To make the meat sauce: Start in 2 Tbsp. of olive oil by cooking the pancetta or bacon until crisp, then add the celery, onion, garlic and carrots and cook until soft . Once the vegetables are soft add the meats and cook until browned breaking up the meat as it cooks.
  3. Add the wine and let it evaporate before adding the tomato paste and water. Bring to a boil, then turn down to a simmer cover and cook for one hour. If using peas add them to the meat sauce the last 10 minutes .
  4. This recipe uses about 3 cups of meat filling any leftovers can be used for pasta sauce.
  5. To assemble and fry; the rice should be warm for easier forming , if the rice has be in the fridge warm in the microwave.
  6. Wet your hands this will make forming the rice balls easier. Take about 1 Tbsp. of rice and flatten into your cupped hand. Place 1Tbsp. of the meat filling and 1 piece of the mozzarella in the center and roll into a ball making sure all the filling is covered .
  7. Then in a bowl mix the breadcrumbs with the parmesan cheese and Italian parsley. In another bowl whisk the egg slightly
  8. Dip the arancini balls first in the egg and then in the breadcrumb mixture. Now refrigerate for 30 minutes or even overnight.
  9. Then bring 3 cups of canola – olive oil blend to medium high heat and fry the rice balls until golden brown about 5 minutes.
  10. Drain on absorbent paper . serve hot.

Make sure the rice is completely chilled before forming the arancini. Cold rice is much easier to shape and will hold together better. Keep your hands slightly damp as you form the balls, and don’t overfill them—this helps prevent the filling from leaking out while cooking.
Tip text

Appetizer, Main Course, Side Dish
Italian
Arancini, Italian rice balls


Sausage stuffed shells with bechamel

Sausage Stuffed Shells with Bechamel

This post may contain affiliate links, that help support this blog. If you make a purchase through these links, I may earn a commission—at no cost to you. For more information read my disclosure policy.

There is something undeniably cozy about baked pasta dishes. Sausage stuffed shells with bechamel sauce is a recipe that combines bold flavors with creamy decadence, creating a meal perfect for family gatherings, special occasions or even a quit night in.

This dish takes the traditional idea of stuffed shells and gives it a luxurious twist. Instead of marinara , a velvety bechamel sauce coats the shells, enhancing the savory sausage filling with a creamy richness. Every bite is a delicious blend of tender pasta, flavorful filling, and a smooth sauce baked to perfection.

Tips for success when making sausage stuffed shells with bechamel

1. Prep ahead: cook the pasta , make the filling , and prepare the bechamel sauce up to a day in advance. Store them separately in the fridge until you are ready to assemble.

2. Use crumbled Italian sausage for faster browning . You can customize your sausage preference by using mild or a combination of mild and spicy.

3. Pipe the filling: Transfer the sausage  filling mixture to a piping bag or a zip -top with the corner snipped for a quick and mess -free stuffing.

Sausage stuffed shells with bechamel sauce is a comforting , crowd- pleasing dish that transforms simple ingredients into a luxurious Italian-inspired meal. Whether you are preparing it for a weeknight family dinner or a special occasion , this recipe is sure to impress with it’s creamy sauce, savory filling, and bubbly golden topping. With a little prep and these streamlined tips, you will have a stunning baked pasta dish that’s as easy to make as it is delicious!!!

Storage

Refrigerator: Cover and refrigerate leftovers for up to 4 days. Reheat in a 350°F oven until hot and bubbly, or microwave individual portions.

Freezer: Assemble the stuffed shells in a freezer-safe baking dish, cover tightly, and freeze for up to 3 months. Thaw overnight in the refrigerator before baking. You can also freeze individual portions after baking.

More Italian Pasta Recipes

If you love comforting baked pasta, try my Lasagna Bolognese, Pasta al Forno, Zucchini Lasagna with Bolognese, and Spicy Rigatoni Amatriciana. For more delicious Italian-inspired pasta dishes, browse my Pasta Recipes.


Sausage Stuffed Shells with Bechamel

Jumbo pasta shells stuffed with savory Italian sausage and a creamy cheese filling, then baked with tomato sauce and a silky béchamel until bubbling, golden, and delicious. This comforting Italian-inspired pasta bake is perfect for Sunday dinner, holidays, or feeding a hungry family.

  • 32 large shells
  • 1/2 lb. spicy Italian sausage
  • 2 Tbsp. olive oil
  • 1/2 cup chopped onion
  • 1 Tbsp. minced garlic
  • 2 cups ricotta cheese
  • 1 cup grated parmesan
  • 1 cup shredded mozzarella
  • 1 egg slightly beaten
  • 1/2 cup chopped Italian parsley
  • 2 cups marinara sauce
  • Bechamel sauce Ingredients: 1 stick of butter+ 1/4 cup flour+ 4 cups milk+ pinch of nutmeg
  1. Cook the shells el dente (about 3 minutes less than the package directions) drain and rinse under cold water. Set aside.

  2. In a skillet over medium high heat in the olive oil saute the onion and garlic until soft and translucent then add the sausage and cook until browned and fully cooked, breaking it into small pieces. Remove and let cool slightly.
  3. In a bowl combine the ricotta, mozzarella, parmesan cheese, egg , parsley and the sausage mixture. Salt and pepper to taste
  4. Make the bechamel sauce In a sauce pan melt the butter over medium heat. Whisk in the flour and cook for 2 minutes until golden forming a roux. Gradually whisk in the milk stirring continually to prevent lumps until the sauce thickens 5-8 minutes. Add the nutmeg , salt and pepper to taste. remove from the heat.
  5. Preheat your oven to 375-degrees
  6. Spread a thin layer of bechamel sauce and the marinara sauce on the bottom of an oven proof baking dish.

  7. Fill each pasta shell with 1-2 Tablespoons of the sausage mixture and arrange them in the dish .
  8. Pour the remaining bechamel sauce evenly over the shells.
  9. Top the shells with additional mozzarella and parmesan cheese. Cover the dish with foil and bake for 20 minutes. Then remove the foil and bake 10 minutes longer or until the cheese is bubbly and golden. Top with additional Italian parsley.

Don’t overcook the shells before stuffing them. Cook them just until al dente—they’ll continue cooking in the oven. Rinse them briefly under cool water after draining to stop the cooking and make them easier to handle. For the best result, let the stuffed shells rest for about 10 minutes before serving so the filling and béchamel can settle.

Main Course
Italian
sausage stuffed pasta shells,


Italian Vegetable beef soup

Italian Vegetable Beef Soup

This post may contain affiliate links, that help support this blog. If you make a purchase through these links, I may earn a commission—at no cost to you. For more information read my disclosure policy.

Nothing warms the soul quite like a bowl of Italian vegetable beef soup. This classic dish is the ultimate comfort food, combining the slow -cooked beef with the vibrant, earthy taste of fresh vegetables. Full of wholesome ingredients like tender chunks of beef, carrots and potatoes it’s a hug in a bowl. Simmered with Italian herbs every spoonful is a burst of flavor that transports you to a rustic Italian countryside kitchen.

Perfect for chilly evenings or make-ahead meal for busy days. Whether you pair it with crusty bread  or enjoy it on it’s own, It’s a satisfying and nourishing that your whole family will love. Plus, it’s a great way to incorporate vegetables into your diet without compromising taste.

Why you will love this Italian vegetable beef soup

What sets this Italian vegetable beef soup a part is it’s versatility. The recipe allows for endless customizations, so you can use whatever vegetables you have on hand. It’s also a one-pot wonder. making cleanup a breeze. Plus the slow simmering process not only deepens flavor it leaves you hands free and your kitchen with an irresistible aroma that will have everyone eagerly waiting for dinner.

Whether your looking for a comforting dish on a cold night or an easy meal prep recipe, this soup is bound to become a family favorite too.

This soup is even better the next day, once the flavors have had time to meld. If you plan to freeze it, leave out any pasta or add it after thawing and reheating so it doesn’t become too soft.

Storage

Refrigerate leftovers in an airtight container for 3–4 days. The soup can also be frozen for up to 3 months. Thaw overnight in the refrigerator and reheat gently on the stovetop.

Serving Suggestion

Serve with crusty Italian bread, garlic bread, or a simple green salad for a complete meal.

More Italian Comfort Food to Try

If you love a hearty bowl of homemade soup, be sure to try some of my other comforting favorites. From cozy Italian Wedding Soup to creamy sausage Gnocchi Soup, there’s something for everyone. And if you’re craving a classic pasta dish, my Authentic Italian Bolognese is always a favorite.

A good all-around stock pot is a kitchen essential—perfect for soups, stocks, pasta, and large batches of your favorite recipes. 

Italian Vegetable Beef Soup

A hearty Italian-style vegetable beef soup made with tender beef, garden vegetables, tomatoes, and savory herbs. This comforting one-pot soup is rich, flavorful, and perfect for a cozy family dinner.

  • 1 Lb. beef chuck
  • 2 Tbsp. olive oil
  • 1 cup diced onion
  • 2 Tbsp. minced garlic
  • 1 cup diced celery
  • 2 cups diced carrots
  • 3 medium potatoes medium dice
  • 2 Tbsp. tomato paste
  • 4 cups beef broth
  • 1 cup water
  • 1 cup small shaped pasta
  • a few bay leaves
  • salt and pepper to taste
  • grated parmesan cheese
  • 2 Tbsp. chopped Italian parsley
  1. Heat the oil in a large stock pot . salt and pepper the meat. then brown on all sides . Remove and set aside.

  2. In the same pan add the onion, garlic, celery and carrots. Cook until soft and just beginning to brown.
  3. Add the tomato paste, broth, water and bay leaves. Return the beef back to the pot. Bring to a slow simmer and cook covered for 45 minutes. Add in the potatoes cook 15 minutes longer add the pasta the last 5 minutes.

  4. Ladle into soup bowls . Top with grated parmesan cheese and the Italian parsley.

For the best flavor, don’t rush the beef. Brown it well in batches before adding the vegetables and broth. Those browned bits on the bottom of the pot add incredible depth and richness to the soup.

Main Course, Soup
Italian
Italian beef soup,


Authentic Italian shrimp oreganata

Authentic Italian Shrimp Oreganata

This post may contain affiliate links, that help support this blog. If you make a purchase through these links, I may earn a commission—at no cost to you. For more information read my disclosure policy.

Authentic Italian  shrimp oreganata isn’t just a recipe- it’s a cherished part of my childhood memories, especially during La Vigilia, the Italian  Christmas eve feast of the seven fishes.

Every Christmas Eve, our family would gather around a table full of seafood dishes, each prepared with love and tradition. Shrimp oreganata was always one of my favorites, a dish that represented the warmth of the season. The kitchen would be filled with the smells of garlic sizzling in olive oil. My mother would prepare the shrimp, layering them in the baking dish, while I would sprinkle the breadcrumb mixture making sure each shrimp was perfectly coated. Christmas Eve was always a special night-no meat just the bounty of the sea. Shrimp oreganata was often the first dish to disappear. it’s crispy topping and tender shrimp was irresistible to everyone at the table.

To this day , authentic Italian shrimp oreganata holds a special place in my heart and on my Christmas eve table. It’s more than a dish: It’s a connection to my roots, a reminder of those joyful  Christmas Eves, spent with family and the traditions that make the season so meaningful.

The magic of authentic Italian shrimp oreganata

The magic of shrimp oreganata lies in it’s simplicity. Plump shrimp are the star, complemented by  the crunchy breadcrumb topping and the zesty tang of lemon juice. The breadcrumbs soak up the shrimps natural juices and blend with the olive oil and butter for a savory melt-in – your dish. Traditionally served with crusty Italian bread to mop up every bite, it also pairs deliciously with pasta or a salad for a complete meal.

This authentic preparation brings the spirit of Italian cooking- fresh wholesome ingredients prepared simply. Whether you are making this for a holiday dinner or a casual weeknight meal , shrimp oreganata is a crowd- pleaser that brings a taste of Italy to your table.

For the most flavorful topping, use fresh garlic, Italian parsley, good-quality Pecorino Romano, and extra-virgin olive oil. A squeeze of fresh lemon over the finished shrimp brightens all the flavors.

Storage

Store leftovers in an airtight container in the refrigerator for up to 2 days. Reheat gently to avoid overcooking the shrimp.

Serving Suggestion

Serve with crusty Italian bread to soak up the flavorful juices, or pair it with pasta, roasted vegetables, or a simple green salad.

More Italian Seafood Recipes to Try

If you love simple Italian seafood recipes, don’t stop with Shrimp Oreganata! Try my Italian style Dover Sole, Italian-Style lemon piccata Cod, or my personal favorite Shrimp spaghetti with tomato basil sauce for more easy and flavorful seafood dinners. Looking for something heartier? My Authentic Italian Bolognese is another family favorite. 

Authentic Italian Shrimp Oreganata

Tender shrimp are topped with a savory mixture of Italian-seasoned breadcrumbs, garlic, parsley, Pecorino Romano, and olive oil, then baked until golden and delicious. This classic Italian-American shrimp dish is simple enough for a weeknight dinner and elegant enough for entertaining.

  • 1 lb. large shrimp ((16-20) peeled and deveined, tails on)
  • 2 Tbsp. olive oil
  • 1 Tbsp. minced garlic
  • juice from one lemon
  • 1 cup breadcrumbs
  • 1 Tbsp. red chili flakes
  • 1/2 cup grated parmesan cheese
  • 1 Tbsp. dried oregano
  • 2 Tbsp. chopped Italian parsley
  • Lemon slices for serving
  1. Per heat your oven to 400- degrees

  2. Clean the shrimp Then place the shrimp in a oven proof baking dish drizzle with 2 Tbsp. of the olive oil. season with salt, pepper, half of the minced garlic, white wine and the lemon juice. Toss to coat evenly
  3. In a bowl mix the breadcrumb, grated parmesan, oregano and red pepper flakes
  4. Then in 1 Tbsp. of olive oil and 2 Tbsp. of butter over medium high heat add the garlic cook until fragrant then add the breadcrumb mixture and toast until golden brown.
  5. Spread the breadcrumb mixture evenly over the shrimp, ensuring each shrimp is evenly coated.
  6. Bake in the preheated oven for 12-15 minutes, or until the shrimp are pink and opaque .
  7. Garnish with additional chopped Italian parsley and lemon slices.

Don’t overcook the shrimp. They should be just cooked through and tender when they come out of the oven. Shrimp continue cooking from residual heat, so keep a close eye on them.

Appetizer, Main Course, Side Dish
American, Italian


Authentic Italian baccala

Authentic Italian Baccala

This post may contain affiliate links, that help support this blog. If you make a purchase through these links, I may earn a commission—at no cost to you. For more information read my disclosure policy.

Authentic Italian Baccalà is salted cod that has been preserved with salt, giving the fish a wonderfully flaky texture and an intensely savory flavor that is never overly fishy. In Italy, baccalà is more than just a beloved ingredient—it is a fish deeply connected to tradition, family, and celebration.

Growing up, baccalà with potatoes was always part of our Feast of the Seven Fishes on Christmas Eve. Sometimes my mother would prepare it as a simple salad, combining the cooked baccalà and potatoes with a generous drizzle of extra-virgin olive oil and freshly squeezed lemon. No matter how she prepared it, it was always delicious.

When it comes to carrying on traditions, however, there can sometimes be a little extra work involved. Baccalà is preserved in salt, so before it can be cooked, it needs to be soaked in cold water to rehydrate the fish and remove the excess salt. The water must be changed frequently, often over the course of a couple of days. It may take some planning, but for me, that little bit of extra effort is part of the tradition—and well worth it.

This is the kind of recipe that takes me right back to Christmas Eve at my mother’s table, where food was about much more than what was on the plate. It was about family, tradition, and keeping the recipes we grew up with alive.

Top Tips for Making Authentic Italian Baccalà

Don’t rush the soaking process. Baccalà is preserved in a generous amount of salt, so properly desalting the fish is one of the most important steps in the recipe. I recommend soaking it in cold water for three days, changing the water every day.

You’ll find plenty of baccalà recipes online that recommend soaking the fish for only 24 hours, but in my experience, that simply isn’t enough. The fish can still be far too salty and leave you with an otherwise delicious dish that is nearly inedible. Giving the baccalà those extra days allows it to properly rehydrate while gradually removing the excess salt. This is one step I never skip, especially when I’m making it for a holiday meal.

Good to Know

Baccalà needs to be soaked before cooking to both rehydrate the fish and remove the salt used to preserve it. Keep it refrigerated while soaking and change the water daily.

Storage

Store leftover cooked baccalà and potatoes in an airtight container in the refrigerator for up to 3 days. Reheat gently to prevent the fish from becoming dry.

Serving Suggestion

Serve with crusty Italian bread to soak up the flavorful olive oil and juices. A simple green salad makes a lovely accompaniment.

More Italian Recipes to Bring to the Table

If you enjoy recipes that are rooted in Italian tradition and family memories, be sure to explore more of my classic Italian recipes. From comforting Italian Wedding Soup and Authentic Italian Bolognese to classic Pasta al Forno, these are the kinds of recipes meant to be shared around the table. 

Authentic Italian Baccala

Authentic Italian Baccalà with potatoes is a traditional Italian dish made with salt-cured cod, tomatoes, tender potatoes, extra-virgin olive oil, garlic, parsley, and fresh lemon. A beloved recipe for Christmas Eve and the Feast of the Seven Fishes, this simple dish is full of Italian family tradition.

  • 2 lbs. dried salted baccala
  • 2 Tbsp. olive oil
  • 1 cup chopped onion
  • 2 Tbsp. minced garlic
  • 1 Tbsp. red hot pepper flakes
  • 2 cups cherry tomatoes
  • 1 28 oz. crushed tomatoes
  • 1 cup red wine
  • 4 potatoes peeled and cut in medium cubes
  • 1/2 cup chopped Italian parsley
  1. Start by soaking the cod. This step takes three days with the water being changed every day. Then remove pat dry and cut into equal size pieces

  2. Then in a stock pot in the olive oil fry the fish . remove and set aside.
  3. In the same pot add the red pepper flakes, onion and garlic and cook until soft and translucent .
  4. Then mix in the cherry tomatoes and the diced potatoes. coating then with the onion mixture. Now deglaze the pan with the red wine, waiting until it evaporates before adding in crushed tomatoes. Rinse out the can and add about a cup of the liquid. Cover and simmer until the potatoes are fork tender. Return the baccala back to the pot just to heat through. Add the Italian parsley, Ladle into pasta bowls, top with additional parsley.

Don’t rush the soaking process. Baccalà needs plenty of time in cold water to remove the excess salt. I recommend soaking it for three days, changing the water every day. This extra time makes all the difference and prevents the finished dish from being overly salty.


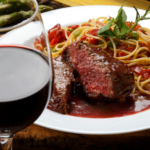
Filet Mignon with Red Wine Reduction Sauce

Filet Mignon with Red Wine Reduction SauceThis post may contain affiliate links, that help support this blog. If you make a purchase through these links, I may earn a commission—at no cost to you. For more information read my disclosure policy.

Filet mignon, renowned for it’s buttery tenderness and mild flavor transforms into something extra special when paired wild a luxurious wine reduction sauce. This simple yet elegant addition combines the bold richness of red wine with shallots and fresh herbs creating a sauce that enhances  the steak’s natural juiciness  A wine reduction sauce is surprisingly easy to make. With just a few high – quality ingredients and a bit of patience, you can make a dish that is restaurant- worthy. Pair your filet mignon with this sauce and serve with roasted vegetables and creamy  potatoes for a meal  perfect for special occasions or when you want to indulge.

Tips for the Perfect Filet Mignon

Bring the steaks to room temperature. Allow the filet mignon to sit at room temperature for about 30 minutes before cooking. This promotes more even cooking and helps you achieve a beautifully browned crust while keeping the center juicy and tender.

Season generously. Season both sides of the steaks well with salt and freshly ground black pepper. Filet mignon is a mild cut of beef, so proper seasoning makes a big difference.

Use a heavy-bottomed skillet. A cast-iron skillet is ideal because it holds heat exceptionally well. Preheat the skillet thoroughly before adding the oil. Once the pan is very hot, add the steaks and sear for about 4–5 minutes per side for medium-rare, or adjust the cooking time to your preferred doneness.

Don’t skip the resting time. Transfer the steaks to a plate and let them rest for 5–10 minutes before slicing. This allows the juices to redistribute throughout the meat, keeping your filet juicy and tender.

Deglaze the pan. After removing the steaks, add the wine to the hot skillet and scrape up all those flavorful browned bits from the bottom of the pan. Those little bits are packed with flavor and are the foundation of a delicious red wine reduction sauce.

Chef’s Tip: For the best sear, make sure the filet mignon is thoroughly patted dry before seasoning. A dry surface and a very hot skillet are the keys to achieving that beautiful restaurant-quality crust.

Serving Suggestions

Serve your filet mignon with creamy mashed potatoes, roasted asparagus, sautéed mushrooms, or your favorite roasted vegetables. Spoon the rich red wine reduction generously over the steak just before serving.

Storage

Store leftover steak and sauce separately in airtight containers in the refrigerator for up to 3 days. Reheat the steak gently to avoid overcooking, and warm the sauce separately over low heat. 

Filet Mignon with Red Wine Reduction Sauce

Perfectly seared filet mignon is served with a rich and flavorful red wine reduction sauce. The sauce is reduced with aromatics and finished until silky and concentrated, creating an elegant restaurant-style dinner that's surprisingly simple to make at home.

  • 2 filet mignon steaks (6-8 oz. each)
  • Salt and freshly ground pepper
  • 2 Tbsp. olive oil
  • 6 Tbsp. butter divided
  • 1 small minced shallot
  • a few sprigs of rosemary and thyme
  • 1 cup red wine
  • 1 cup beef stock
  1. Start by patting the steaks dry with paper towels. Then generously season both sides with salt and pepper.

  2. Heat a cast- iron skillet over medium high heat until smoking hot. Add the olive oil and let it shimmer. Place the steaks in the pan and sear for 4-5 minutes pre side for medium rare.
  3. Add 2 Tbsp. of the butter tilt the pan and spoon the melted butter over the steaks for added flavor, while cooking.
  4. Remove the steaks from the skillet tent with foil while preparing the wine reduction sauce.
  5. In the same pan , add 2 Tbsp. of butter and the shallots cook until the shallots are soft and fragrant ( 4-5 minutes). Add the red wine and beef stock scrap up the brown bits from the bottom , add the rosemary and thyme and let it simmer until reduced by half about 10 minutes. Then whisk in the remaining 2 Tbsp. of cold butter cubes to create a glossy finish.
  6. Slice the steaks on a diagonal pour the sauce over it.

Let the steaks rest before slicing. After searing the filet mignon, transfer it to a plate and let it rest for about 5–10 minutes. This allows the juices to redistribute, keeping the steak tender and juicy.

Main Course
American, Italian, Mediterranean
filet mignon with red wine sauce,


Italian One Pot Pasta and Potatoes (Pasta e Patate)

Italian One Pot Pasta and Potatoes (Pasta e Patate)

This post may contain affiliate links, that help support this blog. If you make a purchase through these links, I may earn a commission—at no cost to you. For more information read my disclosure policy.

There is something magical about simple, rustic recipes that warm your heart as much as your stomach. One pot pasta and potatoes or pasta e patate is a beloved pasta dish in Italian households, a true testament to cucina povera- Italian peasant cooking that transforms humble ingredients into something delicious.

The recipe is the essence of simplicity, combining tender pasta, creamy potatoes, and herbs in a single pot. The starch from the potatoes and pasta create a naturally creamy sauce, perfectly flavored with pancetta, garlic and onions. It’s a meal that feels like home for me , whether I am serving it on a cold winter night or as a quick weeknight dinner.

The beauty of one pot -meals isn’t just in the ease of cleanup-it’s the way the flavors melt together, creating flavor that is timeless and effortless.

Here’s  why this one-pot pasta and potato recipe stands out

One- pot pasta and potatoes has a lot going for it here’s why

  1.  The combination of pasta and potatoes creates a creamy, hearty texture that’s filling and satisfying, perfect for chilly nights.
  2. Simple and accessible: You only need a handful of pantry staples: pasta, potatoes, and a few aromatics. The only ingredient you may need is pancetta and here you could use bacon. Or for a vegetarian option leave it out completely.
  3. One-pot convenience: Minimal cleanup is always a win!!!Cooking everything in one pot not only makes for easy cleanup but also allows the ingredients to infuse each other with flavor.
  4. Economical and filling: Combining two carbs  ( pasta and potatoes) with pancetta creates a hearty meal that’s budget -friendly and delicious. Whether you are cooking for a cozy weeknight dinner or looking for a dish that feels like home this recipe delivers every time. With it’s  rich, creamy texture smoky pancetta, and minimal cleanup, it’s destined to become a family favorite.

    Storage

    Store leftover Pasta e Patate in an airtight container in the refrigerator for up to 3 days. The pasta will continue to absorb the liquid as it sits, so add a splash of water or broth when reheating. Reheat gently on the stovetop or in the microwave until heated through.

    What to Try Next

    If you love simple Italian comfort food, try a few more of my easy recipes:

    Looking for more easy Italian-inspired recipes? Browse my pasta recipes for more simple meals the whole family will love.


Italian One Pot Pasta and Potatoes (Pasta e Patate)

This Italian One Pot Pasta and Potatoes, or Pasta e Patate, is a simple, comforting dish made with tender potatoes and pasta simmered together in one pot. It’s an easy, hearty Italian meal with humble ingredients and plenty of flavor.

  • 1/2 Lb. short pasta
  • 2 Tbsp. olive oil
  • 1 cup chopped onion
  • 1 Tbsp. minced garlic
  • 1 cup diced pancetta
  • 2 Tbsp. tomato paste
  • 3 cups chicken stock
  • 3 cups small diced potatoes
  • parmesan rind
  • a few rosemary sprigs
  • 1 cup shredded provolone
  1. Start in a stock pot over medium high heat in the 2 Tbsp. of olive oil by cooking the pancetta until crisp.

  2. Then add the onion and garlic and cook until soft and translucent. mix in 2 Tbsp. of tomato paste , Then add the potatoes and mix to coat with the cooked ingredients in the pot. Salt and pepper. Then add the stock, parmesan rinds and a few sprigs of rosemary.
  3. Cover and simmer on low until the potatoes are fork tender , about 20 minutes. Then add the pasta and cook until the pasta is el dente about 9 minutes longer.
  4. Take it off the fire and mix in the shredded provolone cheese . Mix to melt the cheese.
  5. Ladle into pasta bowls , top with more grated parmesan and fresh chopped Italian parsley.

For the best texture, don’t add all the liquid at once. Add it gradually as the pasta cooks so the potatoes and pasta release their starch and create a naturally creamy sauce.

For the best texture, don’t add all the liquid at once. Add it gradually as the pasta cooks so the potatoes and pasta release their starch and create a naturally creamy sauce.
Tip text

Main Course, pasta
Italian
Italian pasta and potatoes,


Roast spatchcock chicken with vegetables

Roast Spatchcock Chicken with Vegetables

This post may contain affiliate links, that help support this blog. If you make a purchase through these links, I may earn a commission—at no cost to you. For more information read my disclosure policy.

This roast spatchcock chicken with vegetable is delicious, easy to make and ready in less than 1 hour.

There is something undeniably satisfying about serving a perfectly roasted chicken, but when you take it up a notch with the spatchcock  technique, the results are next-level. spatchcock, where the backbone is removed and  the bird  is flattened, allows for even cooking and a irresistible crispy skin. It’s a simple adjustment that transforms a traditional roast chicken into a culinary masterpiece.

I first discovered this method a few years ago when cooking Sunday  dinner for my family and friends. My mom always taught me to roast the chicken the traditional way, but on this day time was short. I needed a way to cook the chicken faster without sacrificing any flavor or appearance. Enter the spatchcock technique -a game changer.

What I love most about this Roast spatchcock chicken with vegetables


What I love most about this spatchcock  method of roasting chicken is how it creates perfectly even  cooked chicken every time. The flattened chicken cooks faster, so your not left waiting for the thickest part of the breast to finish cooking.  The exposed surface means more even seasoning and golden-brown crispy skin = the best part in my opinion. Plus it’s easy to prepare and you have a complete restaurant quality meal that is on your table from start to finish in less than an hour.

This Roast spatchcock chicken with vegetables is more than just a cooking recipe – it’s a way to elevate a classic meal into something truly impressive. Whether you are preparing it for a family dinner or for a holiday gathering with friends, spatchcock chicken with vegetables is bound to steal the spotlight. Once you have tired this method of roasting chicken there is no going back.

I hope this recipe inspires you to give this  roast spatchcock chicken with vegetables  a try. If you do, let me know how it turns out- I’d love to hear about your experience with the recipe.

Store leftover chicken and vegetables in an airtight container in the refrigerator for up to 4 days. Reheat the chicken in the oven or air fryer for the best texture, or microwave until heated through.

If you love an easy roast chicken dinner, try some of my other comforting chicken recipes:

Looking for more easy weeknight meals? Browse my chicken dinner recipes for more simple, restaurant-inspired recipes made for home cooks.


Oven Roasted Spatchcock Chicken with Vegetables

This oven roasted spatchcock chicken with vegetables is an easy one-pan dinner with juicy, flavorful chicken and perfectly roasted vegetables. Spatchcocking the chicken helps it cook evenly while giving you beautifully crisp, golden skin.

  • 1 whole chicken 4-5 lb.
  • 1 stick of butter
  • 1 Tbsp. each garlic + onion+ paprika powder divided in half we are using half to season the compound butter and the other half to season the vegetables
  • 1 Tbsp. rosemary + 1 Tbsp. Italian parsley
  • 4 medium peeled and cut in half potatoes
  • 4 peeled and cut in half carrots
  • 2 peeled and quartered onions
  • 2 Tbsp. olive oil
  • 1 cup white wine
  • 1 sliced lemon
  • salt and pepper to taste
  1. Start by cleaning out the cavity of your chicken then wash and pat dry. Lay the chicken breast bone down on a cutting broad. Hit the back of the chicken hard with a mallet to loosen the back bone. Then using a knife or a pair of chicken scissors cut the backbone away from the chicken.

  2. Turn the chicken around and push down with your hands to flatten the chicken. Salt and pepper to taste.
  3. Then make the compound butter: In a bowl add soft butter, garlic, onion, paprika powder and mix to make a pasta.
  4. Spread the compound butter all over the chicken top with the chopped rosemary and Italian parsley.
  5. Lay the vegetables on a baking sheet drizzle with the olive oil, and the remaining spices you used to season the compound butter. salt and pepper to taste.
  6. Lay the chicken on top of the seasoned vegetables, add the lemon slices and roast in a preheated 400- degree oven for 45 minutes. Add the wine the last 15 minutes. Let the chicken rest for 10 minutes before cutting. Pour the pan juices over the top.

Spatchcocking the chicken is the secret to evenly cooked chicken with crispy skin. Press the chicken firmly to flatten it before roasting, and pat the skin completely dry before seasoning. This helps the skin brown beautifully while the vegetables roast underneath.
Tip text

Main Course
American, Italian, Mediterranean
roast chicken with vegetable


Italian Meatball Sunday Sauce with Homemade Meatballs

Italian Meatball Sunday Sauce with Homemade Meatballs

This post may contain affiliate links, that help support this blog. If you make a purchase through these links, I may earn a commission—at no cost to you. For more information read my disclosure policy.

There’s something special about Italian Sundays. It’s the day when life slows down, the kitchen becomes the heart of the home, and the smell of sauce simmering on the stove fills the house.

In my family, Sundays and sauce went together like peanut butter and jelly. Sunday sauce wasn’t just dinner—it was a tradition, a time to gather around the table, share a meal, and enjoy being together. It’s the kind of food that brings back memories and connects generations.

My Meatball Sunday Sauce is my easier, more approachable version of that tradition. You still get tender, flavorful meatballs and a rich tomato sauce, but without spending all day in the kitchen. The sauce cooks for about 1½ hours, giving you plenty of time to let the flavors develop while keeping the recipe manageable for today’s home cook.

It’s also a great recipe to make ahead, and like many Italian sauces, it may taste even better the next day. Serve it over your favorite pasta, add some crusty bread, and you have the kind of Sunday meal that brings everyone to the table.

Because Sunday sauce is about more than the sauce—it’s about family, tradition, and making time for the people you love.

Why This Meatball Sunday Sauce Is Perfect for Busy Days

Minimal prep: The ingredients are simple and easy to find, and you don’t need any fancy equipment or complicated techniques.

Easy to assemble: The meatballs come together quickly, and the sauce can be simmering on the stove in about 30 minutes. Then you can let it cook while you get on with the rest of your day.

Make-ahead friendly: Both the meatballs and sauce can be made ahead and refrigerated for up to 3 days or frozen for up to 3 months. Just reheat when you’re ready for an easy homemade meal that tastes like you spent all day in the kitchen.

Versatile: Serve this Sunday sauce over your favorite pasta, spoon it over creamy polenta, or enjoy the meatballs and sauce on their own with plenty of crusty bread for dipping.

Meatball Sunday Sauce doesn’t have to be complicated to feel special. This recipe gives you all the comfort and flavor of a traditional Italian Sunday meal without spending the entire day in the kitchen. Make it ahead, let the flavors develop, and when you’re ready to eat, simply reheat and bring everyone to the table.

If your looking for more authentic easy Italian Recipes try my easy Sicilian Potato Salad ( no Mayo) for an easy side dish everyone  loves, Or Acqua Pazza  “fish in crazy water, or a light healthy dinner that comes together in minutes 

Italian Meatball Sunday Sauce with Homemade Meatballs

This Italian Meatball Sunday Sauce is a comforting family-style meal made with tender homemade meatballs simmered in a rich, flavorful tomato sauce. My easy version brings the taste and tradition of an Italian Sunday meal to the table without spending all day in the kitchen.

  • 2 eggs
  • 1/3 cup milk
  • 1 cup day-old bread (crust removed (or 1 cup plain breadcrumbs))
  • 1/3 cup grated parmesan
  • 2 Tbsp. chopped Italian parsley
  • 1 Tbsp. finely minced garlic + 1 teaspoon garlic powder
  • 1/4 cup finely chopped onion + 1 Tbsp. onion powder
  • 1 Lb. lean ground beef
  • Salt and pepper to taste

INGREDIENTS FOR THE SAUCE

  • 2 Tbsp. olive oil
  • 1 small onion
  • 1 handful
  • Italian parsley
  • 3 cloves of garlic
  • 2 San Manzano 14 oz. crushed tomatoes
  • 1 San Manzano 14 oz. can tomato sauce
  • 1 Tbsp. oregano
  • 1 cup water from rinsing out the tomato cans
  • A few fresh basil leaves
  • 1 Tbsp. butter
  1. Start by making the sauce. Chop the onion, garlic and Italian parsley into almost a paste. Then in 2 Tbsp. of olive oil over medium high heat saute the paste until soft and fragrant.

  2. Add the tomatoes rinse out the cans with a little water and add to the stock pot. Bring to a slow simmer. cover and simmer for 1 hour. In the meantime make the meatballs: Preheat your oven to 375- degrees In a bowl add the eggs, milk, cheese and bread. Let sit for 10 minutes. Then add the rest of the meatball ingredients except for the ground beef and mix until well combined. Then add the ground beef, and mix just until well mixed. With wet hands form the meat into golf size balls. You should have 10 meatballs with this amount of ingredients.
  3. Bake the meatballs on a parchment lined cookie sheet for 10 -12 minutes or until just beginning to brown.
  4. After the sauce has been simmering for 1 hour. Add the baked meatballs and simmer the Sunday sauce for 1 hour longer. Add 1 Tbsp. of butter for a rich finish, and fresh basil.

Don’t rush the simmer. The longer the meatballs gently cook in the tomato sauce, the more flavor they add to the sauce. Keep the heat low and let everything simmer gently rather than boiling.

Main Course
Italian
Sunday sauce with meatball


Sausage mushroom sauce polenta

Sausage Mushroom Sauce Polenta

This post may contain affiliate links, that help support this blog. If you make a purchase through these links, I may earn a commission—at no cost to you. For more information read my disclosure policy.

If your looking for the ultimate comfort food that’s both hearty and delicious, sausage mushroom sauce polenta is what to make. This dish is the epitome of rustic Italian cooking, blending savory spicy sausage, earthy mushrooms, and velvety polenta into a meal that warms your heart and soul.  Whether served as a casual family meal or Saturday night dinner with friends, it’s a guaranteed hit.

Tips for making sausage mushroom sauce polenta

  1. Choose the right sausage and mushrooms: When I make this dish i like using spicy Italian sausage for it’s bold flavors, and pairs well with cremini mushrooms. The sausage adds a savory depth, while the earthy mushrooms balance the richness. of course you can use any mushroom that you prefer or mild Italian sausage. A splash of red wine makes the sauce even more flavorful- trust me, it’s worth it.
  2. Slow cooked  polenta is key: polenta reminds me of my Italian childhood- it’s comfort food through and through. Stirring the polenta slowly and consistently ensures it turns out creamy and lump-free. Adding parmesan makes it indulgent. the way my family used to enjoy
  3. Layer flavors: One trick I learned is to season each layer. Saute the sausage and mushrooms with onion and garlic , then let the sauce simmer gently. This brings out deep, complex flavors that  makes this dish delicious and unforgettable. Enjoy every moment while making this- it’s one of those meals where the love you put into it really shines through!!!

Sausage Mushroom Sauce Polenta

  • 2 Tbsp. olive oil
  • 1/2 lb. sliced cremini mushrooms
  • 1 cup chopped onions
  • 1 Tbsp. minced garlic
  • 1 lb. spicy Italian sausage crumbles
  • 1/2 cup red wine
  • 2 cups marinara sauce
  • salt and pepper to taste

INGREDIENTS FOR THE POLENTA

  • 2 cups chicken or vegetable stock
  • 1 cup milk
  • 1/2 cup grated parmesan cheese
  • 2 Tbsp. chopped Italian parsley
  • 2 cups polenta
  • salt and pepper to taste
  1. Start by making the sauce in a saute pan over medium high heat, in the olive oil cook the mushrooms until beginning to brown. Then add the onions and garlic and continue cooking until soft and translucent.

  2. Then add in the sausage cook until brown. Deglaze the pan with the red wine, waiting until it evaporates before adding in the marinara sauce and simmer for 15-20 minutes. In the meantime make the polenta.
  3. In a sauce pan add the stock and milk. Bring to boil , then lower the heat to a simmer. Slowly add in the cornmeal, stirring continuously. When the polenta begins to thicken about 10 minutes , add in the grated parmesan, parsley, salt and pepper. Adjust the consistency, if to dry add more stock. It should be the consistency of mash potatoes. Add in the Italian parsley. Continue cooking for 5 minutes longer.
  4. Spread the polenta on a platter top with the sausage mushroom sauce top with additional parmesan top with chopped Italian parsley.