Leeks peas and asparagus risotto

Leeks Peas and Asparagus Risotto

This post may contain affiliate links, that help support this blog. If you make a purchase through these links, I may earn a commission—at no cost to you. For more information read my disclosure policy.

This leeks peas and asparagus risotto combines tender  leeks, crisp asparagus, sweet peas and a squeeze of lemon for a bright, zesty finish. Perfect for a light family dinner, a special brunch or simply celebrating the arrival of warmer days.

The leeks provide a subtle sweetness that pairs beautifully with the freshness of peas and the earthy bite of asparagus. As the rice slowly absorbs the warm broth, it transforms into a luscious, creamy dish that feels both indulgent and light. The lemony finish lifts the flavors, making each bite a delightful reminder of spring’s arrival.

  • Whether you’re preparing a family dinner or hosting friends, this risotto is a versatile crowd-pleaser. Serve it as a comforting main course with a side of crusty bread, or pair it alongside grilled chicken or fish for a more elaborate spread. Its vibrant colors and fresh flavors will bring a touch of elegance to any meal.

Things to know about this leeks peas and asparagus risotto recipe

  • Seasonal Ingredients: Fresh leeks, peas, and asparagus are at their peak in spring, making this risotto a celebration of the season.
  • Creamy Comfort: The traditional Italian method of slowly adding broth ensures a luxuriously creamy texture without needing cream.
  • Easy Elegance: Perfect for a weeknight dinner or a special occasion, this risotto brings a touch of sophistication to your table.

Tips for the Perfect Risotto

  • Use Warm Broth: Always keep your vegetable or chicken broth warm to maintain the cooking temperature of the rice.
  • Stir Consistently: Stirring frequently helps release the starches from the rice, creating that creamy texture.
  • Taste as You Go: Adjust salt, pepper, and lemon juice to your liking for the perfect balance of flavors.

This leeks, peas, and asparagus risotto pairs beautifully with a glass of chilled white wine and a side of crusty bread. It’s a delightful way to savor the fresh, bright flavors of spring. Give it a try and let the vibrant greens and creamy rice bring a bit of seasonal joy to your table.

Have you made this risotto? Share your experience in the comments or tag me on social media with your creations. I’d love to see how it turns out! 

Leeks Peas and Asparagus Risotto
Creamy Italian risotto made with tender asparagus, sweet peas, and sautéed leeks. This simple spring-inspired dish is packed with fresh vegetables and finished with Parmesan for a rich, comforting flavor.

  • 2 cups Arborio rice
  • 1 leek cleaned and sliced
  • 1 cup trimmed and chopped asparagus
  • 1 cup fresh or frozen peas
  • 4 cups hot vegetable or chicken stock
  • 1/2 cup white wine
  • 2 Tbsp. butter
  • 1 Tbsp. olive oil
  • 1/2 cup parmesan cheese
  • Juice from 1 lemon
  • 2 Tbsp. chopped Italian parsley
  • Salt and pepper to taste
  1. Saute the leeks : heat the oil and butter in a large skillet over medium high heat. Add the sliced leeks and saute until soft and fragrant.

  2. Toast the rice: Stir in the Arborio rice and cook until lightly toasted 3-4 minutes
  3. Deglaze the pan with the wine stirring until absorbed
  4. Add the warm broth one ladle at a time, stirring constantly. allow the broth to absorb before adding more.
  5. After 15 minutes, stir in the asparagus and peas. Continue cooking until the rice is creamy and al dente.
  6. Remove from the heat , stir in the parmesan cheese , squeeze in the lemon juice and Italian parsley.
Appetizer, Main Course, Side Dish
Italian
leeks peas and asparagus risotto,


Pasta de Santo Giuseppe

Pasta de Santo  Giuseppe

This post may contain affiliate links, that help support this blog. If you make a purchase through these links, I may earn a commission—at no cost to you. For more information read my disclosure policy.

Pasta di San Giuseppe has as many variations as there are regions in Italy, with each area adding its own traditional touch. One ingredient, however, remains essential: toasted breadcrumbs instead of grated cheese. The breadcrumbs represent the sawdust from Saint Joseph’s carpentry workshop, honoring him as a humble and hardworking carpenter.

This simple and delicious Italian pasta can be enjoyed year-round, but it holds special significance on March 19, when Italians celebrate La Festa di San Giuseppe, or Saint Joseph’s Day. While much of the world celebrates St. Patrick’s Day on March 17, Italians honor Saint Joseph, the patron saint of fathers, workers, and those in need. Because the feast traditionally falls during Lent, meatless dishes are often served.

The toasted breadcrumbs sprinkled over the pasta symbolize the sawdust of Saint Joseph’s workshop and serve as a reminder of his humble life and devotion. In many parts of Italy, families also prepare elaborate St. Joseph’s altars, filled with breads, fava beans, pastries, and other symbolic foods as an offering of gratitude for his protection and provision.

Three Variations of Pasta di San Giuseppe

Sicilian Sweet and Savory:
This traditional Sicilian variation combines pasta with anchovies, garlic, and wild fennel, then finishes it with toasted breadcrumbs sautéed in olive oil. The combination of savory anchovies, aromatic fennel, and crunchy breadcrumbs creates the distinctive sweet-and-savory flavor Sicily is known for.

Southern Italian Tomato-Based — My Version:
In parts of Southern Italy, Pasta di San Giuseppe is prepared with a light tomato sauce made with crushed San Marzano tomatoes, onions, and garlic. This version has a slightly richer flavor while still keeping the traditional toasted breadcrumb topping. It’s the version I make and the one I’m sharing here.

Vegetarian Lentil and Fava Bean:
As a nod to Saint Joseph’s role as a protector of the poor, some families incorporate lentils or fava beans into the dish. Both are traditional symbols of abundance and good fortune. The legumes add protein and a hearty texture, making this a satisfying meatless meal.

More Than Just a Pasta Dish

Pasta di San Giuseppe is more than just a dish—it’s a symbol of Italian heritage, faith, and gratitude. Whether prepared with anchovies, tomatoes, lentils, or fava beans, the humble toasted breadcrumbs remain a constant, symbolizing the sawdust of Saint Joseph’s carpentry workshop and reminding us of his humility and hard work.

On March 19, families across Italy gather to celebrate his legacy, honoring tradition through food, family, and faith. No matter which variation you choose, this humble pasta is a delicious way to connect with Italy’s deep-rooted culinary and cultural traditions.


Pasta de Santo Giuseppe

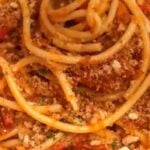
Pasta di San Giuseppe is a traditional Italian dish served for Saint Joseph’s Day on March 19. This Southern Italian version features pasta tossed in a light tomato sauce with garlic and onion, then finished with toasted breadcrumbs in place of cheese. Simple, rustic, and flavorful, it’s a delicious meatless pasta rooted in Italian tradition.

  • 12 oz. spaghetti
  • 2 cups bread crumbs
  • 1 cup grated parmesan cheese
  • 2 Tbsp. chopped Italian parsley
  • 2 Tbsp. butter
  • 2 Tbsp. olive oil
  • 4 anchovy fillets
  • 2 Tbsp (hot red pepper flakes)
  • 2 cups cherry tomatoes
  • 2 cups my easy marinara sauce
  • 1 cup pasta water
  1. In a large pot of salted rapidly boiling water cook the spaghetti al dente.

  2. In a saute pan in 1 Tbsp. of butter and 1 tbsp. of olive saute 1 Tbsp. of minced garlic until soft and the bread crumbs and cook until the breadcrumbs are toasted and golden, remove from the fire add in the grated parmesan and 2 Tbsp. of freshly chopped Italian parsley and set aside,
  3. In the same pan add the remaining 1 tbsp. of butter and olive oil add the remaining 1 tbsp. of minced garlic cook until soft and translucent, then add the cherry tomatoes cook until the tomatoes burst.
  4. Add in the marinara and pasta water simmer until the sauce thickens about 15 minutes. Add some fresh torn basil leaves, then toss the spaghetti in the sauce.
  5. Plate top with the breadcrumb mixture.
Main Course
Italian
Pasta di San Giuseppe, Saint Joseph’s Day pasta


Tomato piccata shrimp bucatini pasta

Tomato Piccata Shrimp Bucatini Pasta

This post may contain affiliate links, that help support this blog. If you make a purchase through these links, I may earn a commission—at no cost to you. For more information read my disclosure policy.

If your looking for an easy yet elegant seafood pasta dish, this tomato piccata shrimp bucatini pasta is a must -try. Featuring tender shrimp, a bright and tangy tomato piccata sauce and perfectly al dente bucatini, this recipe is packed with bold flavors and comes together in under 30 minutes.

With every forkful, you’ll experience a delicious blend of textures and flavors. The bucatini absorbs the garlicky , tomato sauce while maintaining  its signature al dente bite. The shrimp remain plump and juicy, and the capers add a briny pop that enhances the natural sweetness of the tomatoes. The fresh basil ties everything together , making this dish feel like a restaurant- quality experience at home.

Why you’ll love this tomato piccata shrimp  bucatini pasta recipe

Quick and easy: Perfect for weeknights but fancy enough for entertaining.

Bright and tangy: Lemon, capers and tomatoes bring a zesty zing to the dish.

Rich and creamy: garlic and pasta water add depth and silkiness to the sauce.

Perfect pasta pairing: Bucatini’s hollow center holds the sauce for an irresistible bite.

Pair this dish with a crisp green salad and a side of garlic bread for a delicious complete meal. If you make this tomato piccata shrimp bucatini pasta, let me know in the comments and please don’t forget to tag me on Instagram with your creations. I love hearing from you. 

Tomato Piccata Shrimp Bucatini Pasta

Tomato Piccata Shrimp Bucatini is a bright and flavorful Italian-inspired pasta made with tender shrimp, bucatini, tomatoes, capers, garlic, and fresh lemon. The light, silky sauce coats every strand of pasta for an easy restaurant-quality meal that's ready for any night of the week.

  • 12 oz. bucatini pasta
  • 1 lb. large shrimp, peeled and deveined (16-20 per lb. )
  • 2 Tbsp. olive oil
  • 1 Tbsp. minced garlic
  • 2 cups cherry tomatoes
  • 1/2 cup white wine
  • 1 cup chicken stock
  • 1 cup reserved pasta water
  • juice from 1 lemon
  • 1/3 cup drained capers
  • 1/4 cup torn basil
  • salt and pepper to taste
  1. Bring a large pot of salted water to a boil and cook the bucatini al dente. Reserve 2 cups pasta water before draining.

  2. Heat the olive oil and butter in a large skillet over medium high heat. Add the tomatoes, red pepper, and garlic cook until the tomatoes burst and the garlic is soft and translucent. About 5 minutes.
  3. Deglaze the pan with the wine waiting until fully absorbed before adding the chicken stock, pasta water lemon juice and capers. Simmer until the sauce begins to thicken 7-10 minutes.
  4. Add the shrimp, and cook 5 minutes or until the shrimp are cooked through. Then add in the pasta, top with fresh basil.
Main Course
Italian
tomato piccata shrimp pasta,


rosemary garlic seared lambchops

Rosemary Garlic Seared Lambchops

This post may contain affiliate links, that help support this blog. If you make a purchase through these links, I may earn a commission—at no cost to you. For more information read my disclosure policy.

Nothing beats the aroma of rosemary and garlic sizzling in a pan , especially when paired with perfectly seared lambchops. This dish is an effortless way to bring a gourmet meal to your table with minimal effort. Whether you’re cooking for a special occasion or simply craving a hearty flavorful dinner, these rosemary garlic seared lambchops will be a hit. The rich, succulent flavor of the lamb is enhanced by the earthy warmth of fresh rosemary and the robust essence of garlic. The crispy golden crust on the outside gives way to tender juicy meat inside, making every bite irresistible.

Choosing the lamb for this rosemary garlic seared lambchops recipe

For the best results, opt for high -quality lambchops. Rib chops are the most tender and have a delicate, mild flavor, while loin chops are slightly meatier with a robust taste. If you prefer an even richer flavor shoulder chops can be a great alternative, though they require a longer cooking time to become tender.

When possible, choose grass-fed lamb for a more pronounced depth of flavor and superior texture. Look for chops that have a vibrant red color with some marbling, as the fact contributes to the juiciness and taste.

These rosemary garlic seared lambchops are easy to make and delicious, they deliver a restaurant -quality dish right at home. The combination of crispy seared edges, fragrant herbs, and a buttery sauce makes this dish a guaranteed crowd- pleaser. Perfect for an elegant dinner or quick weeknight meal, they’re bound to impress. 

Rosemary Garlic Seared Lambchops

These Rosemary Garlic Seared Lamb Chops are tender, juicy, and packed with classic Mediterranean flavor. Fresh rosemary, garlic, and olive oil create a simple yet flavorful crust while a quick sear keeps the lamb beautifully tender. An easy restaurant-quality dinner that's perfect for weeknights or entertaining.

  • 1.5- 2 lbs. of lamb chops
  • 2 Tbsp. olive oil
  • 1 Tbsp. minced garlic
  • 1 Tbsp. fresh rosemary finely chopped
  • Salt and pepper to taste

FOR THE PANSAUCE

  • 2 Tbsp. butter
  • 1 Tbsp. finely minced garlic
  • 1 Tbsp. finely chopped rosemary
  • 1 Tbsp. corn starch
  • 1/2 cup white wine
  • Juice from 1 lemon
  • 1 lemon sliced
  • 1 cup chicken stock
  • 1 Tbsp. chopped Italian parsley
  1. Remove the lambchops from the refrigerator at least 20 minutes before cooking. Pat them dry then season with the rosemary, garlic salt and pepper. Massage the seasonings into the chops on both sides.

  2. In a heavy skillet or cast-iron pan heat the oil over medium high heat until shimmering.
  3. Add the lambchops to the hot pan and sear for 3-4 minutes on one side until a deep golden crust forms. Flip and sear the other side for another 3 minutes. Then remove and set aside.
  4. In the same pan add the butter, garlic and rosemary cook until soft and translucent . Add the corn starch and cook for 1 minute longer
  5. Deglaze the pan with the wine waiting until it is absorbed before adding the chicken stock and lemon juice and lemon slices. Simmer until sauce is beginning to thicken (3-5 minutes). Then remove the lemon slices.
  6. Return the lambchops back to the pan to heat through, basting the chops with the sauce. Finish with the Italian parsley .
Main Course
Italian
rosemary garlic lamb chops, seared lamb chops,


Caramelized onion pasta

Caramelized Onion Pasta

This post may contain affiliate links, that help support this blog. If you make a purchase through these links, I may earn a commission—at no cost to you. For more information read my disclosure policy.

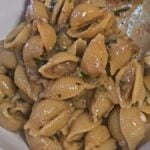
If you love the deep, sweet-savory flavor of caramelized onions, this Caramelized Onion Pasta is about to become a new favorite comfort dish. Slowly caramelized onions, rich beef broth, and Parmesan cheese come together to create a silky, flavorful sauce that feels indulgent without being complicated. The onions add a natural sweetness that balances beautifully with the savory broth and salty Parmesan.

Made with just a handful of simple ingredients, this is an easy pasta dish that delivers plenty of flavor. The onions do take some time to caramelize, but most of that time is hands-off, making this a perfect recipe for a cozy weeknight dinner or a relaxed weekend meal.

Pro tips for the best caramelized onion pasta

Low and slow is key- Cooking onions over low heat allows them to slowly develop their signature sweet , golden flavor.

Deglazing adds extra depth- the wine helps lift any flavorful bits from the bottom of the pan, enriching the sauce.

Make it creamy- Stir in a spoonful of mascarpone or heavy cream for a richer texture.

Add protein- Crispy pancetta or shredded beef would be a delicious addition.

This pasta pairs beautifully with a simple green salad or garlic bread for a complete delicious meal.

If you make this caramelized onion pasta, don’t forget to tag me on Instagram! I’d love to see your creations, it’s my favorite part!!! 

Caramelized Onion Pasta

Caramelized Onion Pasta is a simple, comforting Italian-inspired dish made with slowly caramelized onions, savory beef broth, and Parmesan cheese. The onions become sweet and deeply flavorful as they cook, creating a rich, silky sauce that coats the pasta beautifully. Made with a handful of simple ingredients, this cozy pasta is easy enough for a weeknight but feels special enough for entertaining.

  • 3 large onions thinly sliced
  • 2 Tbsp. butter + 1 olive oil
  • 1 Tbsp. minced garlic
  • 1 tbsp. flour
  • 1/2 cup red wine
  • 2 cups beef broth (vegetable broth if you want to keep it vegetarian)
  • 1/2 lb. medium size shells
  • 1/2 cup chopped Italian parsley
  • 1/2 cup grated parmesan cheese
  • salt and pepper to taste
  1. In a Dutch oven or heavy stockpot heat the butter and olive oil over medium low heat. Add the onions with a pinch of salt and cook for 40 -45 stirring occasionally minutes until deep golden brown.

  2. Stir in the garlic and flour cook for 1 minute. Deglaze the pot with the wine waiting until it evaporates before adding the beef or vegetable stock .
  3. Bring to a simmer and add the pasta . Cook until the pasta is el dente (7-8 minutes) add in the grated parmesan cheese and Italian parsley.
  4. Ladle into pasta bowls. Top with additional grated parmesan .
Main Course
Italian
caramelized onion pasta


Classic spinach ricotta gnudi

Classic Spinach Ricotta Gnudi

This post may contain affiliate links, that help support this blog. If you make a purchase through these links, I may earn a commission—at no cost to you. For more information read my disclosure policy.

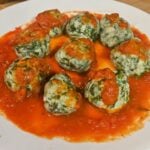
If you love Italian food, you’ve probably heard of gnocchi- but have you ever tried gnudi? These delicate, ricotta – spinach based dumplings are a lesser -known Tuscan specialty, and they are as delicious as they are easy to make. Their name , “gnudi”, literally means “naked ” in Italian, as they are basically the filling of ravioli without the pasta shell. Light, pillowy, and melt-in-your-mouth delicious, gnudi are a must try for any pasta lover. Unlike gnocchi, which are made primarily with potatoes, gnudi are made with creamy ricotta, spinach and just enough flour to hold them together. The result is an incredibly tender bite far lighter than traditional pasta. Their delicate makes them perfect for absorbing rich sauces while still feeling light and airy.

Sauces for these classic spinach ricotta gnudi

One of the best things about gnudi is their versatility. They can be served with a variety of sauces.

My easy marinara sauce– a simple yet robust tomato sauce provides a bright contrast to the delicate dumplings.

Classic sage butter-Browned butter with crispy sage leaves enhances gnudi’s natural richness with a nutty aromatic flavor.

My Bolognese meat ragu– A slow- simmered hearty ragu transforms gnudi into a Tuscan comfort comfort dish that’s perfect for chilly nights.

Light and fresh- serve with sauteed greens, lemon zest , grated parmesan and a drizzle of olive oil for a refreshing twist.

Classic spinach ricotta gnudi are a delicious example of how simple, high-quality ingredients can create an extraordinary dish.  Their delicate yet satisfying taste makes them an irresistible option for any pasta lover looking to try something new.

Have you ever had gnudi before? What’s  your favorite sauce? Let me know in the comments below. 

Classic Spinach Ricotta Gnudi

Classic Spinach Ricotta Gnudi are delicate Italian dumplings made with creamy ricotta, fresh spinach, Parmesan cheese, and a touch of nutmeg. Soft and tender with a melt-in-your-mouth texture, these rustic Tuscan dumplings are traditionally served simply with butter and sage or a light sauce.

  • 1 1/2 cups ricotta
  • 4 cups clean spinach
  • 1 large egg
  • 1 cup flour + 1/2 cup for rolling
  • 1/2 cup grated parmesan
  • salt and pepper to taste
  1. Clean and blanch the spinach in salted water. Let cool slightly then chop . Place in a colander over a bowl. Let sit in the refrigerator for 15 minutes to drain . Then use your hands to squeeze out as much of the liquid as possible.

  2. In a bowl, wisk the egg then mix the in the ricotta, spinach, and grated parmesan, slowly add the flour until a soft, slightly sticky dough forms . Salt and pepper to taste.
  3. With lightly floured hands roll the gnudi into balls roll in flour.
  4. In a medium stock pot bring salted water to a gentle boil. Cook the gnudi in in batches until they float 2-3 minutes
  5. Toss with my easy marinara sauce or sage butter. Top with additional grated parmesan and serve immediately.
Appetizer, Main Course, Side Dish
Italian
spinach ricotta gnudi,


Caprese stuffed chicken breast

Caprese Stuffed Chicken Breast

This post may contain affiliate links, that help support this blog. If you make a purchase through these links, I may earn a commission—at no cost to you. For more information read my disclosure policy.

If your looking for a restaurant – quality meal that’s easy enough for a weeknight dinner, this caprese stuffed chicken breast with asparagus is a must-try. Juicy chicken breast are packed with the classic flavors of caprese- fresh mozzarella, ripe tomatoes and fragrant basil – along with tender asparagus for a wholesome . satisfying dish that’s easy to make and delicious.

Why you’ll love this caprese stuffed chicken breast recipe

Quick and easy: Ready in under 30 minutes

Healthy & Wholesome: Packed with protein, veggies and fresh ingredients

Bursting with flavors: A perfect blend of creamy, tangy, and savory goodness

Make-ahead friendly: Prep and assemble ahead of time, then cook when  ready !!

This caprese stuffed chicken breast with asparagus is a delicious dish that’s easy to prepare yet impressive enough to share with friends. Whether you’re looking for a quick week night dinner or a beautiful centerpiece for a special meal, this recipe delivers on both taste and presentation. Give it a try and let me know how it turns out- I’d love to hear your thoughts. 

Caprese Stuffed Chicken Breast

Juicy chicken breasts are stuffed with fresh mozzarella, ripe tomatoes, and fragrant basil, then baked until tender and golden. This easy Caprese stuffed chicken is packed with classic Italian flavors and makes a delicious weeknight dinner.

  • 2 large chicken breast
  • 12 asparagus spears trimmed
  • 4 slices fresh mozzarella
  • 4 slices thinly sliced tomatoes
  • 2 slices thinly sliced prosciutto
  • 2 Tbsp. olive oil
  • 2 teaspoons each garlic (onion and paprika)
  • 2 Teaspoon Italian seasoning
  • salt and pepper to taste
  1. Preheat your oven to 375- degrees

  2. Cut the tough stem ends from the asparagus and blanch in boiling salted water for a few minutes set aside
  3. Slice the chicken breast in half and pound thin so that you have four pieces of thinly sliced chicken breast
  4. Season the chicken with the garlic, onion, paprika and Italian seasoning. Salt and pepper to taste
  5. Add two slices of cheese, followed by one slice of tomatoes and three asparagus spears. Then sprinkle with sliced prosciutto. Top with a few basil leaves
  6. Roll them up tightly jelly roll style. Secure with tooth picks
  7. Sear the chicken breast in an oven proof pan for about three minutes per side until golden.
  8. Transfer the pan to the preheated oven and bake for 15-20 minutes or until the chicken is cooked through.
Main Course
Italian
Caprese stuffed chicken,breast


Spicy eggs in Purgatory

Spicy Eggs in Purgatory

This post may contain affiliate links, that help support this blog. If you make a purchase through these links, I may earn a commission—at no cost to you. For more information read my disclosure policy.

Spicy eggs in purgatory is a dish that perfectly balances simplicity and bold flavors. This traditional Italian recipe features eggs poached in a rich, garlicky tomato sauce with a touch of heat. It’s an easy one- pan meal that’s perfect for breakfast, brunch or even a light dinner.

The origins of eggs in purgatory are deeply rooted in Italian cuisine, particularly in the southern regions like Campania. The name Uova in Purgatorio is said to symbolize the fiery tomato sauce as purgatory and the delicate eggs as souls within it. Similar to the Middle Eastern shakshuka, this dish showcases the universal love for eggs cooked in a flavorful sauce.

Tips for the best spicy eggs in purgatory

  1. Adjust the spice to your liking by increasing or reducing the red pepper flakes.
  2. Use my easy marinara sauce for a rich and flavorful sauce.
  3. Don’t overcook the eggs if you prefer  runny yolks, keep an eye on them as they set.
  4. Add extra toppings like crumbled feta, olives or cooked Italian sausage or pancetta.

Spicy eggs in purgatory is one of those magical dishes that delivers big flavors with minimal effort. Whether you’re enjoying it for breakfast or dinner, this dish is sure to become a staple in your kitchen.

Have you tried making Eggs in Purgatory? Let me know your favorite variations in the comments below. I love hearing from you. It’s my favorite part and it helps others. 

Spicy Eggs in Purgatory

Spicy Eggs in Purgatory is a simple Italian-inspired dish of eggs gently cooked in a rich, spicy tomato sauce with garlic and herbs. Perfect for breakfast, brunch, or an easy meatless dinner, especially with crusty bread for soaking up the sauce.

  • 2 Tbsp. olive oil
  • 2 cups sliced mixed color bell peppers
  • 1 cup chopped onions
  • 1 Tbsp. minced garlic
  • 1 Tbsp. hot pepper flakes
  • 3 cups my easy marinara sauce
  • 4 eggs
  • 1 Tbsp. each chopped basil and Italian parsley
  1. Start by cleaning your bell peppers and cutting into thin strips

  2. In a saute pan over medium high heat in the olive oil saute the bell peppers, red pepper flakes, onions and garlic until soft and translucent
  3. Then add in the marinara sauce and simmer for 10 minutes.
  4. Make 4 indentations with the back of a spoon in the sauce and drop the eggs into them. Simmer covered until the eggs reach your preferred doneness. Top with the basil and Italian parsley.
  5. Serve with toasted bread.

Simmer the tomato sauce until slightly thickened before adding the eggs so the eggs cook gently without becoming watery.

Breakfast, Main Course
Italian
spicy eggs in purgatory,


Easy Vegetarian zucchini fritters

Easy Vegetarian Zucchini Fritters

This post may contain affiliate links, that help support this blog. If you make a purchase through these links, I may earn a commission—at no cost to you. For more information read my disclosure policy.

Crispy, golden, and oh-so-delicious. These easy vegetarian zucchini fritters are the perfect blend of fresh zucchini, savory cheese, and a hint of garlic.

When you think of zucchini , summer might be the first season that comes to mind. But this versatile vegetable is perfect for creating delicious dishes all year long. One of my favorite ways to enjoy zucchini is by making these irresistibly crispy zucchini fritters. They’re golden, savory, and perfect as an appetizer, side dish, or a quick snack any time of the year!!!!

Why you’ll love these easy vegetarian zucchini fritters

Crispy and delicious: the perfect blend of fresh zucchini, cheese and herbs

Easy to make: With simple ingredients and quick prep, you’ll have these fritters ready in no time.

Versatile: Great on their own, or paired with my easy marinara sauce.

These easy vegetarian zucchini fritters are a wonderful way to enjoy zucchini beyond the summer months. They’re easy, delicious, and sure to become a staple in your kitchen. Give them a try and let me know how you like them. 

Easy Vegetarian Zucchini Fritters

These easy vegetarian zucchini fritters are crisp on the outside, tender inside, and packed with fresh zucchini and savory flavor. They're simple to make and perfect as an appetizer, side dish, light lunch, or meatless meal.

  • 2 medium zucchini washed and finely chopped
  • 2 Teaspoon. salt
  • 2 eggs slightly beaten
  • 1/2 cup grated parmesan cheese
  • 1/3 cup flour
  • 1/2 cup bread crumbs
  • 1 Tbsp. minced garlic
  • 1/3 cup chopped onion
  • 2 Tbsp. fresh chopped Italian parsley
  • salt and pepper to taste
  • 2 cups olive and canola blend oil for frying
  1. Chop the zucchini and sprinkle with salt. Let sit for 10 minutes to draw out the liquid. Use your hands to squeeze out as much liquid as possible

  2. In a bowl combine the zucchini, and the rest of the ingredients except for the frying oil. Mix until well combined.
  3. Scoop out about 2 Tbsp. of the mixture and flatten into patties
  4. Heat the oil over medium high heat until medium hot.
  5. Fry the fritters for 3-4 minutes per side until golden and crispy

Squeeze as much moisture as possible from the grated zucchini before mixing the batter. This helps the fritters brown nicely and keeps them crispy. 

Appetizer, Main Course, Side Dish
Italian
vegetarian zucchini fritters, easy


Asparagus prosciutto ricotta tart

Asparagus Prosciutto Ricotta Tart

This post may contain affiliate links, that help support this blog. If you make a purchase through these links, I may earn a commission—at no cost to you. For more information read my disclosure policy.

Spring is around the corner, and there’s no better  way to celebrate the season then with vibrant and fresh ingredients. This asparagus, prosciutto ricotta tart is the perfect dish to bring a touch of spring to your table. With it’s buttery, flaky crust and creamy ricotta filling, each bite is a blend of crisp, creamy, and savory flavors. Whether served as an appetizer, light lunch or a show- stopping side dish, this tart is as beautiful as it is delicious.

Tips for success when making asparagus, prosciutto ricotta tart

  1. Keep the puff pastry cold: For the flakiest, crispiest  crust , make sure your puff pastry is thawed but well – chilled before baking. Prebaking the pastry crust helps maintain the layers and prevents a soggy bottom.
  2. Avoid overloading the filling: While tempting to pile on the ricotta and toppings, keep a light hand. Too much filling can weigh down the pastry and prevent it from cooking evenly. Spread the ricotta in a thin even layer and avoid over stacking the asparagus and prosciutto. This asparagus, prosciutto, and ricotta tart is a true celebration of spring flavors. With it’s crisp. flaky crust, creamy ricotta filling, and the prefect balance of tender asparagus and savory prosciutto offers a delicious blend of textures and taste. It’s an elegant yet approachable dish that’s sure to impress, whether served at a brunch, a special gathering, or a simply treat for yourself. Give this recipe a try, and enjoy how effortlessly it comes together.


Asparagus Prosciutto Ricotta Tart

This savory asparagus, prosciutto, and ricotta tart combines creamy ricotta, tender asparagus, and salty prosciutto on a crisp, golden pastry crust. It's an elegant yet easy Italian-inspired dish perfect for brunch, lunch, or entertaining.

  • 1 puff pastry sheet thawed
  • 2 cups ricotta cheese
  • 1/2 cup grated parmesan
  • 1 egg
  • 1 Tbsp. chopped Italian parsley
  • 1/2 lb. cleaned (trimmed and steamed asparagus)
  • 2 slices prosciutto cut into thin strips
  • 1 egg yolk + 1 Tbsp. water for brushing
  1. Preheat your oven to 375- degrees and line a baking sheet with parchment paper

  2. Thaw out the puff pastry. Then unfold the pastry onto the baking sheet
  3. Gently score a 1 – inch border around the edges without cutting all the way through. Prick the center all over with a fork to prevent it from puffing up too much. Then prebake the puff pastry for 5-7 minutes or until just beginning to turn golden.
  4. Make the ricotta filling in a bowl mix ricotta, parmesan, egg, parsley salt and pepper to taste. Spread the ricotta mixture evenly within the scored border on the precooked puff pastry.
  5. Steam in the cleaned asparagus in boing salted water for 3 minutes drain well and pat dry. Lay the asparagus spears over the ricotta mixture.
  6. Cut the prosciutto into thin strips and nestle them between the asparagus. Mix the egg yolk with the water, brush the edges with the egg wash. Drizzle with oil olive.
  7. Bake for 15-20 minutes longer.
  8. Once out of the oven, sprinkle with fresh thyme. Slice and serve warm or at room temperature.

Blanch the asparagus briefly before adding it to the tart to ensure it becomes perfectly tender without overcooking the pastry.

Appetizer, Main Course, Side Dish
Italian