Butternut Squash Lasagna

Butternut Squash Lasagna

This post may contain affiliate links, that help support this blog. If you make a purchase through these links, I may earn a commission—at no cost to you. For more information read my disclosure policy.

Fall has always been my favorite time of year. There’s just something about the crisp air, the changing leaves, and the way the kitchen feels cozier when something warm is baking in the oven. I especially love cooking with fall produce, and butternut squash is always at the top of my list. It’s naturally sweet, roasts up beautifully, and makes the creamiest base for so many comforting dishes. This butternut squash lasagna is one of my favorites—it’s layered with roasted squash, creamy ricotta, and plenty of cheese for the ultimate cozy dinner. It’s the kind of meal that’s perfect for a Sunday dinner with family or sharing around the table with friends

Things to know about this butternut squash lasagna

  • Make-Ahead: You can assemble the lasagna a day ahead, cover it tightly with foil, and refrigerate until ready to bake. Just add 10–15 extra minutes to the baking time.

  • Freezer Option: This lasagna freezes beautifully! Bake it, let it cool completely, then wrap well and freeze for up to 3 months. Reheat covered at 350°F until warmed through.

  • Cheese Swaps: Ricotta is classic, but you can use cottage cheese for extra protein, or add fontina or Gruyère for a richer flavor.

  • Shortcuts: Save time by buying pre-cut butternut squash or even frozen squash. No-boil lasagna noodles also make this recipe easier.

  • Add a Protein: If you’d like, layer in Italian sausage, pancetta, or shredded chicken for a heartier version.

  • And if you want to take this lasagna to the next level, try it with my Easy Béchamel Sauce recipe. It’s quick to make and adds that extra creamy layer that makes this dish irresistible.
  • Serving Tip: This lasagna pairs beautifully with a simple green salad and crusty bread for a complete fall dinner.

More Cozy Recipes to Try

If you love this Butternut Squash Lasagna, here are a few more comforting recipes you might enjoy:


Butternut Squash Lasagna

  • 1 medium butternut squash (about 2 ½–3 lbs. ), peeled, seeded, and cubed
  • 2 tbsp olive oil
  • 2 cloves garlic, minced
  • 1 tsp fresh thyme (or ½ tsp dried)
  • 1 tsp fresh sage, chopped (or ½ tsp dried)
  • Salt and black pepper, to taste
  • 2 cups ricotta cheese
  • 1 arge egg
  • 1½ cups shredded mozzarella cheese
  • ½ cup grated Parmesan cheese
  • 2 cups béchamel  (homemade or store-bought)
  • 9 lasagna noodles (no-boil or cooked)
  • ½ tsp red pepper flakes for heat, crispy sage leaves for garnish (optional)
  1. Roast the Squash.

    Preheat oven to 400°F (200°C). Toss squash cubes with olive oil, garlic, thyme, sage, salt, and pepper. Spread on a baking sheet and roast for 25–30 minutes, until soft and caramelized. Mash lightly with a fork (leave a few chunks for texture).

  2. Prepare the Cheese Mixture. In a bowl, mix ricotta, egg, ½ cup mozzarella, ¼ cup Parmesan, salt, and pepper.

  3. Assemble the Lasagna. Spread a thin layer of béchamel on the bottom of a 9×13-inch baking dish. Add noodles, a layer of mashed squash, dollops of ricotta mixture, a drizzle of béchamel, and a sprinkle of mozzarella. Repeat layers (about 3 total), finishing with noodles topped with béchamel, mozzarella, and remaining Parmesan.

  4. Bake. Cover with foil and bake at 375°F (190°C) for 25 minutes. Remove foil and bake another 15–20 minutes until golden and bubbling. Let rest for 10 minutes before slicing.

  5. Serve. Garnish with crispy sage leaves or extra Parmesan.



Chicken Meatballs with Marry Me Orzo

Chicken Meatballs with Marry Me Orzo

This post may contain affiliate links, that help support this blog. If you make a purchase through these links, I may earn a commission—at no cost to you. For more information read my disclosure policy.

Tender chicken meatballs are always a hit at the dinner table, and when you pair them with creamy Marry Me Orzo, you’ve got the ultimate comfort meal. This dish brings together juicy baked chicken meatballs and orzo pasta simmered in a rich Parmesan and sun-dried tomato cream sauce. It’s the kind of meal that feels special enough for date night yet easy enough for a weeknight family dinner.

The name “Marry Me Orzo” comes from the idea that the flavors are so irresistible, they just might win someone’s heart. I love how the baked meatballs soak up the creamy sauce, making every bite flavorful and hearty. If you’re looking for a one-pan recipe that’s simple, satisfying, and a little bit romantic, this is it.

Things to Know About Chicken Meatballs with Marry Me Orzo

  • Bake, don’t fry: Baking the meatballs keeps them juicy without extra oil, and it’s hands-off while you prepare the orzo.

  • Cream swap: Heavy cream gives the sauce its velvety texture, but you can lighten it up with half-and-half or even whole milk (just simmer a little longer to thicken).

  • Cheese matters: Freshly grated Parmesan melts more smoothly than pre-shredded, giving the sauce that silky finish.

  • Customize the spice: Red pepper flakes add a gentle kick—use more if you like a little heat, or leave them out for a milder dish.

  • Make it ahead: The meatballs can be baked in advance and refrigerated (up to 3 days) or frozen (up to 3 months). Add them to the orzo to reheat.

  • Serving ideas: This dish is filling on its own, but it pairs beautifully with a crisp green salad or roasted vegetables.

  • Storage tips: Leftovers keep well in the fridge for 2–3 days. Reheat gently on the stove with a splash of broth or cream to loosen the sauce.

If you loved these Chicken Meatballs with Marry Me Orzo, you’ll also enjoy other comforting Italian favorites: try my Shrimp Marry Me Orzo for a seafood twist, or cozy up with Creamy Sausage Tortellini Soup for a hearty weeknight dinner.


Chicken Meatballs with Marry Me Orzo

For the Chicken Meatballs

  • 1 lb ground chicken
  • 1 large egg
  • 1 cup breadcrumbs
  • ½ cup grated Parmesan cheese
  • 2 cloves garlic, minced
  • 2 tbsp onion, grated or finely minced
  • 2 tbsp fresh parsley, chopped
  • salt and pepper to taste

For the Marry Me Orzo

  1. Bake the Meatballs. Preheat oven to 400°F (200°C). Line a baking sheet with parchment paper.In a mixing bowl, combine ground chicken, egg, breadcrumbs, Parmesan, garlic, onion, parsley, salt, and pepper. Mix until just combined and roll into about 18–20 small meatballs.Place on the prepared baking sheet and bake for 18–20 minutes, until cooked through and lightly golden.

  2. Start the Orzo. While the meatballs bake, heat olive oil in a large skillet over medium heat. Add garlic and sun-dried tomatoes, sautéing for 1–2 minutes. Stir in the orzo and toast lightly.

  3. Simmer the Sauce. Pour in chicken broth and heavy cream. Bring to a gentle simmer and cook, stirring occasionally, until the orzo is al dente and creamy, about 10–12 minutes. Add more broth as needed to keep it saucy.

  4. Finish the Dish. Stir in Parmesan, red pepper flakes, thyme, salt, and pepper. Add the baked meatballs to the skillet and simmer for 2–3 minutes so the flavors meld.

  5. Add Spinach & Serve. Stir in baby spinach (if using) until wilted. Garnish with extra Parmesan and parsley. Serve immediately.


Italian Beef and Farro Soup

Italian Beef and Farro Soup

This post may contain affiliate links, that help support this blog. If you make a purchase through these links, I may earn a commission—at no cost to you. For more information read my disclosure policy.

When the air turns crisp and the leaves start to fall, there’s nothing better than a warm, hearty soup to bring everyone to the table. This Italian Beef and Farro Soup was a favorite in our restaurant’s fall menu—rich, rustic, and packed with flavor. Tender cubes of sirloin simmer alongside sweet carrots, celery, and aromatic herbs in a savory tomato and beef broth, while pearled farro adds a nutty, chewy texture that makes every bite satisfying. It’s the kind of soup that warms both the kitchen and the heart, perfect for a cozy weeknight or a Sunday dinner with family.

Things to know about this Italian Beef and Farro Soup

What is farro?
Farro is an ancient Italian grain with a nutty flavor and chewy texture. It’s a staple in Tuscan cooking and makes soups hearty without feeling heavy.

Can I substitute farro?
Yes! If you don’t have farro, barley works beautifully. Rice or small pasta can be used too, but they’ll change the texture.

Best cut of beef:
Sirloin works wonderfully here because it stays tender in a shorter simmer. You can also use stew meat, chuck, or even leftover roast beef.

Make-ahead friendly:
This soup tastes even better the next day as the flavors develop. Farro holds up better than pasta, so it won’t turn mushy.

Freezer tip:
Freeze in portions without adding the parsley and Parmesan. Add those fresh when reheating for the best flavor.

Serving suggestion:
A drizzle of good olive oil, a sprinkle of Parmesan, and warm crusty bread make this a complete meal 

Italian Beef and Farro Soup

Tender beef, nutty farro, and hearty vegetables simmer in a rich tomato and beef broth for a comforting Italian soup that's perfect for chilly days.

  • 1 pound sirloin, cut into 1-inch cubes
  • 2 tablespoons  olive oil
  • 1 medium onion, finely chopped
  • 2 carrots, peeled and diced
  • 2 celery stalks, diced
  • 3 garlic cloves, minced
  • 1 can (14.5 oz) diced tomatoes
  • 6 cups beef broth
  • 1 teaspoon fresh rosemary, chopped (or ½ teaspoon dried)
  • ¾ cup pearled farro
  • Salt and freshly ground black pepper, to taste
  • ¼ cup fresh parsley, chopped
  • Freshly grated Parmesan, for serving
  1. Brown the beef: Heat olive oil in a large pot over medium-high heat. Add sirloin cubes and sear on all sides until browned. Remove and set aside.

  2. Sauté vegetables: In the same pot, add onion, carrots, and celery. Cook until softened, about 5–6 minutes. Add garlic and cook 1 more minute.

  3. Build the soup base: Return the beef to the pot. Stir in diced tomatoes, beef broth, thyme, and rosemary. Bring to a boil, then reduce heat and simmer for 25–30 minutes until the beef is tender.

  4. Cook the farro: Add the farro and simmer for another 20–25 minutes until the farro is tender but chewy. Stir occasionally and add a bit more broth or water if needed.

  5. Season and finish: Taste and adjust salt and pepper. Stir in fresh parsley just before serving.

  6. Serve: Ladle into bowls, sprinkle with Parmesan, and enjoy with crusty Italian bread.


Steak Pizzaiola with Potatoes and Peas

Steak Pizzaiola with Potatoes and Peas

This post may contain affiliate links, that help support this blog. If you make a purchase through these links, I may earn a commission—at no cost to you. For more information read my disclosure policy.

Steak Pizzaiola with Potatoes and Peas is a rustic Italian classic that transforms simple ingredients into a hearty, comforting meal. Tender strips of sirloin are simmered in a rich tomato-based sauce with sweet bell peppers, golden potatoes, and fresh green peas, infused with garlic, oregano, and basil. This dish brings the warmth and flavor of an Italian kitchen straight to your table—perfect for fall or winter nights when you crave a cozy, satisfying dinner.

Things to Know About Italian Steak Pizzaiola with Potatoes and Peas

  • What is Pizzaiola?
    Pizzaiola is a traditional Neapolitan method of cooking beef in a tomato-based sauce with garlic, oregano, and herbs. Adding potatoes and peas makes it a hearty, one-pan meal.

  • Best Cuts of Beef:
    Sirloin works beautifully, but you can also use ribeye or flank steak. Slice thinly across the grain for maximum tenderness.

  • Make-Ahead Friendly:
    The tomato, pepper, and potato base can be cooked ahead of time. Add the steak and peas just before serving to keep everything fresh.

  • Serving Suggestions:
    Serve with crusty Italian bread, creamy polenta, or over rice. A light green salad makes a perfect accompaniment.

  • Wine Pairing:
    Medium-bodied Italian reds like Chianti or Montepulciano d’Abruzzo complement the tomato sauce and peppers beautifully.

  • Leftovers:
    Store in the fridge for up to 3 days. Reheat gently to keep the steak tender; flavors deepen overnight, making it even more delicious

  • While you’re here, check out some of our other Italian favorites:

    Don’t forget to share your creations on Instagram and tag us — we love seeing your Italian kitchen

Steak pizzaiola with potatoes and peas

  • 1 ½ lbs sirloin steak (thinly sliced into strips)
  • 1 large onion (thinly sliced)
  • 2 medium potatoes (peeled and diced)
  • 3 cloves garlic (minced)
  • 1 can 14 oz crushed tomatoes
  • 1 cup frozen peas (or fresh if in season)
  • 2 tbsp olive oil
  • ½ cup dry white wine (optional)
  • 1 tsp dried oregano
  • 1 tsp dried basil
  • Salt and freshly ground black pepper (to taste)
  • Fresh parsley (chopped (for garnish))
  1. Prepare the steak (10 minutes):

    Season the sirloin strips with salt and pepper. Heat 1 tablespoon olive oil in a large skillet or Dutch oven over medium-high heat. Sear the steak for 2–3 minutes per side until browned but not fully cooked. Remove from the pan and set aside.

  2. Cook the vegetables (15 minutes):

    Add the remaining tablespoon olive oil to the pan. Sauté the onion until softened, about 5–6 minutes. Add the diced potatoes and cook another 5–7 minutes, stirring occasionally, until lightly golden. Stir in the garlic and cook 1 minute until fragrant.

  3. Build the Pizzaiola sauce (20 minutes):

    Pour in the white wine (if using) and allow it to reduce for 2–3 minutes. Add the crushed tomatoes, oregano, and basil. Season with salt and pepper. Cover and simmer gently for 15–20 minutes, or until the potatoes are tender.

  4. Finish the dish (5 minutes):

    Stir in the peas and return the steak to the pan. Simmer on low heat for about 5 minutes, or until the steak is cooked through and the flavors are well blended.

  5. Serve:

    Garnish with chopped fresh parsley. Serve warm with crusty Italian bread, polenta, or over rice for a complete rustic Italian meal.


Creamy Butternut Squash Risotto with Arborio

Creamy Butternut Squash Risotto with Arborio”

This post may contain affiliate links, that help support this blog. If you make a purchase through these links, I may earn a commission—at no cost to you. For more information read my disclosure policy.

It’s no surprise most Italian restaurants have risotto on their menu, it seems too complicated for the home cook. Am here to tell you it’s not complicated at all. This creamy  butternut squash risotto with arborio  was a restaurant menu favorite, it’s easy to make, uses few ingredients and it’s delicious.

Risotto is a classic Northern Italian rice dish slowly cooked in broth until it becomes rich and creamy. The broth can be made from meat, fish, or vegetables—I used chicken broth, but if you’re vegetarian, vegetable stock works just as well. 

Creamy Butternut Squash Risotto with Arborio

Creamy Butternut Squash Risotto is a comforting Italian-inspired dish made with creamy roasted butternut squash, Arborio rice, Parmesan cheese, and a touch of fresh herbs. The slow addition of warm broth creates the signature creamy texture of a classic risotto—perfect for a cozy fall or winter meal.

  • 2 cups Italian short grain rice
  • 1 small butternut squash (peeled seeded and cubed)
  • 2 Tbsp. olive oil + 2 tablespoons butter
  • 1/2 cup minced shallots
  • 1 Tablespoons minced garlic
  • 2 cups chopped spinach
  • 4 cups chicken stock
  • 1 cup white wine
  • 1 cup crumbled gorgonzola cheese
  • 1 cup grated parmesan
  • 2 tablespoons chopped Italian parsley
  • 1/2 cup pine nuts
  • salt and pepper to taste
  1. Peel and cut butternut squash into cubes drizzle with olive oil, salt and pepper roast in a 375 degree oven for 30 minutes
  2. Mean while heat chicken stock keep warm, in a deep saute pan heat the butter and olive oil, add onion and garlic, saute until translucent,
  3. Add the rice cook until golden, salt and pepper to taste, add hot chicken stock slowly and a little at a time waiting until the stock is absorbed before adding more while stirring continuously, Continue adding the broth until all is used
  4. Cook until risotto is firm to the bite cooked about 20 minutes. Add parmesan cheese, roasted butternut squash,
  5. Add the gorgonzola and more broth if the sauce is to thick. Top with Italian parsley, more gorgonzola and toasted pine nuts….ENJOY!!
Main Course
Italian
creamy butternut squash risotto, Arborio rice,


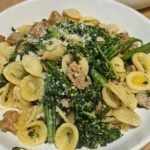
Orecchiette with Italian Sausage and Broccoli Rabe

Orecchiette with Italian Sausage and broccoli Rabe

This post may contain affiliate links, that help support this blog. If you make a purchase through these links, I may earn a commission—at no cost to you. For more information read my disclosure policy.

Orecchiette with Italian Sausage and Broccoli rabe was a favorite on our restaurant menu — not just with our guests, but with the cooks in the kitchen too. They loved making it because it came together quickly and easily, yet never failed to impress. The little “ears” of pasta held onto every bit of savory sausage and garlic, while the broccolini added a fresh, vibrant balance. It was rustic, comforting, and satisfying — the kind of dish that reminded us all why simple Italian cooking is so timeless. Now, I’m sharing it here so you can enjoy the same flavors at home.

  • Broccoli rabe is meant to be slightly bitter. Its earthy, peppery flavor is what makes this dish so traditional. The richness of the Italian sausage balances the bitterness perfectly.
  • Don’t overcook the broccoli rabe. Blanching it briefly before adding it to the skillet helps tame the bitterness while keeping it vibrant and tender.
  • Use good-quality Italian sausage. Sweet or hot Italian sausage both work well. Hot sausage adds a little extra kick, while sweet sausage lets the broccoli rabe shine.
  • Orecchiette is the traditional pasta. Meaning “little ears” in Italian, the pasta’s cup-like shape catches the crumbled sausage, garlic, and small pieces of broccoli rabe in every bite.
  • Reserve the pasta water. Before draining the pasta, save about 1 cup of the cooking water. The starchy water helps create a silky sauce that coats the pasta without needing cream.
  • Freshly grated Parmesan makes a difference. Skip the pre-shredded cheese if possible. Fresh Parmesan melts smoothly and adds a richer, nuttier flavor.
  • A touch of heat is traditional. Red pepper flakes complement the sausage and broccoli rabe without overpowering the dish. Add more or less to suit your taste.
  • This is a true Italian pantry meal. With just a handful of simple ingredients, this recipe proves that authentic Italian cooking relies on quality ingredients rather than complicated techniques.
  • It reheats beautifully. Store leftovers in an airtight container in the refrigerator for up to 3 days. Add a splash of water or chicken broth when reheating to loosen the sauce.
  • Finish with extra virgin olive oil. A light drizzle just before serving brightens the flavors and gives the dish the authentic finishing touch found in many Italian kitchens.


Orecchiette with Italian Sausage and Broccoli Rabe

This Orecchiette with Italian Sausage and Broccoli Rabe is a classic Southern Italian pasta dish that's simple enough for a weeknight but impressive enough for guests. Savory Italian sausage, slightly bitter broccoli rabe, garlic, and a touch of red pepper flakes come together with orecchiette to create a perfectly balanced meal finished with freshly grated Parmesan cheese.

  • 12 oz orecchiette pasta
  • 1 lb. spicy Italian sausage (casings removed)
  • 1 bunch broccolini (trimmed and cut into bite-sized pieces)
  • 3 cloves minced garlic
  • 1/2 cup chopped onion
  • 3 tbsp olive oil
  • 1 tsp red pepper flakes (adjust to taste)
  • 1/2 cup white wine
  • 1 cup chicken stock
  • 1 cup reserved pasta water
  • ½ cup freshly grated Parmesan cheese (plus extra for serving)
  • Salt and freshly ground black pepper (to taste)
  1. Prep the broccoli rabe Trim off the tough ends of the broccolini stems (about ½ inch) and cut the stalks into bite-sized pieces, keeping the florets mostly intact.

  2. Blanch the broccoli Bring a large pot of salted water to a boil. Add broccolini and cook for 2–3 minutes until bright green and just tender. Transfer to a kitchen towel dry and set aside.

  3. Cook the pasta: In the same pot of salted water, add orecchiette and cook until al dente. Reserve 1 cup of pasta water before draining.
  4. Cook the sausage: In a large skillet, heat the olive oil over medium heat. Add sausage and cook, breaking it into small pieces, until browned and cooked through, about 6–7 minutes.
  5. Build the sauce: Add , garlic, onion and red pepper flakes. Cook until fragrant and translucent. ( 3-4 minutes.) deglaze the pan with the white wine, waiting until fully absorbed before proceeding. Then add the chicken stock, and pasta water, simmer for 5 minutes or until sauce begins to thicken.
  6. Combine everything: Add pasta and blanched broccoli rabe to the skillet, tossing with sausage. Gradually add reserved pasta water until the sauce lightly coats the pasta.

  7. Finish and serve: Stir in Parmesan, season with salt and pepper, and toss well. Serve hot with extra cheese on top.
Main Course
Italian
Italian Orecchiette with Sausage and Broccoli Rabe


Tuscan Chicken Under a Brick Recipe

Tuscan Chicken Under a Brick Recipe

This post may contain affiliate links, that help support this blog. If you make a purchase through these links, I may earn a commission—at no cost to you. For more information read my disclosure policy.

In Tuscany, there’s a beloved way of cooking chicken known as Pollo al Mattone — literally, “chicken under a brick.” Traditionally, the chicken is flattened and pressed beneath hot bricks while it cooks, creating crisp golden skin and juicy, flavorful meat. Since I don’t keep bricks in my kitchen, I use a heavy cast iron pan instead, which delivers the same beautiful results with a touch of rustic Italian charm. This method transforms simple ingredients like garlic, rosemary, thyme, and lemon into a dish that feels both traditional and effortless.

Things to Know About Tuscan chicken under a brick

  • What does Pollo al Mattone mean?
    In Italian, it translates to “chicken under a brick.” The brick’s weight helps press the chicken flat, ensuring even cooking, golden crisp skin, and juicy meat.

  • Do I need a brick?
    Traditionally, yes — the brick is wrapped in foil and heated. But a heavy cast iron skillet or Dutch oven works just as well and is easier to manage in a home kitchen.

  • Why spatchcock the chicken?
    Removing the backbone and flattening the chicken helps it cook faster and more evenly. It’s the key to achieving that irresistible crisp skin without drying out the meat.

  • Flavor profile.
    This dish is all about simplicity. Olive oil, garlic, rosemary, thyme, and lemon are classic Tuscan ingredients that let the chicken shine.

  • Cooking method.
    While it can be made on the stovetop or in the oven, it’s equally delicious grilled over wood or charcoal — the way it’s often enjoyed in Tuscany.

  • Serving ideas.
    Pair with roasted potatoes, Tuscan white beans, or a peppery arugula salad. Keep the sides rustic and simple, just like the dish itself.

  • Love this Tuscan-style chicken? Try my Oven-Roasted Spatchcock Chicken next for another easy way to get juicy, golden chicken at home.


Tuscan Chicken Under a Brick Recipe

Tuscan Chicken Under a Brick is a classic Italian dish featuring a whole chicken pressed under a weight for incredibly crispy, golden skin and juicy, flavorful meat. Seasoned with fresh herbs, garlic, lemon, and olive oil, this rustic recipe brings authentic Tuscan flavors to your table.

  • 1 medium whole chicken (about 3 ½–4 lbs, backbone removed and butterflied (spatchcocked))
  • 3 Tbsp. olive oil
  • 4 garlic cloves (minced)
  • 2 sprigs fresh rosemary (finely chopped)
  • 2 sprigs fresh thyme (leaves removed)
  • 1 lemon (zest and juice)
  • salt and pepper to taste (or to taste)
  1. Prepare the Chicken

    Place the chicken breast-side down on a cutting board. Using sharp kitchen shears, cut along both sides of the backbone and remove it. Flip the chicken breast-side up and press firmly to flatten. Pat dry with paper towels.

  2. Season the Chicken

    In a small bowl, mix together olive oil, garlic, rosemary, thyme, lemon zest, lemon juice, salt, and pepper.

    Rub the mixture all over the chicken, making sure to get under the skin where possible for maximum flavor.

  3. Heat the Pan

    Preheat a large cast iron skillet over medium-high heat for 5 minutes until hot. Lightly oil the pan.

  4. Cook the Chicken

    Place the chicken skin-side down in the hot skillet.

    Carefully place another heavy cast iron skillet (or a Dutch oven) on top of the chicken to press it flat.

    Cook for about 12–15 minutes without moving, until the skin is deeply golden and crispy.

  5. Finish Cooking

    Remove the top skillet and carefully flip the chicken over.

    Return the weight on top and cook another 30–35 minutes, or until the thickest part of the thigh registers 165°F (74°C) on a meat thermometer.

  6. Rest and Serve

    Transfer chicken to a cutting board and let rest for 10 minutes before carving.

    Serve with lemon wedges, roasted potatoes, or a crisp green salad.

Main Course
Italian


Italian Braciole in Tomato Sauce

Italian Braciole in Tomato Sauce

This post may contain affiliate links, that help support this blog. If you make a purchase through these links, I may earn a commission—at no cost to you. For more information read my disclosure policy.

The first day of September always feels like the true start of my fall cooking. The air turns a little cooler, and I naturally begin to crave those cozy Italian dishes that remind me of home.

When I was growing up, Sundays meant sauce simmering on the stove. My mom usually made it with meatballs, ribs, sausage — or sometimes all three. But every once in a while, she added braciole, and that made the meal extra special. She would pound slices of beef thin, fill them with cheese, herbs, and breadcrumbs, then roll them up tightly. After slowly cooking in the sauce until tender, they became the kind of dish that felt like a celebration.

For me, braciole will always mark the beginning of hearty, comforting meals — perfect for the cooler season ahead.

Things to Know About Italian Braciole

What is Braciole?
Braciole (pronounced brah-cho-lee) is a classic Italian dish made with thin slices of beef rolled around a savory filling, then simmered slowly in tomato sauce until tender. Once cooked, the rolls are sliced and served with the rich sauce over pasta or alongside crusty bread.

Regional Variations
Every Italian family makes braciole a little differently. In Southern Italy, you’ll often find fillings with raisins and pine nuts for a sweet-and-savory touch. In other regions, it’s kept simple with just breadcrumbs, garlic, parsley, and cheese. Some families also prepare braciole with pork or veal instead of beef.

Cooking Low and Slow
The key to tender braciole is patience. The beef needs time to soften as it gently simmers in the sauce, soaking up all that flavor. A heavy pot or Dutch oven works best for even cooking.

Perfect for Sunday Dinner
Braciole has always been considered a special occasion dish, often reserved for Sunday dinners or holidays. Making it on the first cool days of fall captures that same cozy sense of comfort and tradition.

Make-Ahead Friendly
Like many Italian dishes, braciole tastes even better the next day after the flavors have had time to meld. It’s the perfect make-ahead meal — impressive for guests yet easy to reheat and serve


Italian Braciole in Tomato Sauce

Italian Braciole in Tomato Sauce is a classic Italian Sunday dinner made with thin slices of beef rolled around a savory filling of garlic, parsley, cheese, and breadcrumbs, then slowly simmered in a rich tomato sauce until tender. This traditional Italian-American recipe is a comforting dish that brings family and generations together around the table. Serve it with pasta, crusty bread, or alongside your favorite Sunday sauce for an unforgettable meal.

For the Braciole:

  • 4-6 thin slices beef top round (about 6–8 ounces each, pounded to ¼-inch thickness)
  • 1/2 cup grated Parmesan or Pecorino Romano
  • ½ cup breadcrumbs (preferably Italian seasoned)
  • 2 garlic cloves (finely minced)
  • 1/2 cup fresh parsley (chopped)
  • 2 tablespoons pine nuts (optional, but traditional in many regions)
  • Salt & freshly ground black pepper
  • Olive oil (for searing)
  • Butcher’s twine or toothpicks for tying

For the Sauce:

  • 3 tablespoons olive oil
  • 1 small onion (finely chopped)
  • 2 garlic cloves (minced)
  • 1/2 cup chopped parsley
  • 1 can (28 ounces crushed tomatoes)
  • 1 can 14 ounces tomato sauce
  • ½ cup red wine
  • 1 teaspoon dried oregano (or 2 teaspoons fresh)
  • ½ teaspoon red pepper flakes (optional)
  • 1 bay leaf
  • Salt & pepper to taste
  • Fresh basil (for finishing)
  1. Prepare the filling – In a small bowl, combine breadcrumbs, Parmesan, garlic, parsley, and pine nuts. Season lightly with salt and pepper.

  2. Assemble the rolls – Lay each beef slice flat. cover with plastic wrap and pound thin divide  the filling evenly in the center of each slice. Roll the beef tightly into a log and secure with twine or toothpicks.

  3. Brown the braciole – Heat olive oil in a large heavy pot or Dutch oven over medium-high heat. Sear the beef rolls on all sides until browned, 6–8 minutes. Transfer to a plate.

  4. Make the sauce – In the same pot, add more olive oil if needed. Sauté onion until soft, about 5 minutes, then stir in garlic and parsley. Deglaze with red wine, scraping up any browned bits. Add crushed tomatoes and the sauce,  oregano, red pepper flakes, bay leaf, salt, and pepper. and stir well, Simmer covered for 1 hour

  5. Return the braciole to the pot, nestling them into the sauce. Cover with a lid and simmer gently on low for about 1 hour, or until the beef is tender. Stir occasionally and add a splash of water if sauce thickens too much.

  6. Serve – Remove the twine or toothpicks, slice the braciole into rounds, and serve topped with sauce. Garnish with fresh basil and more grated cheese.

  7. More Serving Suggestions for Braciole

    Over Pasta – Toss the rich tomato sauce with spaghetti, rigatoni, or ziti, then serve the sliced braciole on top.

    With Polenta – Creamy polenta is a classic Italian pairing that soaks up all the delicious sauce.

    Crusty Bread – A warm loaf is a must for dipping into the sauce.

    Vegetable Sides – Pair with roasted broccoli, garlicky green beans, or a simple side salad for balance.

    Wine Pairing – A medium-bodied red like Chianti or Montepulciano complements the richness perfectly.

Main Course
Italian
Italian Braciole in Tomato Sauce


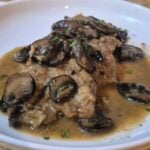
Pork Medallions Marsala with Mushrooms

Pork Medallions Marsala with Mushrooms

This post may contain affiliate links, that help support this blog. If you make a purchase through these links, I may earn a commission—at no cost to you. For more information read my disclosure policy.

When the weather turns crisp, I crave meals that feel rustic yet refined. Pork Medallions Marsala is one of those dishes that instantly brings me back to my restaurant days. It was a customer favorite on our fall menu — tender rounds of pork seared until golden, then simmered in a silky Marsala wine sauce with mushrooms.

The dish had just the right balance of comfort and elegance, which made it perfect for both a weeknight dinner and a special occasion. I remember guests telling us it felt like something you’d order in a little Italian trattoria, yet it came together so simply in our kitchen.

Now, I make it at home for my family. The earthy mushrooms, sweet Marsala, and tender pork remind me of those busy fall nights at the restaurant, when the dining room was full and this dish was always on repeat. It’s still just as cozy, comforting, and elegant — but now it’s a recipe you can bring to your own table.

Restaurant Memory
This dish first appeared on our fall menu when the cooler evenings started calling for something heartier. We wanted a dish that felt warm and comforting, yet still had a touch of elegance — something our guests could enjoy with a glass of red wine. Pork Medallions Marsala checked every box.

I still remember how quickly it became a customer favorite. Tables would order it again and again, sometimes even requesting extra sauce to soak up with bread. For me, it was always a joy to watch a recipe created in our kitchen turn into a signature dish that brought people back. Today, I love recreating that same feeling at home.

Things to know about this Pork Medallions Marsala with Mushrooms

You said:
  •   Marsala Wine Choices – Sweet Marsala gives the sauce a richer, caramelized flavor, while dry Marsala leans more savory. Both work — it’s simply personal preference.
  • No Marsala? – If you can’t find Marsala wine, a dry sherry or Madeira makes a good substitute. Even a dry white wine with a splash of brandy works in a pinch.

  • The Right Cut – Pork tenderloin is best here since it stays juicy and tender when sliced into medallions. Pork loin can work, but may need a slightly longer cooking time.

  • Don’t Overcook the Pork – Pork is perfectly done at 145°F with a slight blush in the center. Overcooking will make the medallions tough.

  • Mushroom Options – Cremini, button, or baby bella mushrooms are classic, but feel free to try wild mushrooms for deeper flavor.

  • Make It Creamy (Optional) – Adding a splash of heavy cream gives the sauce a velvety richness, but it’s just as delicious without.

  • What to Serve It With – Mashed potatoes, creamy polenta, or buttered noodles are perfect for soaking up the sauce. For a lighter option, try roasted green beans or a simple arugula salad.

  • Meal Prep Friendly – The sauce reheats beautifully, so you can make it ahead and gently warm before serving.


Pork Medallions Marsala with Mushrooms

Tender pork medallions seared until golden and finished in a rich Marsala mushroom sauce with garlic, herbs, and savory pan juices. An elegant Italian-inspired dinner that comes together quickly and is perfect for a restaurant-quality meal at home.

  • 2 pork tenderloins (about 1 ½ lbs total, trimmed and cut into 1-inch medallions)
  • Salt and freshly ground black pepper
  • ½ cup all-purpose flour (for dredging)
  • 3 tablespoons olive oil (divided)
  • 2 tablespoons unsalted butter
  • 8 ounces cremini or button mushrooms (sliced)
  • 2 cloves garlic (minced)
  • 1 cup Marsala wine (sweet or dry)
  • 1 cup chicken stock (low-sodium)
  • ½ cup heavy cream (optional, for a richer sauce)
  • 2 teaspoons fresh thyme or chopped parsley (for garnish)
  1. Prep the pork: Slice pork tenderloin into medallions, about 1-inch thick. Season generously with salt and pepper. Lightly dredge in flour, shaking off excess.

  2. Sear: Heat 2 tablespoons olive oil in a large skillet over medium-high. Sear pork medallions in batches, about 2–3 minutes per side, until golden but not fully cooked. Transfer to a plate.

  3. Cook the mushrooms: Add remaining olive oil and butter to the skillet. Sauté mushrooms until browned, about 5–6 minutes. Add garlic and cook 1 minute more.

  4. Deglaze with Marsala: Pour in the Marsala wine, scraping up any browned bits. Let simmer 2 minutes to reduce slightly.

  5. Finish the sauce: Add chicken stock and optional cream. Return pork medallions to the skillet, nestling into the sauce. Simmer gently 5–7 minutes, until pork is cooked through (145°F internal temperature).

  6. Serve: Garnish with thyme or parsley. Serve over mashed potatoes, polenta, or buttered pasta

Main Course
Italian


Crispy Barbecued Buffalo Chicken Wing Recipe

Crispy Barbecued Buffalo Chicken Wing Recipe

This post may contain affiliate links, that help support this blog. If you make a purchase through these links, I may earn a commission—at no cost to you. For more information read my disclosure policy.

Some of our most-loved recipes have their roots in the kitchens of our restaurants, and these Barbecued Buffalo Chicken Wings are no exception. Just like our Smashed Italian Sausage & Pepper Sandwiches, these wings quickly became a customer favorite — and later, a family favorite at home too.

Back in the restaurant, we made them the classic way: fried until golden and crispy, with that irresistible crunch that made them a staple on the menu. We kept the seasoning simple — salt, pepper, paprika, mustard, garlic powder, and a touch of cornstarch — but the result was magic. Crispy wings with just the right balance of smoky, spicy flavor that had people coming back for more.

Over time, I started making them at home too, sometimes grilling or baking instead of frying, but always keeping that same bold flavor. Whether served with a cold drink at the bar or around our own family table, these wings are the kind of dish that proves simple ingredients can deliver unforgettable flavor.


Crispy Barbecued Buffalo Chicken Wing Recipe

Crispy barbecued buffalo chicken wings coated in a flavorful spicy sauce with the perfect balance of heat and tang. A crowd-pleasing appetizer for game days, parties, or an easy weeknight meal.

For the Wings

  • 2 lb chicken wings, split into drumettes and flats, tips removed
  • 1 tbsp baking powder (aluminum-free)
  • 1 tsp garlic powder
  • 1 tsp onion powder
  • 1 tsp smoked paprika
  • ½ tsp salt
  • ½ tsp black pepper

For the Buffalo BBQ Sauce

  • ½ cup buffalo wing sauce
  • ¼ cup barbecue sauce
  • 2 tbsp unsalted butter, melted
  • 1 tbsp honey (optional, for a touch of sweetness)
  • 1 tsp Worcestershire sauce

For Serving (Optional)

  • Ranch or blue cheese dressing
  • Celery sticks
  • Carrot sticks
  • Chopped fresh parsley
  1. Preheat the oven to 425°F (220°C). Line a baking sheet with foil and place a wire rack on top. Lightly grease the rack.

  2. Pat the chicken wings completely dry with paper towels. Dry skin is the key to crispy wings.

  3. In a large bowl, combine the baking powder, garlic powder, onion powder, smoked paprika, salt, and black pepper. Toss the wings until evenly coated.

  4. Arrange the wings in a single layer on the prepared wire rack, leaving space between each wing.

  5. Bake for 20 minutes, then flip the wings and continue baking for another 20–25 minutes, or until golden brown and crispy.

  6. While the wings bake, whisk together the buffalo wing sauce, barbecue sauce, melted butter, honey (if using), and Worcestershire sauce in a small saucepan over low heat. Warm for 2–3 minutes, stirring occasionally.

  7. Transfer the hot wings to a large bowl. Pour the warm Buffalo BBQ sauce over the wings and toss until evenly coated.

  8. For extra caramelization, return the sauced wings to the oven or place them under the broiler for 2–3 minutes, watching carefully to prevent burning.

  9. Serve immediately with ranch or blue cheese dressing, celery sticks, and carrot sticks.

  10. Baking powder helps create an extra crispy skin without frying.

    For a smokier flavor, grill the wings over medium heat for 3–5 minutes after saucing instead of broiling.

    Adjust the heat by using more barbecue sauce for a milder flavor or adding extra buffalo sauce for more spice.

Appetizer
Italian
buffalo chicken wings,