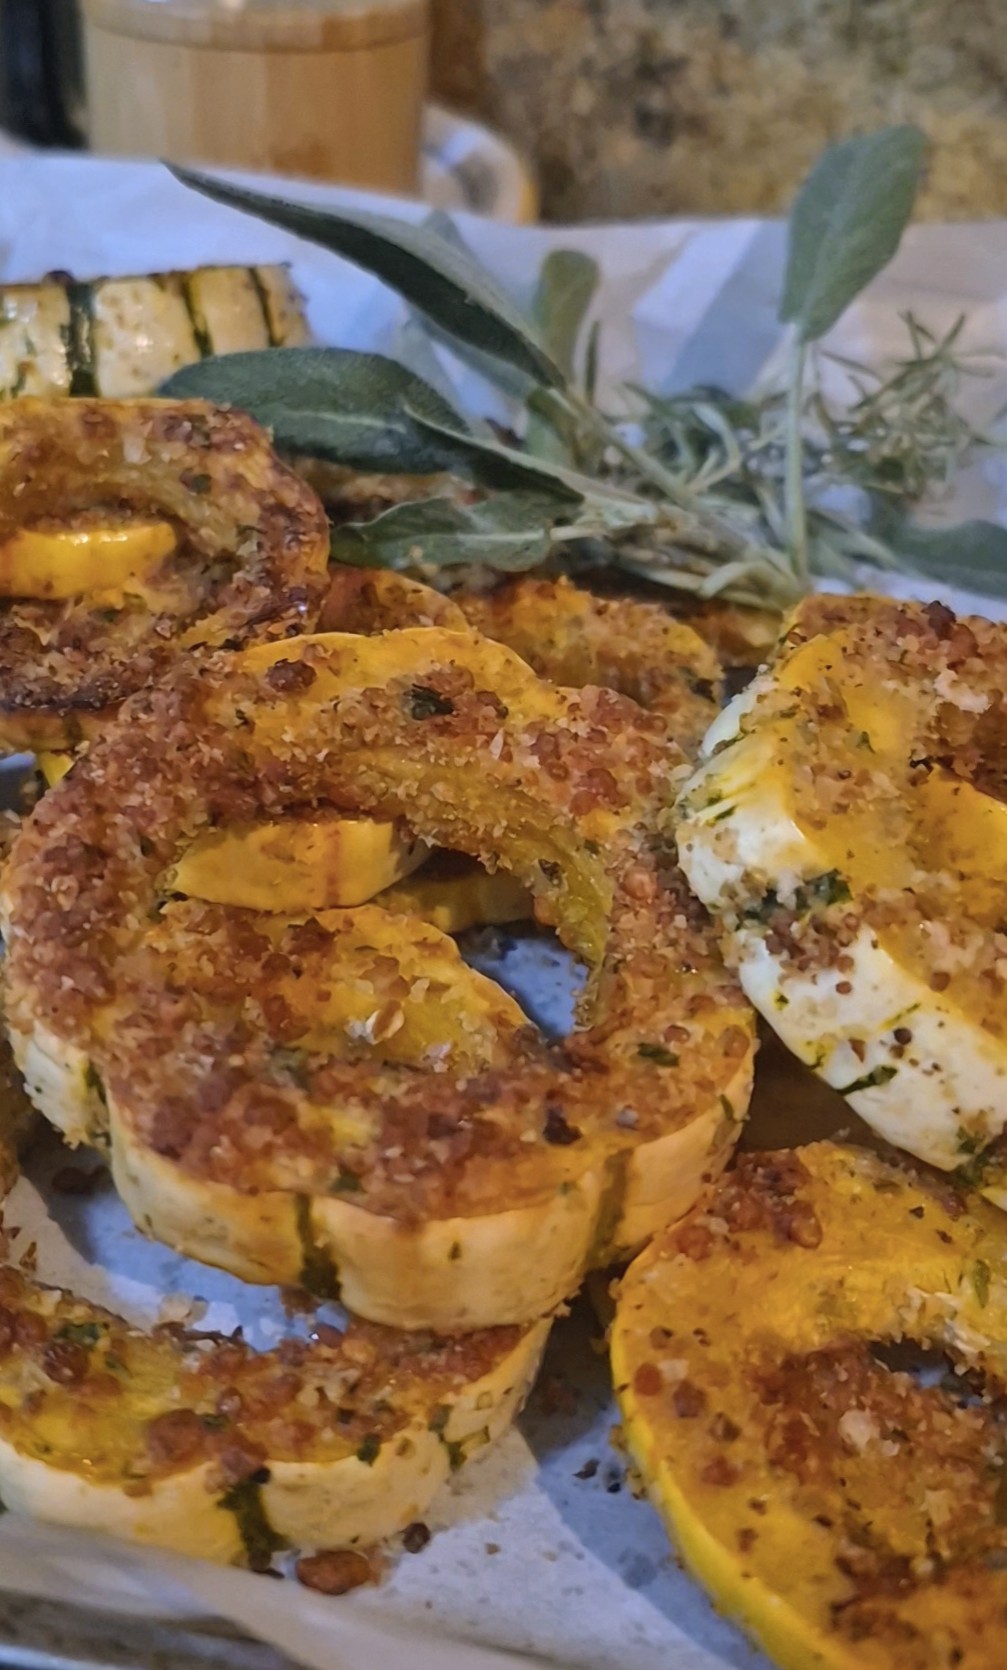
I love when simple seasonal ingredients can shine with just a few Italian touches. This Roasted Delicata Squash Oreganata is my twist on a classic southern Italian preparation, where “oreganata” means seasoned with oregano, garlic, breadcrumbs, and good olive oil. The result is golden, tender squash with a crispy, flavorful topping — the perfect cozy side dish for fall dinners or holiday tables.
Things to know about this Roasted Delicata Squash Oreganata
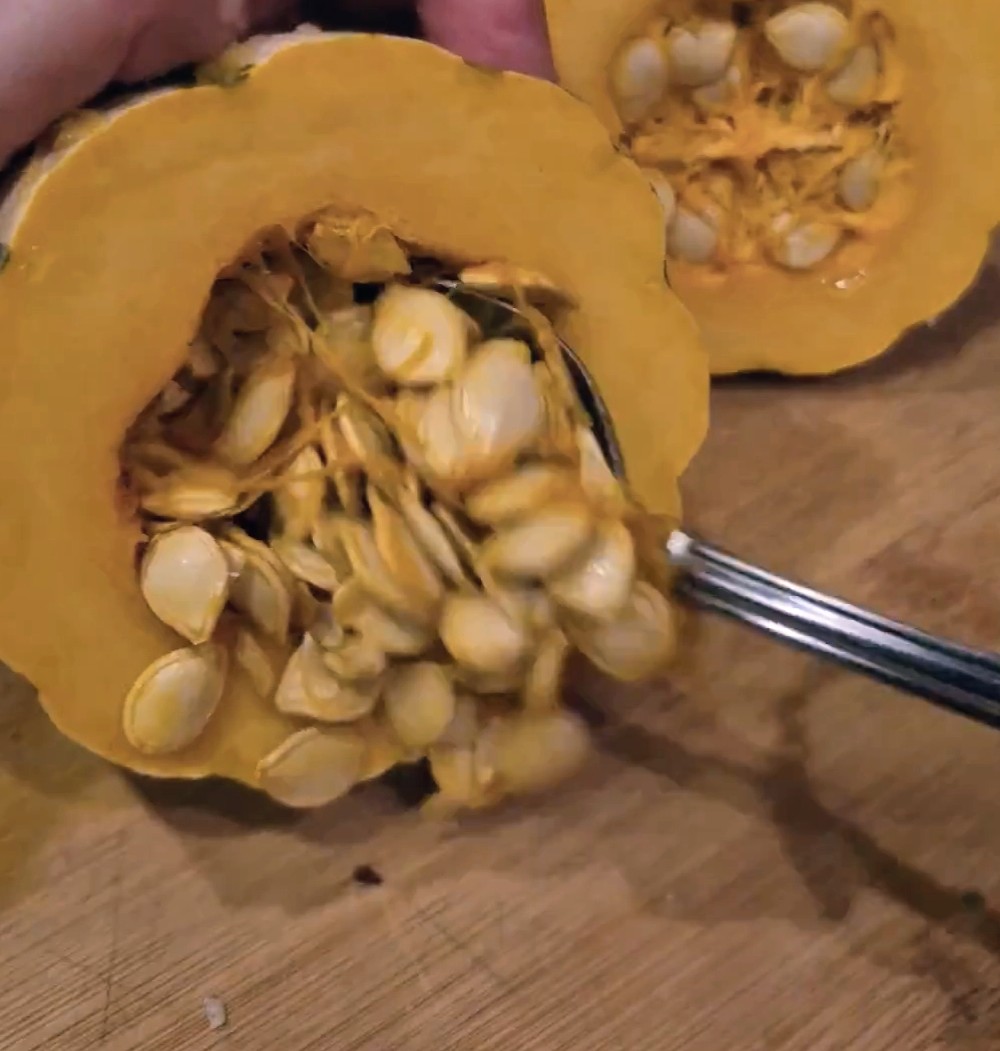
One of the best things about delicata squash is that you don’t have to peel it — the skin is completely edible and turns tender and slightly crisp when roasted. That makes this recipe not only delicious but also incredibly easy to prepare. Look for delicata squash with firm, unblemished skin and a creamy yellow color with green stripes; that’s a sign it’s perfectly ripe and full of flavor.
Because delicata is naturally sweet, it pairs beautifully with the savory oreganata topping — a mix of breadcrumbs, Parmesan, garlic, and herbs that gives every bite a golden crunch. You can prepare the squash ahead of time and reheat it in the oven just before serving, making it a great make-ahead side dish for gatherings or holiday meals. And if you want to make it your own, try adding a sprinkle of crushed red pepper flakes for a touch of heat or a squeeze of lemon juice for brightness just before serving.
Preheat the oven: Set your oven to 400°F (200°C) and line a baking sheet with parchment paper.
Prepare the squash: Slice each delicata squash in half lengthwise. Scoop out the seeds, then cut into ½-inch thick half-moons.
Season: In a large bowl, toss the squash with olive oil, salt, and pepper until evenly coated.
Make the oreganata mixture: In a small bowl, combine breadcrumbs, Parmesan, garlic, parsley, and oregano. Stir well to mix.
Coat the squash: Arrange the squash slices on the prepared baking sheet in a single layer. Sprinkle the breadcrumb mixture evenly over the top, pressing gently so it adheres.
Roast: Bake for 20–25 minutes, turning halfway through, until the squash is tender and the topping is golden and crispy.
Serve: Transfer to a serving platter and garnish with a little extra parsley or Parmesan if desired. Serve warm
Italian Cauliflower al Forno
Italian Cauliflower al Forno
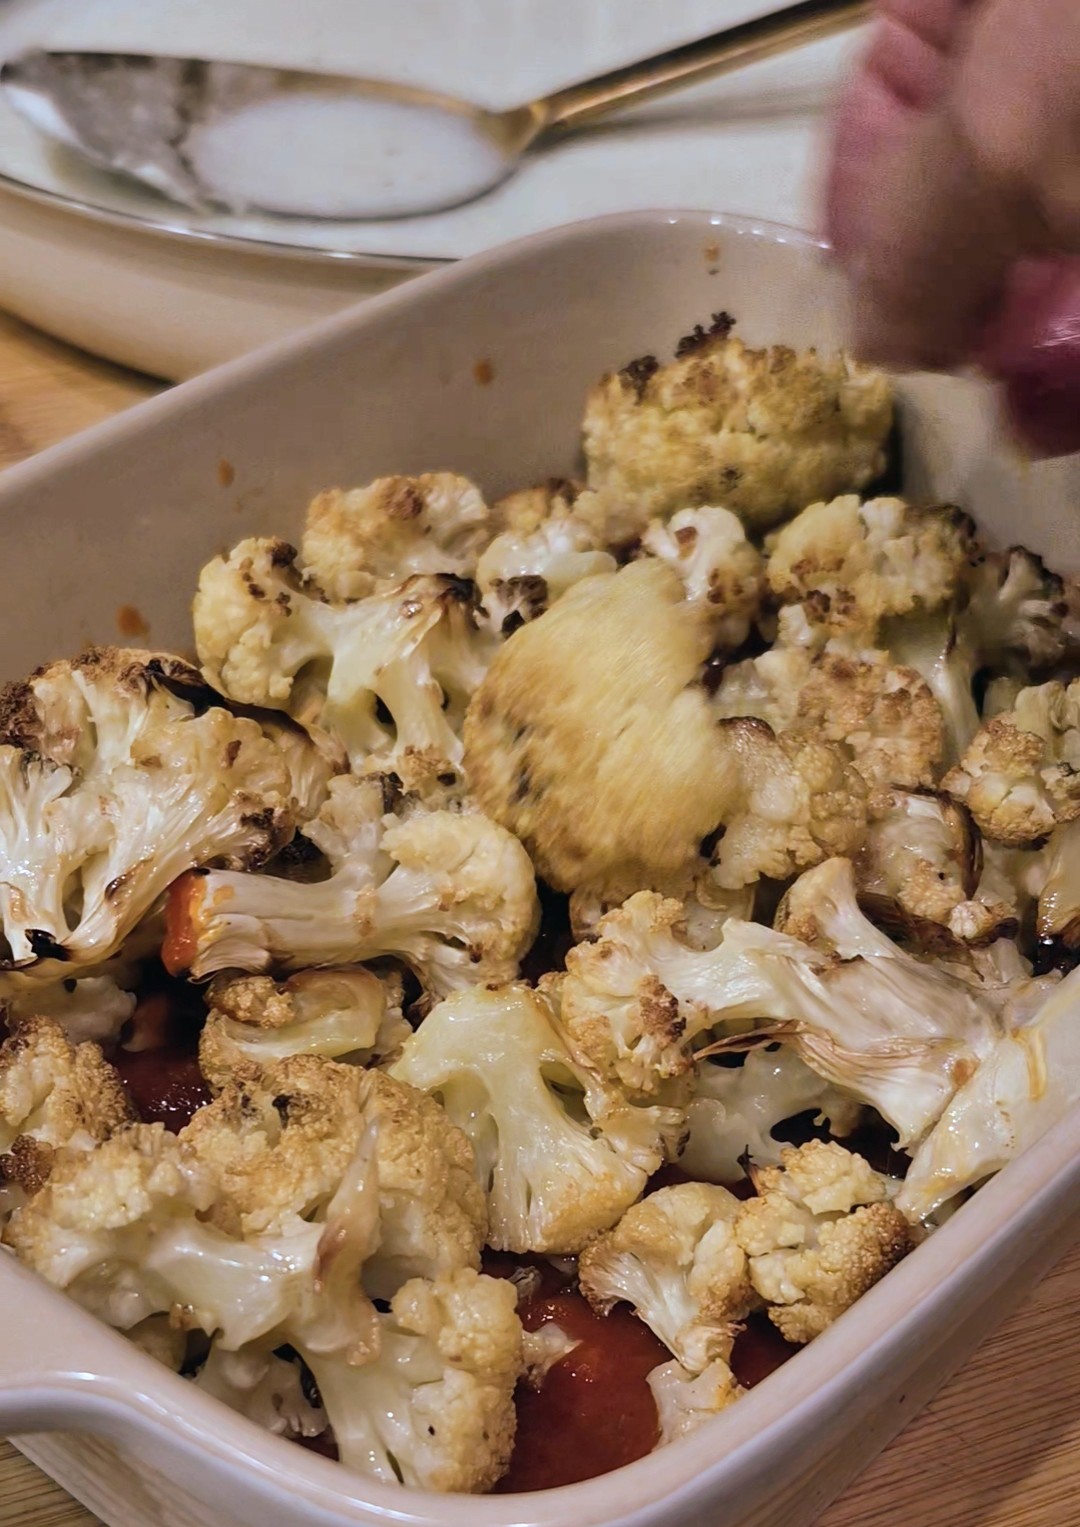
I’ve always loved cauliflower — it’s one of those vegetables that doesn’t get nearly enough credit. Too often it’s overlooked, but with a little Italian flair, it turns into something truly special. This Cauliflower al Forno is proof that simple ingredients can make magic. Roasted until golden, then baked in layers of rich marinara, creamy béchamel, and melted cheese, it’s cozy, comforting, and completely irresistible. Whether you serve it as a side or a vegetarian main, this dish will make anyone rethink how delicious cauliflower can be.
Things to know about this Italian Cauliflower al Forno
Make ahead: You can roast the cauliflower and even assemble the dish a day in advance. Just cover and refrigerate, then bake when ready to serve.
Reheating: Warm leftovers in the oven at 350°F until bubbly, or reheat individual portions in the air fryer for a crisp top.
Serving idea: Pair it with a simple green salad, crusty bread, or even over a scoop of creamy polenta for a full meal.
Storage: Keeps well up to 3 days in the fridge — the flavors get even better as they mingle.
Variations
Add Italian sausage: Brown mild or spicy Italian sausage and scatter it over the roasted cauliflower before baking for extra heartiness.
Use other veggies: Try mixing in roasted zucchini, bell peppers, or mushrooms for more texture and flavor.
Make it spicy: Add a pinch of red pepper flakes to your Easy Marinara Sauce for a little kick.
Go cheesy: Add a layer of ricotta or burrata before topping with mozzarella for an extra creamy version.
Lighter option: Skip the béchamel and just use Easy Marinara Sauce — it’s still delicious and a bit lighter.
Toss cauliflower florets with olive oil, salt, pepper, oregano, and thyme.
Spread on a baking sheet and roast for 20 minutes until slightly golden.
Make the béchamel sauce
In a small saucepan, melt butter over medium heat.
Stir in flour and cook 1–2 minutes until lightly golden.
Gradually whisk in milk, stirring constantly until thickened.
Season with salt, pepper, and a pinch of nutmeg.
Assemble the dish:
In a baking dish, spread a thin layer of tomato sauce.
Arrange roasted cauliflower on top.
Drizzle with béchamel sauce
Pour remaining tomato sauce over the cauliflower.
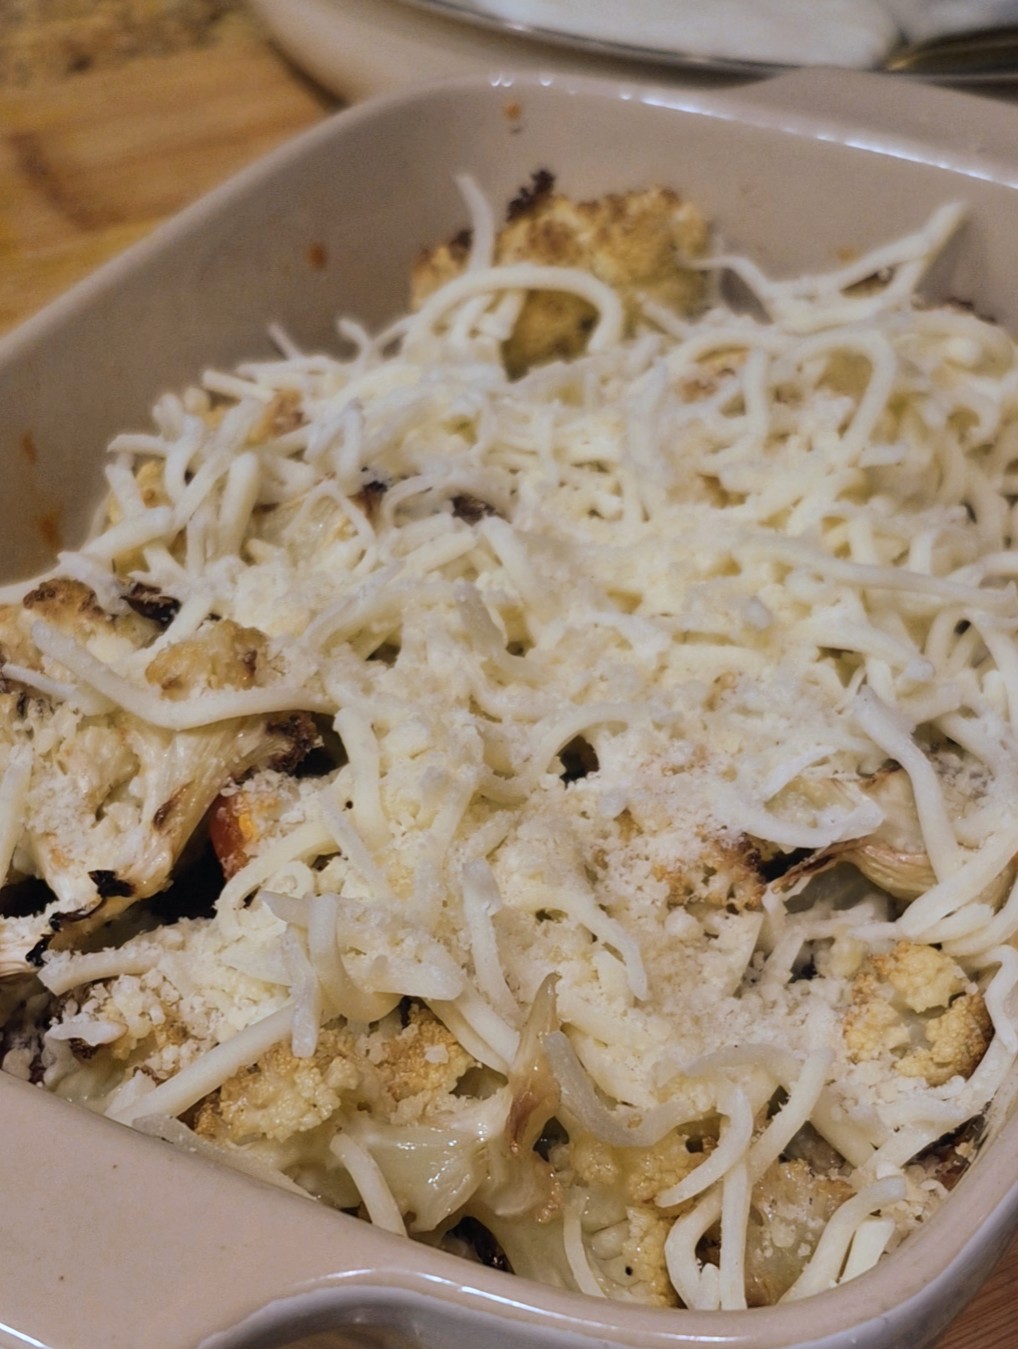
Sprinkle mozzarella and Parmesan evenly on top.
Bake: 20–25 minutes until bubbly and golden on top.
Garnish and serve: Sprinkle with fresh basil or parsley before serving.
Italian Sausage and Potatoes (Stovetop Pan Recipe)
Italian Sausage and Potatoes (Stovetop Pan Recipe)
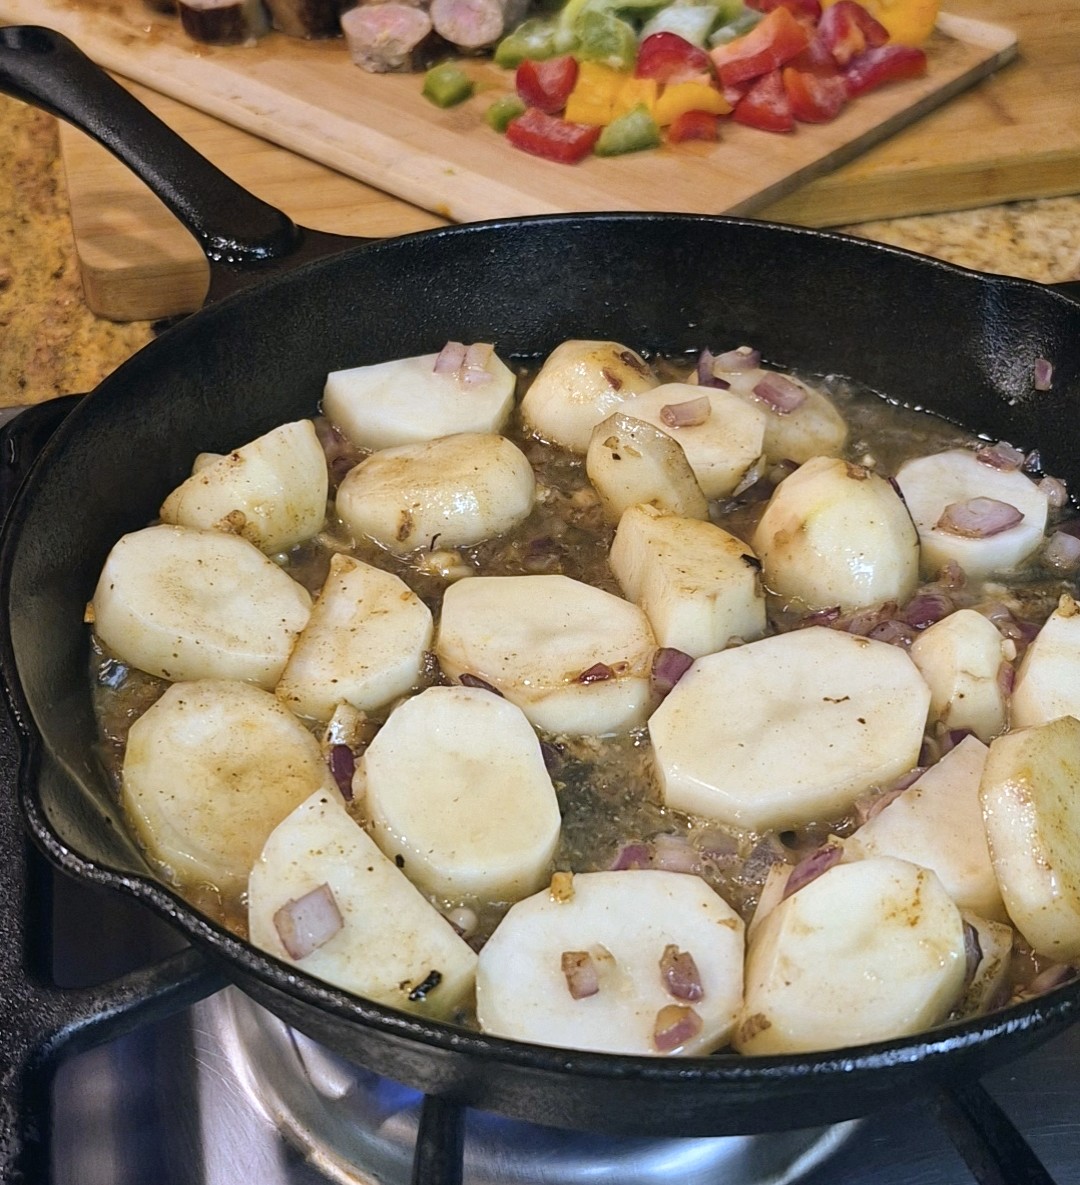
This Italian Sausage and Potatoes stovetop recipe is the kind of hearty, rustic meal that never goes out of style. Juicy sausage links, tender golden potatoes, sweet peppers, and onions all cook together in one pan, creating incredible flavor with minimal effort. It’s perfect for busy weeknights when you crave something comforting, homey, and truly satisfying.
Things to know about this Italian Sausage and Potatoes (Stovetop Pan Recipe)
Quality matters: Use good-quality Italian sausage — sweet, mild, or hot. The sausage you choose sets the tone for the whole dish. If you can find butcher-fresh or locally made sausage, even better.
Don’t rush the browning: Let the sausage get a deep golden crust before removing it from the pan. Those browned bits (fond) are what give the peppers and potatoes their rich, savory flavor once deglazed.
Deglaze smart: A splash of white wine adds a subtle acidity that brightens everything up, while chicken broth keeps it mild and comforting. Either works beautifully.
Make it spicy: Add more crushed red pepper flakes or use hot Italian sausage for an extra kick.
Add a tomato twist: Stir in a few spoonful’s of crushed tomatoes or tomato paste when you deglaze for a more saucy, southern Italian-style version.
Try different potatoes: Yukon golds stay creamy inside and crisp outside, while red potatoes hold their shape nicely. Even small baby potatoes (halved) work great.
Vegetable boost: Toss in zucchini slices, cherry tomatoes, or baby spinach at the end for a colorful, veggie-packed twist.
Meal prep tip: This dish reheats beautifully — store leftovers in an airtight container and rewarm them in a skillet for that freshly cooked flavor.
Craving More Rustic Italian Comfort?
If you loved this Italian Sausage and Potatoes (Stovetop Pan Recipe), try a few more of my classic Italian comfort dishes:
Brown the sausage: Heat 2 tablespoons of olive oil in a large deep skillet over medium heat. Add the sausage links and cook until browned on all sides and mostly cooked through, about 8–10 minutes. Remove from the pan and set aside to cool slightly.
Slice the sausage: Once cool enough to handle, slice the sausage into 1-inch pieces and set aside.
Cook the vegetables: In the same pan (don’t wipe it out — those brown bits add flavor!), add the remaining 2 tablespoons of olive oil. Add the onions, bell peppers, and potatoes. Season with salt and pepper, and cook over medium heat until the potatoes start to soften and everything begins to caramelize, about 10–12 minutes. Add the garlic and cook for another 30 seconds.
Deglaze the pan: Pour in the chicken broth or white wine, scraping up any browned bits from the bottom. Let it simmer for 1–2 minutes.
Combine everything: Return the sliced sausage to the skillet. Sprinkle in the oregano, basil, and crushed red pepper flakes. Stir well to combine, cover partially, and cook for another 5-5 minutes, until the potatoes are tender, the sausage is fully cooked and everything is infused with flavor.
Finish and serve: Taste and adjust seasoning with more salt and pepper if needed. Garnish with fresh Italian chopped parsley and serve hot. ENJOY!!!
Italian Roasted Delicata Squash for Salads
Italian Roasted Delicata Squash for Salads
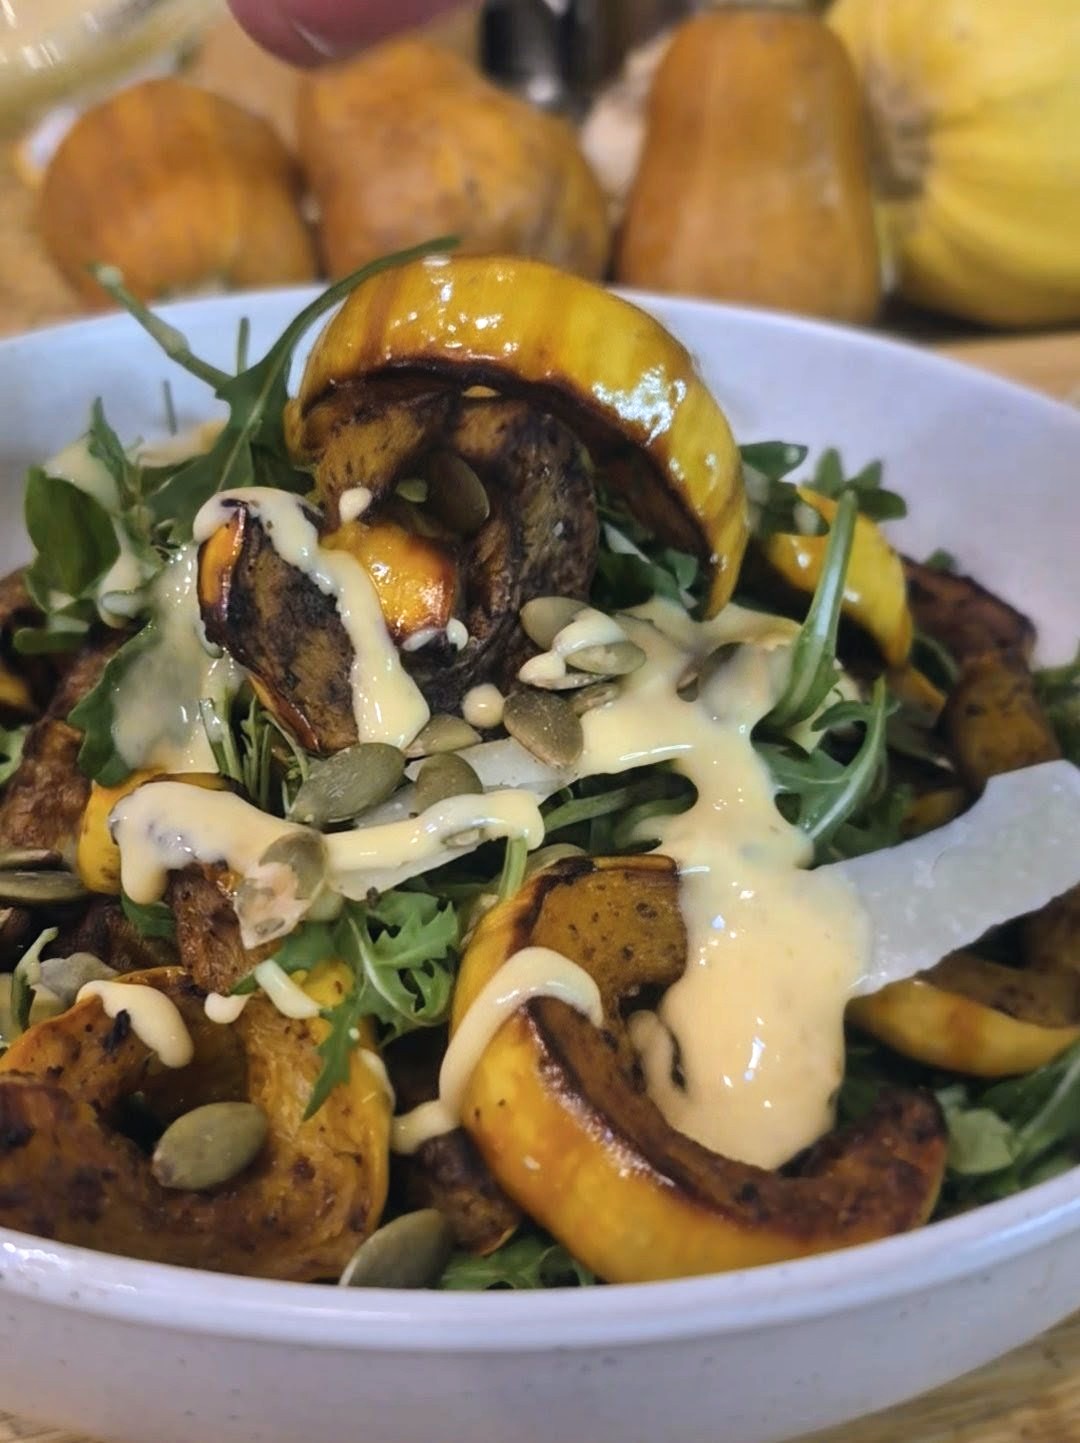
Fall flavors don’t get much better than this: golden roasted delicata squash paired with peppery arugula, crunchy pumpkin seeds, and nutty shaved Parmesan. Tossed in a creamy Sicilian-inspired dressing, this salad is simple, rustic, and full of cozy Italian charm. Best of all? You don’t need to peel the squash — the tender skin adds color, texture, and flavor that makes every bite irresistible. Whether you’re serving it as a side or a light meal, it’s the perfect way to celebrate seasonal produce with a touch of Italian flair.
Things to know about this Italian Roasted Delicata Squash for Salads
No Peeling Needed: The skin of delicata squash is thin and tender when roasted, so it’s completely edible and adds lovely texture.
Roasting Brings Out Natural Sweetness: Roasting caramelizes the edges of the squash, enhancing its nutty, sweet flavor — perfect for balancing the peppery arugula and savory Parmesan.
Flexible Salad Base: This roasted squash works beautifully in salads, grain bowls, or even as a side dish for Italian mains like chicken or sausage.
Pumpkin Seeds Add Crunch: Toasted pumpkin seeds (pepitas) provide a satisfying crunch and a subtle nutty flavor that complements the roasted squash.
Creamy Sicilian Dressing: The dressing is tangy, garlicky, and creamy — it ties the salad together while keeping it light and fresh.
Make Ahead: You can roast the squash a day ahead — just toss it with the dressing right before serving so the arugula stays crisp.
Seasonal & Healthy: This salad is packed with seasonal fall flavors, making it a nutritious, colorful, and Italian-inspired dish for any table.
Italian Roasted Delicata Squash Salad with Creamy Sicilian Dressing
Servings: 2–4 Cook Time: 25–30 minutes
Ingredients for Roasting the Delicata Squash:
1 delicata squash, scrubbed and sliced into ½-inch half-moons (skin on)
2 tablespoons extra virgin olive oil
½ teaspoon sea salt
¼ teaspoon freshly ground black pepper
¼ teaspoon garlic powder (optional)
1 teaspoon fresh thyme or sage, chopped (optional)
Salad Ingredients:
4 cups arugula
2 tablespoons toasted pumpkin seeds (pepitas)
¼ cup shaved Parmesan
Creamy Sicilian Dressing Ingredients:
3 tablespoons mayonnaise or Greek yogurt
1 cup extra virgin olive oil
1/3 cup red wine vinegar
1/4 cup lemon juice
1 garlic clove, minced
2 teaspoon oregano
Salt and pepper to taste
Instructions
Preheat the Oven: Preheat your oven to 425°F (220°C). Line a baking sheet with parchment paper.
Roast the Squash: Toss the sliced delicata squash with olive oil, salt, pepper, garlic powder, and herbs. Spread in a single layer on the baking sheet. Roast for 20–25 minutes, flipping halfway through, until tender and golden at the edges.
Make the Dressing: In a small bowl, whisk together mayonnaise (or Greek yogurt), olive oil, red wine vinegar, lemon juice, minced garlic, oregano, salt, and pepper until smooth and creamy.
Assemble the Salad: In a large bowl, place the arugula and roasted delicata squash. Drizzle with the creamy Sicilian dressing and toss gently. Sprinkle with toasted pumpkin seeds and shaved Parmesan.
Serve: Serve immediately as a warm salad or let the squash cool slightly for a room-temperature version. Perfect as a side dish or a light Italian-inspired meal.
Creamy Italian Pan Chicken and Potatoes
Creamy Italian Pan Chicken and Potatoes
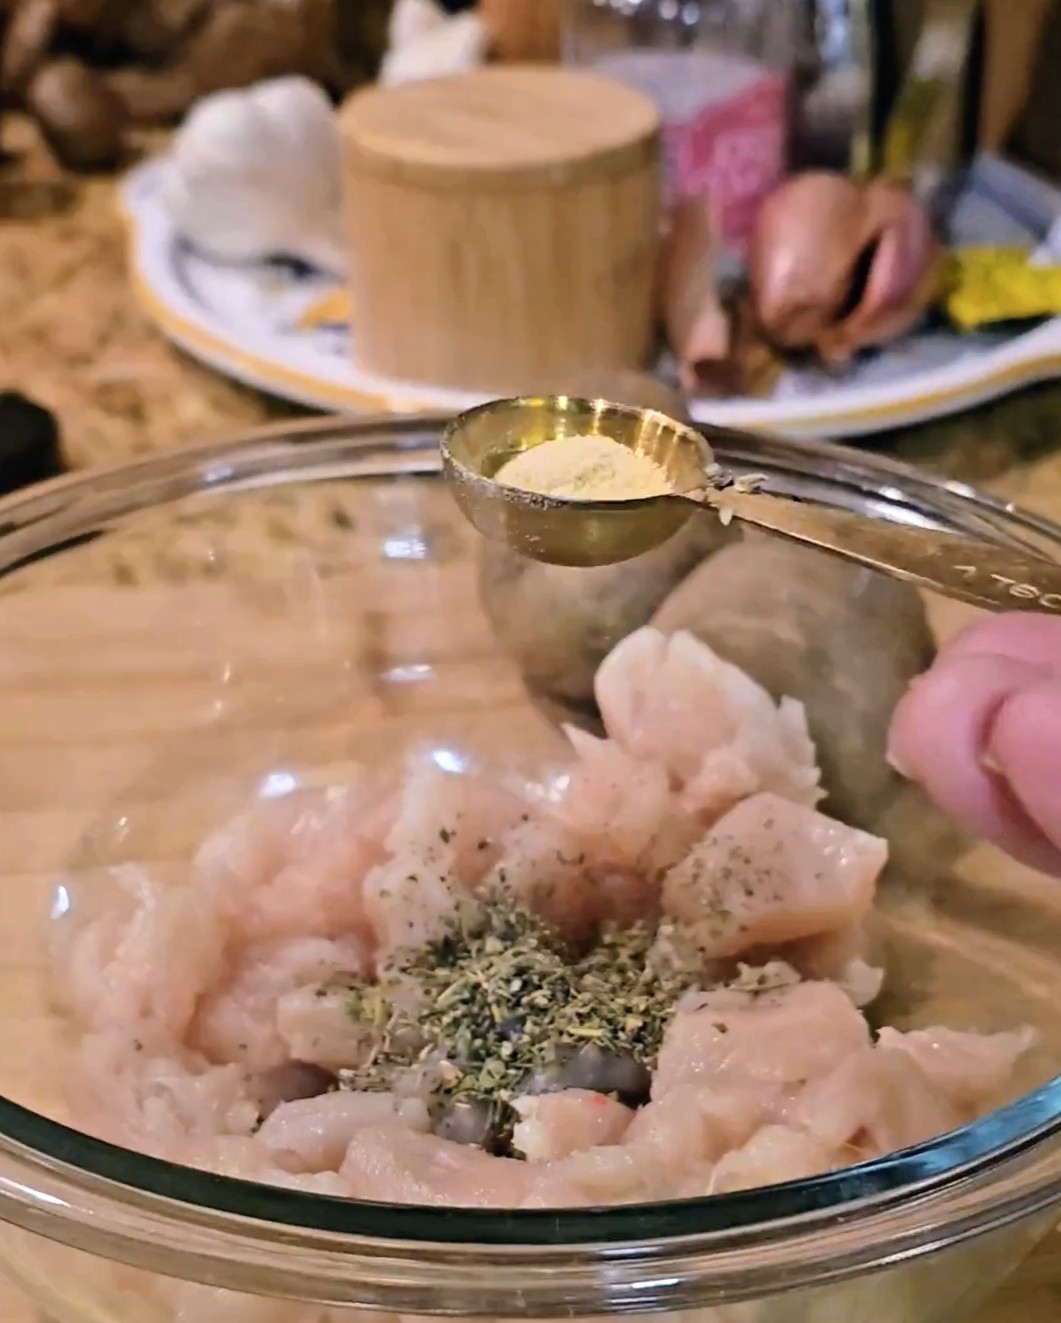
I love simple one pan meals that are easy to make, and use few recognizable ingredient. This Creamy Italian Pan Chicken and Potatoes takes a comforting classic and gives it a delicious Italian twist — tender chicken, golden potatoes, and sweet bell peppers simmered together in a rich white wine and cream sauce. The final touch of freshly grated mozzarella melts into every bite, creating a silky, flavorful finish that’s pure comfort in a pan.
This recipe was inspired by the rustic Italian meals I grew up with — those cozy, one-pan dishes that fill the kitchen with warmth and the kind of aroma that draws everyone to the table. It’s hearty yet elegant, perfect for a busy weeknight when you want something satisfying but don’t want to fuss with too many dishes.
The beauty of this meal is in its simplicity: a few humble ingredients, one pan, and a touch of Italian love. Whether you’re cooking for family, hosting a cozy dinner, or just craving something creamy and comforting, this dish is sure to become a favorite.
Things to know about this Creamy Italian Pan Chicken and Potatoes
Chicken prep: Slicing the chicken into medium dice ensures it cooks quickly and stays tender. You can also use boneless, skinless thighs for extra juiciness.
Potatoes: Small, waxy potatoes work best for this recipe since they hold their shape while cooking. Yukon Gold or red potatoes are ideal.
Wine swap: If you prefer a non-alcoholic version, substitute the white wine with low-sodium chicken broth.
Creaminess: Heavy cream gives a rich sauce, but you can use half-and-half for a lighter version — just simmer a little longer to thicken.
Cheese finish: Freshly grated mozzarella melts best; pre-shredded cheese often has anti-caking agents that affect texture.
Seasoning tips: Garlic and onion powder season the chicken perfectly, but feel free to add Italian herbs like oregano, thyme, or rosemary.
Make it spicy: Add a pinch of crushed red pepper flakes while cooking the peppers for a subtle kick.
One-pan cleanup: Using the same pan for the whole recipe not only builds flavor but keeps cleanup simple — a win for weeknight dinners!
Loved this Creamy Italian Pan Chicken and Potatoes recipe? Try more of our easy Italian-inspired dinners:
Don’t forget to subscribe to our newsletter for more one-pan meals, weeknight dinners, and authentic Italian recipes delivered straight to your inbox! 📩
Creamy Italian Pan Chicken and Potatoes
Servings: 4 Cook Time: 25–30 minutes
Ingredients
2 chicken breasts, cut in medium dice
3 small potatoes, diced (about 2 cups)
1 red bell pepper cut into dice
1 yellow bell pepper cut into dice
2 cloves garlic, minced
1 teaspoon garlic powder
1 teaspoon onion powder
½ cup dry white wine (for deglazing)
¾ cup heavy cream
1 cup freshly grated mozzarella cheese
2 tablespoons olive oil
Salt and black pepper to taste
Fresh parsley, chopped (for garnish)
Instructions
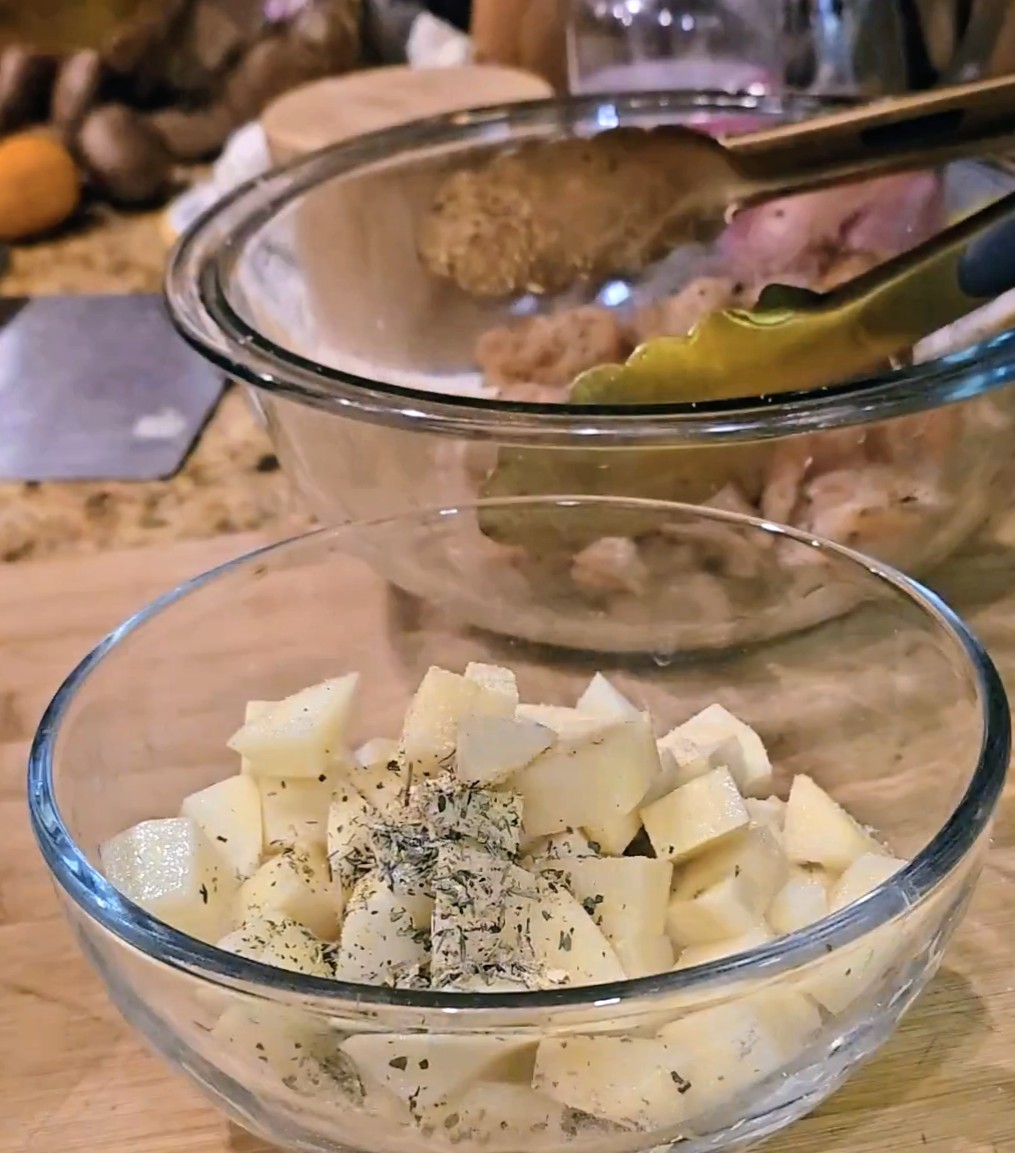
Prepare the ingredients: Slice the chicken breasts into medium dice so they cook quickly and evenly. Dice the potatoes, slice the bell peppers, and mince the garlic.
Cook the potatoes: Heat 1 tablespoon of olive oil in a large pan over medium heat. Add the diced potatoes and season lightly with salt. Cook for 8–10 minutes, stirring occasionally, until golden and tender. Remove from the pan and set aside.
Sear the chicken: Add the remaining tablespoon of olive oil to the same pan. Season the chicken with salt, pepper, garlic powder, and onion powder. Cook for 4–5 minutes per side, until golden and cooked through. Remove and set aside.
Sauté the peppers: Add the sliced bell peppers to the pan and cook for 3–4 minutes until softened. Add minced garlic and sauté for 30 seconds, just until fragrant.
Deglaze with wine: Pour in the white wine, scraping up any browned bits from the bottom of the pan. Let it simmer for 2–3 minutes to reduce slightly and cook off the alcohol.
Make the creamy sauce: Lower the heat and stir in the heavy cream. Simmer for 2–3 minutes until the sauce thickens slightly.
Combine and finish: Return the cooked chicken and potatoes to the pan. Stir to coat everything evenly in the creamy sauce. Sprinkle mozzarella on top, cover, and let it melt for 2–3 minutes.
Serve: Garnish with fresh parsley and serve warm straight from the pan.
Roasted Butternut Squash Soup
Roasted Butternut Squash Soup
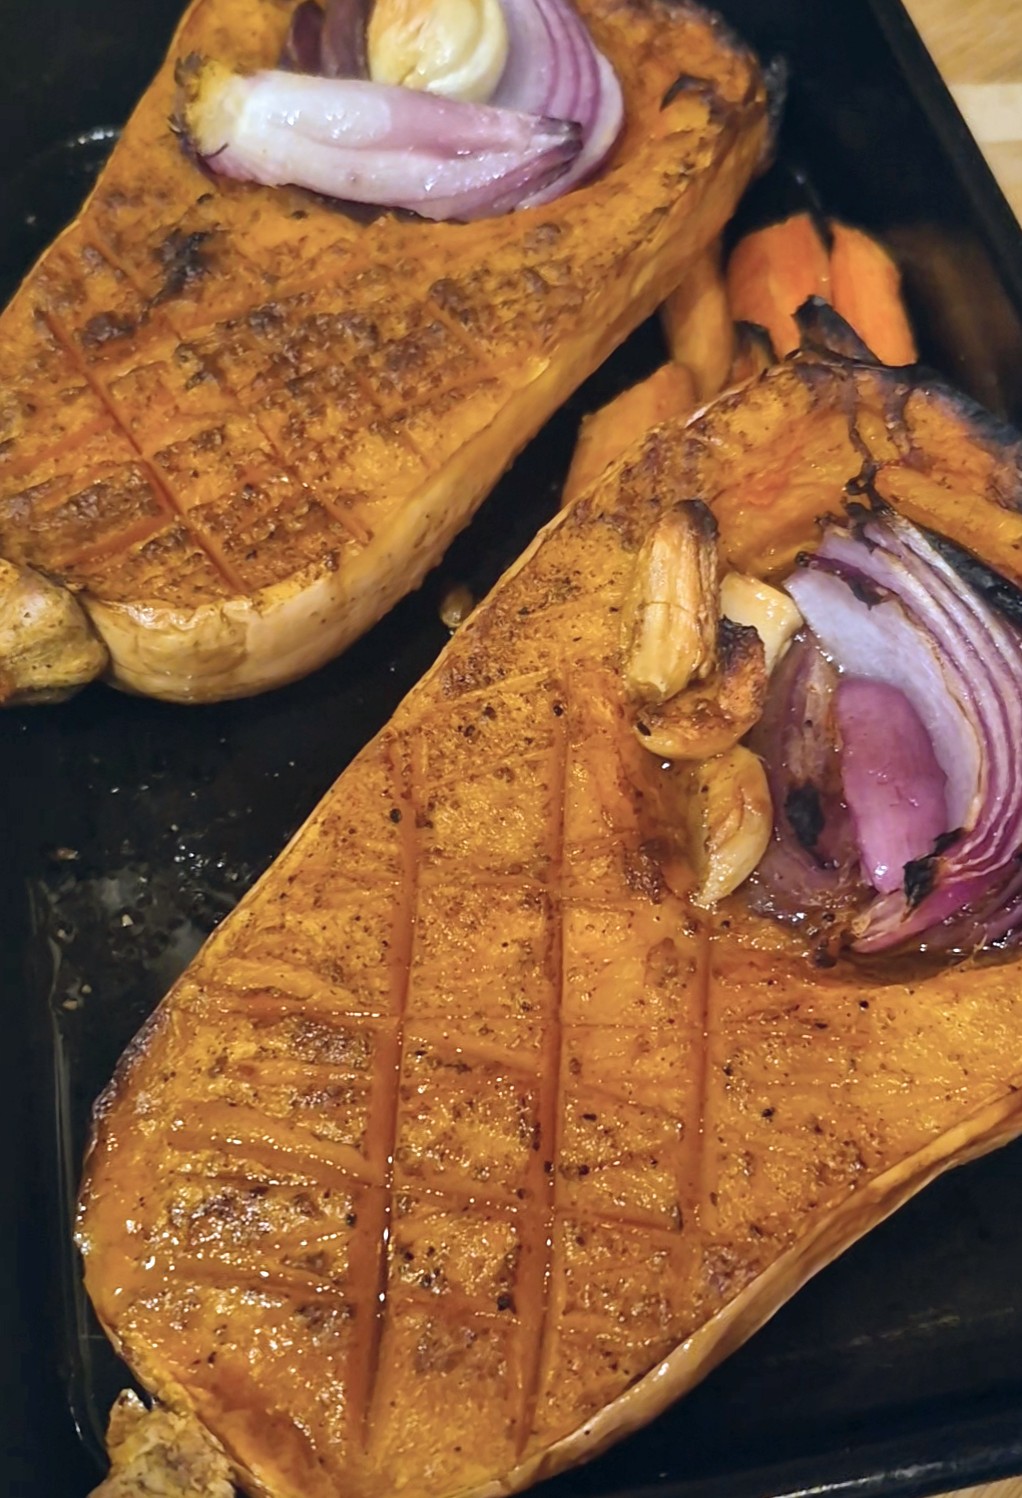
There’s nothing quite like a warm bowl of roasted butternut squash soup on a chilly day. This version roasts everything together — butternut squash, onions, garlic, sweet peppers, and carrots — for deep, caramelized flavor. Once roasted, everything is blended into a silky, naturally creamy soup that’s comforting, wholesome, and full of fall goodness. It’s a simple, rustic dish that tastes like something you’d get at a cozy café, yet it’s easy to make right at home.
Things to know about this Roasted Butternut Squash Soup
Roasting Builds Flavor: Roasting the squash, onion, garlic, peppers, and carrots together gives this soup a naturally sweet, caramelized depth you can’t get from boiling.
Easy to Blend: Once roasted, everything purees beautifully for a smooth, creamy texture — no need for added cream unless you want extra richness.
Customizable Broth: Use vegetable broth for a vegetarian version or chicken broth for a heartier flavor.
Freezer-Friendly: This soup freezes well for up to 3 months. Reheat gently on the stove and refresh with a splash of broth.
Perfect Make-Ahead Meal: Roast the vegetables a day in advance, then blend and warm when ready to serve for a quick, cozy meal.
Italian Flavor Twist: Add a drizzle of olive oil infused with rosemary, a sprinkle of Parmesan cheese, or a touch of crushed red pepper for that warm Italian flair.
Servings: 4–6 Cook Time: 1 hour (15 min prep, 45 min roast)
Ingredients
1 large butternut squash, halved and seeds removed
1 medium onion, roughly chopped
4 cloves garlic, unpeeled
1–2 small sweet peppers (or bell pepper), chopped
2 medium carrots, peeled and chopped
2–3 tablespoons olive oil
Salt and black pepper, to taste
4 cups vegetable or chicken broth (as preferred)
Optional: ½ teaspoon smoked paprika or pinch of chili flakes for depth
Optional toppings: a drizzle of cream, toasted pumpkin seeds, or crispy sage
Instructions
Preheat oven: to 400°F (200°C).
Prepare vegetables: Place the cleaned, halved butternut squash on a baking sheet, cut side up. Fill each cavity with chopped onion, garlic cloves (still in skin), and peppers. Scatter the carrots around the pan.
Season and roast: Drizzle everything with olive oil and season with salt and pepper. Roast for about 45–50 minutes, or until the squash is tender and caramelized.
Scoop and blend: Once cooled slightly, scoop the flesh from the squash and squeeze out the roasted garlic. Add all roasted vegetables to a blender with 3 cups of broth. Blend until smooth, adding more broth to reach your desired consistency.
Simmer: Pour the soup into a pot and warm over medium heat for 5–10 minutes. Adjust seasoning as needed.
Serve: Ladle into bowls and top with a drizzle of cream or olive oil and your favorite garnishes.
Creamy Chicken Breast with Mushrooms
Creamy Chicken Breast with Mushrooms
I love a one-pan meal that feels both comforting and elegant — and this Creamy Chicken Breast with Mushrooms delivers exactly that. Tender chicken breasts simmer in a velvety sauce made with white wine, garlic, and earthy mushrooms, creating a dish that’s full of rich, savory flavor. It’s a restaurant-quality meal made easily at home, ready in 30 minutes and cooked all in one pan — perfect for busy weeknights or a cozy dinner in.
Things to know about this Creamy Chicken Breast with Mushrooms
Use a dry white wine: A crisp Pinot Grigio or Sauvignon Blanc adds depth and enhances the creamy sauce.
Sear the chicken first: That golden crust adds incredible flavor to the dish and builds the base for your sauce.
Mushrooms matter: Cremini, baby bella, or white mushrooms all pair perfectly with the cream and wine.
Adjust your sauce: Simmer longer for a thicker consistency or add a splash of broth if you prefer it lighter.
Reheats beautifully: Gently warm leftovers on the stove — it tastes just as good the next day.
Serving Ideas
Pair this creamy chicken and mushroom dish with:
Buttered noodles or creamy mashed potatoes
Steamed green beans, spinach, or roasted asparagus
A simple salad and crusty Italian bread for dipping
If you love quick, creamy comfort meals, don’t miss these reader favorites:
Prepare the Chicken: Pat the chicken breasts dry and season both sides with salt and pepper.
Sear the Chicken: Heat olive oil in a large skillet over medium-high heat. Add the chicken breasts and cook 4–5 minutes per side, or until golden brown and nearly cooked through. Remove and set aside on a plate.
Sauté the Mushrooms: In the same pan, reduce the heat to medium and add the butter. Once melted, add the sliced mushrooms. Cook for 5–6 minutes, stirring occasionally, until the mushrooms are browned and have released their juices.
Add Garlic and Herbs: Stir in the minced garlic and thyme. Cook for 1 -2 minutes until fragrant.
Deglaze the Pan: Pour in the white wine, scraping up any browned bits from the bottom of the pan. Let it simmer for 2–3 minutes to reduce slightly.
Make the Cream Sauce: Stir in the heavy cream, chicken stock, Parmesan cheese, and Dijon mustard . Simmer gently until the sauce thickens, about 3–4 minutes.
Return Chicken to the Pan: Place the chicken breasts back into the sauce and spoon the creamy mushroom mixture over them. Simmer for 5 minutes, or until the chicken is fully cooked and the sauce has thickened to your liking.
Finish and Serve: Sprinkle with fresh parsley before serving
Lasagna Bolognese with Béchamel Sauce
Lasagna Bolognese with Béchamel Sauce
Few dishes capture the heart of Italian comfort food quite like Lasagna Bolognese. With its rich layers of meat sauce, creamy béchamel, and perfectly melted cheese, this classic meal is a labor of love that never fails to impress. My version keeps the process simple — using store-bought noodles and homemade Bolognese sauce — while still delivering that authentic, slow-simmered flavor that makes every bite unforgettable. Whether for a cozy family dinner or a Sunday gathering, this lasagna is always a crowd-pleaser.
Things to know about this Lasagna Bolognese with Béchamel Sauce recipe
Make ahead: You can assemble the lasagna a day in advance and refrigerate it until ready to bake.
Freezer-friendly: Lasagna freezes beautifully — just wrap it tightly and freeze for up to 3 months.
Noodles: No-boil noodles work well here, but if you prefer, parboil traditional lasagna sheets for a softer texture.
Sauce matters: A rich, slow-cooked Bolognese sauce makes all the difference. If you’ve made extra, freeze it for your next batch.
Rest before slicing: Let the lasagna sit for 15–20 minutes after baking to set the layers and make clean slices.
Whisk in the flour and cook for 1–2 minutes until slightly golden.
Gradually whisk in the warm milk, stirring constantly until smooth and thickened, about 5–7 minutes.
Season with salt, pepper, and nutmeg. Set aside.
Cook the Lasagna Noodles
If using regular noodles, cook in salted boiling water until just al dente.
Drain and lay flat on a lightly oiled surface to prevent sticking.
If using no-boil noodles, skip this step.
Assemble the Lasagna
Preheat oven to 375°F (190°C).
Lightly grease a 9×13-inch baking dish.
Spread a thin layer of Bolognese sauce on the bottom.
Add a layer of noodles.
Spread a layer of béchamel, then a layer of Bolognese, followed by a sprinkle of mozzarella and Parmesan.
Repeat the process ending with a layer of béchamel. ENJOY!!!
Bake
Cover with foil (tent it slightly so it doesn’t touch the cheese).
Bake for 30 minutes.
Uncover and bake another 15 minutes, or until bubbly and golden on top.
Rest and Serve
Let the lasagna rest 20–30 minutes before cutting — this helps the layers set beautifully.
Slice and serve warm with extra Parmesan if desired.
.
Slice and serve warm with extra Parmesan if desired.
5 Cozy Italian-Inspired Fall Soups
5 Cozy Italian-Inspired Fall Soups
When the air turns crisp and the leaves start to fall, nothing warms the soul like a steaming bowl of soup. Over my years in Italian kitchens and running my restaurants, I’ve crafted many comforting soups that bring warmth and flavor to chilly days. These five cozy Italian-inspired fall soups are my absolute favorites — perfect for family dinners, casual weeknights, or when you just need a little comfort in a bowl.
Each one is packed with flavor and nostalgia, and I’ve linked each recipe so you can make them right at home. Plus, these soups aren’t just for fall — they’ll keep you cozy all through the cold weather season!
1. Classic Italian Wedding Soup
Comforting, hearty, and filled with mini meatballs, greens, and pasta. Italian Wedding Soup Perfect for chilly nights, this traditional Italian favorite brings nostalgia and warmth in every spoonful.
2. Creamy Italian Sausage Zuppa Toscana
Creamy and savory with sausage and greens — tastes like fall in a bowl. Zuppa Toscana with Italian Sausage This restaurant-style soup is rich, comforting, and made easily at home.
3. Potato Leek Soup with Pancetta
A restaurant classic — simple, silky, and full of flavor. Potato Leek Soup with Pancetta One of the most popular soups from my restaurant days, it’s rustic yet elegant, and perfect for cozying up on a fall evening.
4. Split Pea Soup with Ham
A hearty and rustic soup that feels like home cooking at its best. Split Pea Soup with Ham A longtime favorite from my restaurant menu, this one delivers rich, smoky comfort with every bite.
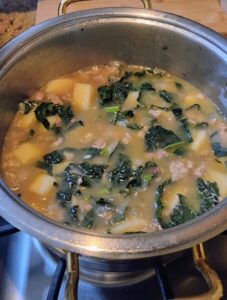
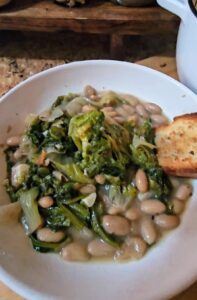
5. Escarole and Bean Soup with Italian Sausage
A true Italian classic that’s nourishing and full of flavor. Escarole and Beans with Italian Sausage Simple, healthy, and satisfying — this soup has all the soul of Italian home cooking.
Things to know about these 5 Italian inspired Fall soups
Use quality ingredients. A great soup starts with a good base — use a rich homemade or low-sodium broth, fresh herbs, and real Parmigiano-Reggiano for authentic Italian flavor.
Layer your flavors. Sautéing onions, garlic, and vegetables first helps develop deep, rich flavor before adding liquids.
Don’t rush the simmer. Many soups taste even better the next day as the flavors meld — perfect for meal prepping or easy leftovers.
Add pasta last. For soups like Italian Wedding or Zuppa Toscana, cook the pasta separately or just until al dente in the soup to avoid overcooking.
Freeze-friendly favorites. Split Pea Soup, Escarole and Bean, and even the Italian Wedding Soup freeze beautifully — perfect for cozy nights when you don’t feel like cooking.
Garnish matters. A drizzle of good olive oil, fresh herbs, or a sprinkle of cheese can turn a simple bowl into something restaurant-worthy.
Pair with crusty bread. No Italian soup night is complete without a loaf of warm, crusty bread or homemade baguette for dipping.
Try one and tag me on Instagram @ Lorianasheacooks — I love seeing your cozy soup
Salmon Florentine with Mushrooms
Salmon Florentine with Mushrooms
When you want a meal that’s both elegant and comforting, this Salmon Florentine with Mushrooms is the perfect choice. Tender seared salmon fillets are nestled into a creamy garlic-Parmesan sauce with fresh spinach and earthy mushrooms, creating a dish that’s rich, flavorful, and satisfying without being heavy.
This classic Italian-inspired recipe gets its name from “Florentine,” which refers to dishes prepared with spinach, a favorite ingredient in Florence. The addition of mushrooms gives the sauce extra depth, making it perfect for spooning over pasta, rice, or even with a side of crusty bread to soak up every drop.
Things to know about this Salmon Florentine with Mushrooms
What “Florentine” Means: In Italian cooking, “Florentine” refers to dishes prepared with spinach, a nod to the city of Florence where spinach is a beloved ingredient.
Best Salmon to Use: Choose skin-on fillets if you like a crisp sear, or skinless if you prefer easier serving. Thicker fillets work best for this recipe so they don’t overcook.
Mushroom Varieties: Cremini or baby bella mushrooms add a deeper, earthier flavor, while white mushrooms give a lighter taste. You can even use a mix for more complexity.
Make-Ahead Tip: The sauce can be prepared a few hours in advance and reheated gently. Add the spinach just before serving to keep it vibrant and fresh.
Pairings: This creamy salmon dish pairs beautifully with a crisp Pinot Grigio, Sauvignon Blanc, or a light Chardonnay. For a non-alcoholic option, try sparkling water with lemon.
Serving Ideas: Spoon over pasta, creamy mashed potatoes, or rice—or serve with crusty bread to soak up the sauce.
Storage: Leftovers keep well in an airtight container in the refrigerator for up to 2 days. Reheat gently over low heat, adding a splash of broth or cream to loosen the sauce.
This Salmon Florentine with Mushrooms is one of those recipes that feels special without requiring a lot of effort. The creamy garlic-Parmesan sauce, tender salmon, and earthy mushrooms come together in just 30 minutes, making it a dish you’ll want to make again and again. If you enjoy this recipe, you’ll also love my cod puttanesca recipe and Bone-In Pork Chop Piccata—both are simple, flavorful Italian-inspired meals perfect for any night of the week.
Salmon Florentine with Mushrooms
Servings: 4
Prep Time:10 minutes
Cook Time: 20 minutes
Total Time: 30 minutes
INGREDIENTS
4 salmon fillets (6 ounces each, skinless or skin-on)
2 tablespoons olive oil (divided)
2 tablespoon unsalted butter
2 cloves garlic (minced)
1 small shallot (finely chopped)
8 ounces cremini or white mushrooms (sliced)
5 ounces fresh baby spinach (about 5 cups)
1 cup heavy cream
1/2 cup chicken or vegetable broth
½ cup grated Parmesan cheese
1 teaspoon Dijon mustard
1 teaspoon red pepper flakes (optional)
Juice of ½ lemon
Salt and black pepper (to taste)
Instructions
Cook the salmon:
Pat salmon dry with paper towels, season with salt and black pepper.