Creamy mushroom penne pasta recipe

creamy mushroom penne pasta recipe

Satisfy your  Italian food craving with this creamy mushroom penne pasta recipe.

This classic Italian pasta dish is a simple yet luxurious recipe that combines the earthy goodness of mushrooms with the velvety richness of a creamy sauce.

Three tips when making this  creamy mushroom penne pasta recipe

First start by sauteing the mushroom in the olive oil and butter mixture until golden  brown when you make this creamy mushroom penne pasta recipe, this adds depth of flavor to your mushroom sauce.

Second, build flavors gradually by adding the garlic and shallots letting them saute until soft, before deglazing the the pan with either white wine or chicken stock.

Lastly finish  with freshly grated parmesan cheese. Season with fresh chopped Italian parsley. Salt and pepper to taste. Enjoy!!

Please email or comment with questions. And please don’t forget to tag me on Instagram if you make this easy creamy mushroom penne pasta recipe. I love hearing from you. It’s my favorite part!!!!

Many of you asked about my preferred saute pan.I have linked my favorite .

Ingredients

  • 1/2  lb. penne pasta
  • 1/2 stick of butter
  • 1 Tablespoon extra virgin olive oil
  • 2 tablespoon minced garlic
  • 3 tablespoon minced shallots
  • 1/2 pound sliced cremini mushrooms
  • 2 cups white wine or chicken stock
  • 2 cups cream
  • 1 cup pasta water
  • 1 cup grated parmesan
  • 1/2 cup chopped Italian parsley

Instructions

  1. In the  1/2 stick of butter and the one tablespoon of olive oil saute the shallots and garlic until soft and fragrant
  2. Add the mushrooms and saute until brown salt and pepper the mushrooms
  3. Deglaze the pan with the white wine or chicken stock simmer until the liquid evaporates. before adding the cream and pasta water.
  4. Simmer until sauce thickens about 15 minutes.
  5. Add in the parsley, toss in the el dente penne, grate more parmesan cheese over the top. Enjoy!!!


Easy Chicken Piccata

Easy Chicken Piccata

This Easy Chicken Piccata Recipe is so easy and quick, its prefect for family weeknight meals, but fancy enough for weekend dinner with friends.

Melt in your mouth chicken breast in a light creamy, lemony sauce made this recipe a restaurant favorite, I simplified the recipe for the home cook, no worries none of the flavor is lost

What Makes  Easy Chicken Piccata Easy???

This Easy Chicken Piccata recipe is so easy on so many levels. First, you only need a few common ingredients. The only ingredient may be not be so common could be the capers

Second, Chicken Piccata is nothing more than fillet chicken breast dredged in flour and saute to a golden deliciousness.

One important thing to remember when sautéing, the saute pan needs to be big enough to cook the chicken to a golden brown.

If the saute  pan is too small your chicken wouldn’t brown, you’ll end up with chicken that looks like it was boiled instead of sautéed,

we don’t want that boiled chicken look in this recipe. We want beautifully browned chicken, so we can deglaze the pan and scoop up

all those delicious browned bits at the bottom of the pan, where all the flavor is!!!!

Ingredients

  • 4 skinless boneless chicken breast
  • 1/4 cup  flour
  • 1 cup chicken stock or white wine
  • 2 Tablespoons chopped garlic
  • 1/2 cup chopped onion
  • 2 Tablespoons chopped Italian parsley
  • 1/4 cup lemon juice  or juice from 2 lemons
  • 2 Tablespoons lemon rind
  • 1 cup heavy cream
  • 1/2 cup capers
  • 2 tablespoons butter
  • 2 tablespoons olive oil
  • Salt and pepper to taste

Instructions

  1. Cut the chicken breast into equal  sliced pieces
  2. Salt and pepper chicken
  3. Dredge chicken in flour shaking off excess
  4. Heat butter and oil to medium in a large saute pan
  5. Saute chicken until golden brown remove and set aside
  6. Saute garlic and onion until tender and just beginning to brown
  7. Deglaze the saute pan with the chicken broth or white wine
  8. Add the cream and lemon juice  simmer 5 minutes
  9. Return chicken to saute pan
  10. Add the capers simmer covered 10 minutes
  11. Sprinkle with additional chopped Italian parsley


Seared scallop creamy orzo

seared scallop creamy orzo

Just in time for valentine day this restaurant quality seared scallop and creamy orzo is sure to impress your loved ones!!!

This recipe combines the succulence of large perfectly seared scallops with the comforting texture of orzo, creating a taste that  elevates this seared scallop creamy orzo to the next level!!!

Three tips for success when making seared scallop creamy orzo

To a achieve a prefect sear on the scallops when making this seared scallop creamy orzo be sure to pat the scallops dry with paper towels. And don’t crowd the pan, the scallops should not be touching each other. I used a mixture of butter and extra virgin olive oil. I find this combination for seared the scallops works best it produces a beautiful golden  sear without the burn. Also I prefer to use a stainless saute pan. In my experience in produces a better sear on the scallops than a non stick pan,

Elevate the orzo by cooking it in a mixture of cream and broth infusing it with rich flavor and  a velvety, creamy texture.

Complement the sweetness of scallops with a hint of lemon in the orzo and finish with a sprinkle of fresh chopped Italian parsley.

Lastly be sure to tag me on Instagram if you make this. I love hearing from you. It’s my favorite part!!!

Ingredients

  • 16 to 20 scallops
  • 1/2 stick of butter
  • 2 tablespoon extra virgin olive oil
  • 2 teaspoon minced garlic
  • 4 tablespoon chopped onion
  • 2 cups orzo
  • 2 cups chicken stock
  • 1/2 cup white wine
  • 1 cup heavy cream
  • 3 cups chopped spinach
  • 1 cup grated parmesan cheese
  • salt, pepper and paprika

Instructions

  1. Start by pulling the mussel off the side of the scallops. Pat dry with paper towels. then seasoning the scallops with salt. pepper and the paprika.
  2. In a pan over medium high heat add the butter and the olive oil be sure the pan is hot before adding the scallops
  3. Sear the scallops three minutes per side . basting the scallops with the butter while cooking.  remove and set aside
  4. In the same pan add the garlic and onion saute until soft  and fragrant.
  5. Add the chicken stock, wine , cream and the orzo. simmer covered for 10 minutes. Add the spinach and parmesan simmer 2 to 3 minutes longer
  6. Plate the orzo add the scallops on top and enjoy!!!!


My Best Holiday Turkey

My Best Holiday Turkey

Ok guys am going to toot my own horn,  seriously this is My best Holiday Turkey Recipe It is so good and easy you’ll be making it more than just for  the Holidays. 

I’ve make a lot of turkeys through out the years. I’ve tried a few recipes and methods, from brining to cooking it up side down

to basting every 30 minutes and I have to say this recipe is the best.

The turkey is melt in your mouth moist with a hint of fresh citrus taste. I couldn’t believe how crispy and beautifully colored the skin was.

My husband who normally isn’t as impressed by food as am, couldn’t stop raving about how good the turkey was. It was so good that even after three  days of turkey everything I was still craving more.

3 Tips when making My Best Holiday Turkey

First, when you make My Best holiday Turkey use a the right roasting pan with a lid it’s important to keep the turkey covered until the last 30 minutes to prevent drying the meat.

Second, oven temperatures vary and can effect cooking times if in doubt use a meat thermometer. A turkey is safe to eat when the internal temperature is 165 degrees. 

Third, this temperature guide is for an unstuffed turkey, stuffed turkeys are cooked longer at 15 minutes per pound.

I always bake my stuffing in casserole dish along side the turkey, it’s easier for serving and just as delicious. One more thing no need

for basting in this recipe, the  turkey self bastes from the citrus and butter. 

I hope you try My best holiday Turkey recipe and it becomes your Best Holiday Turkey. And when it does be sure to tell me about it, I love   hearing from you.


Ingredients

  • 15 lb. turkey
  • 1 stick butter
  • 1 tablespoon each chopped together Italian parsley, thyme, sage and rosemary
  • 3 Tablespoons chopped garlic
  • 1 onion cut into quarters
  • 2 lemons sliced medium thick
  • 2 oranges sliced
  • 2 apples quartered
  • 2 stalks celery
  • Salt and pepper

Instructions

  1. If using a frozen turkey defrost in the refrigerator 2 to 3 days before cooking
  2. Preheat oven to 425
  3. Bring Turkey to room temperature
  4. Remove the insides from the cavity and neck
  5. Mix the herbs and garlic in the soft butter until well incorporated
  6. Pat the turkey dry rub the whole turkey even under the skin with the butter mixture
  7. Salt ant pepper the outside and cavity of the turkey
  8. Stuff the cavity with the cut onion, apples, lemons and oranges
  9. Stick some lemon and orange slices under the skin
  10. Tie the legs together with kitchen twine or skewers tuck the wing tips under the turkey
  11. Roast in 425 oven covered for 30 minutes
  12. Lower the heat to 375 and roast 10 minutes per lb. longer for a 15 lb. turkey that’s about 3 hours remove the cover the last 30 minutes
  13. Let the turkey rest 20 to 30 minutes before slicing strain the drippings into a medium pan:
  14. For the gravy simmer  the dripping over low heat mix 1/4 cup flour with 1/2 cup water slowly pour into simmering drippings stirring continuously


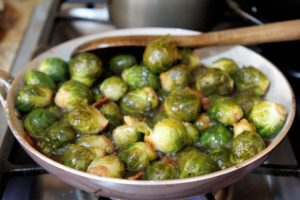
Balsamic Glazed Brussels Sprouts

Delicious, easy and quick  this crispy bacon brussel sprouts in a mustard, balsamic glaze is a staple side  dish at Thanksgiving dinner in my house, but because I love brussels sprout, and it’s so easy, simple and impressive I make it more often.

After crisping the bacon you should have about 1 tablespoon of bacon fat, coating the brussel sprouts in the fat adds a delicious smokey flavor.

Have enough liquid in the pan to cover the brussel sprouts, adding more if needed. The last 10 minutes of cooking the pan should be left uncovered, to extract the liquid and leave the sprouts covered in a beautiful syrupy  glaze. This recipe is make easy by how quickly it comes together and it uses few ingredients, cooks in one pan and is prefect for potluck dinners.

If am asked to bring a side dish this is one of my go to recipes This is the saute pan I like to use when braising meats or vegetables on the stove top.  .

To protect the surface of the non stick surface on this pan use wooden utensils not to scratch the surface.

Brussel sprouts are in the cabbage family, I find them to be a bit more bitter than cabbage which is balanced in this recipe by adding the brown sugar and vinegar.

You can adjust the the amount of sugar, according to your taste, or leave it out. The balsamic vinegar, sweetens the brussel sprouts adding a syrupy delicious glaze, eliminating  the need for sugar.

To add extra flavor let the Brussels sprouts simmer in the bacon drippings  before adding the liquids.


Ingredients serves four

1 Lbs. Brussels sprouts

4 slices diced bacon

1 tablespoon butter

1 cup chicken stock

1 cup balsamic vinegar

1 tablespoon garlic

2 tablespoons brown sugar

2 tablespoons Dijon mustard

1 Tablespoon each chopped Italian parsley, thyme, red pepper flacks and lemon zest

1 cup Parmesan cheese

Salt and pepper to taste

Instruction

Melt the butter in a large saute pan

Add diced bacon cook until brown

Add Brussels sprouts mix to coat in bacon drippings

Add rest of ingredients except the herbs and Parmesan

Simmer covered 45 minutes or until the Brussels spouts are fork tender and the sauce is syrupy

Add herbs last 10 minutes and lemon zest sprinkle with parmesan …ENJOY!!!


Chicken Meatball Soup Recipe

Chicken Meatball Soup recipe

This Chicken Meatball Soup recipe is a hearty soup filled with nutritious and delicious ingredients. Each slurp is filled with bold Italian flavors, everyone likes.

Tasty  and healthy ground chicken meatballs, good for you vegetables, and pasta in a light tomato broth makes this soup is a family favorite.Sometimes it’s hard to find a meal everyone likes, this is one of those soup recipes that everyone likes. And you will feel good about serving your family a good for you meal.

Here’s 3 Prep Plan Tips When Making This Chicken Meatball Soup Recipe

Don’t let the looks of this Chicken Meatball Soup recipe intimidate you. If you have a prep plan this soup recipe can be on your table in 30 minutes.

Start by making the meatballs, you can make them one  day ahead of time, or weeks ahead of time and keep them frozen after baking, in freezer friendly containers.

Second  I bake the meatballs in my Toaster oven/air fryer for a quicker and more affordable bake, than turning on my large wall ovens.

And third you can make the whole recipe ahead of time and freeze it for ready made meals. In fact purposely double the recipe for during the week lunch reheats.

Just one more thing, please leave me a comment if you make this recipe and please don’t forget to tag me on Instagram. I love hearing from you!!!!

Ingredients For The Meatballs

    • 1 lbs. ground chicken breast
    • 1 cup Italian seasoned bread crumbs
    • 1 cup grated parmesan cheese
    • 2 Tablespoons each chopped garlic and Italian parsley
    • 1 egg
    • 2 tablespoons milk
    • salt and pepper to taste
    • For the Soup
    • 1 chopped yellow onion
    • 2 Tbs. chopped garlic
    • 1 cup chopped celery
    • 1 cup sliced carrots
    • 2 cups chopped spinach
    • 1 14.5 can crushed tomatoes
    • 2 cups chicken broth
    • 2 cups water
    • 2 cups dry small tube pasta
    • Salt and pepper to taste
    • 1 cup grated parmesan cheese

    Instructions

    1. Turn oven to 375 degrees
    2. Mix all ingredients except the ground chicken well
    3. Add the ground chicken mixing until well blended don’t over mix
    4. With damp hands roll into small size balls
    5. Bake in a preheated oven 10 minutes set aside
    6. Meanwhile in a medium stock pot saute the onion and garlic until tender and just beginning to brown
    7. Add the carrots and celery saute until tender
    8. Add the tomatoes, chicken broth and water
    9. Simmer covered 30 minutes
    10.  Return the meatballs to the soup add the pasta and spinach simmer 5 minutes longer
    11. Adjust seasonings sprinkle with parmesan
    12. ENJOY!!!!


Italian Crusted lemon Chicken

Italian crusted Lemon chicken

Who doesn’t love an Italian flavored lemon chicken ?

This Italian crusted lemon chicken has the trifecta  to make it one of my favorite  chicken breast recipes, It’s easy, delicious and quick.  And the best part ? it can be make ahead of time and fried when your ready to serve it, making it a prefect weeknight meal. And if your looking to impressive family and friends on what a great chef you are make this Italian crusted lemon chicken.

Tips for success when you make this Italian crusted lemon chicken

The first tip  when you make this Italian crusted lemon chicken use a canola and extra virgin olive oil blend.

I find this oil blend best for the flavor the olive oil gives and the high burn temperature of the canola oil.

Second the oil has to be at the right temperature to produce a crispy crust and still be juicy on the inside.

Third I add flour to the bread crumbs instead of a separate flour dip for the chicken. One more tip after breading let your chicken rest in the refrigerator to chill, it helps the bread coating to stick to the chicken, bring to room temperature before frying.

Ingredients

  • 4 chicken breast
  • 2 cups Italian seasoned bread crumbs
  • 1/3 cup flour
  • 1 cup grated parmesan cheese
  • 2 Tbls. chopped Italian parsley
  • 2 eggs
  • 1/2 cup e canola
  • 1/2 cup olive oil
  •  2 Tbls. butter
  • 1 Tbls. minced garlic
  • 1 cup white wine or chicken stock
  • 1 cup heavy cream
  • lemon juice and zest from 1 lemon
  • Dijon mustard
  • capers

Instructions

  1. Pound the chicken breast thin in between 2 pieces of wax paper. Then salt and pepper
  2. Mix together the bread crumbs, flour,  grated parmesan and the Italian parsley
  3. Beat the eggs slightly
  4. Dip the chicken breast first in the egg then in the bread crumb mixture.
  5. Heat  together 1/2 cup canola and 1/2 cup olive oil to medium high.
  6. Fry the chicken until golden brown on both sides about five minutes pre side. Remove and set aside.
  7. Remove the oil in the same pan add the butter and garlic saute until the garlic is fragrant and just beginning to  brown.
  8. Deglaze the pan with the white wine or chicken stock and lemon juice
  9. Add the cream and mustard simmer until sauce thickens about ten minutes
  10.  Pour the sauce over the chicken breast top with Italian parsley the and lemon slices. ENJOY!!!


Tuscan Pappa al Pomodoro

Tuscan Pappa al Pomodoro

Tuscan Pappa al pomodoro is a traditional Italian dish the consist mainly of stale bread and tomatoes. The recipe originated in the Tuscan region of Italy, where I was born.

It is a simple and delicious recipe that showcases the bold flavors of the region and is often made with fresh off the vine tomatoes.

Once thought of as peasant food this Tuscan Pappa al Pomodoro can now be found in many Italian restaurant menus.

Variations for this Tuscan Pappa al pomodoro

I wanted to keep this Tuscan pappa al pomodoro vegetarian so I used vegetable stock. You can substitute the vegetable stock for chicken stock if that fits your taste.

Another variation has to do with the bread sliced or cubed doesn’t matter it’s a personal preference. Traditionally  the bread wasn’t fried. I find that this extra step of frying and seasoning the bread adds so much flavor, it’s well worth It.

I make this Tuscan Pappa al Pomodoro in the summer with just picked garden tomatoes. But if its not tomato season be sure to use good quality canned tomato product.

This Tuscan pappa al pomodoro uses just a few ingredients, so its important to use the quality for the best price. From the tomatoes to the bread and just as important for all around good Italian  kitchen cooking is a good quality extra virgin olive oil that is affordable.


Ingredients

  • 1/2 stale loaf Italian baguette
  • 2 Tablespoons extra virgin olive oil
  • 1/2 cup chopped yellow onion
  • 1 Tablespoon minced garlic
  • 1 cup vegetable stock
  • 1 28 oz. can crushed tomatoes or 1 Lb. chopped roma tomatoes seeds removed.
  • 1 cup marinara sauce
  • 1 cup white wine or vegetable stock
  • Salt and pepper to taste
  • fresh chopped basil and Italian parsley
  • 1/2 cup grated parmesan

Instructions

  1. Cut the bread into thin slices
  2. Fry in the 2 Tablespoons of olive oil until browned on both sides
  3. Add the onion and garlic saute until fragrant and just beginning to brown
  4. Deglaze the pan with the white wine or vegetable stock simmering until absorbed
  5. Then add the tomatoes and the remaining cup of vegetable stock
  6. Salt and pepper to taste
  7. Simmer on low for 30 minutes
  8. Sprinkle with the grated parmesan and chopped Italian parsley. ENJOY!!!


Spicy Rigatoni Amatriciana


Spicy Rigatoni Amatriciana

This classic spicy rigatoni Amatriciana sauce gets its spiciness from freshly ground black pepper and dried red pepper flakes. This Roman pasta dish is full of Italian flavor that traditionally comes from guanciale, Italian  salt cured pork jowl. If you can’t find guanciale  use pancetta which is more readily available.

Amatriciana sauce is one of the four classic Roman pasta sauce. If you love  hearty, flavorful, and spicy pasta sauce you will love this recipe. This tomato and pancetta based spicy rigatoni pasta dish taste like something you would order at your favorite Italian restaurant. And the best part it uses few ingredients and comes together pretty quickly.

Tips for success for this Spicy Rigatoni Amatriciana

The first tip when you make this spicy rigatoni Amatriciana pasta dish is to saute the pancetta until crispy and all fat rendered.

Second by toasting the red pepper flakes and using freshly ground black pepper you add a restaurant quality element to this simple pasta sauce.

And third to insure a silky creamy sauce add the grated  pecorino  cheese with the sauce off the fire and cooled ever so slightly to prevent a lumpy sauce.

Lastly I used rigatoni shaped pasta in this Amatriciana sauce you can use any shape you prefer.

If  you make this  delicious pasta sauce please leave me a comment. I love hearing from you its my favorite part!!!

Ingredients

  • 1 Lb. rigatoni
  • 4 oz. pancetta
  • 1 Tablespoon crushed red pepper flakes
  • 2 Teaspoon freshly ground black pepper
  • 1 Tablespoon minced garlic
  • 1/3 cup chopped onion
  • 1 cup white wine or chicken stock
  • 1 28 0z. peeled crushed  tomatoes with juices
  • 2 cups reserved pasta water
  • 1 cup grated pecorino cheese
  • 1 Tablespoon chopped Italian parsley
  • Salt to taste
  • Instructions
  1. Sauté the pancetta until crispy
  2. Add the red pepper flakes and freshly ground black pepper toast until fragrant
  3. Then add the garlic and onion saute until just beginning to brown
  4. Deglaze the pan with the white wine or chicken stock
  5. Add the crushed tomatoes, tomato paste and reserved pasta water bring  simmer until sauce thickens 45 minutes
  6. Remove from heat add the pecorino cheese stir until well mixed
  7. Toss the rigatoni with the all Amatriciana sauce grate more pecorino cheese over the top, sprinkle with Italian parsley. ENJOY!!!


Cacio E Pepe Pasta recipe

Cacio e Pepe Pasta Recipe

This cacio e pepe pasta recipe  is a pasta dish from the city of Roma. This Roman pasta dish of spaghetti with Pecorino Roman cheese and black  pepper uses just a few ingredients and comes together in less than 30 minutes.

Cacio e pepe translates to cheese and pepper in English. In keeping with its name, the dish contains grated Pecorino cheese and black pepper, I added grated parmesan too. The goal is to created a creamy sauce using the grated cheese, black pepper and pasta water. When the sauce is done right the results are creamy deliciousness!!!

Tips when making this Cacio e pepe pasta recipe

The first and most important tip to insure a creamy sauce when you make this cacio e pepe pasta recipe is not to overheat the cheese.

When this happens instead of a creamy smooth silky pasta sauce the cheese ends up in clumps, not smooth. To prevent this from happening keep the sauce off the heat when you add the pasta water and the cheese stirring continually.

Number two this Cacio e pepe pasta recipe uses just a few ingredients be sure to use good quality cheeses

And third by using whole peppercorns and toasting them this simple pasta recipe becomes a restaurant quality pasta dish. Fancy enough for Saturday night dinner with friends and enough enough for busy family weeknight meals.

Lastly please leave me a comment when you made this Classic Roman pasta dish!!!

Ingredients

  • 1 Lbs. spaghetti or bucatini
  • 1/2 cup black peppercorns
  • Salt to taste
  • 2 Tablespoon butter
  • 1 Tablespoon extra virgin olive
  • 1 cup grated pecorino cheese
  • 1 cup grated parmesan
  • 2 cups pasta water

Instructions

  1. Cook your pasta el Dente reserving 2 cups of the pasta water
  2. Meanwhile in a saute pan over medium heat toast the peppercorns until fragrant. Removed from pan with a mallet between paper towels crush the peppercorns and return to pan.
  3. Add the butter and olive oil cook just until the butter is melted. Turn off the fire add the pasta water and cheeses stirring continuously.
  4.  Toss the spaghetti or bucatini with the Cacio e pepe sauce. Sprinkle with more grated pecorino and Italian parsley. ENJOY!!!!