Italian Sponge Cake

Italian Sponge cake

This post may contain affiliate links, that help support this blog. If you make a purchase through these links, I may earn a commission—at no cost to you. For more information read my disclosure policy.

The Italian name for this classic sponge cake is Pan Di Spagna, meaning bread of sponge. What ever you call it after you try it you’ll call it delicious.

It may sound and look intimidating, but it’s not. This sponge cake can be made in steps, the cake and  filling can be make the day before, then assembled and frosted the day you plan to serve it.

Want to make it more easy?? You can do that by using vanilla pudding for the lemon cream filling. Here’s how: follow the package directions on the package for the vanilla pudding substitute 1/4 of the milk with freshly squeezed lemon juice, it’s that easy.

Now for the whipped cream frosting: Dissolve 1 teaspoon unflavored gelatine with 4 teaspoons of warm water, cool completely.

Beat 2 cups heavy cream until almost stiff add 1 cup powdered sugar and 3 teaspoons of vanilla extra, continue beating

until stiff, then mix in the cooled  gelatine, your now stabilized whipped cream frosting will hold up for 2 to 3 days. Isn’t that exciting??

Steps to Success When Making Pan Di Spanaga Sponge Cake

  • 1:   Eggs should be at room temperature
  • 2: Beat the eggs with the sugar until light and fluffy
  • 3: Mix in the flour slowly while mixing
  • 4: Use the right size cake pans I used 8 inch round cake pans
  • 5: Bake the cake in two separate cake pans
  • 6: cool completely before layering with the custard and frosting the sponge cake

And yes,  you read the recipe correctly there is NO butter in the cake. The moistness comes from the eggs and the simple orange juice syrup. For the simple syrup:

Dissolve 1/2 cup of sugar with 1 cup of orange juice  simmer until thickened and syrup consistency about 10 minutes. Pour the sweet syrup on the warm cake layers.

Traditionally the simple syrup is make with rum, because I don’t drink alcohol I use orange juice, you don’t have to use what fits your lifestyle and taste.

Pour the simple syrup over warm cake layer it soaks in better and you end up with a delicious, moist cake without the butter and a little less guilt.

Once you make this cake and see how easy and delicious it is, you’ll want to make it often. When you make this Pan Di Spagna, Italian sponge cake

Please leave me a comment, let me know your experience and don’t forget to tag me on Instagram, that’s my favorite part! 

Italian Sponge Cake

  • 8 eggs
  • 1½ cups flour
  • 1½ cup sugar
  • 4 tsp baking powder
  • 4 tsp vanilla extract
  • 1 juice and zest from 1 lemon
  1. Pre heat oven to 350 degrees

  2. Grease 2 eight inch cake pans

  3. Beat eggs and sugar until light and double in volume

  4. Add vanilla

  5. Blend flour and baking powder together

  6. Mix flour mixture into egg batter

  7. Divide batter among the two cake pans

  8. Bake for 30 minutes or until an inserted toothpick comes out clean

  9. Cool completely

  10. Layer with cream

  11. Frost with with whipped cream frosting

  12. Decorate with fresh berries and silvered almonds



Apple Cheesecake

Apple Cheesecake

This post may contain affiliate links, that help support this blog. If you make a purchase through these links, I may earn a commission—at no cost to you. For more information read my disclosure policy.

This apple cheesecake is moist, easy and a delicious dessert. It’s the perfect sweet and spicy cake, with chunks of sweet apples in a cream cheese filling with a melt-in-your-mouth cookie crust.The recipe was inspired by two things: one, I had apples that I needed to use, and two, truthfully I wanted something more exciting than your average apple cake.

Although apple cake is one of my favorite cakes, it can be a bit predictable. I was having two ladies over for lunch, one I never met, so I wanted something more exciting. Introducing: an apple cheesecake with a cookie crust, featuring all the flavors of an apple cake, but better!

You can use any variety of sweet apples you like or have on hand. In this recipe, I used Red Delicious and Gala.

In addition to leaving you with a delicious cheesecake, this apple cheesecake recipe will fill your home with the most cozy, comforting aroma of apples and spices.

I used a 9-inch spring form pan with a removable bottom. Grease the pan to prevent sticking. It’s also better if you cool the apple cheese cake completely before slicing.

I don’t know about you, but for me, I like simple, easy desserts that taste delicious, come together in less than a hour, but have your friends thinking it took hours. This is one of those cakes. It’s  simple and so delicious, you’ll want to make it often.

This cake freezes well for a ready-to-make dessert and keeps fresh for a day or two covered in the refrigerator .

If you make this cake, please leave me a comment and tag me on Instagram. 

Apple Cheesecake

A soft cinnamon cookie crust is layered with creamy cheesecake and sweet grated apples, then finished with a simple cinnamon glaze for a cozy dessert that's perfect for any occasion.

Apple Cheesecake Cookie Crust

  • 1 stick butter
  • 1½ cups cups flour
  • 2 tsp baking powder
  • ½ tsp baking soda
  • 1 egg
  • 1 cup sugar
  • 2 tsp each cinnamon, allspice, and vanilla

Apple Cheesecake Filling

  • 2 packages of 4 oz cream cheese
  • 2 eggs
  • 1 cup sugar
  • 3 unpeeled sweet apples, grated
  • 1 tbsp each vanilla and cinnamon
  1. Heat oven to 350º F

  2. Coat a 9-inch spring form pan with nonstick cooking spray

  3. Beat eggs, sugar, vanilla and butter together until light

  4. Combine dry ingredients

  5. Add dry ingredients to liquid ingredients

  6. Mix until well blended

  7. Pour crust into the prepared spring form pan

  8. Then mix filling ingredients together except for the apples until light

  9. Add the apples and mix just until blended

  10. Bake in a 350º F oven for 45 minutes or until a toothpick comes out clean

  11. Cool for 20 minutes

  12. Drizzle cooled cake with a simple glacé

Apple Cheesecake Glacé

  1. Mix 2 cups powdered sugar with 2 tablespoons of milk and 1/2 teaspoon of cinnamon

  2. Drizzle the mixture over over a cooled cake and enjoy!


Four Ingredient Crème Brûlé

Four Ingredient Crème Brûlé

This post may contain affiliate links, that help support this blog. If you make a purchase through these links, I may earn a commission—at no cost to you. For more information read my disclosure policy.

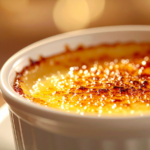
Only four ingredients are all it takes to create this restaurant-worthy crème Brulé.

Eggs, cream, sugar, and vanilla come together to make this classic, elegant dessert with a rich, silky custard and a crisp caramelized sugar top.

What is crème Brulé?

Crème Brulé is a traditional French dessert featuring a smooth vanilla custard base topped with a layer of caramelized sugar that’s torched until crisp and golden.

You can brown the sugar in your oven broiler or use a kitchen torch, another way is to heat up a medal spoon and touch the sugared tops a few times, with the back of the spoon.

What ever method you use to caramelize the sugar topping, it is best that the custards are chilled before hitting the tops with heat. To add another depth of flavor,

I caramelized some sliced strawberries by cooking them in 2 tablespoons of sugar for 10 minutes, and topped the Creme Brule with them. you don’t have to.

This dessert is easy, quick and delicious, it’s a special dessert but it’s so easy you’ll want to make it often.

Using the right size ramekins is important to ensure even cooking, I use 6 oz. ramekins and be sure the baking pan is deep enough for the water to bath the ramekins 3/4 of the way up.

I don’t know about you, but for me I like simple, easy desserts that taste delicious, come together in less than a hour, but has your friends thinking it took hours, this is one of those desserts. It’s  simple and so delicious you’ll want to make it often.

If you like easy desserts that are easy, use few ingredients and delicious try my classic Italian zabaglione recipe

If you make this 4 ingredient Creme Brule dessert, please leave me a comment and tag me on Instagram.

Four Ingredient Crème Brûlé

Silky vanilla custard is topped with a crisp caramelized sugar crust for a rich, elegant dessert that's surprisingly simple to make at home.

  • 4 egg yolks
  • 2 cups heavy cream
  • 1 vanilla bean, split and scraped ((or 1 tablespoon pure vanilla extract))
  • 1 cup granulated sugar, divided ((½ cup for the custard, ½ cup for the caramelized topping))
  1. Preheat the oven to 325°F (165°C). Place four 6-ounce ramekins in a deep baking dish.

  2. In a saucepan over medium heat, combine the heavy cream and the seeds and pod from the vanilla bean. Heat until the cream is hot but not boiling. Remove from the heat. If using vanilla extract, stir it in after removing the cream from the heat.

  3. In a mixing bowl, whisk together the egg yolks and ½ cup of the sugar until smooth and slightly pale.

  4. Slowly pour the hot cream into the egg mixture, whisking constantly to prevent the eggs from curdling.

  5. Strain the mixture through a fine-mesh sieve into a measuring cup or bowl to ensure a silky-smooth custard.

  6. Divide the custard evenly among the ramekins.

  7. Pour hot water into the baking dish until it reaches about halfway up the sides of the ramekins.

  8. Bake for 35–40 minutes, or until the edges are set and the centers still have a slight jiggle.

  9. Carefully remove the ramekins from the water bath and let them cool to room temperature. Cover and refrigerate for at least 4 hours, or overnight.

  10. Just before serving, sprinkle each custard evenly with the remaining sugar (about 2 tablespoons per ramekin). Using a kitchen torch, caramelize the sugar until it turns deep golden brown and crisp. Alternatively, place the ramekins under a hot broiler for 1–2 minutes, watching closely to prevent burning.

  11. Let the caramelized sugar harden for 2–3 minutes, then serve immediately.

  12. For the smoothest custard, avoid letting the cream boil.

    Chilling overnight develops the best flavor and texture.

    A thin, even layer of sugar creates the signature crisp, glass-like topping.

    Garnish with fresh berries or a sprig of mint for an elegant presentation, if desired.