Lemon Blueberry Swirl Semifreddo

Lemon Blueberry Swirl Semifreddo

This post may contain affiliate links, that help support this blog. If you make a purchase through these links, I may earn a commission—at no cost to you. For more information read my disclosure policy.

If you’re looking for an elegant dessert that’s surprisingly easy to make, this Lemon Blueberry Swirl Semifreddo is it. Semifreddo, which means “half frozen” in Italian, has a light, creamy texture that’s somewhere between ice cream and mousse. Bright lemon and a homemade blueberry swirl make this refreshing dessert perfect for summer dinners, holidays, or whenever you want to impress your guests without turning on the oven. Best of all, you don’t need an ice cream maker to make it.


Things to know about this Lemon Blueberry Swirl Semifreddo

  • Use fresh lemons. Fresh lemon juice and zest give this semifreddo its bright, vibrant flavor.
  • Cool the blueberry swirl completely. Warm puree will melt the whipped cream and affect the texture.
  • Don’t over-swirl. A few gentle passes with a knife create beautiful ribbons of blueberry throughout the dessert.
  • Use cold heavy cream. Very cold cream whips faster and creates the light, airy texture that makes semifreddo unique.
  • Freeze overnight if possible. While six hours is enough, an overnight freeze gives the best texture and cleanest slices.
  • Slice with a warm knife. Dip your knife in hot water and wipe it dry between slices for picture-perfect servings.
  • Make it ahead. Semifreddo can be prepared up to one week in advance, making it an excellent dessert for entertaining.
  • Store properly. Wrap tightly in plastic wrap and then foil to help prevent freezer burn.
  • Customize it. Try raspberries, blackberries, strawberries, or a mixed berry swirl instead of blueberries for a delicious variation.


More Italian Desserts You’ll Love

Did you make this Lemon Blueberry Swirl Semifreddo? I’d love to hear how it turned out! Leave a comment below and let me know if you stuck with the blueberry swirl or tried another fruit. If you enjoyed this recipe, please leave a ⭐⭐⭐⭐⭐ rating—it helps others find my recipes. Don’t forget to share your photos on social media and tag me so I can see your beautiful creations


Lemon Blueberry Swirl Semifreddo

A light, creamy Italian frozen dessert with bright lemon flavor and ribbons of homemade blueberry sauce. This no-churn semifreddo is elegant enough for entertaining but easy enough to make at home.

Blueberry Swirl

  • 2 cups fresh blueberries
  • 1/3 cup granulated sugar
  • 1 Tbsp. lemon juice

Lemon Semifreddo

  • 4 large egg yolk
  • 1/2 cup granulated sugar
  • 2 Tbsp water
  • 2 Tbsp. finely grated lemon zest
  • 1/4 cup freshly squeezed lemon juice
  • 2 tsp vanilla extract
  • pinch of salt
  • 2 cups cold whipping cream

For Garnish (Optional)

  • Fresh blueberries Lemon zest Fresh mint leaves Powdered sugar
  1. Make the Blueberry Swirl

    In a small saucepan, combine the blueberries, sugar, and lemon juice. Cook over medium heat for 5 to 7 minutes, stirring occasionally, until the blueberries burst and become soft.

    Blend the mixture until smooth using an immersion blender or a standard blender. For an extra-smooth sauce, strain it through a fine-mesh sieve. Let the blueberry puree cool completely, then refrigerate until cold.

  2. Make the Lemon Semifreddo

    Line a 9 x 5-inch loaf pan with plastic wrap, leaving enough overhang to lift the semifreddo out after freezing.

    In a heatproof bowl, whisk together the egg yolks, sugar, and water. Set the bowl over a saucepan of gently simmering water, making sure the bottom of the bowl does not touch the water. Whisk constantly for 5 to 7 minutes, or until the mixture is thick, pale, and reaches 160°F (71°C).

    Remove the bowl from the heat and whisk in the lemon zest, lemon juice, vanilla extract, and salt. Allow the mixture to cool to room temperature.

    In a separate large bowl, whip the heavy cream until stiff peaks form.

    Fold one-third of the whipped cream into the cooled lemon mixture to lighten it. Gently fold in the remaining whipped cream until fully incorporated and no streaks remain.

  3. Assemble

    Spread one-third of the lemon mixture into the prepared loaf pan. Spoon several tablespoons of the chilled blueberry puree over the top.

    Repeat the layers two more times, finishing with the remaining blueberry puree.

    Using a butter knife or skewer, gently swirl the blueberry puree through the lemon mixture, taking care not to overmix.

    Cover the pan with plastic wrap and freeze for at least 6 hours, or preferably overnight.

  4. Serve

    Remove the semifreddo from the freezer about 10 minutes before serving. Lift it from the pan using the plastic wrap, slice with a warm knife, and garnish with fresh blueberries, lemon zest, and mint, if desired.

Dessert
Italian
lemon blueberry semifreddo, Italian semifreddo recipe, no churn Italian dessert, frozen lemon dessert, blueberry swirl dessert, easy summer dessert, make ahead frozen dessert, Italian lemon dessert


Light & Fresh Italian Recipes for Summer

Light & Fresh Italian Recipes for SummerThis post may contain affiliate links, that help support this blog. If you make a purchase through these links, I may earn a commission—at no cost to you. For more information read my disclosure policy.

When the weather warms up, the way I cook shifts right along with it. I’m not looking for anything heavy or overcomplicated—I want food that feels fresh, simple, and full of flavor without spending all day in the kitchen.

That’s what Italian cooking does best this time of year. A few good ingredients—olive oil, garlic, lemon, fresh herbs—come together to make something that feels complete without doing too much.

These are the light Italian recipes for warm weather that I come back to again and again.


Orzo with Summer vegetables

Some meals just feel easy—especially when they come together in one pan. This one-pan orzo with summer vegetables is one of those simple, feel-good recipes that checks all the boxes: quick to make, minimal cleanup, and full of fresh summer flavor.GO TO RECIPE

Shrimp Spaghetti with Tomato Basil Sauce

This Shrimp Spaghetti with Tomato Basil Sauce is a simple, fresh pasta dish made with sautéed shrimp, juicy summer tomatoes, garlic, and plenty of fragrant basil. The sauce is created right in the pan by combining the tomato juices with starchy pasta water and a generous handful of grated parmesan, giving you a light  flavorful coating that clings to the pasta.GO TO RECIPE

Authentic Pasta al Limone (Italian Lemon Pasta)

Authentic Pasta al Limone made the Italian way—no cream, just lemon, butter, cheese, and pasta water for a silky, bright, and easy lemon pasta recipe.

GO TO RECIPE

Authentic Pasta Portofino

Inspired by the coastal village of Portofino, this dish brings together the bold freshness of basil, the sweetness of ripe tomatoes, and the richness of good olive oil. It’s often described as a cross between a tomato sauce and Pesto alla Genovese—but simpler, looser, and meant to taste like summer.

No cream. No mozzarella. Just real ingredients, handled the right way.

GO TO RECIPE

Tubettini Pasta Salad (Italian pasta fredda)

This authentic Italian tubettini pasta salad is loaded with fresh mozzarella, tomatoes, and savory Italian meats, all tossed in a simple olive oil dressing. The perfect light and flavorful summer pasta fredda for gatherings, picnics, or easy weeknight meals.

GO TO RECIPE

Authentic Italian Stuffed Tomatoes with Rice and Potatoes (Roman Recipe)

Authentic Italian stuffed tomatoes filled with rice, garlic, and basil, roasted with potatoes until tender and flavorful—just like in Rome.

GO TO RECIPE

Best Cod Francese Recipe – in 30 Minutes

A lightly battered, pan-fried cod fillet in an elegant lemon, butter and  white wine sauce. It’s similar to chicken piccata—but without the capers and with a velvety, lemon-butter sauce. Ready in less than 30 minutes.GO TO RECIPE

Air fryer salmon Skewer Italian Spiedini

This air fryer salmon skewer Italian spiedini recipe uses simple ingredients you probably already have at home. Salmon is so versatile, it can be cooked in so many different ways. No air fryer? No problem, these salmon spiedini can be baked , grilled or pan-fried. And the best part is they can be on your table in minutes.GO TO RECIPE

Lemon Cod Piccata (Light Italian Seafood Dinner)

Light and flavorful Cod Lemon Piccata made with pan-seared cod, lemon, butter, capers, and white wine. A quick Italian seafood dinner ready in 30 minutes.GO TO RECIPE

Easy chicken piccata

This Easy Chicken Piccata Recipe is so easy and quick, its prefect for family weeknight meals, but fancy enough for weekend dinner with friends.

Melt in your mouth chicken breast in a light creamy, lemony sauce made this recipe a restaurant favorite, I simplified the recipe for the home cook, no worries none of the flavor is lostGO TO RECIPE

Caprese stuffed chicken breast

this caprese stuffed chicken breast with asparagus is a must-try. Juicy chicken breast are packed with the classic flavors of caprese- fresh mozzarella, ripe tomatoes and fragrant basil – along with tender asparagus for a wholesome . satisfying dish that’s easy to make and delicious.GO TO RECIPE

Italian roasted lemon chicken and potato

This Italian roasted lemon chicken dinner is incredibly easy to make because it requires minimal prep, simple ingredients and a hands – free cooking method. The seasoning is as straightforward as mixing olive oil. lemon juice. garlic and herbs, then rubbing it into the  chicken.  There’s no complicated  marinating or advanced techniques- just a few minutes of prep and the oven does the rest.GO TO RECIPE

Air fryer Chicken spiedini

Air fryer parmesan chicken spiedini are Italy’s version of skewers or kabobs. In this spiedini recipe boneless, skinless chicken thighs are marinated in a blend of Italian spices, cooked in the air fryer, and basted with a delicious garlic, parmesan butter sauce.GO TO RECIPE

Easy Italian Vinaigrette Recipe (Better Than Store-Bought)

Homemade Italian vinaigrette made with simple pantry ingredients. Fresh, budget-friendly, and better than store-bought—ready in minutes.


GO TO RECIPE

Watermelon Cucumber Feta Salad

 
When the weather warms up and watermelon starts showing up in every market bin, I can’t help but crave this bright and refreshing salad. This Watermelon  Cucumber, feta  salad with  and Lemon-Honey Dressing is one of my go-to dishes during the warmer months. It’s light, vibrant, and incredibly refreshing—with just the right balance of sweet, salty, and tangy.

GO TO RECIPE

If you’re looking for easy summer meals that don’t feel heavy, this is a great place to start. Mix a light pasta with a fresh salad or something grilled, and you have a complete meal without overthinking it.

You can find all the full recipes linked above, along with more Italian-inspired dishes on the blog to keep your summer cooking simple and full of flavor.


Blanched & Pureed Lemon Loaf (Bakery-Style Citrus Cake)

Blanched & Pureed Lemon Loaf (Bakery-Style Citrus Cake)

This post may contain affiliate links, that help support this blog. If you make a purchase through these links, I may earn a commission—at no cost to you. For more information read my disclosure policy.

If you love lemon desserts that actually taste like lemon, this loaf is about to become your new obsession.

Instead of just using zest or juice, this recipe takes things further—whole lemons are blanched to soften the peel, then pureed into a silky citrus base. The result? A lemon loaf that is deeply fragrant, naturally tangy, and unbelievably moist with no artificial flavor needed.

The blanching step removes bitterness from the peel while keeping all the bright citrus oils that make lemon desserts so irresistible. When blended into the batter, the entire lemon becomes part of the flavor—nothing wasted, nothing muted.

This is the kind of loaf that works for everything: brunch, afternoon coffee, dessert, or even wrapped up as a gift. One slice and you’ll understand why this method makes such a difference.

Things to know about this Blanched & Pureed Lemon Loaf (Bakery-Style Citrus Cake)

  • The peel is what gives this loaf its bold lemon flavor—don’t skip blending it in.
  • If your lemons are very thick-skinned, blanching twice helps reduce bitterness further.
  • This loaf tastes even better the next day once the citrus oils settle.
  • use the right size pan  a standard 9 X 5 loaf pan works best

If you love bright, bakery-style citrus desserts, this lemon loaf is a must-bake. Save this recipe for later, and don’t forget to tag me when you make it—I love seeing your bakes come to life! 🍋

Storage Instructions

This lemon loaf stores beautifully and actually gets better as it sits.

  • Room Temperature: Store in an airtight container for up to 2–3 days. Keep it in a cool, dry place.
  • Refrigerator: Store for up to 5–6 days. Bring to room temperature before serving for best texture.
  • Freezer: Wrap tightly in plastic wrap and foil, then freeze for up to 2 months. Thaw overnight in the fridge or at room temp.

💡 Tip: If glazed, let the glaze set completely before storing to prevent stickiness.

You might also love”:


Blanched & Pureed Lemon Loaf ( Bakery-Style Citrus Cake)

This blanched and pureed lemon loaf is incredibly moist, bright, and packed with real lemon flavor. Made with whole lemons for a bold citrus punch, it’s the ultimate bakery-style lemon cake you can make at home.

  • loaf pan
  • 2 medium lemons
  • 3 medium eggs
  • 1 cup sugar
  • 1/2 cup light olive oil
  • 1 cup plain Greek yogurt
  • 2 cups flour
  • 2 tsp. baking powder
  • 2 cups powder sugar (optional lemon glaze)
  • 1 Tbsp. lemon juice (optional lemon glaze)
  1. Blanch the lemons Place whole lemons in boiling water for 2–3 minutes. This softens the peel and reduces bitterness.

  2. Cool & prep Let lemons cool slightly, then remove seeds and rough skin and ends.

  3. Puree Blend whole lemons (peel included) until completely smooth and thick.

  4. Make the batter Whisk eggs, sugar, yogurt, and oil together until smooth. Add the lemon puree.

  5. Dry ingredients Fold in flour and baking powder until just combined—don’t overmix.

  6. Bake Pour into a parchment lined loaf pan and bake at 350°F for 50–60 minutes, or until a toothpick comes out clean.

  7. Cool & glaze Let cool completely before drizzling with lemon glaze if desired.

Dessert
Italian
Lemon loaf, cake


Biscotti da Colazione (Italian Breakfast Cookies)

Biscotti da Colazione (Italian Breakfast Cookies)

This post may contain affiliate links, that help support this blog. If you make a purchase through these links, I may earn a commission—at no cost to you. For more information read my disclosure policy.

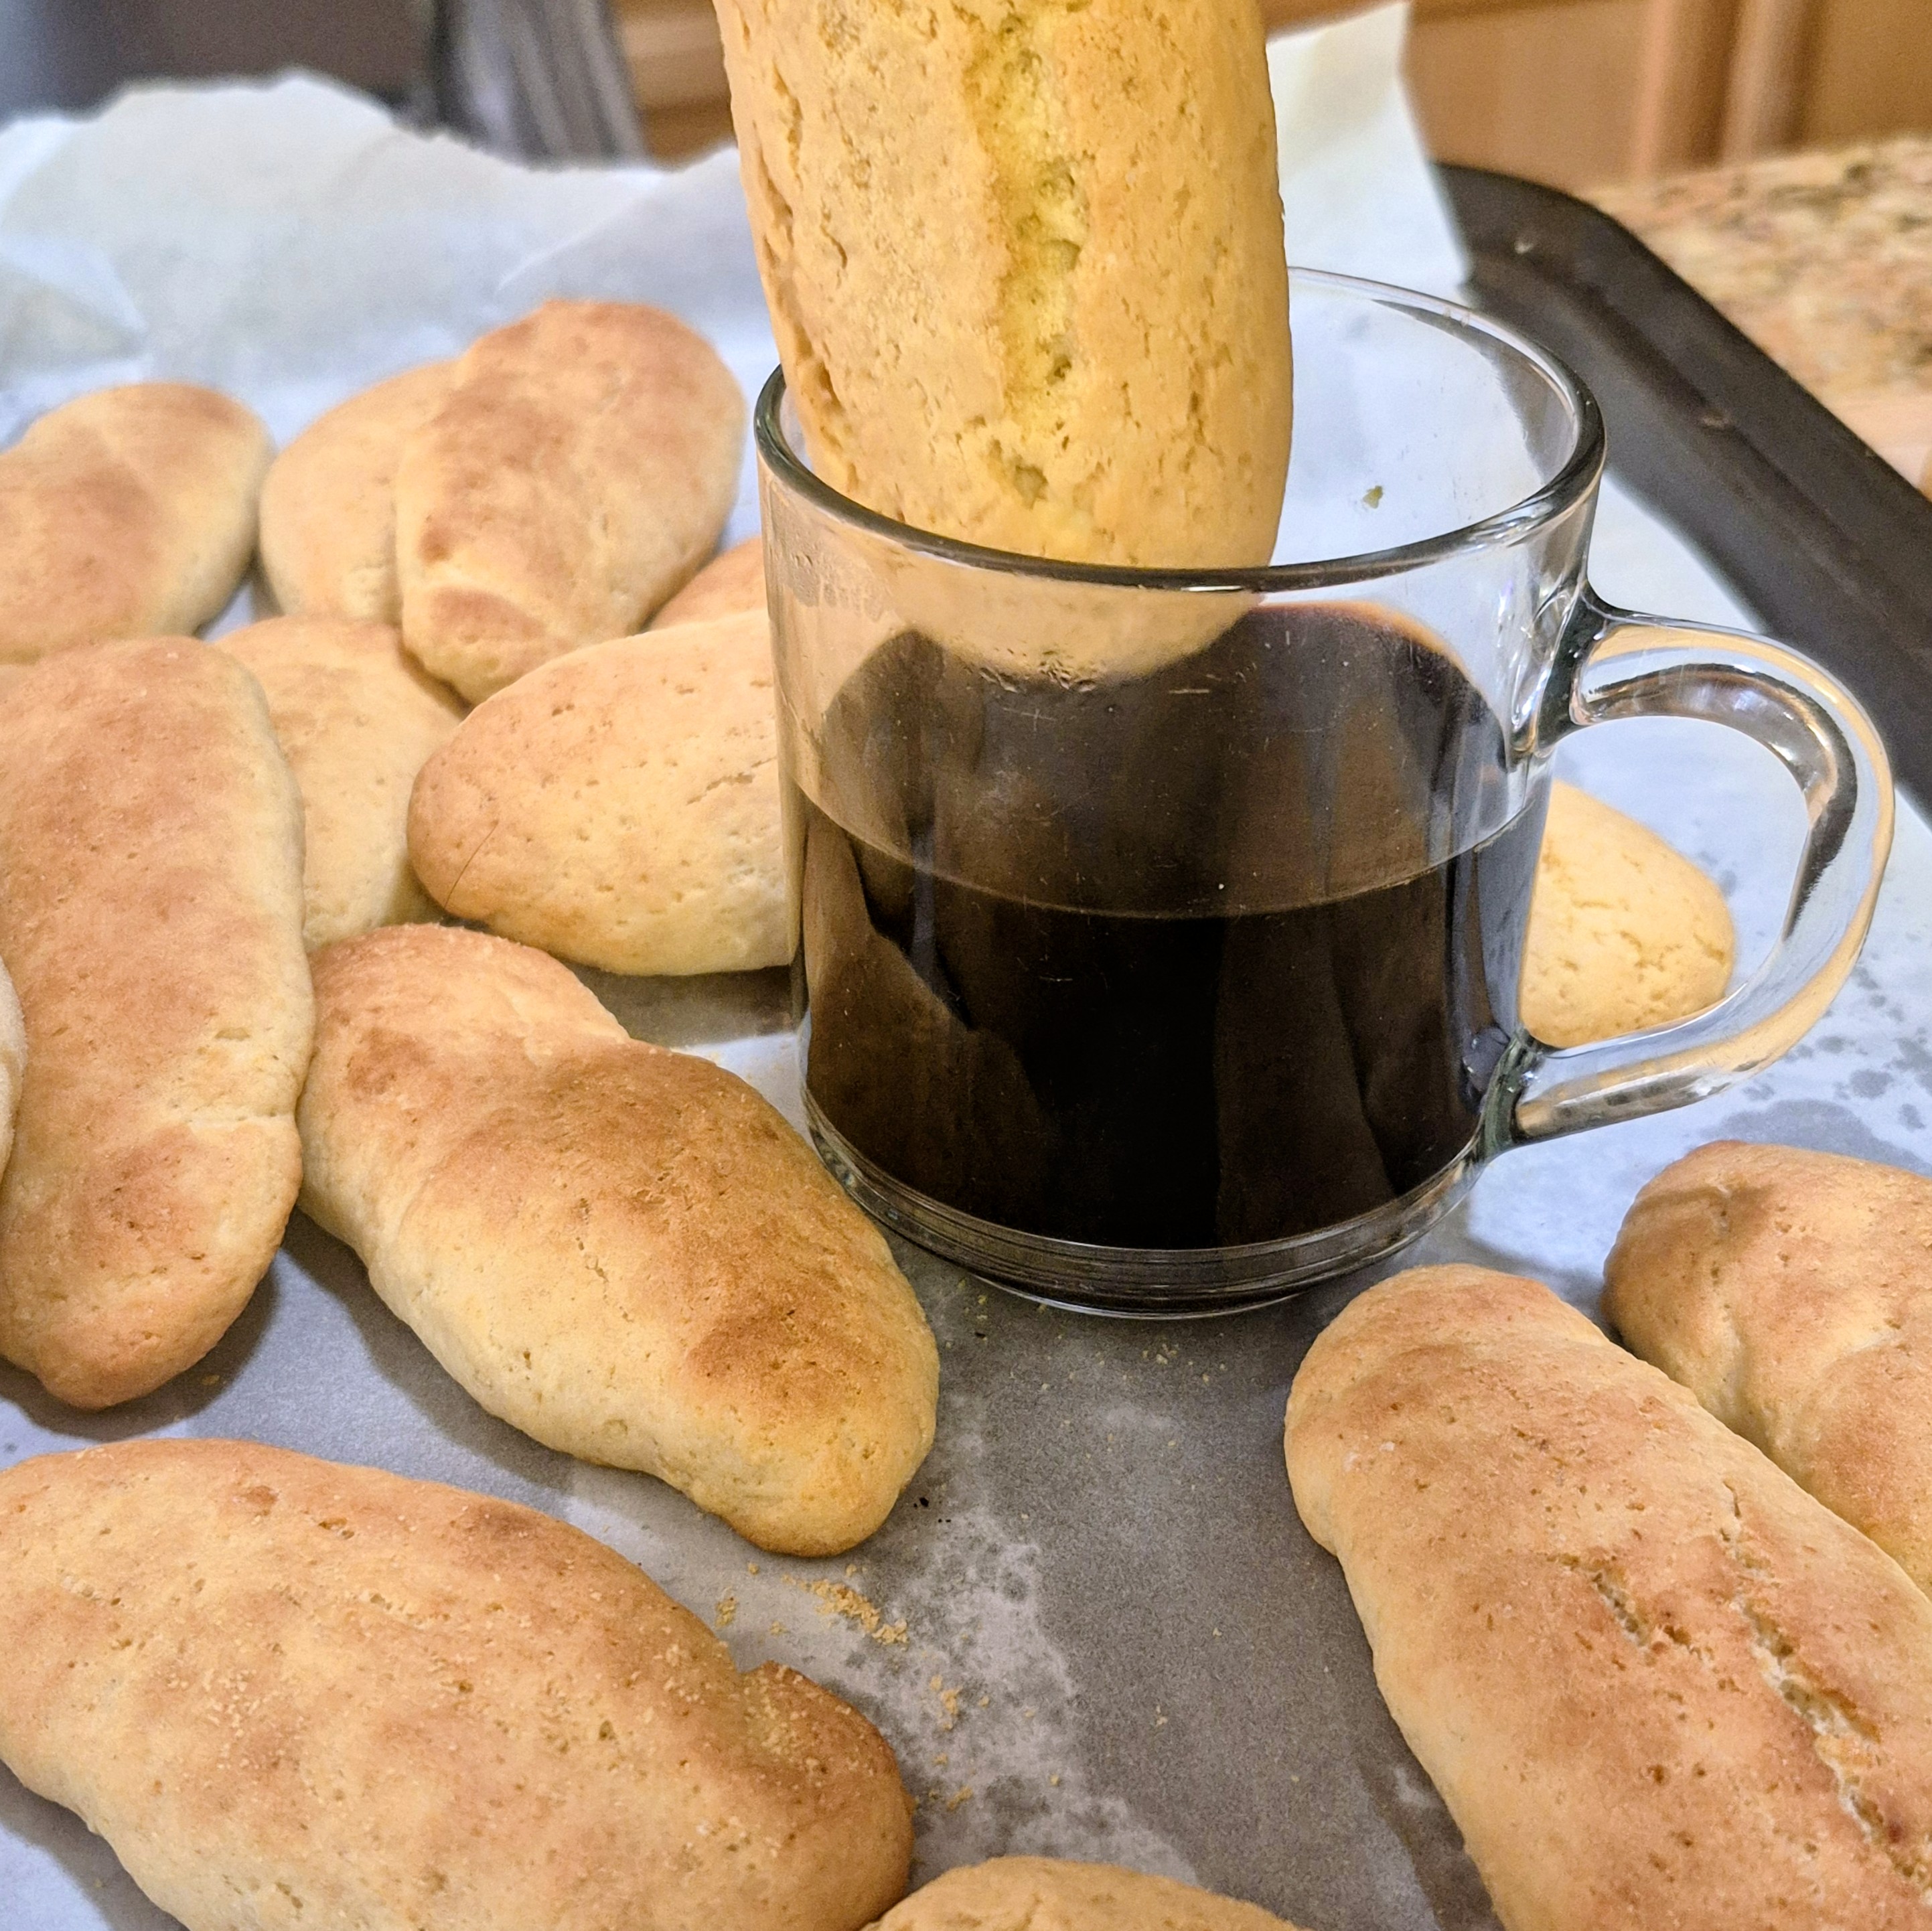
There’s nothing more comforting than a simple Italian colazione — a warm drink and a cookie made for dunking. These biscotti da colazione are exactly that: lightly sweet, soft yet sturdy, and kissed with lemon. They’re the kind of cookies you’d find on a Nonna’s kitchen table, ready to be dipped into cappuccino or a glass of warm milk.

Unlike overly sweet bakery cookies, these are meant to be simple and everyday. Rustic, unfussy, and absolutely perfect for slow mornings.


Things to know about   this Biscotti da Colazione (Italian Breakfast Cookies)

  • The dough should be soft but not sticky — add a little flour if needed.
  • Don’t overbake; these should stay tender inside.
  • The glaze is optional but adds a classic bakery-style finish.

How to Serve

Traditionally enjoyed at breakfast, these cookies are best:

This is true Italian inzuppo — simple, comforting, and meant to be savored slowly.

Storage

  • Store in an airtight container at room temperature for up to 5 days
  • Freeze for up to 2 months and thaw at room temp

Final Thoughts

These biscotti da colazione are a reminder that Italian baking doesn’t need to be complicated to be beautiful. With just a handful of ingredients, you get a cookie that feels nostalgic, comforting, and deeply rooted in tradition.

If you loved this recipe, be sure to check out my other Italian baking favorites like these

Traditional Italian S cookies

Italian braided lemon cookies

Or my personal favorite Italian almond cantucci cookies. 

Biscotti da Colazione (Italian Breakfast Cookies)

Soft and lightly sweet, these Biscotti da Colazione are classic Italian breakfast cookies made for dunking in coffee or milk. Easy, authentic, and perfect for everyday baking.

  • 3 cups all purpose flour
  • 1 cup sugar
  • 2 tsp Baking powder
  • 2 large eggs
  • 1/2 cup milk
  • 1/2 cup neutral oil or light olive oil
  • 1 Tbsp. vanilla extract
  • 1 Tbsp. lemon zest (use the zest and juice from 1 lemon)
  • 1 Tbsp. lemon juice
  • pinch of salt
  • 1 cup powder sugar (for optional glaze)
  • 1 -2 Tbsp. milk or lemon juice (for optional glaze)
  1. Preheat oven to 350°F (175°C) and line a baking sheet with parchment.

  2. Whisk eggs and sugar until light, then mix in milk, oil, vanilla, and lemon zest.

  3. Combine dry ingredients and add to the wet mixture to form a soft dough.

  4. Move the dough to a lightly floured surface and knead the dough to a smooth constistency

  5. Shape the dough by scooping about 2 tablespoons at a time and rolling into logs or ovals, about 2 inches long and 1 inch thick. Keep them slightly rustic — they shouldn’t be perfectly smooth. Place on the baking sheet with a little space between each. then lightly sprinkle the tops with granulated sugar for a classic bakery-style finish.

  6. Bake 12 -15 minutes these cookies bake pale for added color broil for a few minute, Keep a close eye they can over brown quickly

Dessert
Italian
Italian, cookie, breakfast


Italian Easter Bread (Pane di Pasqua)

Italian Easter Bread (Pane di Pasqua)This post may contain affiliate links, that help support this blog. If you make a purchase through these links, I may earn a commission—at no cost to you. For more information read my disclosure policy.

There are recipes that feel like home—and Pane di Pasqua is one of them. Soft, lightly sweet, and scented with citrus, this traditional Italian Easter bread is as symbolic as it is beautiful. The braided dough represents unity and celebration, while the colorful eggs nestled inside are a sign of new life and renewal.

This is the kind of recipe that fills your kitchen with warmth. The smell alone—yeasty, buttery, with a hint of orange—feels like Easter morning before you even take a bite.

Across Italy, every family has their own version of Pane di Pasqua—some add anise, others keep it simple with citrus. No matter the variation, it always comes back to the same idea: gathering, sharing, and celebrating.


Things to know about this Italian Easter Bread (Pane di Pasqua)recipe

  • The eggs bake right in the oven—no need to boil first.
  • Orange zest is traditional, but lemon works beautifully too.
  • The texture should be soft and rich, similar to brioche.
  • You can shape this into individual mini breads for gifting.

 Serving Suggestions

This bread is perfect:

  • With espresso on Easter morning
  • Lightly toasted with butter
  • Served alongside ricotta and honey

    Storage

    Italian Easter Bread is best enjoyed fresh, but it stores beautifully with a few simple tips.

    🥖 Room Temperature

    • Store covered or in an airtight container for up to 2–3 days
    • Keep it in a cool, dry place
    • For best texture, wrap in plastic wrap or foil to prevent it from drying out

    🧊 Refrigerator

    • Not recommended—this will dry the bread out faster

    ❄️ Freezing

    • Do not freeze with the eggs in the bread (remove them first or bake without)
    • Wrap the bread tightly in plastic wrap and foil, or place in a freezer-safe bag
    • Freeze for up to 2 months

    🔥 Reheating

    • Thaw at room temperature
    • Warm in a 300°F oven for 10–15 minutes to refresh the texture

    💬 Final Thoughts

    If you’ve never made Italian Easter bread from scratch, this is your year. It’s simple, deeply traditional, and incredibly rewarding. Once you pull that golden braid out of the oven, you’ll understand why this recipe has stood the test of time.


    🔗 More Easter Recipes You’ll Love


Italian Easter Bread (Pane di Pasqua)

Soft, lightly sweet, and beautifully braided, this classic Italian Easter Bread is flavored with citrus and topped with colorful eggs—an easy, traditional recipe perfect for your holiday table.

  • 4 cups flour
  • 1 cup sugar
  • 1 package active dry yeast (2-3 tsp.)
  • 1 cup milk (warmed)
  • 2 large eggs
  • 1/2 cup butter (melted)
  • 1 Tbsp orange zest
  • 4 -6 medium eggs (raw and dyed)
  • 1 medium egg (for egg wash)
  • 1 Tbsp. sprinkles (Optional)
  1. Activate the Yeast

    In a small bowl, combine warm milk and yeast. Let it sit until foamy—about 5–10 minutes.

  2. Make the Dough

    In a large bowl, mix flour, sugar, and salt. Add eggs, melted butter, vanilla, orange zest, and the yeast mixture. Stir until a soft dough forms.

  3. Knead

    Turn onto a floured surface and knead for 8–10 minutes, until smooth and elastic.

  4. First Rise

    Place in a greased bowl, cover, and let rise until doubled in size (about 1–1.5 hours).

  5. Shape the Bread

    Divide the dough into ropes and braid. Form into a round wreath or loaf. Gently nestle the dyed eggs into the dough.

  6. Second Rise

    Cover and let rise again for 30–45 minutes.

  7. Bake

    Brush with egg wash, add sprinkles, and bake at 350°F (175°C) for 25–30 minutes until golden brown.

Dessert
Italian
Easter, bread, Italian


Italian Braided Lemon Cookies

Italian Braided Lemon Cookies

This post may contain affiliate links, that help support this blog. If you make a purchase through these links, I may earn a commission—at no cost to you. For more information read my disclosure policy.

There’s something about old-school Italian cookies that never goes out of style—and these braided lemon cookies are exactly that. Soft, lightly sweet, and finished with a delicate lemon glaze, they’re the kind of treat you’d find on every holiday tray growing up.

This recipe is all about simplicity. No complicated techniques, no fancy ingredients—just a tender dough, a hint of fresh lemon, and that classic glossy icing with sprinkles on top. My mom would even place a raw egg right in the center before baking—such a beautiful, traditional touch you still see around Easter. They’re perfect for Easter, Sunday gatherings, or honestly… just with your morning coffee.

What makes these special is the texture. Unlike crunchy cookies, these stay soft and almost cake-like, with a light crumb that melts in your mouth. The braid (or knot) shape gives them that traditional bakery look, but they’re incredibly easy to make at home.


Things to know about this Italian Braided Lemon Cookie recipe

These cookies stay soft and tender for days, which makes them perfect for baking ahead.

  • Room Temperature: Store in an airtight container for up to 3–4 days

  • Refrigerator: Not recommended—they can dry out faster

  • Freezer (Unglazed): Freeze up to 2 months, then thaw and glaze fresh

  • Freezer (Glazed): You can freeze them, but the glaze may lose its shine

  • Make Ahead Tip: Bake the cookies a day in advance and glaze the next day for the best texture and appearance

💛 Want More Italian Baking Recipes?

If you loved these soft Italian lemon cookies, here are a few more recipes from the blog you’ll want to try next:

These are all classic, bakery-style recipes that bring a little bit of Italy right into your kitchen 🇮🇹


Italian Braided Lemon Cookies (Soft & Glazed)

These soft Italian braided lemon cookies are light, fluffy, and topped with a sweet lemon glaze and sprinkles. A classic bakery-style recipe that’s easy to make and perfect for holidays or everyday baking.

  • 3 1/2 cups flour
  • 1 Tbsp. Baking powder
  • 1/2 tsp salt
  • 1 stick butter (room temperature)
  • 1 cup sugar
  • 3 large eggs
  • 1 Tbsp. lemon zest
  • 1/4 cup lemon juice
  • 2 Tsp vanilla extract
  • 1/3 cup milk
  • 2 cups powder sugar (for the glaze)
  • 2 -3 Tbsp. milk or lemon juice (for the glaze)
  • sprinkles (to decorate)
  1. 1. Prep

    Preheat your oven to 350°F and line baking sheets with parchment paper.

  2. 2. Mix the Dry Ingredients

    In a medium bowl, whisk together the flour, baking powder, and salt.

  3. 3. Cream Butter and Sugar

    In a large bowl, beat the butter and sugar until light and fluffy.

  4. 4. Add the Wet Ingredients

    Mix in the eggs one at a time. Add lemon zest, lemon juice, and vanilla extract.

  5. 5. Bring the Dough Together

    Gradually add the dry ingredients, alternating with the milk. Mix until a soft dough forms. It should be smooth and slightly tacky, not sticky.

  6. 6. Shape the Cookies

    Take small portions of dough and roll into ropes about 5–6 inches long. Twist into braids or tie into knots and place on the baking sheet.

  7. 7. Bake

    Bake for 12–15 minutes, until the bottoms are lightly golden while the tops remain pale.

  8. 8. Glaze and Finish

    Let cookies cool completely. Dip or drizzle with glaze, then top with sprinkles. Allow the glaze to set before serving.

Dessert
Italian
cookies, lemon Italian


Italian Lemon Jam (Marmellata di Limoni)

Italian Lemon Jam (Marmellata di Limoni)This post may contain affiliate links, that help support this blog. If you make a purchase through these links, I may earn a commission—at no cost to you. For more information read my disclosure policy.

Bright, sweet, and slightly bitter in the best way, Marmellata di Limoni is a classic preserve made throughout southern Italy where lemons grow in abundance. In regions like the sun-soaked Amalfi Coast and across Sicily, families have long turned their extra citrus into homemade marmellata, preserving the flavor of the harvest to enjoy throughout the year. Unlike many jams, Italian lemon marmalade traditionally uses the whole fruit—peel and all—which gives it its signature balance of sweetness and gentle bitterness.

Making lemon jam at home is a simple, old-world process: fresh lemons are sliced thin, simmered slowly, and cooked with sugar until thick and glossy. The natural pectin in the citrus peel helps the jam set beautifully without any added pectin. Spread it over toasted bread, spoon it onto fresh ricotta, or tuck it into a buttery crostata—this bright Italian preserve brings a little taste of sunshine to any table.


Things to know about this Italian Lemon Jam (Marmellata di Limoni)

Making Marmellata di Limoni is simple, but a few traditional tips will help you get the best flavor and texture.

Tips for the Best Lemon Jam

  • Use unwaxed lemons if possible. Since the peel is used, organic or unwaxed lemons give the cleanest flavor.

  • Slice the lemons very thin. Thin slices help the peel soften faster and create a smoother jam texture. Use a sharp knife or mandolin

  • Remove the seeds. Lemon seeds can make the jam slightly bitter, though they do contain natural pectin.

  • Don’t rush the simmer. Cooking the lemons slowly helps soften the peel and release the natural pectin that thickens the jam.

  • Test before stopping the cook time. Use the cold plate test—if the jam wrinkles when pushed, it’s ready.

  • Jam thickens as it cools. It may seem loose in the pot but will set more once cooled.

Storage

  • Refrigerator: Store sealed jars in the refrigerator for up to 3–4 weeks.

  • Freezer: Lemon jam freezes well for up to 6 months. Leave a little space at the top of the container for expansion.

  • Canned (water bath): If properly sealed using a water-bath method, jars can last up to 1 year in a cool pantry.

How to Use It

This bright citrus jam is delicious:

  • spread on toast or biscuits

  • layered in a crostata

  • spooned over ricotta or yogurt

  • paired with soft cheeses for a sweet contrast

Homemade lemon jam captures the bright flavor of fresh lemons and is a wonderful way to preserve a big citrus harvest. 🍋

Ways to Use Italian Lemon Jam

This bright citrus preserve is incredibly versatile. Try it:

Homemade lemon jam is a beautiful way to preserve fresh lemons and bring a bright citrus flavor to many classic Italian recipes.


Italian Lemon Jam (Marmellata di Limoni)

Bright and citrusy Italian lemon jam (marmellata di limoni) made with fresh lemons, sugar, and water. A traditional homemade preserve perfect for toast, crostata, yogurt, or cheese boards.

  • 2 lbs. lemons (about 8-10 lemons)
  • 4 cups water
  • 6 cups sugar
  1. Wash the lemons well Since you’ll use the peel, scrub them thoroughly.

  2. Slice the lemons Cut them in half, remove the seeds, then slice very thin (peel and all).

  3. Soak overnight Place the sliced lemons in a bowl with the water. Cover and let sit 12–24 hours. This softens the peel and reduces bitterness.

  4. Cook the lemons Pour the lemons and soaking water into a pot. Bring to a boil, then simmer 25–30 minutes until the peel is very soft.

  5. Add the sugar Stir in the sugar and cook over medium heat 30–40 minutes, stirring occasionally, until thick and jammy..

  6. Test for doneness Place a small spoonful on a cold plate. If it wrinkles when pushed, it’s ready.

  7. Jar the jam Pour into sterilized jars and seal.

  8. Flavor tip: If you want a smoother jam, you can pulse part of it briefly with an immersion blender before jarring.

Appetizer
Italian
Italian lemon jam


Italian Ricotta Pie (Crostata di Ricotta)

Italian Ricotta Pie (Crostata di Ricotta)

This post may contain affiliate links, that help support this blog. If you make a purchase through these links, I may earn a commission—at no cost to you. For more information read my disclosure policy.

Italian Ricotta Pie is a classic rustic dessert found in many Italian homes, especially around holidays like Easter. It’s made with pasta frolla, a tender Italian sweet pastry dough, and filled with creamy sweetened ricotta scented with orange zest and studded with chocolate. The result is a pie that’s rich but not overly sweet, with a delicate citrus aroma and a buttery crust.

This dessert has roots in southern Italian baking traditions where ricotta is commonly used in pastries. Draining the ricotta is key—it creates a thick, velvety filling that slices beautifully and holds its shape. Paired with the crisp, cookie-like pasta frolla, it becomes a simple but elegant dessert perfect for holidays, Sunday dinners, or with an afternoon espresso.

Things to know about this Italian Ricotta Pie (Crostata di Ricotta)

  • Drain the ricotta well: This prevents a watery filling and keeps the pie creamy.

  • Use whole milk ricotta: It gives the richest flavor and texture.

  • Let it cool completely: Cutting too early can cause the filling to be soft.

  • Even better the next day: Like many Italian desserts, the flavors deepen after resting overnight in the refrigerator.


Serving Suggestions

Serve Italian Ricotta Pie slightly chilled or at room temperature. A light dusting of powdered sugar on top makes it beautiful and simple. It pairs perfectly with espresso, cappuccino, or a small glass of sweet dessert wine.


Storage

Store the pie covered in the refrigerator for up to 4 days. Because of the ricotta filling, it should always be kept chilled.

Love traditional Italian baking? Try these recipes next on the blog:

They’re simple, authentic recipes that bring classic Italian flavors right into your kitchen.


Italian Ricotta Pie (Crostata di Ricotta)

This traditional Italian ricotta pie features a buttery pasta frolla crust filled with sweetened ricotta, eggs, orange zest, and chocolate chips for a creamy, classic Italian dessert.

  • 2 1/2 cups flour
  • 1/2 cup sugar
  • 1 tsp. baking powder
  • 1 stick cubed cold butter
  • 1 1 egg
  • 1 1 egg yolk
  • 1 Tbsp. lemon zest
  • 1 Tbsp. vanilla
  • For The ricotta filling
  • 2 cups well drained whole milk ricotta
  • 3/4 cup sugar
  • 1 Tbsp. grated orange zest
  • 2 large eggs
  • 1 tsp. vanilla extract
  • 1 cup semi- sweet chips or chopped dark chocolate
  • 1 cup jam (an additional layer)
  1. 1. Drain the Ricotta

    Place the ricotta in a fine mesh strainer or cheesecloth over a bowl. Cover and refrigerate for at least 1 hour or overnight to remove excess moisture.

  2. 2. Make the Pasta Frolla

    In a large bowl whisk together the flour, sugar, baking powder, and salt.

    Add the cold butter and work it into the flour mixture with your fingers or a pastry cutter until the mixture resembles coarse crumbs.

    Add the egg, egg yolk, vanilla, and lemon zest. Mix just until a dough forms.

    Shape the dough into a disk, wrap in plastic wrap, and refrigerate for 30–60 minutes.

  3. 3. Make the Ricotta Filling

    In a bowl combine the drained ricotta and sugar until smooth.

    Add the eggs, orange zest, and vanilla and mix until fully combined.

    Fold in the chocolate chips.

  4. 4. Assemble the Pie

    Preheat oven to 350°F (175°C).

    Roll out about ⅔ of the pasta frolla and press it into a 9-inch pie dish or tart pan, bringing the dough up the sides.

    Spread the jam evenly over the bottom crust.

    Pour the ricotta filling over the jam layer and smooth the top.

    Roll out the remaining dough and cut into strips to create a lattice pattern over the filling.

  5. 5. Bake

    Bake for 40–50 minutes, or until the crust is golden and the filling is set.

    Allow the pie to cool completely for about 2 hours before slicing.

Dessert
Italian
Italian, ricotta, pie


Ciambelle (Unfilled Italian Donuts)

Ciambelle (Unfilled Italian Donuts)

This post may contain affiliate links, that help support this blog. If you make a purchase through these links, I may earn a commission—at no cost to you. For more information read my disclosure policy.

In Italy, Ciambelle are the kind of simple pastry that never goes out of style. Long before elaborate glazes and over-the-top toppings, these golden ring donuts were made with basic pantry ingredients, lightly scented with lemon zest, fried until perfectly puffed, and rolled in sugar. Their name comes from the Italian word ciambella, meaning “ring,” and versions of these sweet breads have been part of Italian home baking for generations.

You’ll find them in neighborhood bakeries, at festivals, and on Sunday mornings alongside a strong espresso. They aren’t meant to be flashy — they’re meant to be comforting.

At our restaurant, we served them warm with espresso, just as they would in Italy. There’s something special about that pairing — the slight bitterness of the coffee against the soft, sweet dough. It’s simple, authentic, and unforgettable.

These Ciambelle are exactly that: traditional, unfussy, and rooted in real Italian baking.

Things to know about these Ciambelle (Unfilled Italian Donuts)

  • Lemon zest is the signature Italian flavor — don’t skip it.

  • The dough should be soft and slightly tacky but not sticky.

  • Fry at 350°F for even cooking and that golden exterior.

  • These are best enjoyed fresh the same day.

  • You can bake them, but frying gives the classic texture and flavor.


Storage

  • Store at room temperature in an airtight container for up to 2 days.

  • Reheat briefly in the microwave (8–10 seconds) to soften.

  • They can be frozen (without the sugar coating) for up to 1 month. Thaw, warm slightly, then roll in fresh sugar before serving.

  • If you love traditional Italian baking, be sure to check out my other classic recipes and bring even more authentic flavors into your kitchen.

     Traditional Italian Esse cookies ( S cookies )

    Classic favorite Italian Tiramisu recipe a real pick you up dessert

    Or my personal favorite Pureed Apple and walnut bundt

    And if you make these Ciambelle, leave a comment and let me know — I love seeing your creations!

Ciambelle (Unfilled Italian Donuts)

  1. Activate the Yeast

    In a small bowl, combine warm milk, 1 tablespoon of the sugar, and yeast. Let sit 5–10 minutes until foamy.

  2. Make the Dough

    In a large bowl (or stand mixer):

    • Combine flour, remaining sugar, and salt.

    • Add eggs, vanilla, lemon zest, and yeast mixture.

    • Mix until combined.

    • Add softened butter and knead 8–10 minutes until smooth and elastic.

    • The dough should be soft but not sticky.

  3. First Rise

    Place in a lightly oiled bowl, cover, and let rise 1–1½ hours until doubled.

  4. Shape the Rings

    • Turn dough onto a floured surface.

    • Roll to about ½-inch thickness.

    • Cut circles using a 3-inch cutter.

    • Cut a small hole in the center (or use your finger to stretch gently).

    • Place on parchment squares.

    Cover loosely and let rise again 30–45 minutes.

  5. Fry

    In a deep fry pan Heat oil to 350°F (175°C).Fry 1–2 at a time, about 1–2 minutes per side, until golden brown.

    Do not overcrowd.

  6. Coat

    While still warm, roll in granulated sugar.


Traditional Italian S Cookies (Biscotti Esse)

Traditional Italian S Cookies (Biscotti Esse)

This post may contain affiliate links, that help support this blog. If you make a purchase through these links, I may earn a commission—at no cost to you. For more information read my disclosure policy.

These classic Italian S cookies, known as Biscotti Esse, are an old-school staple found in Italian bakeries and home kitchens across Italy. Their simple S shape comes from the Italian word esse—the letter S—and dates back to a time when cookies were made with basic pantry ingredients and mixed by hand.

Simple, unfussy, and timeless, these cookies are crisp on the outside, tender inside, and meant to be enjoyed with espresso, coffee, or tucked onto a holiday cookie tray.

Things to know about this Traditional Italian S Cookies (Biscotti Esse) recipe

  • Esse cookies are traditionally pale; avoid overbaking so they stay tender inside.

  • Butter is rubbed into the flour first, creating a delicate, bakery-style crumb.

  • Dough should be soft and smooth, not sticky—dust hands lightly with flour if needed.

  • These cookies are lightly sweet and designed to be served with coffee or espresso.

  • Store in an airtight container at room temperature for up to 5 days.

  • Baked cookies freeze well for up to 2 months.

  • If you love old-school Italian baking, don’t miss my other classic recipes like Italian Amaretti Cookies recipeAuthentic Italian Tiramisu, Traditional Italian Almond Biscotti, and my collection of Italian Christmas cookies. Save this recipe, share it with a fellow cookie lover, and let me know in the comments if your Nonna made them this way too 🤍

Traditional Italian S Cookies (Biscotti Esse)

Makes approximately 30–36 S cookies, depending on size.

  • 3 cups 360 g all‑purpose flour
  • 2 teaspoons baking powder
  • 1/4 teaspoon salt
  • 1/2 cup 113 g unsalted butter, cold and cubed
  • 1 cup granulated sugar
  • 2 large eggs (room temperature)
  • 1 Tbsp. vanilla extract
  • Zest of 1 lemon
  1. Preheat oven to 350°F (175°C) and line two baking sheets with parchment paper.
  2. In a large bowl, whisk together the flour, baking powder, and salt.
  3. Add the cold butter and work it into the flour with your fingertips until the mixture is fine and crumbly.
  4. Make a well in the center of the flour mixture.
  5. Add the sugar, eggs, vanilla, and lemon zest into the well.
  6. Using a fork, beat the eggs gently and begin pulling the flour in from the sides.
  7. Once the dough starts to come together, use your hands to gently work it until smooth and soft. Do not overwork.
  8. Transfer the dough to a piping bag fitted with a large plain tip, or shape by hand.
  9. Pipe or form S‑shaped (esse) cookies onto the prepared baking sheets, spacing slightly apart.
  10. Bake for 10–12 minutes, until set and lightly golden on the bottom. Tops should remain pale.
  11. Cool on the baking sheet for 5 minutes, then transfer to a wire rack to cool completely.