Biscotti da Colazione (Italian Breakfast Cookies)

Biscotti da Colazione (Italian Breakfast Cookies)

This post may contain affiliate links, that help support this blog. If you make a purchase through these links, I may earn a commission—at no cost to you. For more information read my disclosure policy.

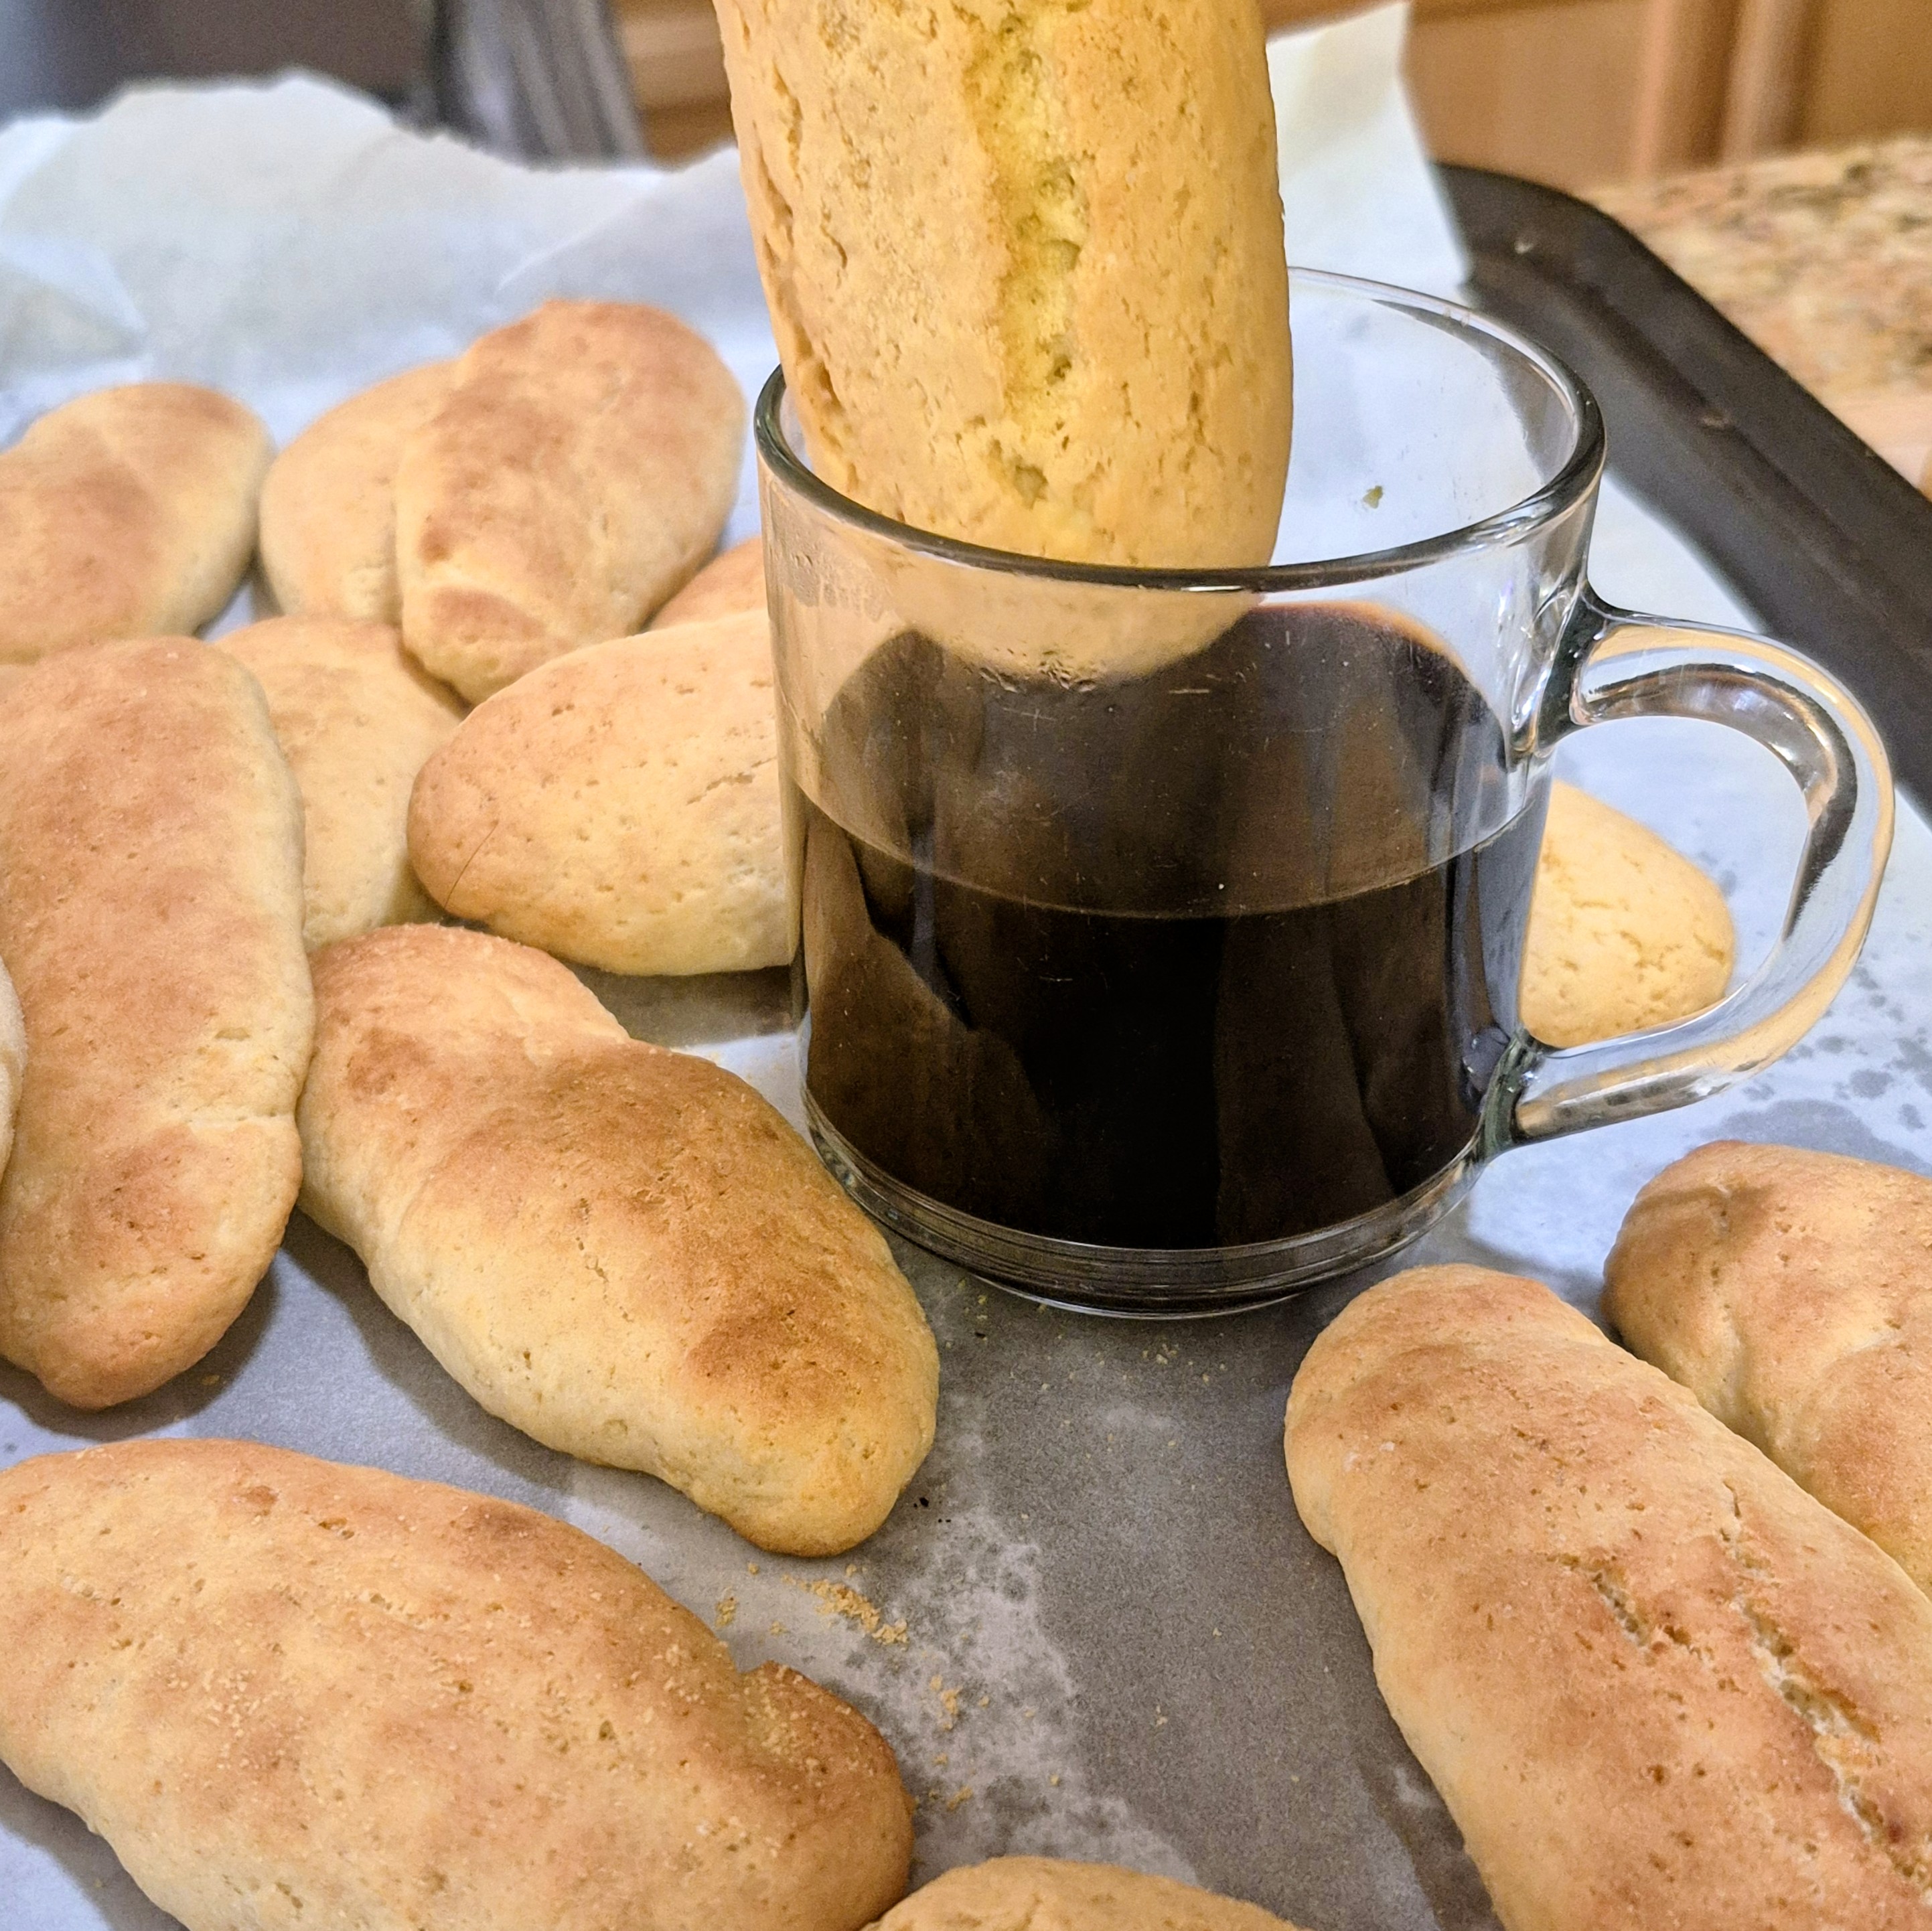
There’s nothing more comforting than a simple Italian colazione — a warm drink and a cookie made for dunking. These biscotti da colazione are exactly that: lightly sweet, soft yet sturdy, and kissed with lemon. They’re the kind of cookies you’d find on a Nonna’s kitchen table, ready to be dipped into cappuccino or a glass of warm milk.

Unlike overly sweet bakery cookies, these are meant to be simple and everyday. Rustic, unfussy, and absolutely perfect for slow mornings.


Things to know about   this Biscotti da Colazione (Italian Breakfast Cookies)

  • The dough should be soft but not sticky — add a little flour if needed.
  • Don’t overbake; these should stay tender inside.
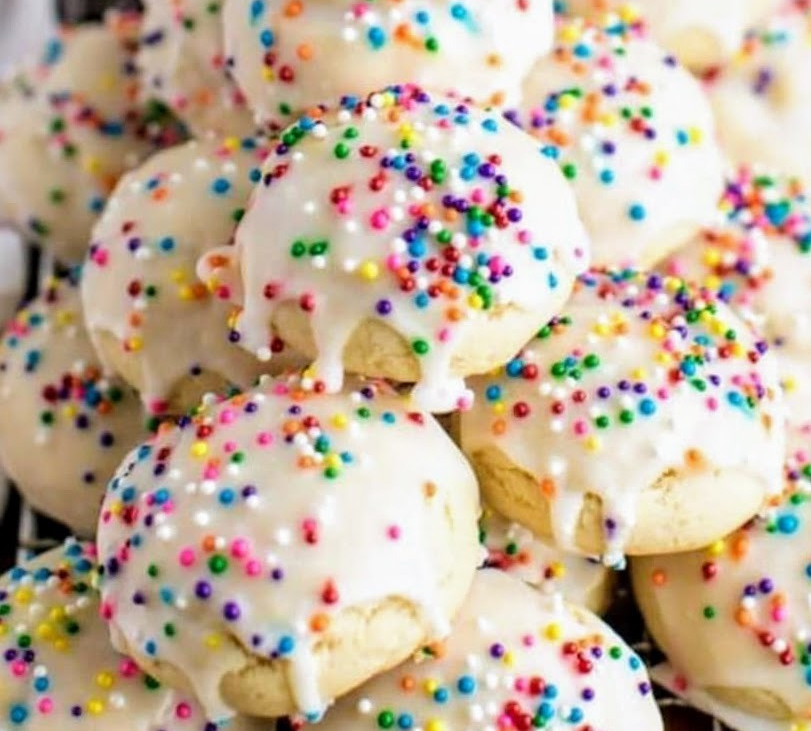
  • The glaze is optional but adds a classic bakery-style finish.

How to Serve

Traditionally enjoyed at breakfast, these cookies are best:

This is true Italian inzuppo — simple, comforting, and meant to be savored slowly.

Storage

  • Store in an airtight container at room temperature for up to 5 days
  • Freeze for up to 2 months and thaw at room temp

Final Thoughts

These biscotti da colazione are a reminder that Italian baking doesn’t need to be complicated to be beautiful. With just a handful of ingredients, you get a cookie that feels nostalgic, comforting, and deeply rooted in tradition.

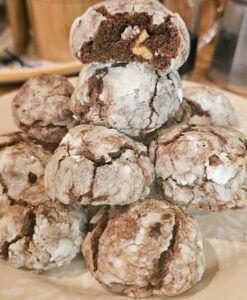
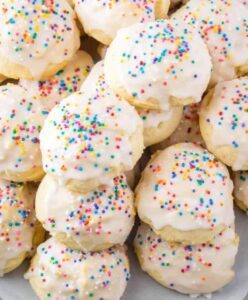
If you loved this recipe, be sure to check out my other Italian baking favorites like these

Traditional Italian S cookies

Italian braided lemon cookies

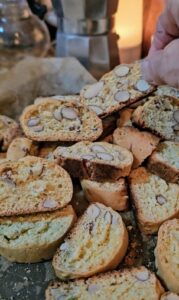
Or my personal favorite Italian almond cantucci cookies. 

Biscotti da Colazione (Italian Breakfast Cookies)

Soft and lightly sweet, these Biscotti da Colazione are classic Italian breakfast cookies made for dunking in coffee or milk. Easy, authentic, and perfect for everyday baking.

  • 3 cups all purpose flour
  • 1 cup sugar
  • 2 tsp Baking powder
  • 2 large eggs
  • 1/2 cup milk
  • 1/2 cup neutral oil or light olive oil
  • 1 Tbsp. vanilla extract
  • 1 Tbsp. lemon zest (use the zest and juice from 1 lemon)
  • 1 Tbsp. lemon juice
  • pinch of salt
  • 1 cup powder sugar (for optional glaze)
  • 1 -2 Tbsp. milk or lemon juice (for optional glaze)
  1. Preheat oven to 350°F (175°C) and line a baking sheet with parchment.

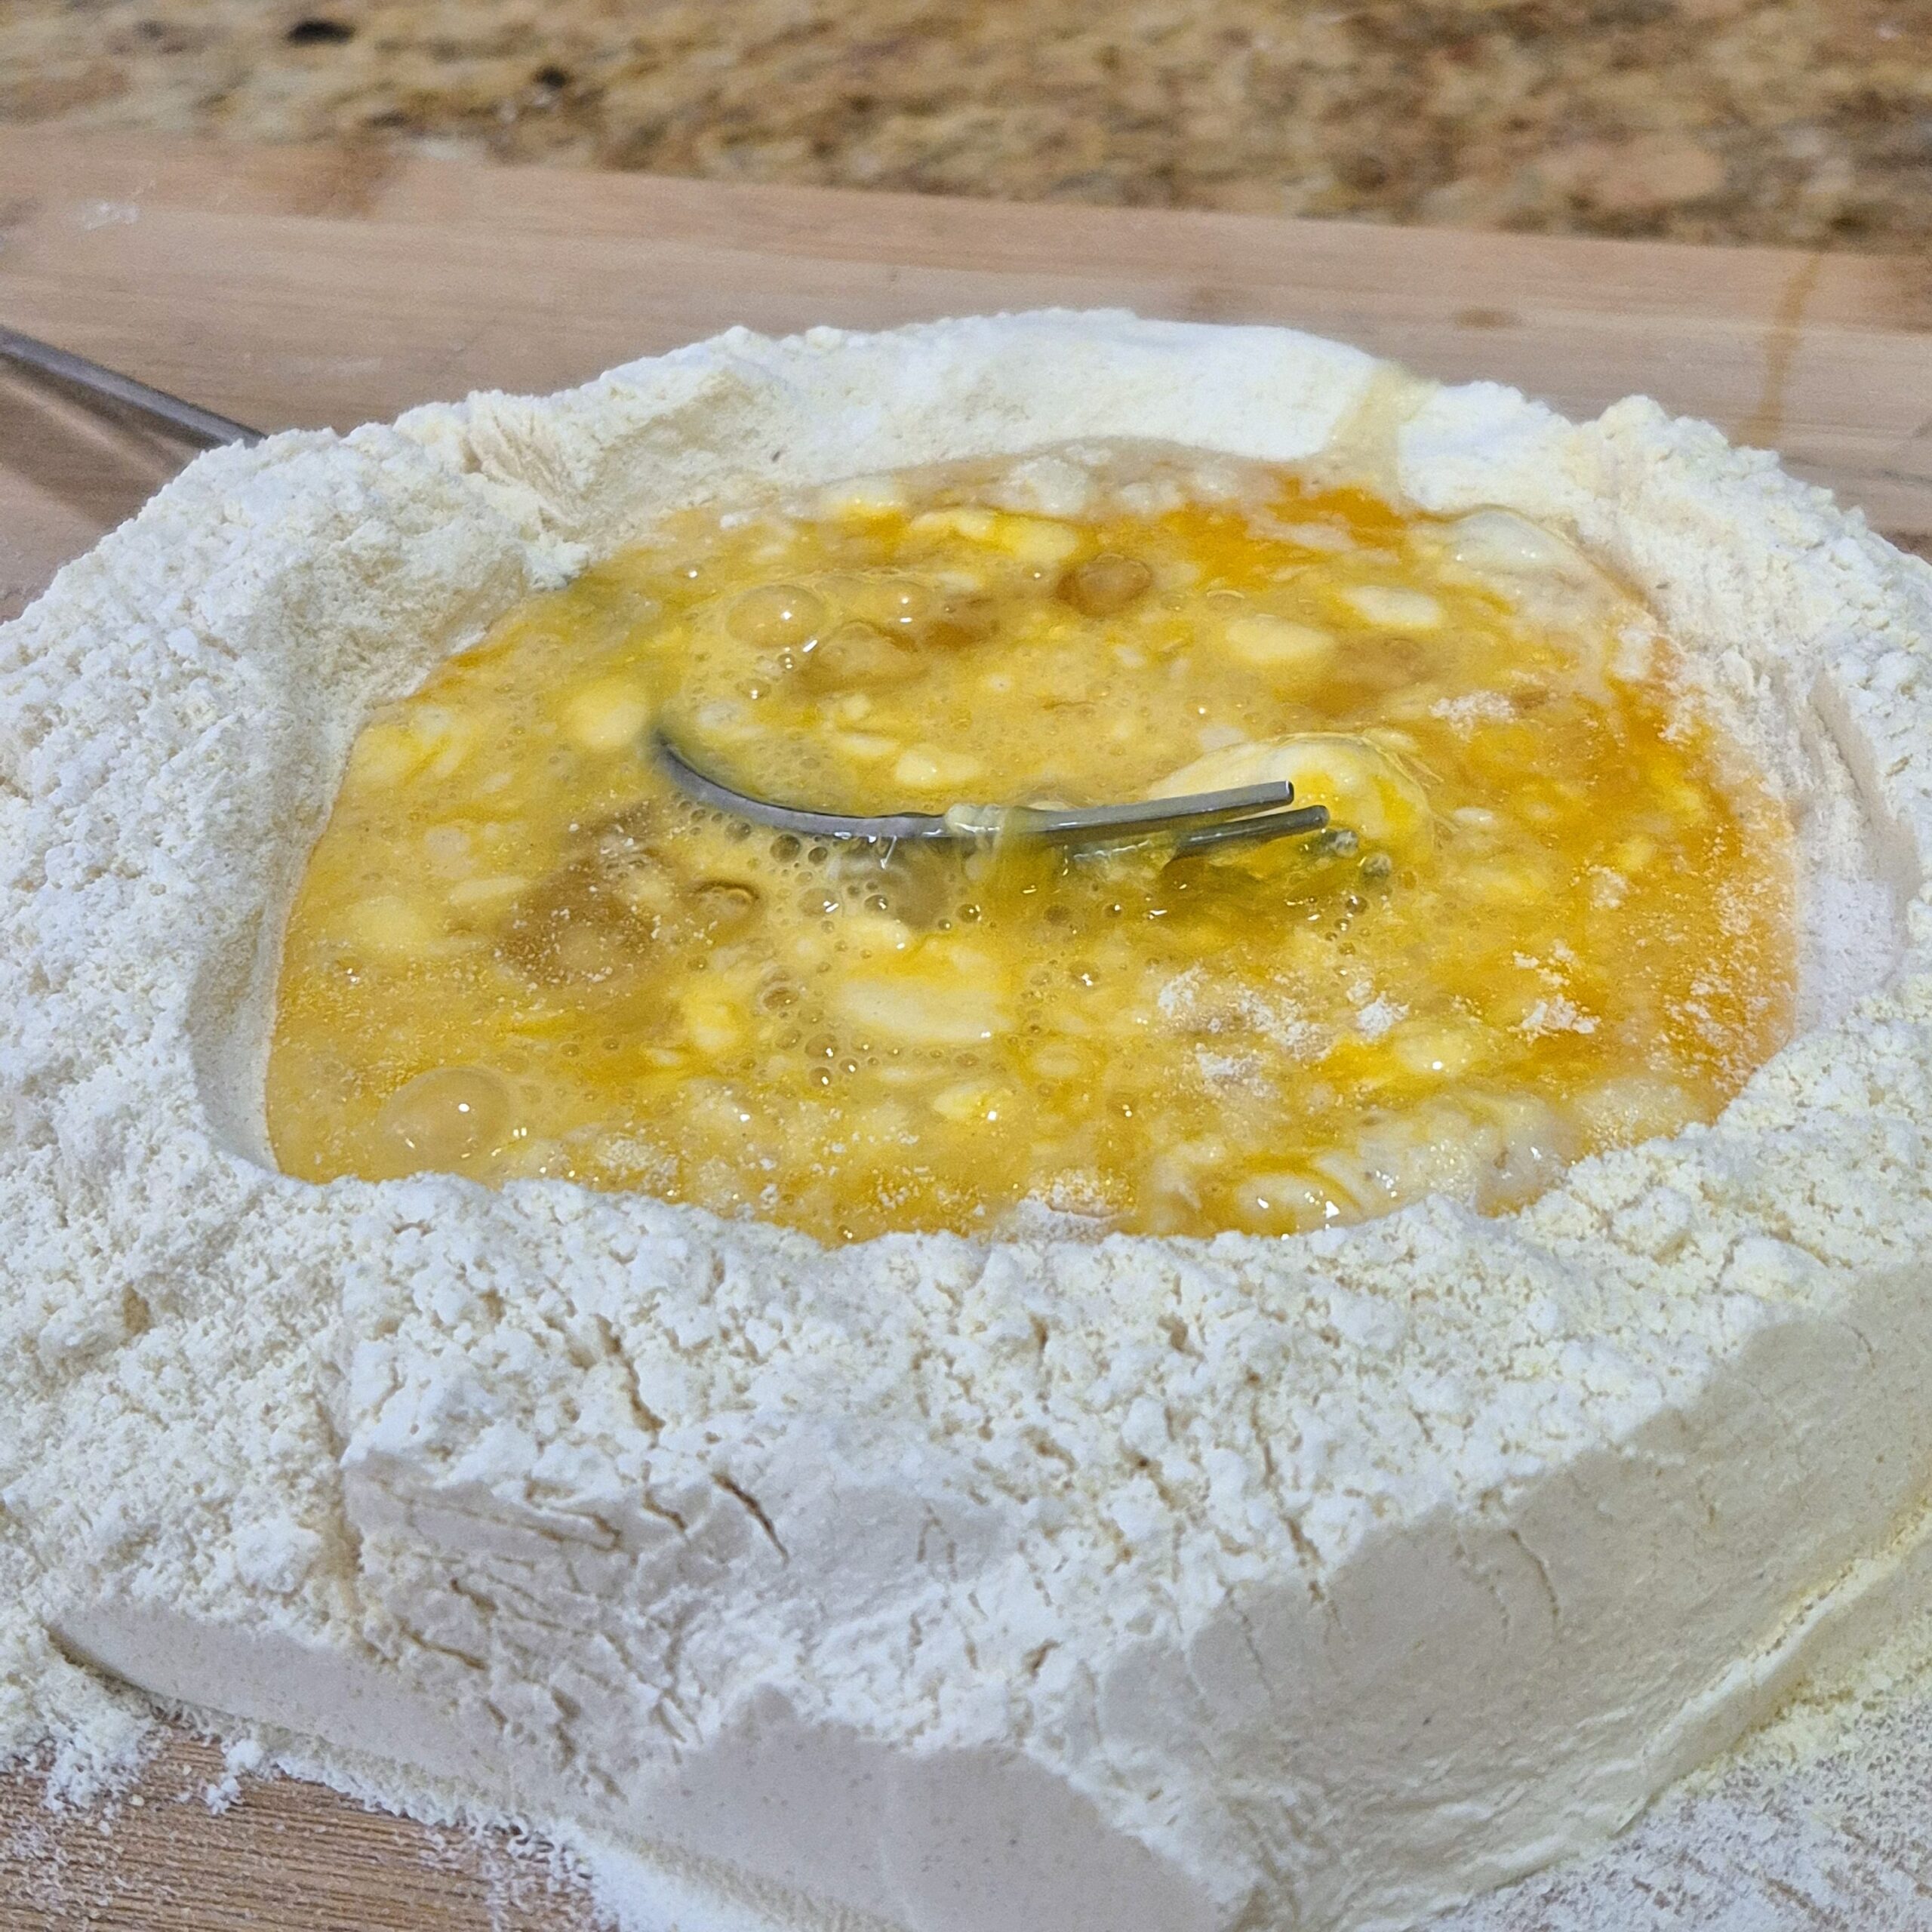
  2. Whisk eggs and sugar until light, then mix in milk, oil, vanilla, and lemon zest.

  3. Combine dry ingredients and add to the wet mixture to form a soft dough.

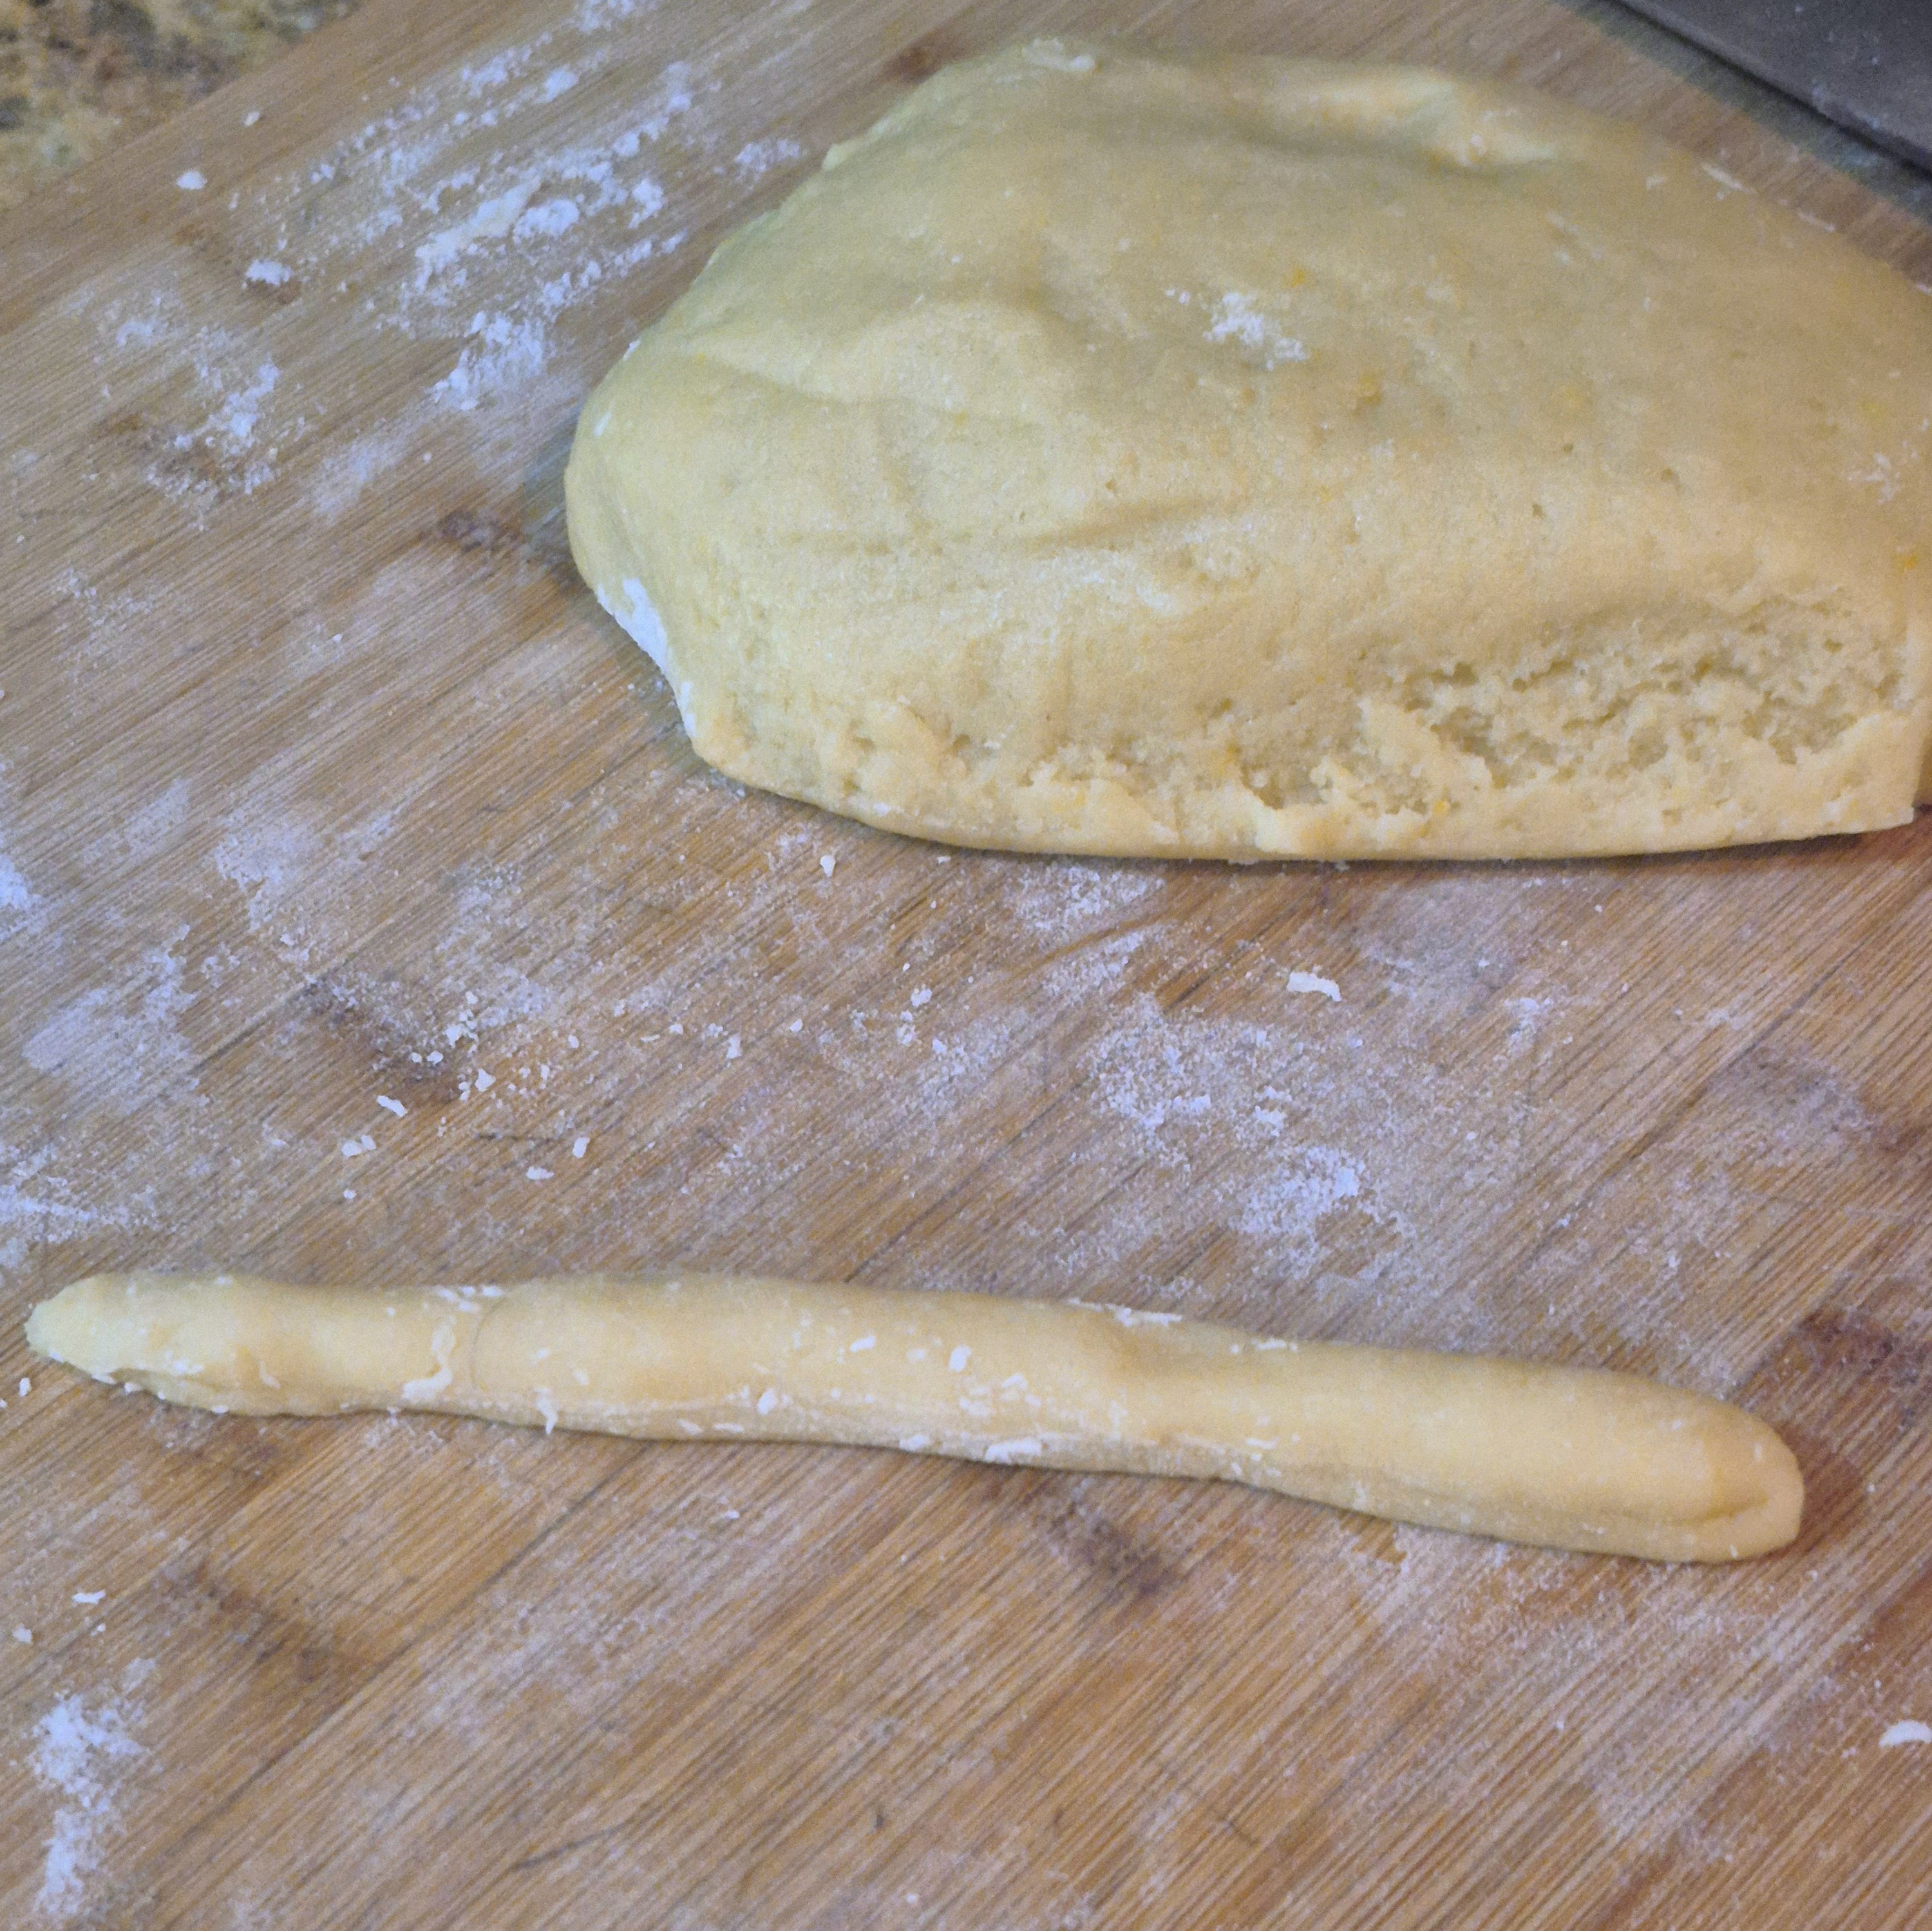
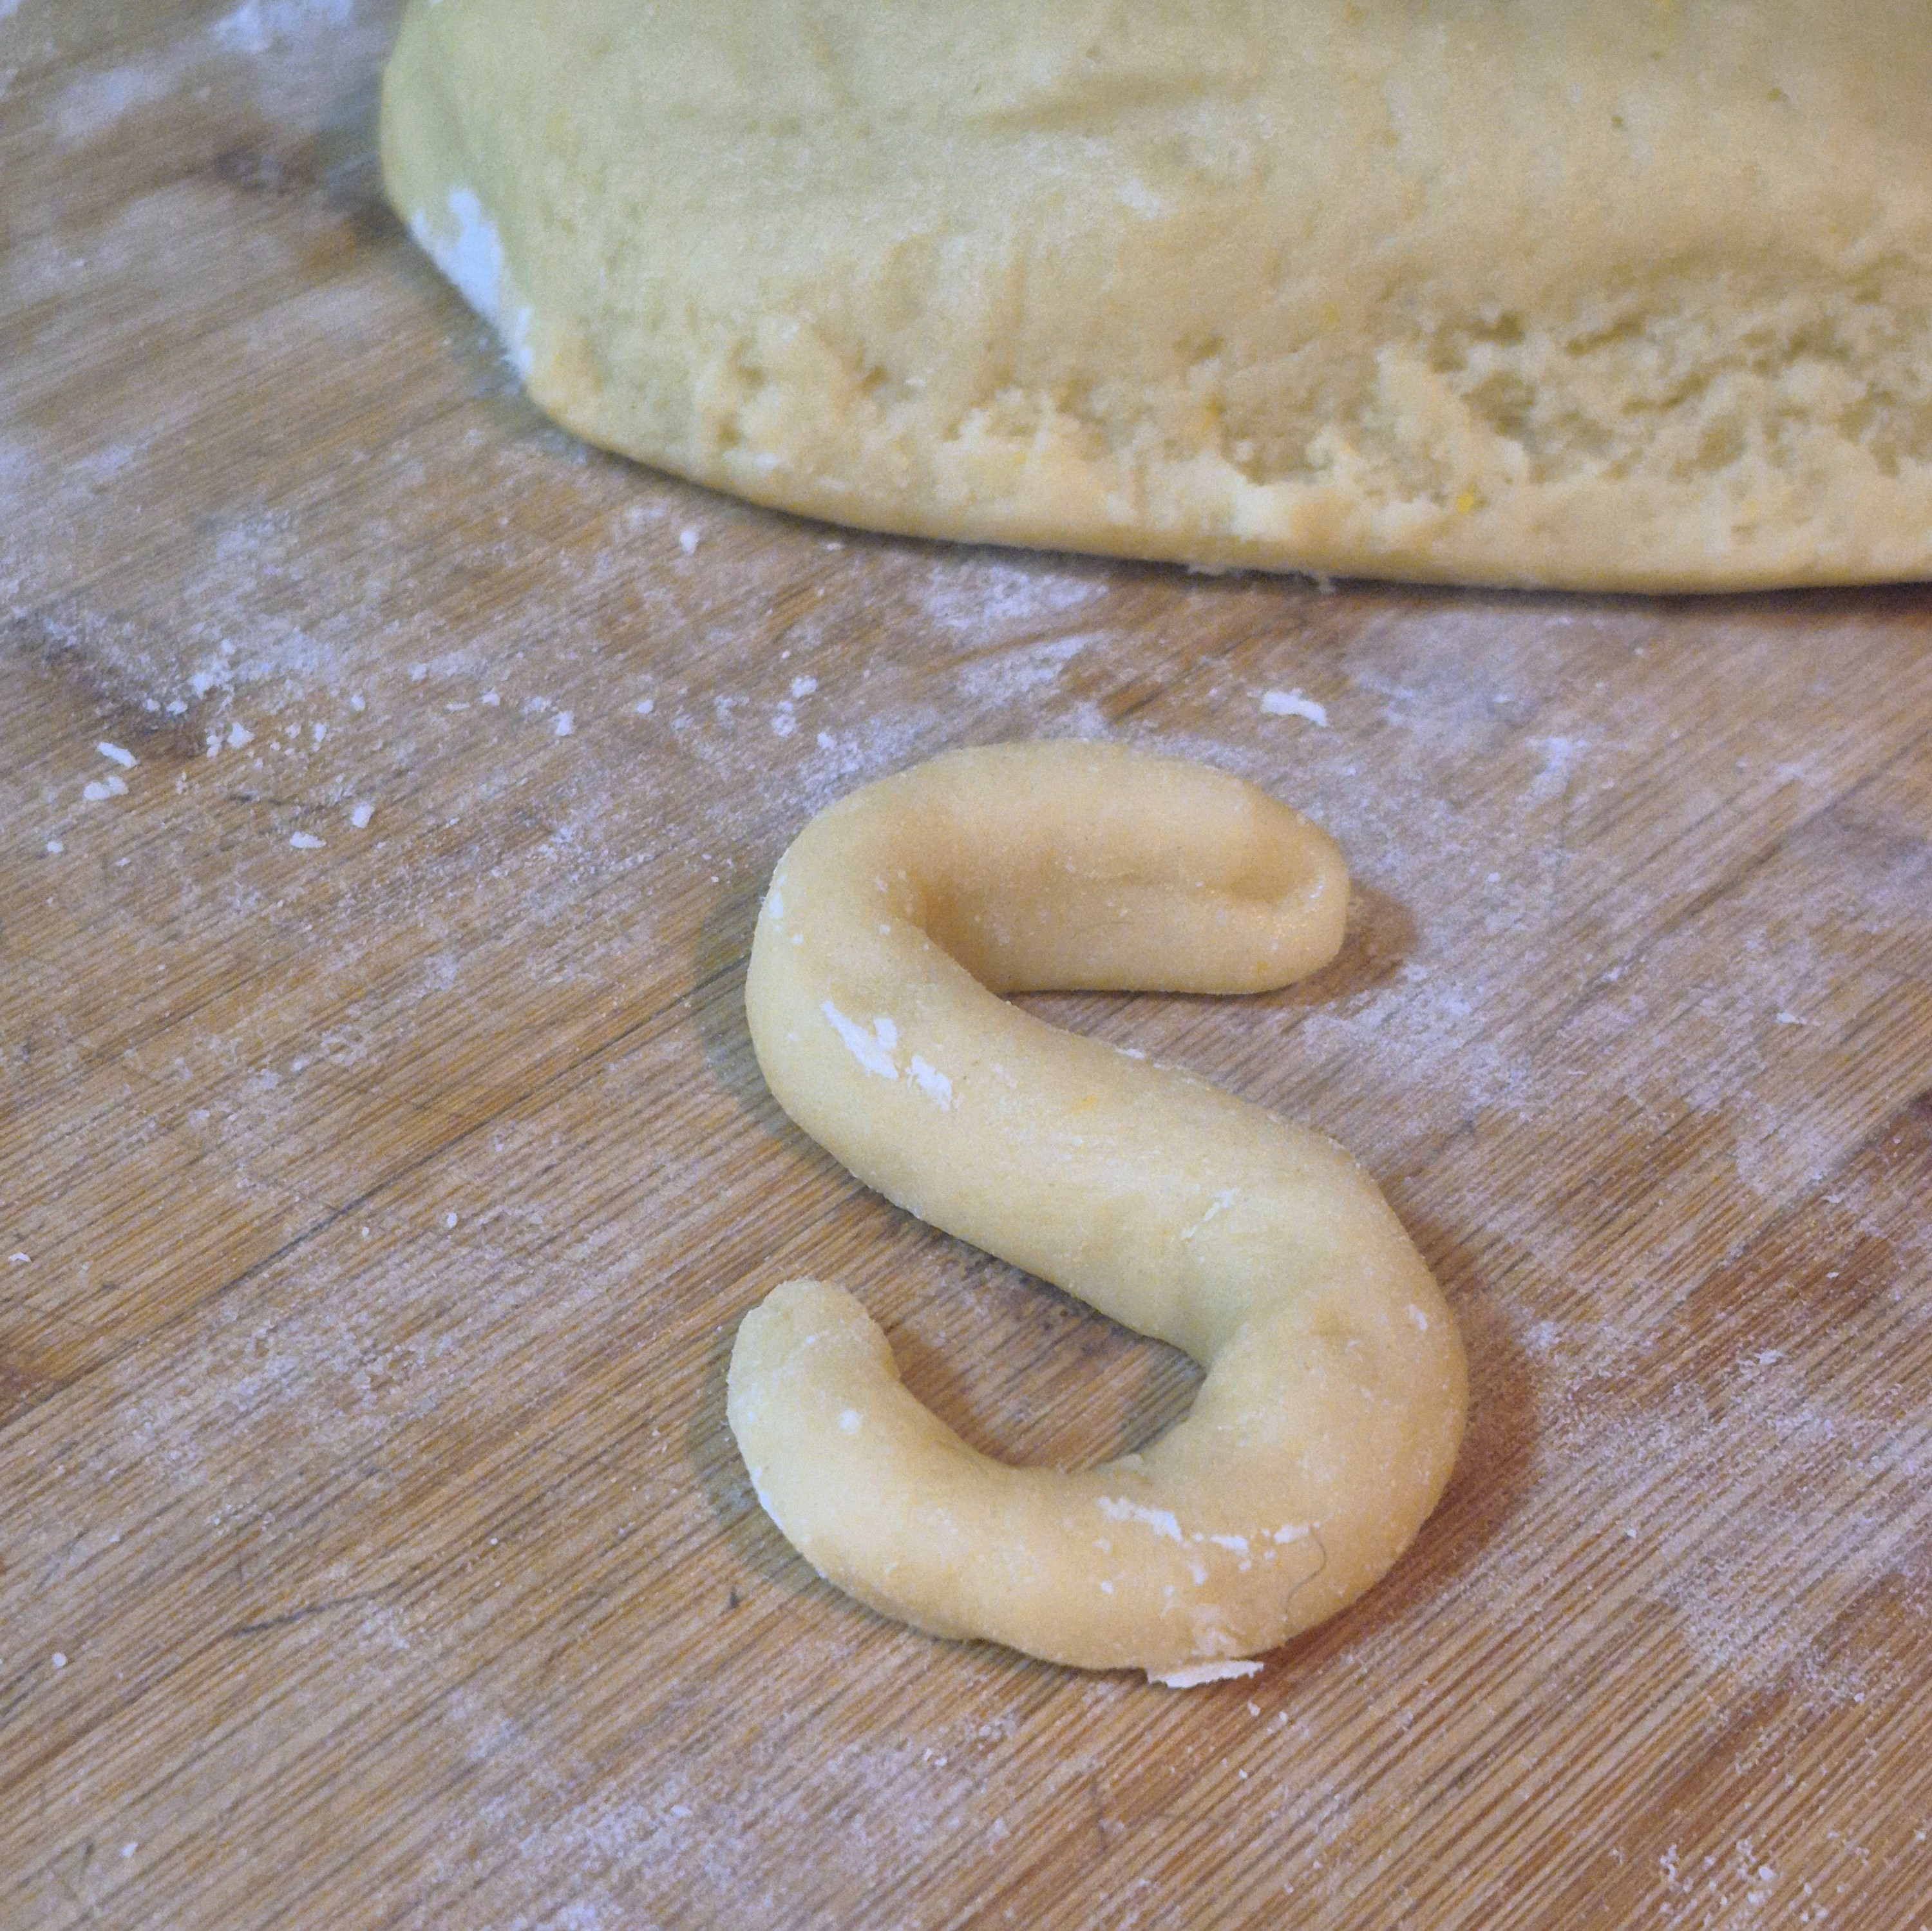
  4. Move the dough to a lightly floured surface and knead the dough to a smooth constistency

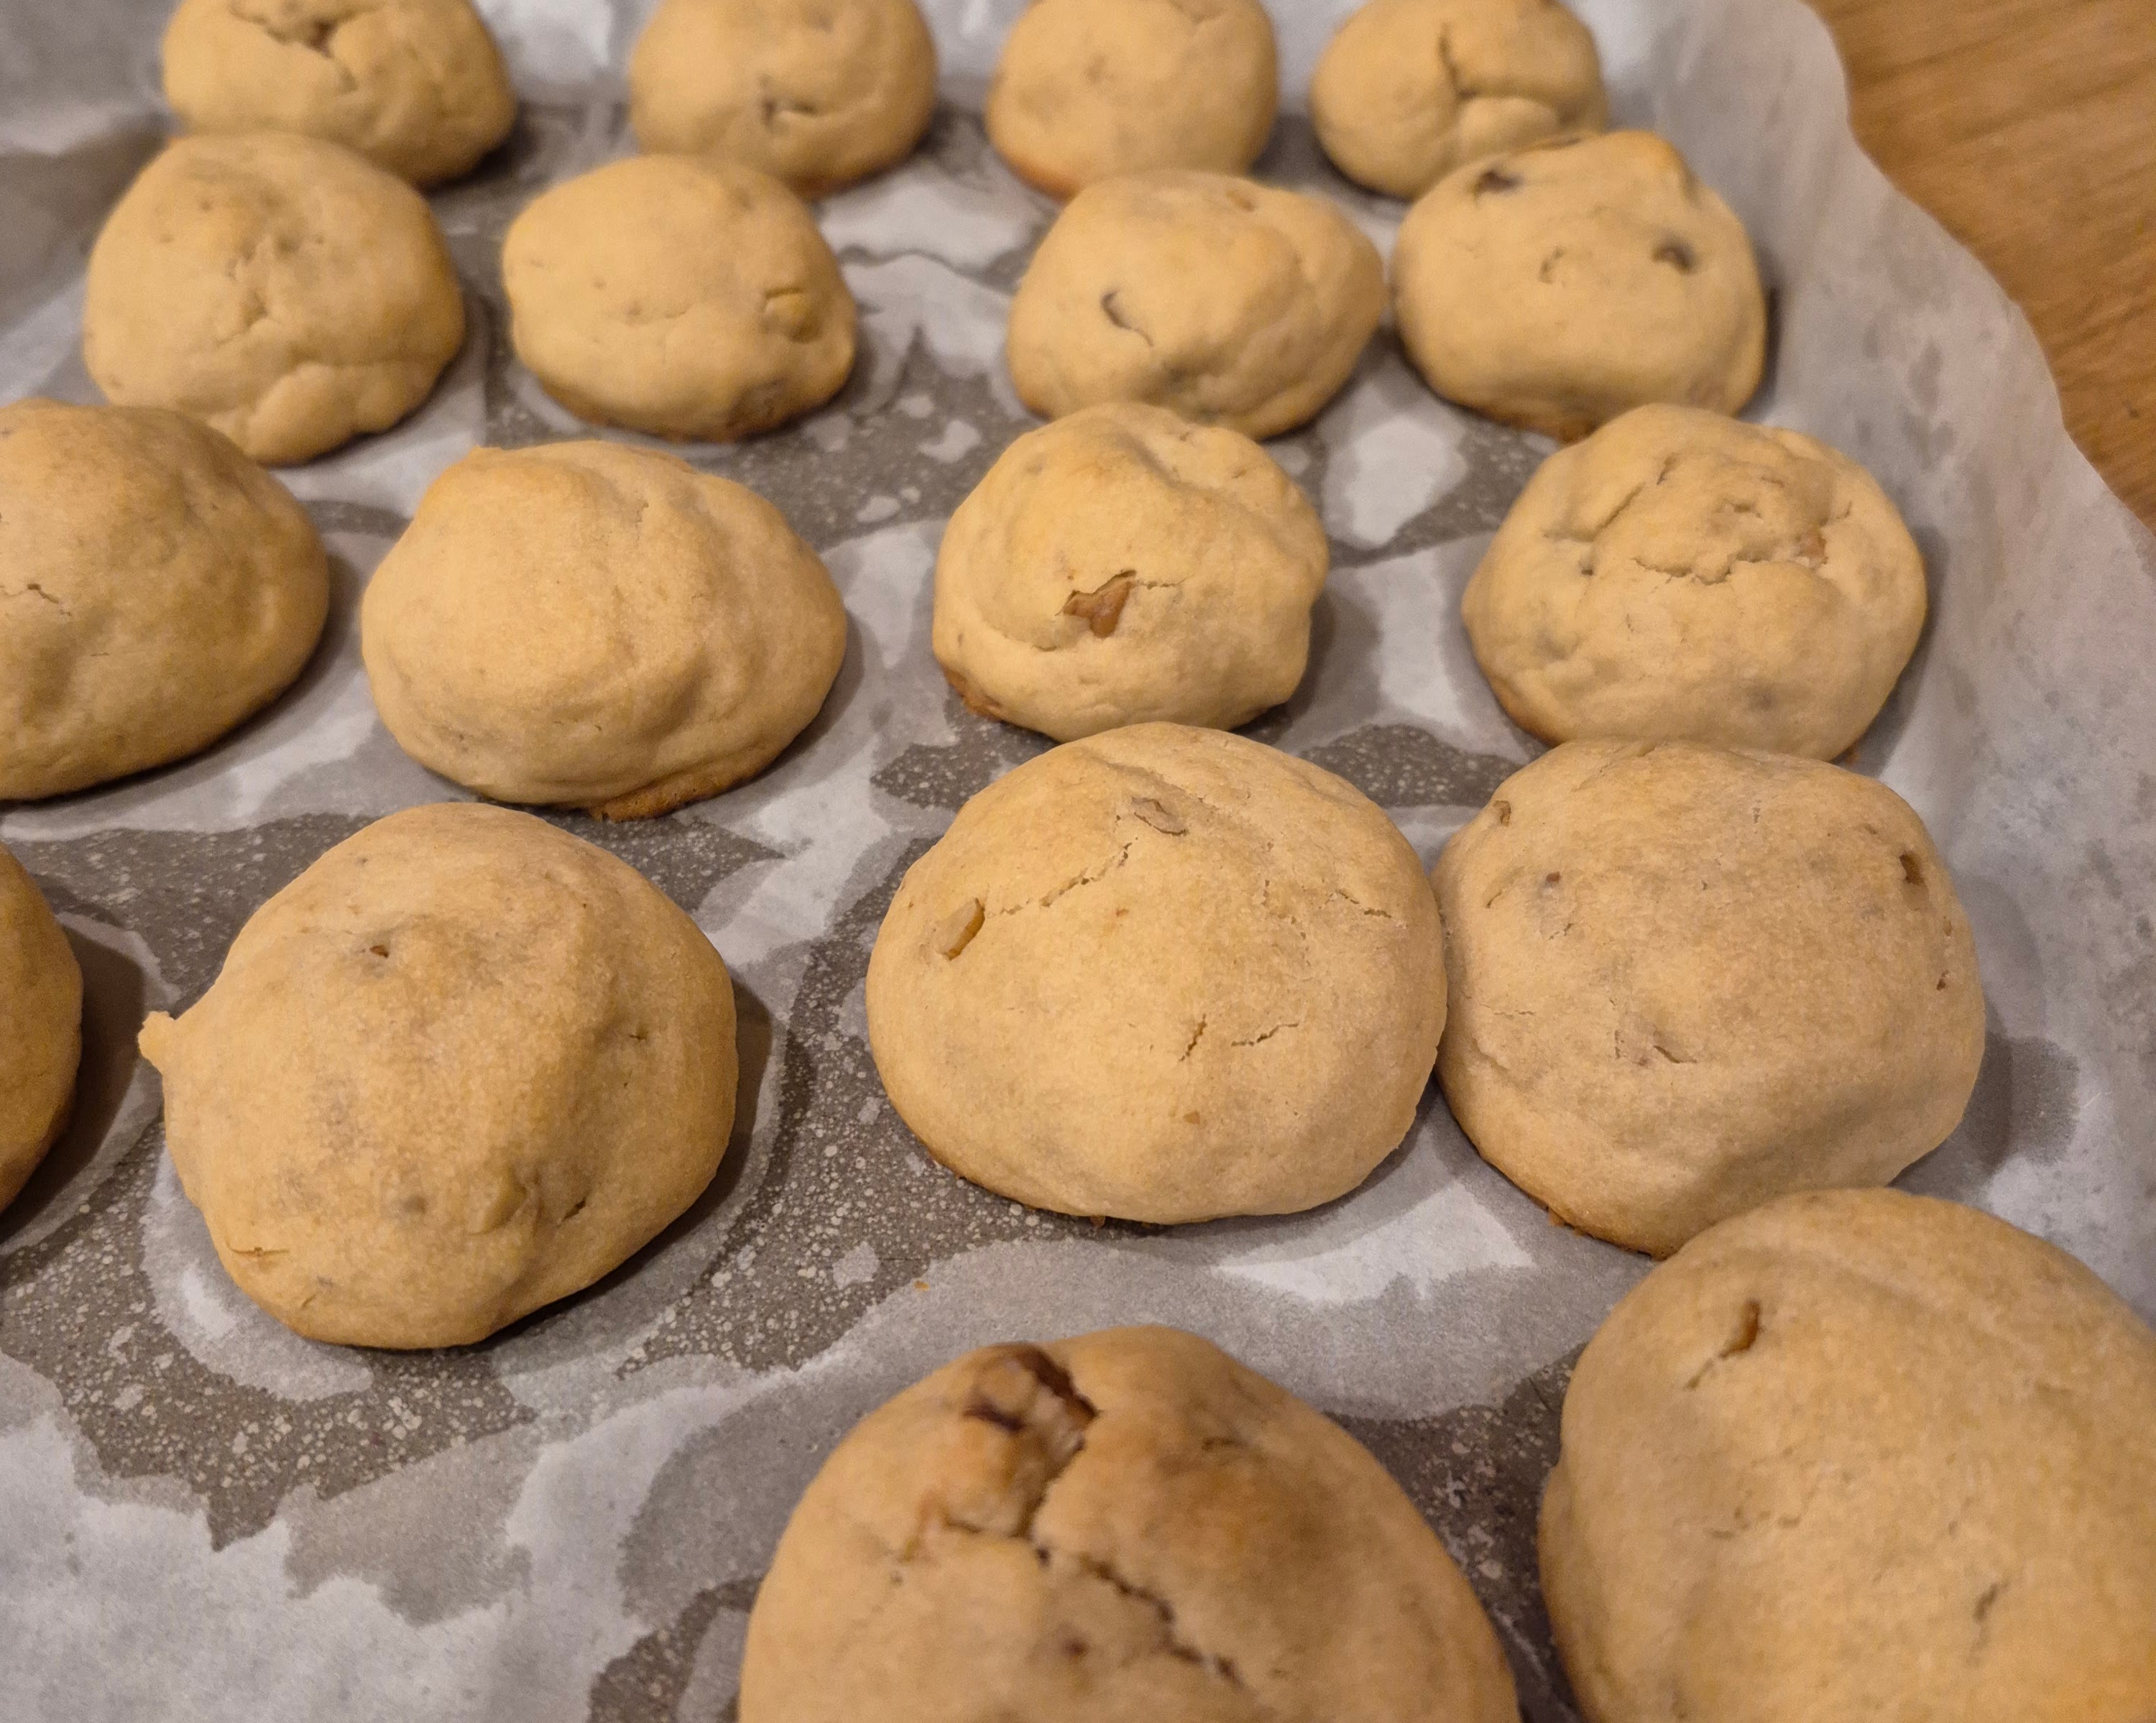
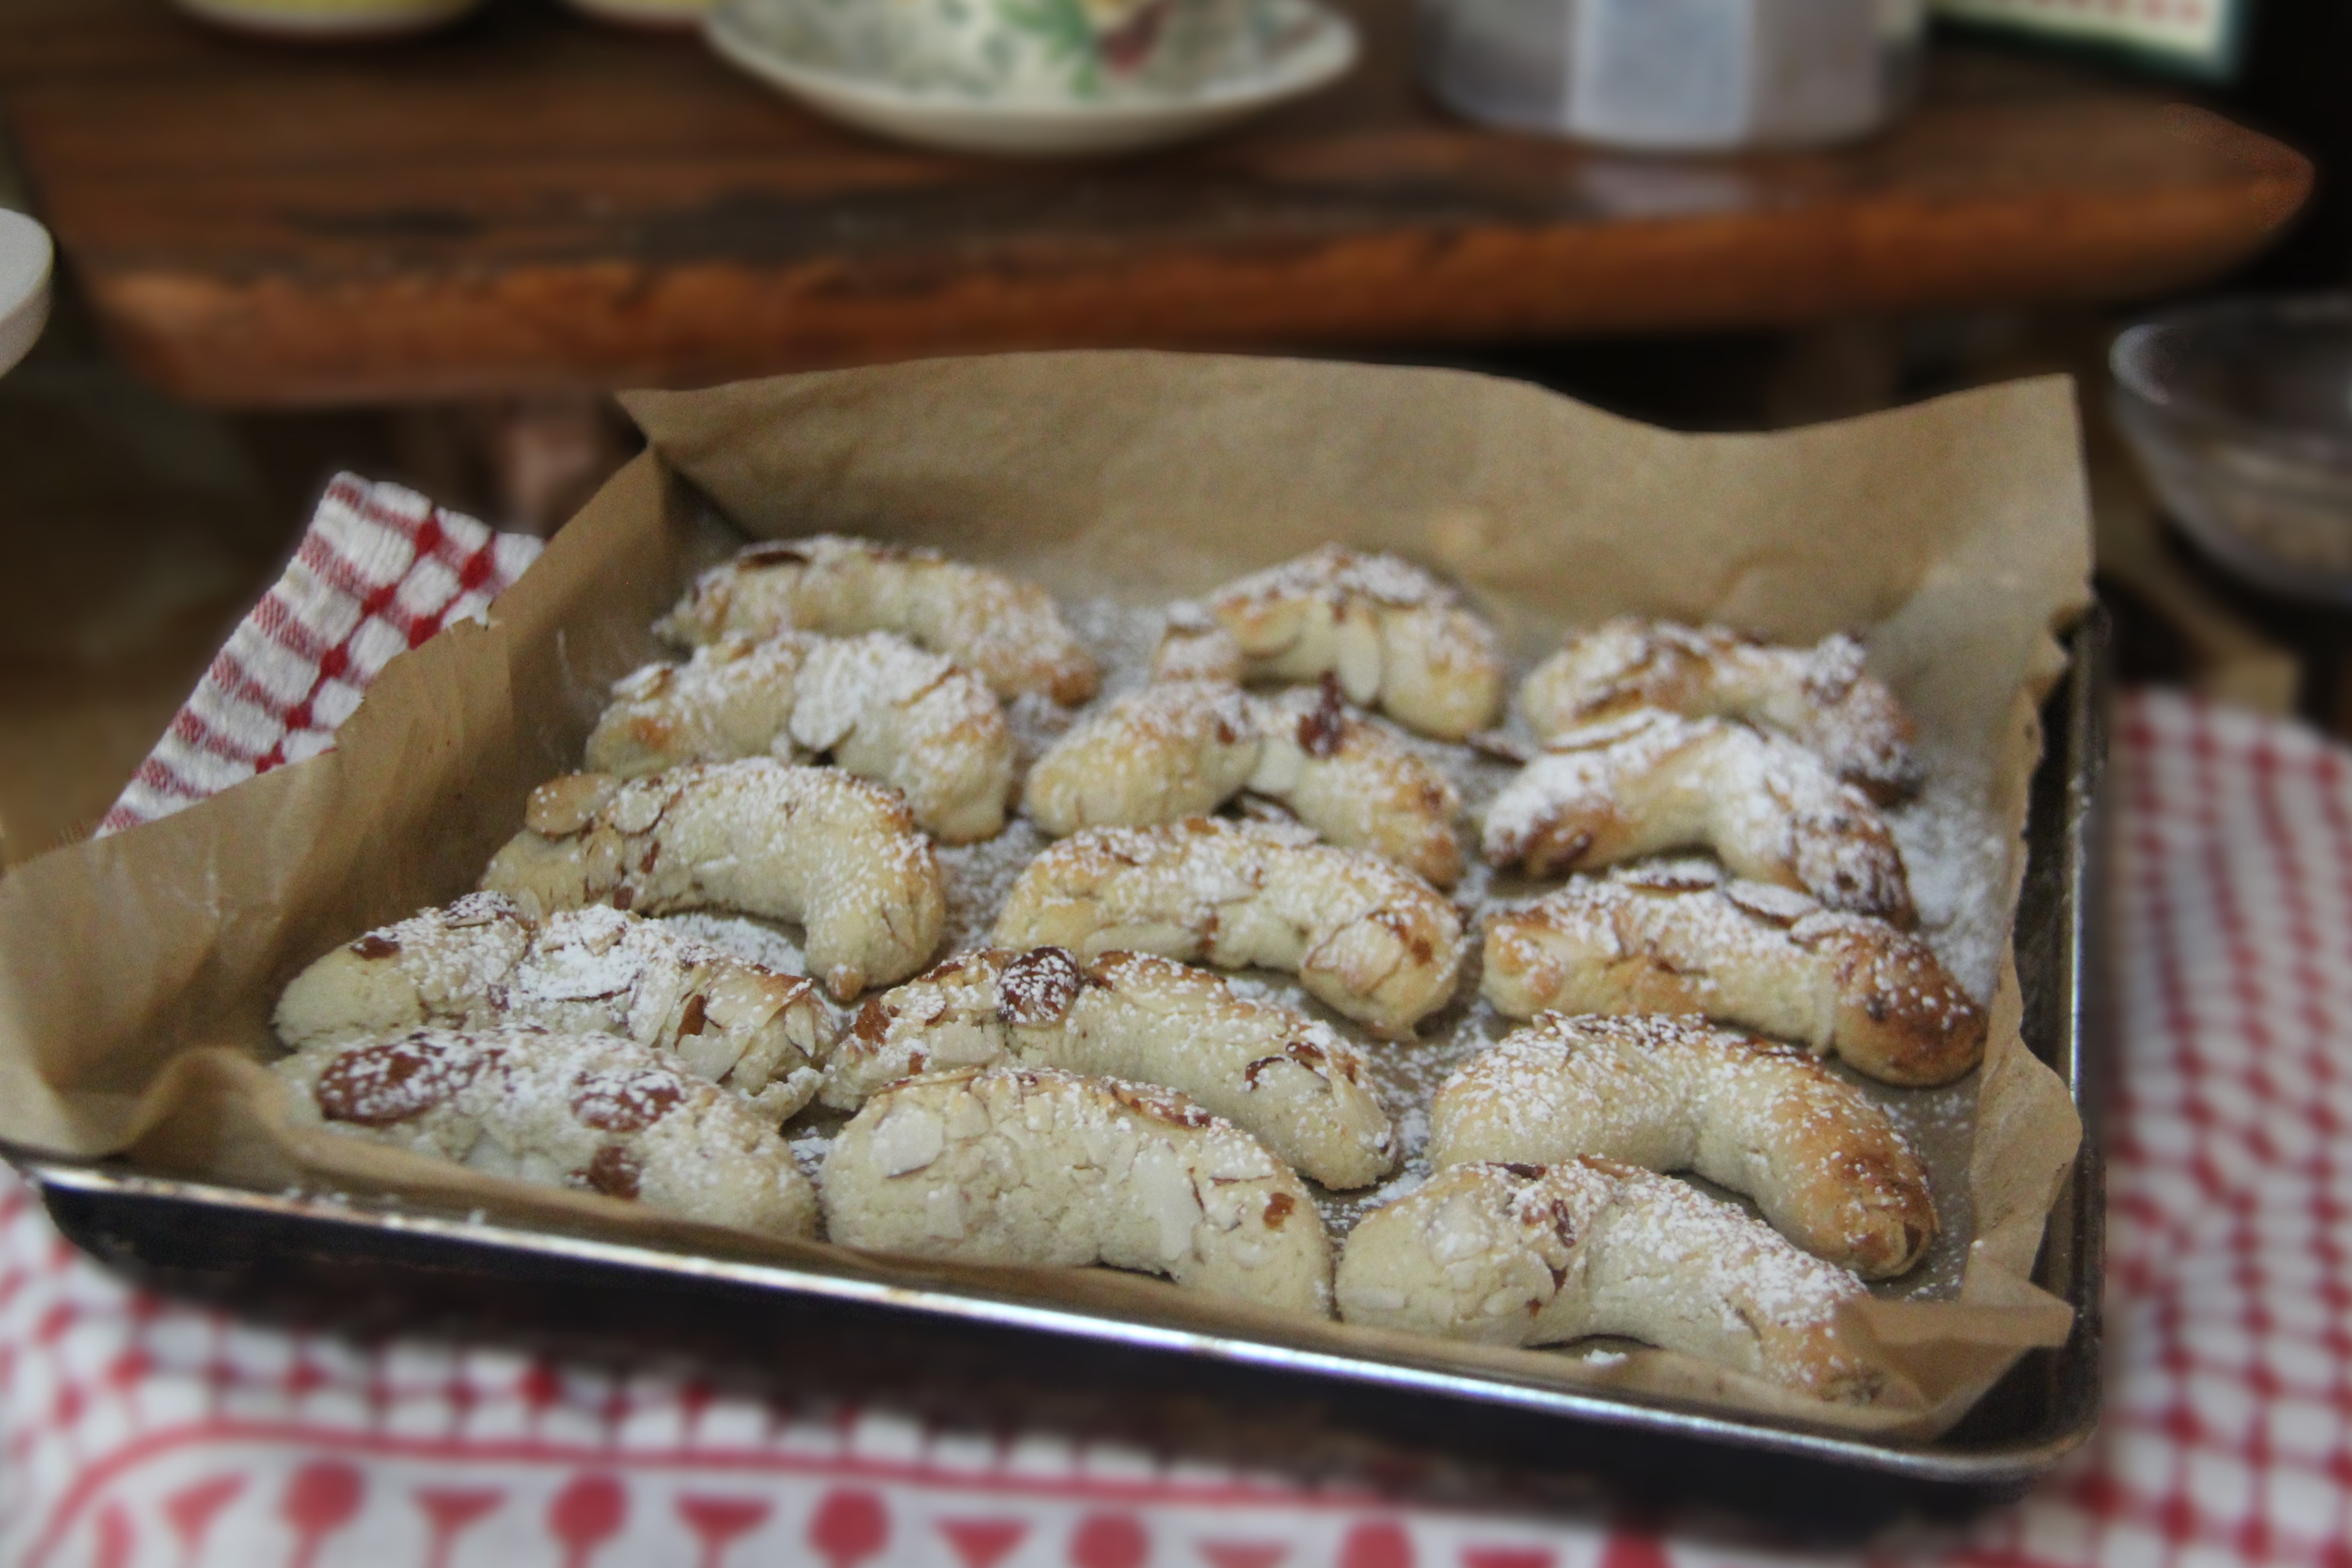
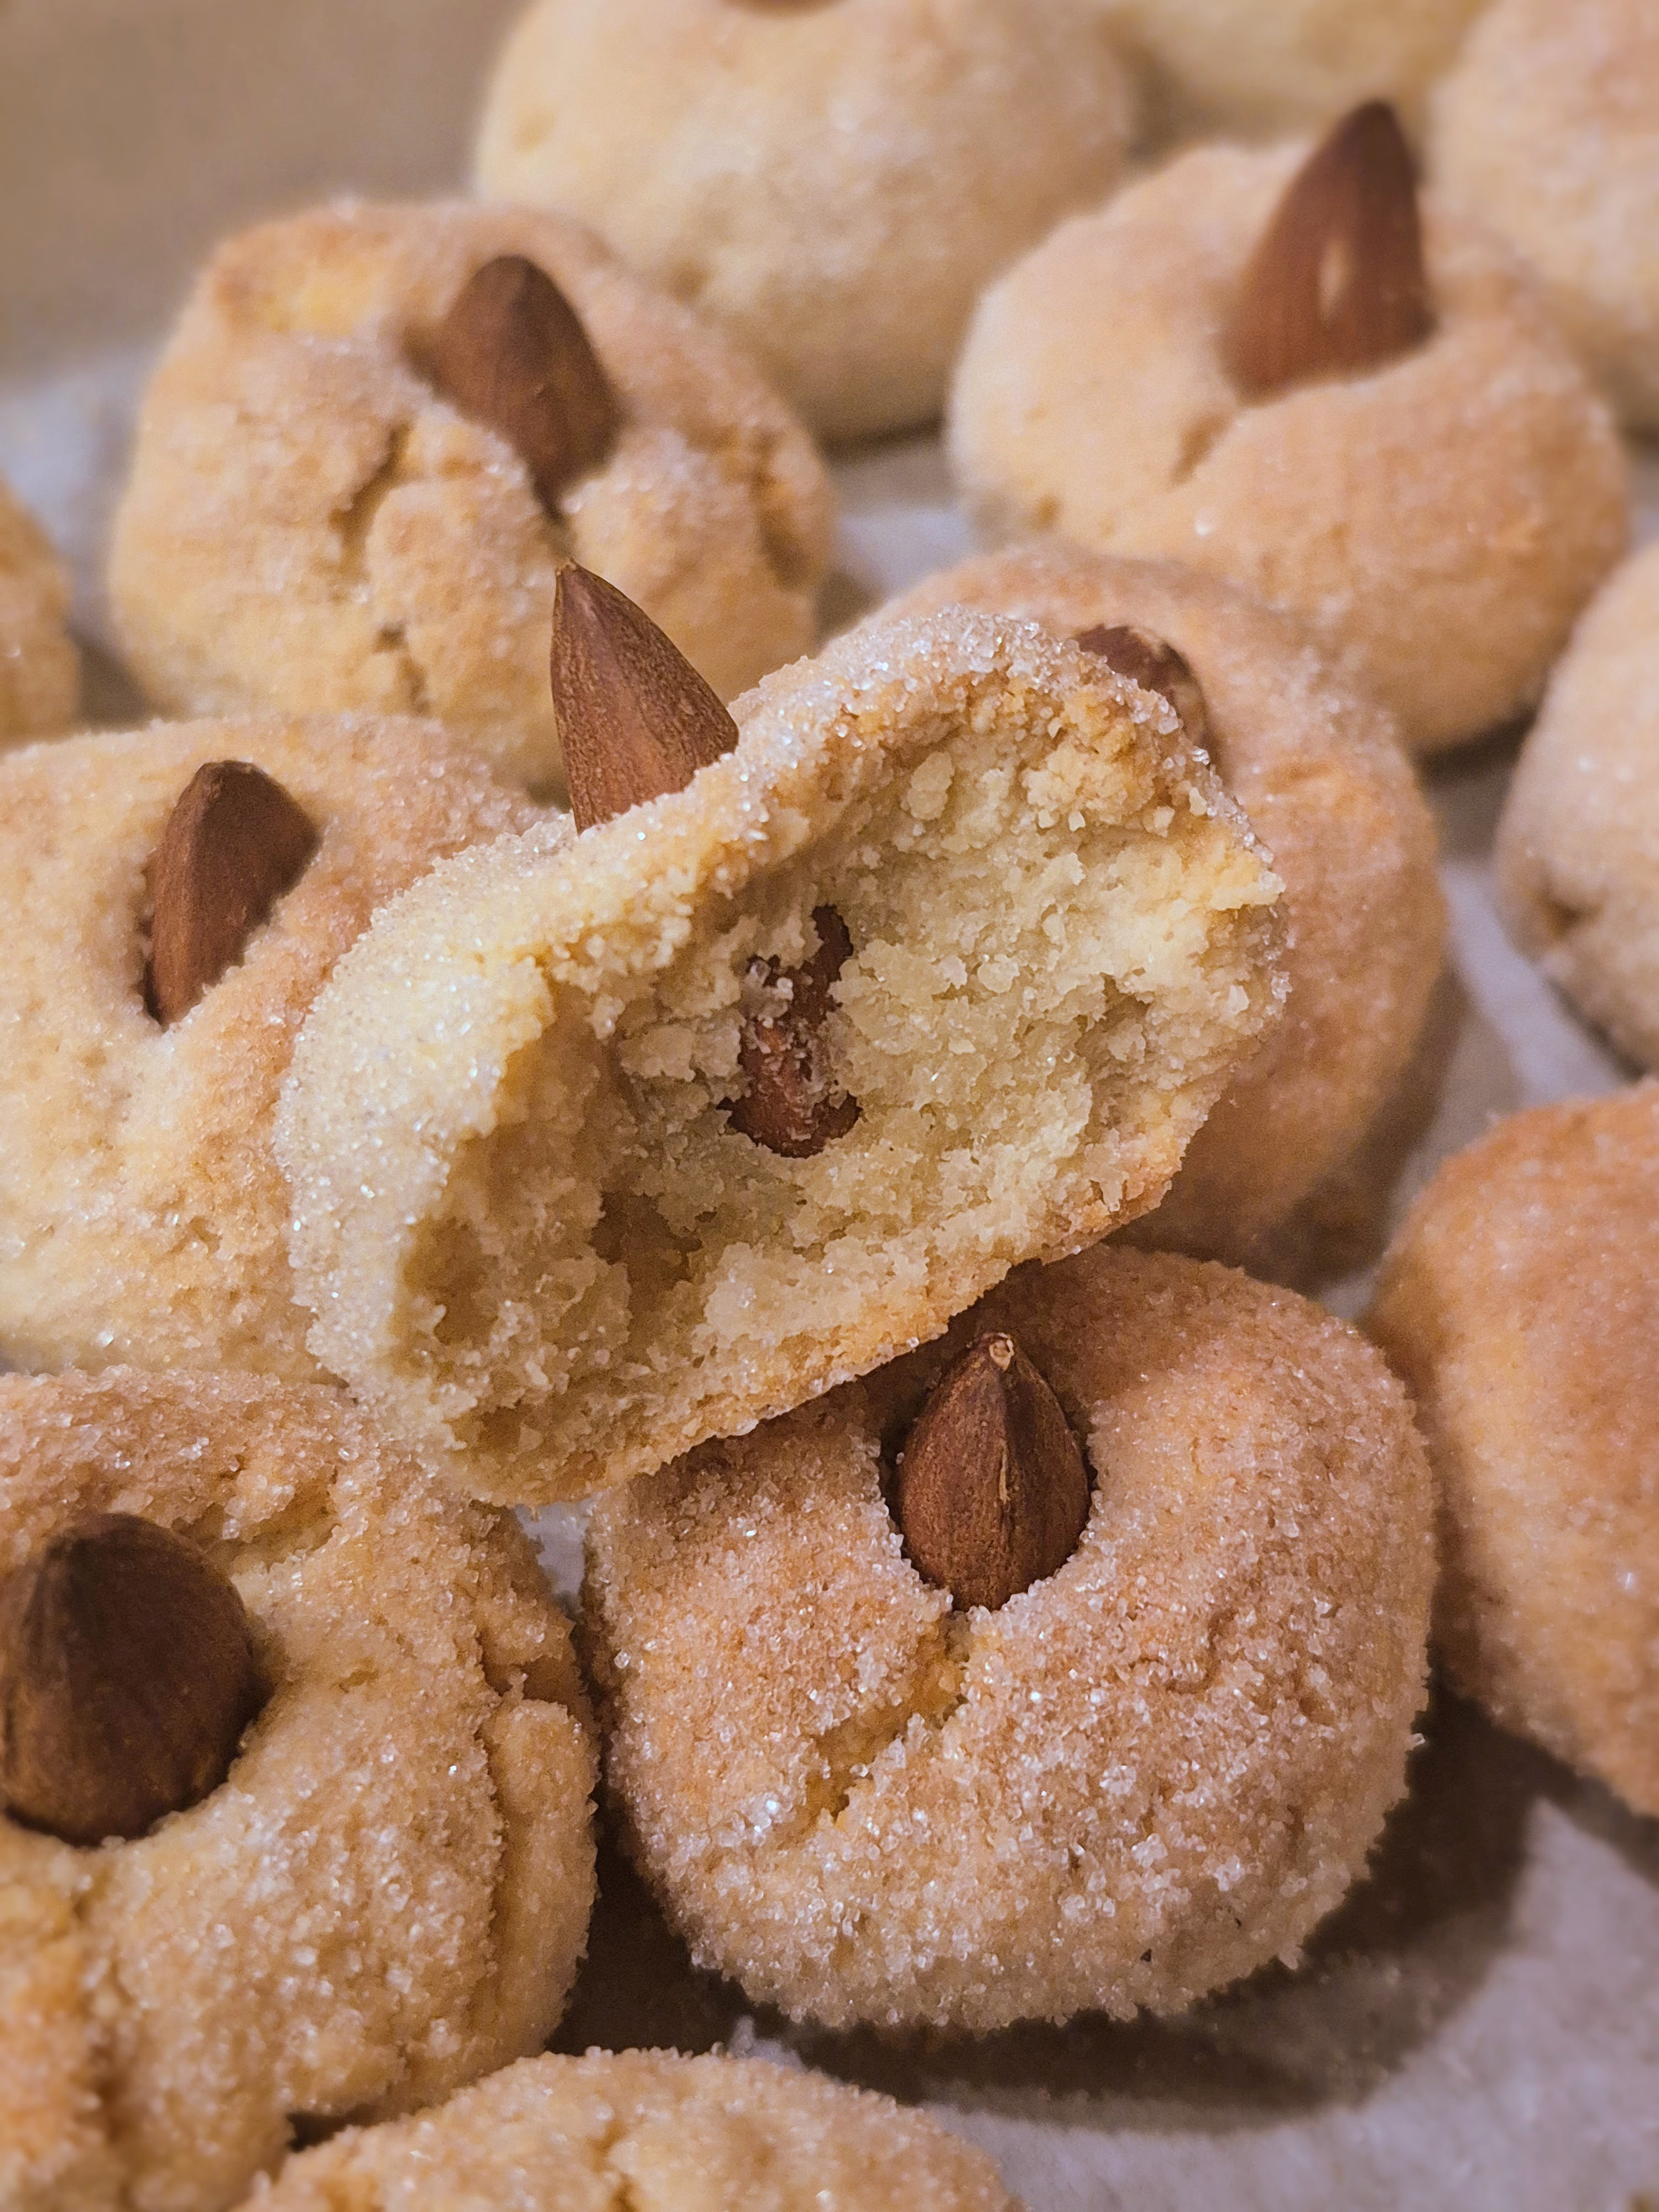
  5. Shape the dough by scooping about 2 tablespoons at a time and rolling into logs or ovals, about 2 inches long and 1 inch thick. Keep them slightly rustic — they shouldn’t be perfectly smooth. Place on the baking sheet with a little space between each. then lightly sprinkle the tops with granulated sugar for a classic bakery-style finish.

  6. Bake 12 -15 minutes these cookies bake pale for added color broil for a few minute, Keep a close eye they can over brown quickly

Dessert
Italian
Italian, cookie, breakfast


Italian Braided Lemon Cookies

Italian Braided Lemon Cookies

This post may contain affiliate links, that help support this blog. If you make a purchase through these links, I may earn a commission—at no cost to you. For more information read my disclosure policy.

There’s something about old-school Italian cookies that never goes out of style—and these braided lemon cookies are exactly that. Soft, lightly sweet, and finished with a delicate lemon glaze, they’re the kind of treat you’d find on every holiday tray growing up.

This recipe is all about simplicity. No complicated techniques, no fancy ingredients—just a tender dough, a hint of fresh lemon, and that classic glossy icing with sprinkles on top. My mom would even place a raw egg right in the center before baking—such a beautiful, traditional touch you still see around Easter. They’re perfect for Easter, Sunday gatherings, or honestly… just with your morning coffee.

What makes these special is the texture. Unlike crunchy cookies, these stay soft and almost cake-like, with a light crumb that melts in your mouth. The braid (or knot) shape gives them that traditional bakery look, but they’re incredibly easy to make at home.


Things to know about this Italian Braided Lemon Cookie recipe

These cookies stay soft and tender for days, which makes them perfect for baking ahead.

  • Room Temperature: Store in an airtight container for up to 3–4 days

  • Refrigerator: Not recommended—they can dry out faster

  • Freezer (Unglazed): Freeze up to 2 months, then thaw and glaze fresh

  • Freezer (Glazed): You can freeze them, but the glaze may lose its shine

  • Make Ahead Tip: Bake the cookies a day in advance and glaze the next day for the best texture and appearance

💛 Want More Italian Baking Recipes?

If you loved these soft Italian lemon cookies, here are a few more recipes from the blog you’ll want to try next:

These are all classic, bakery-style recipes that bring a little bit of Italy right into your kitchen 🇮🇹


Italian Braided Lemon Cookies (Soft & Glazed)

These soft Italian braided lemon cookies are light, fluffy, and topped with a sweet lemon glaze and sprinkles. A classic bakery-style recipe that’s easy to make and perfect for holidays or everyday baking.

  • 3 1/2 cups flour
  • 1 Tbsp. Baking powder
  • 1/2 tsp salt
  • 1 stick butter (room temperature)
  • 1 cup sugar
  • 3 large eggs
  • 1 Tbsp. lemon zest
  • 1/4 cup lemon juice
  • 2 Tsp vanilla extract
  • 1/3 cup milk
  • 2 cups powder sugar (for the glaze)
  • 2 -3 Tbsp. milk or lemon juice (for the glaze)
  • sprinkles (to decorate)
  1. 1. Prep

    Preheat your oven to 350°F and line baking sheets with parchment paper.

  2. 2. Mix the Dry Ingredients

    In a medium bowl, whisk together the flour, baking powder, and salt.

  3. 3. Cream Butter and Sugar

    In a large bowl, beat the butter and sugar until light and fluffy.

  4. 4. Add the Wet Ingredients

    Mix in the eggs one at a time. Add lemon zest, lemon juice, and vanilla extract.

  5. 5. Bring the Dough Together

    Gradually add the dry ingredients, alternating with the milk. Mix until a soft dough forms. It should be smooth and slightly tacky, not sticky.

  6. 6. Shape the Cookies

    Take small portions of dough and roll into ropes about 5–6 inches long. Twist into braids or tie into knots and place on the baking sheet.

  7. 7. Bake

    Bake for 12–15 minutes, until the bottoms are lightly golden while the tops remain pale.

  8. 8. Glaze and Finish

    Let cookies cool completely. Dip or drizzle with glaze, then top with sprinkles. Allow the glaze to set before serving.

Dessert
Italian
cookies, lemon Italian


Ciambelle (Unfilled Italian Donuts)

Ciambelle (Unfilled Italian Donuts)

In Italy, Ciambelle are the kind of simple pastry that never goes out of style. Long before elaborate glazes and over-the-top toppings, these golden ring donuts were made with basic pantry ingredients, lightly scented with lemon zest, fried until perfectly puffed, and rolled in sugar. Their name comes from the Italian word ciambella, meaning “ring,” and versions of these sweet breads have been part of Italian home baking for generations.

You’ll find them in neighborhood bakeries, at festivals, and on Sunday mornings alongside a strong espresso. They aren’t meant to be flashy — they’re meant to be comforting.

At our restaurant, we served them warm with espresso, just as they would in Italy. There’s something special about that pairing — the slight bitterness of the coffee against the soft, sweet dough. It’s simple, authentic, and unforgettable.

These Ciambelle are exactly that: traditional, unfussy, and rooted in real Italian baking.

DO NOT PUT IMAGES IN THIS TEXT BLOCK!

Things to know about these Ciambelle (Unfilled Italian Donuts)

  • Lemon zest is the signature Italian flavor — don’t skip it.

  • The dough should be soft and slightly tacky but not sticky.

  • Fry at 350°F for even cooking and that golden exterior.

  • These are best enjoyed fresh the same day.

  • You can bake them, but frying gives the classic texture and flavor.

Storage

  • Store at room temperature in an airtight container for up to 2 days.

  • Reheat briefly in the microwave (8–10 seconds) to soften.

  • They can be frozen (without the sugar coating) for up to 1 month. Thaw, warm slightly, then roll in fresh sugar before serving.

  • If you love traditional Italian baking, be sure to check out my other classic recipes and bring even more authentic flavors into your kitchen.

     Traditional Italian Esse cookies ( S cookies )

    Classic favorite Italian Tiramisu recipe a real pick you up dessert

    Or my personal favorite Pureed Apple and walnut bundt

    And if you make these Ciambelle, leave a comment and let me know — I love seeing your creations!


Ciambelle (Unfilled Italian Donuts)

  • Prep: 20 minutes

  • Rise: 1½–2 hours

  • Cook: 15 minutes

  • Servings: 10–12 donuts

Ingredients

Instructions

  1. 1️⃣ Activate the Yeast

    In a small bowl, combine warm milk, 1 tablespoon of the sugar, and yeast. Let sit 5–10 minutes until foamy.

    2️⃣ Make the Dough

    In a large bowl (or stand mixer):

    • Combine flour, remaining sugar, and salt.

    • Add eggs, vanilla, lemon zest, and yeast mixture.

    • Mix until combined.

    • Add softened butter and knead 8–10 minutes until smooth and elastic.

    The dough should be soft but not sticky.

    3️⃣ First Rise

    Place in a lightly oiled bowl, cover, and let rise 1–1½ hours until doubled.

    4️⃣ Shape the Rings

    • Turn dough onto a floured surface.

    • Roll to about ½-inch thickness.

    • Cut circles using a 3-inch cutter.

    • Cut a small hole in the center (or use your finger to stretch gently).

    • Place on parchment squares.

    Cover loosely and let rise again 30–45 minutes.

    5️⃣ Fry

     In a deep fry pan Heat oil to 350°F (175°C).
    Fry 1–2 at a time, about 1–2 minutes per side, until golden brown.

    Do not overcrowd.

    6️⃣ Coat

    While still warm, roll in granulated sugar.

  2. Second
  3. And so on


Traditional Italian S Cookies (Biscotti Esse)

Traditional Italian S Cookies (Biscotti Esse)

These classic Italian S cookies, known as Biscotti Esse, are an old-school staple found in Italian bakeries and home kitchens across Italy. Their simple S shape comes from the Italian word esse—the letter S—and dates back to a time when cookies were made with basic pantry ingredients and mixed by hand.

Simple, unfussy, and timeless, these cookies are crisp on the outside, tender inside, and meant to be enjoyed with espresso, coffee, or tucked onto a holiday cookie tray.

Things to know about this Traditional Italian S Cookies (Biscotti Esse) recipe

  • Esse cookies are traditionally pale; avoid overbaking so they stay tender inside.

  • Butter is rubbed into the flour first, creating a delicate, bakery-style crumb.

  • Dough should be soft and smooth, not sticky—dust hands lightly with flour if needed.

  • These cookies are lightly sweet and designed to be served with coffee or espresso.

  • Store in an airtight container at room temperature for up to 5 days.

  • Baked cookies freeze well for up to 2 months.

  • If you love old-school Italian baking, don’t miss my other classic recipes like Italian Amaretti Cookies recipe, Authentic Italian Tiramisu, Traditional Italian Almond Biscotti, and my collection of Italian Christmas cookies. Save this recipe, share it with a fellow cookie lover, and let me know in the comments if your Nonna made them this way too 🤍

Ingredients

Yields

Makes approximately 30–36 S cookies, depending on size.

3 cups (360 g) all‑purpose flour

2 teaspoons baking powder

1/4 teaspoon salt

1/2 cup (113 g) unsalted butter, cold and cubed

1 cup granulated sugar

2 large eggs, room temperature

1 Tbsp. vanilla extract

Zest  of 1 lemon

Instructions

  • Preheat oven to 350°F (175°C) and line two baking sheets with parchment paper.
  • In a large bowl, whisk together the flour, baking powder, and salt.
  • Add the cold butter and work it into the flour with your fingertips until the mixture is fine and crumbly.
  • Make a well in the center of the flour mixture.
  • Add the sugar, eggs, vanilla, and lemon zest into the well.
  • Using a fork, beat the eggs gently and begin pulling the flour in from the sides.
  • Once the dough starts to come together, use your hands to gently work it until smooth and soft. Do not overwork.
  • Transfer the dough to a piping bag fitted with a large plain tip, or shape by hand.
  • Pipe or form S‑shaped (esse) cookies onto the prepared baking sheets, spacing slightly apart.
  • Bake for 10–12 minutes, until set and lightly golden on the bottom. Tops should remain pale.
  • Cool on the baking sheet for 5 minutes, then transfer to a wire rack to cool completely.


Italian Wedding Cookies (Classic Butterball Style)

Italian Wedding Cookies (Classic Butterball Style)

These traditional Italian Wedding Cookies are the kind of cookie you’ll find piled high on platters at weddings, holidays, and Sunday family gatherings. Simple, buttery, and dusted generously with powdered sugar, they practically melt the moment they hit your tongue.

They’re not flashy cookies — and that’s exactly the point. Made with just a handful of pantry ingredients, these cookies rely on good butter, proper balance, and gentle handling. This is the recipe I come back to year after year when I want something timeless and unmistakably Italian.

Things to know about Italian Wedding Cookies (Classic Butterball Style)

  • These cookies should not brown — pale equals tender.

  • Chilling the dough prevents spreading.

  • Rolling twice in powdered sugar gives that signature snowy finish.


Storage

  • Store in an airtight container at room temperature for up to 1 week.

  • They also freeze beautifully (uncoated). Roll in powdered sugar after thawing.


Final Note

Italian wedding cookies prove that the simplest recipes are often the most beloved. No nuts, no fuss — just buttery, delicate cookies that feel like a bite of celebration every time.

If you love classic Italian cookies like these, be sure to explore more of my favorites. From Italian amaretti cookies to traditional almond cantucci cookies, you’ll find plenty of old-world treats perfect for holidays, celebrations, or everyday baking.

👉 Browse all my Italian cookie recipes here.

Italian Wedding Cookies (Classic Butterball Style)

Servings:
Makes about 36–40 cookies (1-tablespoon size)

Prep Time:
15 minutes
(+ 30–45 minutes chilling time)

Cook Time:
12–14 minutes per batch

Total Time:
About 1 hour (including chilling)

Ingredients

  • 2 sticks (1 cup) unsalted butter, softened

  • 1 cup powdered sugar, plus more for rolling after baking

  • 1 tablespoon vanilla extract

  • 2¼ to 2½ cups all-purpose flour

  • 1 cup finely chopped walnuts
  • Pinch of salt (optional, but recommended if using unsalted butter

Instructions

  1. Cream the butter and sugar
    In a large bowl, beat the softened butter with the powdered sugar until light, fluffy, and pale — about 3-4 minutes.

  2. Add vanilla
    Mix in the vanilla extract until fully incorporated.

  3. Incorporate the flour
    Gradually add the flour (starting with 2¼ cups) and salt, mixing just until a soft dough forms.

    1. The dough should be tender and not sticky.

    2. If it feels too soft, add flour 1 tablespoon at a time.

  4. Mix in the walnuts until well combined

Chill the dough
Cover and refrigerate for 30–45 minutes. This helps the cookies hold their shape.

  1. Shape the cookies
    Scoop about 1 tablespoon of dough and roll into small balls.

  2. Bake
    Place on a parchment-lined baking sheet and bake at 350°F (175°C) for 12–14 minutes.
    The cookies should stay pale with just a hint of color on the bottom — do not overbake.

  3. Finish with powdered sugar
    Let cookies cool slightly, then roll generously in powdered sugar.
    For a classic look, roll them again once fully cooled


Ravioli Dolci di Ceci (Italian Fried Chickpea Pastries)

Ravioli Dolci di Ceci (Italian Fried Chickpea Pastries)

There are some Italian recipes that were never written down because they never needed to be. These are one of them. Growing up, I didn’t know what these were called — I don’t think my family really did either. They were simply i dolci di Natale, the sweet fried pastries that appeared around the holidays, usually when the oil was already hot and the kitchen smelled like citrus, cocoa, and sugar.

Only later did I learn that many Italian families made some version of these: a simple pasta frolla dough, filled with a sweet chickpea and cocoa mixture, folded like little ravioli, and fried until golden. It’s pure cucina povera ingenuity — turning humble pantry ingredients into something rich, comforting, and surprisingly elegant.

If chickpeas in dessert sound strange, trust me: you don’t taste them. They create a creamy, almost chestnut-like base that carries chocolate and orange beautifully. These are crisp on the outside, soft in the center, and even better the next day re crisped

Things to know about Ravioli Dolci di Ceci (Italian Fried Chickpea Pastri

  • You should not taste the chickpeas — they act as a creamy base, similar to chestnuts.
  • If the filling feels loose, add 1 tablespoon ground almonds, crushed amaretti, or fine breadcrumbs.
  • These keep well for 2–3 days, lightly covered at room temperature.
  • They’re even better the next day once the flavors settle.
  • Why You’ll Love This Recipe

  • Simple pantry ingredients
  • Deeply traditional and nostalgic
  • Perfect for holidays and special occasions
  • A beautiful example of Italian cucina povera
  • A Note From My Kitchen

    This is one of those recipes that reminds me why I love Italian food so much. It’s not about fancy ingredients — it’s about memory, practicality, and making something special from what you already have. If your family made something similar, chances are it didn’t have a name either — and that’s exactly what makes it special.

    If you try these, I’d love to hear what your family called them — or if they just appeared on the table like magic.

  • If you love traditional Italian holiday sweets, be sure to explore more of my favorites:


Ravioli Dolci di Ceci (Italian Fried Chickpea Pastries)

Servings & Timing

  • Servings: about 20–24 pastries
  • Prep Time: 45 minutes
  • Chill Time: 30 minutes
  • Cook Time: 15 minutes

Ingredients

  • Pasta Frolla (Sweet Pastry Dough)

  • 2 ½ cups (315 g) all-purpose flour
  • ½ cup (100 g) granulated sugar
  • ½ cup (113 g) unsalted butter, cold and cubed
  • 1 large egg
  • Zest of 1 lemon or orange
  • Pinch of salt

½ teaspoon vanilla extract (optional)

Chickpea Filling

  • 1 ½ cups cooked chickpeas, well-drained
  • ½ cup (100 g) granulated sugar
  • ¼ cup (25 g) unsweetened cocoa powder
  • Zest of 1 orange
  • ½ teaspoon ground cinnamon
  • ½ teaspoon vanilla extract
  • 2–3 tablespoons milk or espresso, added gradually
  • Pinch of salt
  • For Frying & Finishing

  • Neutral oil (vegetable or sunflower)
  • Powdered sugar, for dusting

Instructions

1. Make the Pasta Frolla

In a large bowl, combine the flour, sugar, and salt. Add the cold butter and rub it in with your fingertips until the mixture resembles coarse crumbs.

Add the egg, citrus zest, and vanilla. Gently bring the dough together just until it forms. Do not overwork.

Form into a disk, wrap tightly, and refrigerate for at least 30 minutes.

2. Prepare the Chickpea Filling

Dry the chickpeas very well with a kitchen towel. This is key to avoiding a loose filling.

Place the chickpeas in a food processor and process until very smooth, scraping down the sides as needed.

Add the sugar, cocoa powder, orange zest, cinnamon, vanilla, salt, and 2 tablespoons of milk or espresso. Process until thick and creamy. Add the remaining tablespoon only if needed.

The filling should be thick and spoonable, not loose. Chill for 20–30 minutes if needed.

3. Roll and Fill

You can roll the dough by hand with a rolling pin or use a pasta machine, both of which are traditional.

Rolling pin method: Roll the chilled dough very thin on a lightly floured surface — almost like ravioli dough. You should be able to see a faint shadow of your hand through it.

Pasta machine method: Divide the dough into manageable pieces. Flatten slightly, then pass through the pasta machine starting at the widest setting. Fold and pass through once or twice, then continue rolling thinner until you reach about setting 5–6, or just thinner than fresh pasta sheets.

Cut the dough into rectangles or circles. Place about 1 teaspoon of filling in the center of each.

Lightly moisten the edges with water, fold over, and press firmly to seal. Crimp with fingers or a fork. Trim edges neatly.


4. Fry

Heat oil to 350°F (175°C).

Fry pastries in batches, turning once, until golden brown — about 1–2 minutes per side.

Transfer to paper towels to drain.

5. Finish

Dust generously with powdered sugar while still warm.


Angel Wing Cookies (Italian Fried Pastry)

Angel Wing Cookies (Italian Fried Pastry)

Angel wing cookies are one of those recipes that show up on Italian tables year after year, especially around Christmas and Easter. Light, crisp, and dusted generously with powdered sugar, they’re known by many names—chiacchiere, crostoli, frappe, bugie—depending on the region.

This version is made with a classic Italian pasta frolla–style dough, rolled paper-thin and fried until delicate and blistered. I like using my pasta machine to stretch the dough evenly, but a rolling pin works just as well—as long as you roll it extra thin. The thinner the dough, the lighter and crispier the cookies.

Things to know about this Angel Wing Cookies (Italian Fried Pastry)

  • These cookies rely on thin dough, not sweetness, for their signature light and crisp texture.
  • A pasta machine makes it easy to get the dough evenly thin, but a rolling pin works just as well if you take your time.
  • The cookies puff and blister quickly in the oil—this is exactly what you want.
  • They are best the day they’re made but keep well for several days in an airtight container.
  • Re-dust with powdered sugar just before serving for the prettiest finish.
  • Tips for Success

Roll thinner than you think: Thick dough will result in dense cookies. Thin dough gives you that light, shatteringly crisp texture.

Oil temperature matters: Too cool and the cookies absorb oil; too hot and they brown too quickly.

Storage & Freezing

Room Temperature: Store completely cooled angel wing cookies in an airtight container at room temperature for up to 5–7 days.

Do Not Refrigerate: Refrigeration introduces moisture and will soften the cookies.

Freezing Fried Cookies: These cookies are best enjoyed fresh and do not freeze well once fried, as they tend to lose their crisp texture after thawing.

  • Freezing the Dough: You can freeze the raw dough. Wrap it tightly in plastic wrap, then place in a freezer-safe bag for up to 2 months. Thaw overnight in the refrigerator, then bring to room temperature before rolling and frying.

If you try these angel wing cookies, I’d love to hear about it. Leave a comment below, rate the recipe, or tag me on Instagram so I can see your cookie tray. Be sure to explore the blog for more classic 10 Italian cookies you must make this  holiday , perfect for sharing with family and friends.

Angel Wing Cookies (Italian Fried Pastry)

Servings: About 6 dozen cookies
Prep Time: 30 minutes (plus 30 minutes resting)
Cook Time: 20–25 minutes

Ingredients

  • 3 cups all-purpose flour
  • 1/2  cup granulated sugar
  • 2 tablespoons unsalted butter, softened
  • 2 large eggs
  • 1/3 cup white wine or grappa
  • 1 teaspoon lemon zest
  • 1 teaspoon vanilla extract
  • 1 teaspoon baking powder
  • ¼ teaspoon salt
  • Vegetable or neutral oil, for frying
  • Powdered sugar, for dusting

Instructions

1. Make the Dough

In a large bowl, whisk together the flour, sugar, baking powder, and salt. Add the butter and rub it into the flour mixture with your fingertips until it resembles coarse crumbs.

Add the eggs, lemon zest, and vanilla. Mix until a dough forms, then knead briefly until smooth and supple, about 3–4 minutes. The dough should be firm but not sticky. If it feels dry, add a few drops of water; if sticky, dust lightly with flour.

Form into a disk, wrap tightly, and let rest at room temperature for 30 minutes.


2. Roll the Dough

Divide the dough into 4 pieces, keeping the portions you’re not working with covered.

Using a pasta machine:

  • Flatten one piece slightly and run it through the widest setting.
  • Continue passing it through the machine, reducing the thickness one notch at a time, until you reach setting 6 or 7 (very thin, almost translucent).

Using a rolling pin:

  • Roll the dough out on a lightly floured surface until it is paper-thin. You should almost be able to see through it.

    3. Cut the Cookies

    Using a fluted pastry wheel, cut the dough into rectangles or diamond shapes, about 2 x 4 inches. Cut a small slit in the center of each piece if desired (traditional but optional).

    Place the cut dough on a lightly floured surface and repeat with remaining dough.

    4. Fry

    Heat about 2 inches of oil in a deep skillet or Dutch oven to 350°F (175°C).

    Fry the cookies in batches, turning once, until puffed and lightly golden, about 30–45 seconds per side. Do not overcrowd the pan.

    Transfer to a paper towel–lined tray to drain.


    5. Finish

    Once completely cool, dust generously with powdered sugar.


Buccellato Siciliano – Traditional Christmas Fig & Nut Pastry Ring

Buccellato Siciliano – Traditional Christmas Fig & Nut Pastry Ring

Even though I’m from Northern Italy, I’ve grown to love and appreciate the beautiful traditions of the South—especially thanks to my Sicilian sister-in-law. Every Christmas, she brings a gorgeous Buccellato Siciliano, a stunning fig and nut pastry ring that fills the whole house with the aromas of honey, citrus, and warm spices. Watching her make it over the years inspired me to create my own version, honoring her family’s recipe while adding a touch of my northern Italian style. This festive pastry is rustic, impressive, and truly one of the most special holiday desserts to come out of Sicily.


Things to know about Buccellato Siciliano – Traditional Christmas Fig & Nut Pastry Ring

Buccellato is truly a labor of love—from soaking the figs to chopping the nuts and carefully mixing the sweet, spiced filling. Rolling out the dough, spreading the filling evenly, and shaping it into the signature ring takes patience, but every step adds to its incredible flavor and charm. This isn’t a recipe for rushing—it’s a holiday tradition, meant to be savored, shared, and enjoyed with family.

How to Cut for the Classic Look:
Once the ring is shaped and brushed with egg wash, use a sharp paring knife to create the traditional open slits. Start with long diagonal cuts evenly spaced around the ring, then add shorter slashes in between for a feathered effect. These cuts let the filling peek through during baking and give the Buccellato its iconic rustic, bakery-style appearance. Don’t worry about perfection—the charm is in its handmade look.

Making Buccellato is more than just baking; it’s a way to bring a little Sicilian holiday magic into your home.

Ready to bring a taste of Sicily to your holiday table? If you make this Buccellato Siciliano, be sure to leave a comment and rate the recipe — I love hearing how my readers bring these Italian traditions to life!
Share your beautiful pastry with me on Instagram by tagging @lorianasheacooks and don’t forget to check out my other festive Italian Christmas recipes here:


Buccellato Siciliano Christmas Fig & Nut Pastry Ring

Serves: 10–12
Difficulty: Medium
Time: About 2 hours (including chilling)

Ingredients

PASTRY DOUGH

  • 3 cups all-purpose flour

  • ½ cup sugar

  • 1 cup cold unsalted butter, cubed

  • 2 large eggs

  • 1 teaspoon vanilla extract

  • Zest of 1 orange

  • Pinch of salt

  • 1–2 tablespoons cold water (only if needed)

Make the dough:

  1. Mix flour + sugar + salt + orange zest.

  2. Cut in the cold butter until crumbly.

  3. Add eggs + vanilla.

  4. Knead just until smooth.

Wrap and chill 30 minutes.

FIG & NUT FILLING

  • 2 cups dried figs, chopped (soaked in Marsala 20–30 min, drained)

  • ¾ cup raisins

  • 1 cup walnuts, chopped

  • 1 cup pistachios, chopped

  • ½ cup almonds, chopped

  • ½ cup candied orange peel (cedro), chopped

  • ½ cup honey

  • ⅓ cup sugar

  • Zest of 1 orange

  • 1 teaspoon cinnamon

  • ½ teaspoon clove

  • 2–4 tablespoons Marsala or the soaking liquid (optional, only if the mixture is too thick)

Make the filling:

  1. Combine the soaked figs, raisins, nuts, candied orange peel.

  2. Add honey, sugar, cinnamon, clove, and orange zest.

  3. Pulse a few times in a food processor OR mix by hand for a chunkier filling.

  4. Add a spoonful of the Marsala soaking liquid only if you need to loosen it.

Filling should be thick, sticky, and spreadable — not wet.

ASSEMBLE

  1. Roll chilled dough into a large rectangle (about ¼-inch thick).

  2. Spread the filling evenly, leaving a border.

  3. Roll the dough up like a jelly roll.

  4. Form into a ring and pinch ends to seal.

  5. Make small decorative cuts on top (the traditional “Sicilian feathering”).

  6. Brush with egg wash.


BAKE

  • 350°F (175°C)

  • 35–45 minutes, until deeply golden.

  • DECORATE (OPTIONAL)

  • Warm apricot jam + a splash of water and brush over the top

  • Add candied fruit or pistachios

  • Dust with powdered sugar


10 Italian Christmas Cookies You Must Bake

10 Italian Christmas Cookies You Must Bake

Celebrate the season with these classic Italian cookies that bring warmth, tradition, and a touch of sweetness to your table.

Christmas in Italy isn’t complete without cookies — each bite carries memories, traditions, and a little magic. Over the years, I’ve shared many of my favorite Italian cookies on the blog, and today I’m rounding up 10 must-bake Italian Christmas cookies that are perfect for gifting, freezing, or enjoying with a cup of espresso.

 1. Italian Amaretti cookies 

Crispy on the outside, soft and chewy inside, these almond-flavored cookies are a classic. Perfect with coffee or a glass of Vin Santo.

2. Italian lemon knot cookies

These soft and zesty Italian lemon knot cookies are one of my favorites. Bright with fresh lemon, dipped in a sweet lemon glaze and full of delicious flavor.


3. Pizzicati Pinch Cookies

Jam-filled, tender cookies with a perfect pinch of sweetness. They’re fun to make and look adorable on a holiday platter.


4. Chocolate Walnut Holiday Cookies

Rich, spiced, and studded with walnuts, these cookies are deeply chocolatey and festive — a crowd favorite.


5. lemon Ricotta Cookies

Soft, lightly sweet, and aromatic with lemon  zest, these cookies are perfect for a winter morning treat or gift tins.


6. Tuscan Bullseye Cookies

Named for their beautiful round design with jam in the center, these cookies are as charming as they are delicious.


7. Italian Almond cantucci Cookies

A simple, classic cookie that’s nutty, slightly chewy, and perfect for dipping into coffee or dessert wine.

8. Italian Pizzelle cookies

No Italian Holiday is without  these crisp, thin, buttery Italian  Pizzelle Cookies. Delicate, thin, wafer like this recognizable Italian cookies aren’t baked in the oven, they get their shape by pressing the  batter between the hot Pizzella Iron 


9. Italian rainbow Christmas cookies

Italian rainbow Christmas cookies , also known as tricolor cookies, are a delicious festive cookie that blends flavor, color and tradition. These iconic treats, often associated with Italian – American bakeries, are not actually cookies in the traditional sense but rather delicate almond sponge cakes layered with sweet jam.

10.  Gluten- free  Italian walnut cookies

I didn’t think gluten free and Italian cookies could be in the same sentence.  Not only are these Italian walnut cookies gluten free, there is no flour or butter in these nutty cookies. Recipe

Tips for a Successful Italian Christmas Cookie Season

  • Bake in batches and freeze: Many Italian cookies freeze beautifully for up to 3 months.

  • Mix flavors and textures: Include chewy, crisp, nutty, and chocolatey cookies for variety.

  • Gift with love: Wrap cookies in parchment and tins for a beautiful homemade present.

  • Start early: December flies by — freezing cookies allows you to enjoy the month without stress.


Italian Lemon knot cookies

Italian Lemon knot cookies

These soft and zesty Italian lemon knot cookies are one of my favorites. Bright with fresh lemon, dipped in a sweet lemon glaze and full of delicious flavor. I always put some away for my self before sharing with others, these tend to disappear quickly.

I make them around this time of year,  especially because we have a lemon tree that’s so prolific in the spring, I’m always looking for ways to use the harvest. They have the most tender, cake-like texture that just melts in your mouth- prefect with a cup of coffee or espresso.

 Things to know about this Italian lemon knot cookie recipe

These Italian lemon knot cookies are best enjoyed fresh, but they store beautifully too. Once the glaze has fully set, keep them in an airtight container at room temperature up to 4-5 days. If your stacking them, place parchment paper between the layers to prevent sticking. Their soft, cake-like texture holds up well without drying out.

This cookies are also freezer- friendly! You can freeze the unglazed cookies for up to 2-3 months- just let them cool completely and store in a sealed container or freezer bag. When you’re ready to serve , thaw at room temp. and glaze fresh for that bright, just baked taste.

You can also freeze them fully prepared and glazed- just let the glaze set completely first, then layer them between parchment paper in an airtight freezer container. Thaw at room temperature when ready to enjoy, and they’ll taste just as fresh.

If you love cookies as much as I do Check out my lemon ricotta cookies or my Italian gluten free walnut cookies or my personal favorite Italian almond cantucci

Ingredients

  • 3 1/2 cups flour
  • 1 Tbsp. baking powder
  • 1 cup sugar
  • 3 eggs
  • 1/2 stick room temperature butter
  • 2 teaspoon vanilla extract
  • Juice and zest from 2 lemons
  • 1/3 cup milk
  • FOR THE LEMON GLAZE
  • 2 cups powder sugar
  • 2-3 Tbsp. lemon juice

Instructions

  1.  Line baking sheets with parchment paper
  2. In a bowl wisk together the flour , sugar, and baking powder set aside
  3. In a separate bowl with a hand mixture beat the sugar with the butter  until light. Add the eggs one at a time , beating well after each one. Stir in the vanilla, milk,  lemon zest and juice.
  4. Gradually mix in the flour, then move to a lightly floured smooth surface and knead the dough until smooth. Cover and let rest in the fridge for at least one hour or overnight.
  5. Then preheat your oven to 350 degrees.
  6. Take a heaping  tablespoon of dough , roll it into a rope about 6 inches long, and tie a loose knot. Place on the baking sheets 1 inch apart.
  7. Bake for 10-12 minutes or until lightly golden on the bottom . The cookies should stay pale on top. Let cool.
  8. Make the glaze. in a bowl mix the powder sugar with 2-3 tablespoons of lemon juice until smooth. Dip the cooled cookies in the glaze top with sprinkles if desired. ENJOY!!