Creamy Italian Street Corn (No Mayo!)

Creamy Italian Street Corn (No Mayo!)

This post may contain affiliate links, that help support this blog. If you make a purchase through these links, I may earn a commission—at no cost to you. For more information read my disclosure policy.

If you love Mexican street corn, this creamy Italian Street Corn might just become your new summer favorite. Instead of mayo, we swap in luscious mascarpone cheese for a velvety base, then finish it with bright lemon zest, a shower of Parmigiano-Reggiano, and fresh herbs. It’s grilled until charred  and bursting with bold, savory flavor — all with a Mediterranean flair. Perfect as a BBQ side or light summer bite, this no-mayo corn is a simple Italian twist  on a classic.

While corn (mais) isn’t as common in traditional Italian cuisine as tomatoes or pasta, it does have deep regional roots — especially in Northern Italy, where it’s ground into polenta or grilled whole in the summer months. This version skips the mayo and takes inspiration from those flavors, using creamy mascarpone, bright lemon zest, aged Parmigiano, and fresh herbs. Grilled to perfection and bursting with savory flavor, it’s a Mediterranean twist on a beloved street food classic.

Things to know about this Creamy Italian Street Corn (No Mayo!)

  • No Mayo Needed: Unlike traditional elote, this version uses mascarpone cheese for a rich, silky texture that blends beautifully with lemon, Parmigiano, and herbs.

  • Use Peak-Season Corn: Fresh summer corn on the cob is ideal — sweet, juicy, and perfect for grilling.

  • Grill or Roast: You can cook the corn on an outdoor grill, grill pan, or even under a broiler for a bit of char.

  • Make it Your Own: Add crispy pancetta, a sprinkle of Calabrian chili flakes, or a drizzle of aged balsamic for extra depth.

  • Pairs Well With: Serve alongside grilled meats, pasta salads, or as part of an Italian-style cookout spread.

  • Ready to Upgrade Your Summer Sides?

    If you loved this creamy Italian street corn, don’t stop here — check out my other fresh and easy summer side dishes packed with seasonal Italian flavor. From zucchini rollatini to tomato ricotta tart, there’s something delicious for every warm-weather table. ENJOY!!!!


Creamy Italian Street Corn (No Mayo!)

  • 4 ears of corn (husked)
  • 2 tablespoons olive oil or melted butter
  • ½ mascarpone or cream cheese
  • 1/3 cup grated Parmigiano Reggiano or Pecorino Romano
  • Zest of 1 lemon
  • 1 garlic clove (finely grated or minced)
  • 1 tablespoon chopped fresh basil or parsley
  • Optional: pinch of chili flakes or Calabrian chili paste for heat
  • Salt and pepper to taste
  1. Grill the Corn: Brush corn with olive oil or melted butter. Grill over medium-high heat, turning occasionally, until slightly charred (about 8–10 minutes).
  2. Make the Topping: In a small bowl, mix mayo, garlic, lemon zest, cheese, herbs, salt, and pepper.
  3. Dress the Corn: While the corn is hot, brush or spoon the mayo mixture over each ear. Sprinkle with extra cheese and herbs if desired.
  4. Finish: Serve with a squeeze of lemon and a sprinkle of chili flakes for extra zing.



Tomato Ricotta Puff Pastry Tart

Tomato ricotta puff pastry tart

This post may contain affiliate links, that help support this blog. If you make a purchase through these links, I may earn a commission—at no cost to you. For more information read my disclosure policy.

This Tomato Ricotta puff pastry tart is everything you want in a summer recipe: simple, stunning, and bursting with fresh flavor. Golden, flaky pastry is filled with a creamy ricotta-Parmesan mixture, then topped with juicy, sun-ripened tomatoes and fresh herbs. It’s light yet satisfying and perfect for brunch, lunch, or an easy dinner on the patio.

By prebaking the puff pastry and salting the tomatoes beforehand, you avoid soggy bottoms and ensure a crisp, bakery-style tart every time. The seasoned ricotta brings garlicky, lemony brightness, and the Parmesan adds a rich, salty note that perfectly complements the tomatoes.

Things to know about this Tomato Ricotta Puff Pastry tart

  1. Pre-bake the Puff Pastry for Crispiness
    Prick the puff pastry with a fork and prebake it before adding toppings. This step keeps the base flaky and prevents sogginess from the ricotta or tomato juices.

2. Season the Ricotta for Flavor
The ricotta is seasoned with grated Parmesan, salt, and pepper for extra depth. You can also add fresh herbs like basil or thyme if you like.

3. Salt the Tomatoes
Sprinkle tomato slices with a bit of salt and let them sit briefly before layering. This helps release excess water so the tart doesn’t get watery.

4. Use a Sheet Pan or Quarter Sheet Pan
A quarter sheet pan (9×13-inch) is ideal for this tart, but any similar-sized baking sheet or parchment-lined pan works.

5. Serve Warm or Room Temperature
It’s great fresh out of the oven or cooled slightly—perfect for brunch, lunch, or a light dinner with a salad.

6. Customize Freely
Top with fresh basil, drizzle with olive oil, or add a pinch of red pepper flakes for a kick. Want more protein? Add crumbled sausage or prosciutto before baking.

Ready to Bake This Gorgeous Tart?
Whip up this easy, elegant Tomato Ricotta Puff Pastry Tart tonight—perfect for summer gatherings or a cozy dinner at home. Save the recipe, share it with a friend, and let me know how yours turns out in the comments below! And if you love puff pastry tarts as much as we do here is another one to try asparagus prosciutto ricotta tart. ENJOY!!!!

Tomato ricotta puff pastry tart

  • 1 sheet puff pastry (thawed)
  • 1 cup whole milk ricotta
  • ⅓ cup freshly grated Parmesan cheese
  • 1 garlic clove (finely grated)
  • Zest of ½ lemon
  • 1 tablespoon chopped fresh basil or parsley
  • Salt and freshly ground black pepper
  • 2 ripe tomatoes (heirloom, beefsteak, or plum, sliced)
  • Olive oil (for drizzling)
  • Fresh basil leaves (for garnish)
  • Optional: flaky sea salt or crushed red pepper flakes
  1. For this tart, use a sheet of store-bought puff pastry (typically about 9×13 inches) and fit it onto a parchment-lined quarter sheet pan or baking sheet of similar size. If your pastry is slightly smaller, you can gently roll it out to fit the pan without making it too thin

    Preheat oven to 400°F (200°C). Line a quarter sheet pan or rimmed baking sheet (about 9×13 inches) with parchment paper.

  2. Slice the tomatoes, place them on paper towels, and sprinkle lightly with salt. Let sit for 10–15 minutes to draw out excess moisture. Gently pat dry.

  3. Roll out the puff pastry slightly on a floured surface, then transfer to the prepared pan. Score a 1-inch border around the edge (without cutting all the way through), and prick the center all over with a fork.

  4. Prebake the pastry for 10–12 minutes, or until lightly puffed and just golden. If it puffs too much, gently press the center down with the back of a spoon.

  5. Mix the ricotta filling: In a bowl, combine ricotta, Parmesan, garlic, lemon zest, chopped herbs, salt, and pepper.

  6. Spread the ricotta mixture evenly over the prebaked pastry, staying within the border. Top with the tomato slices in a single layer.

  7. Drizzle with olive oil and season with more black pepper.

  8. Return to the oven and bake for another 10–12 minutes, until the edges are deep golden and the tomatoes are just softened.

  9. Cool slightly, garnish with fresh basil, and slice to serve warm or at room temperature.


Italian olive oil dip and marinade

Italian olive oil dip and marinade

This post may contain affiliate links, that help support this blog. If you make a purchase through these links, I may earn a commission—at no cost to you. For more information read my disclosure policy.

In our Italian restaurants, we always placed a small bowl of olive oil on the table—simple, unassuming, and always appreciated. It was usually just olive oil, and balsamic vinegar with a touch of garlic or dried herbs. Nothing fancy, but it brought warmth and welcome to the table.

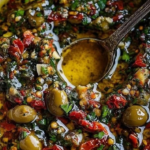
This recipe is a love letter to that memory—with a little more flair. It’s an elevated Italian-style dipping oil made with briny green olives, sweet sun-dried tomatoes, fresh parsley, lemon zest, and plenty of garlic. It’s bold, herby, a little spicy, and totally addictive.

And just like many good Italian recipes, it’s versatile. It works beautifully as a marinade for chicken, shrimp, or vegetables—or spooned over grilled bread or roasted potatoes.

Things to know about this Italian olive oil dip and marinade recipe

1. It’s based on our old restaurant classic.
We used to serve a much simpler version—just olive oil with garlic and dried herbs. This version is a flavorful upgrade that still feels nostalgic and authentic.

2. It does double duty.
This isn’t just for dipping bread! It works beautifully as a marinade for chicken, shrimp, fish, or roasted vegetables. You can even drizzle it over grilled meats, pasta, or use it as a base for bruschetta.

3. It gets better as it sits.
The longer it rests, the more the garlic, olives, and herbs infuse into the oil. Make it a few hours—or even a day—ahead for the best flavor.

4. Use good-quality olive oil.
Because olive oil is the base, the flavor really matters here. Use a bold, peppery extra virgin olive oil for the most authentic Italian taste.

5. Customize it to your taste.
Prefer black olives? Use them! Like more heat? Add extra chili flakes. Don’t have fresh basil? Skip it or swap in thyme. The recipe is flexible and forgiving.

6. It stores well.
You can keep it in the fridge for up to a week. Just be sure to bring it to room temperature before serving—the olive oil will solidify when chilled.

7. It adds instant Italian flavor.
This is one of those “secret weapon” recipes to keep in your fridge. A spoonful can instantly transform roasted veggies, grilled proteins, or even a plain bowl of pasta.


Italian olive oil dip and marinade

  • 2 cups extra virgin olive oil
  • ⅓ cup balsamic vinegar
  • 1 cup total of mixed green olives and kalamata olives, pitted and roughly chopped ( )
  • ½ cup chopped sundried tomatoes in oil
  • 2 gloves finely minced garlic
  • 1 teaspoon red pepper flakes (adjust to taste)
  • 1 teaspoon dried oregano
  • 1 Tbsp. each chopped fresh Italian parsley and basil
  1. Combine all ingredients in a bowl and stir to combine.
  2. Let it sit for at least 15 minutes to allow the flavors to infuse.
  3. Taste and adjust the seasoning as needed.
  4. Serve at room temperature. Enjoy!!!


Crispy Fried Zucchini Flowers (Non-Stuffed)

Crispy Fried Zucchini Flowers (Non-Stuffed)

This post may contain affiliate links, that help support this blog. If you make a purchase through these links, I may earn a commission—at no cost to you. For more information read my disclosure policy.

I had fried zucchini flowers in Rome once… and honestly, the batter ruined it—way too thick, heavy, and greasy. It completely masked the delicate flavor of the flowers. But when they’re done right? They’re light, crisp, and absolutely dreamy. This version uses a simple tempura-style batter that lets the zucchini blossoms shine—no stuffing needed, just a quick dip and fry for the perfect summer bite.

Things to know about this Crispy Fried Zucchini Flowers (Non-Stuffed) recipe

Zucchini flowers are delicate and seasonal, usually blooming in late spring through summer. If you don’t grow zucchini yourself, check your local farmers market—they often have them fresh in the mornings. Some specialty grocery stores or Italian markets may carry them, but they go fast, so grab them when you see them! Make sure the blossoms look fresh and bright, not wilted or slimy. And remember: the fresher they are, the better they’ll fry up!

How to clean zucchini flowers:
Zucchini flowers are delicate, so handle them gently. Start by giving them a light rinse under cool water to remove any dirt or tiny insects. Shake off excess water and pat dry carefully with a paper towel. Open each blossom and pinch off the yellow stamen inside—it can be bitter. If the flowers have long stems, leave a bit on; they make perfect little handles for dipping and frying!

Craving more easy Italian summer bites? Try my other favorite appetizers like baked tomatoes oreganata, zucchini alla scapece, and  bruschetta grilled chicken tenders. Head to the blog for the full collection—perfect for entertaining or snacking al fresco! 

Crispy Fried Zucchini Flowers (Non-Stuffed

  • 10 fresh zucchini flowers (stamens removed)
  • ¾ cup 90g all-purpose flour (or 00 flour for extra lightness)
  • ½ cup 120ml club soda or sparkling water, ice cold
  • ½ cup grated parmesan cheese
  • 1 tsp salt
  • 4 cups olive oil for frying
  • Optional: flakey salt or grated Parmigiano for serving
  1. Prep the flowers:

    Gently rinse zucchini flowers and pat dry with paper towels.

    Carefully remove the stamens (inside the flower) if not already done.

    Keep the stems on if possible — they make great little handles for frying and eating.

  2. Make the batter:

    In a bowl, whisk together the flour and salt.

    Add the ice-cold sparkling water gradually and whisk just until smooth. The batter should be slightly runny — like heavy cream. Don’t overmix (a few small lumps are fine).

  3. Heat the oil:

    Heat about 1–2 inches of oil in a skillet or small saucepan to 350°F (175°C).

  4. Fry:

    Dip each flower into the batter, let excess drip off, and carefully lower into hot oil.

    Fry 2–3 at a time until light golden, about 1–2 minutes per side.

    Transfer to a paper towel-lined plate to drain.

  5. Serve:

    Sprinkle with a little flakey salt or freshly grated Parmesan while still warm. ENJOY!!!


Italian Marinated Fried Zucchini (Zucchini Alla Scapece)

Italian Marinated Fried Zucchini (Zucchini Alla Scapece)

This post may contain affiliate links, that help support this blog. If you make a purchase through these links, I may earn a commission—at no cost to you. For more information read my disclosure policy.

Thinly sliced zucchini, fried until golden, then marinated with vinegar, garlic, and mint—this Southern Italian classic is a simple and flavorful way to enjoy summer zucchini.

If you grew up  in an Italian household  or spent any time in a Southern Italian kitchen during the summer, chances are you’ve had Zucchine alla Scapece. This classic dish is just pan-fried zucchini, marinated in vinegar, garlic, and fresh mint—but don’t let the simplicity fool you. It’s full of bold flavor and the kind of recipe that tastes even better the next day. We always made this when the garden was overflowing with zucchini, and it was gone just as fast. Serve it as an antipasto, a side, or tuck it into a sandwich—this one’s a summer staple.

Things to know about this Italian marinated Fried Zucchini (zucchini alla scapece)

Zucchine alla Scapece is a  dish in Southern Italy, especially in the Campania region where Naples is located. The name “scapece” is thought to come from the Spanish word escabeche, which refers to marinating something in vinegar. It’s a technique that was likely introduced during Spanish rule, but it became something uniquely Italian over time—simple, rustic, and full of Mediterranean flavor.

This recipe is traditionally made with summer zucchini, when they’re in abundance and at their peak. The zucchini are sliced and fried until beautifully golden and slightly crisp on the edges, then marinated with thin slices of garlic and fresh mint before getting a generous splash of vinegar. As the dish marinates, all the flavors meld together—the zucchini soaks up the tangy vinegar and the aromatic garlic and mint, becoming even more flavorful by the hour.

Zucchine alla Scapece is very  versatile. Serve it as a cold antipasto, a side to grilled meats or fish, or even tucked into a crusty sandwich. It’s also naturally vegan and gluten-free, making it a great option for gatherings. The longer it sits, the better it tastes—so don’t hesitate to make it a day in advance.

Craving More Simple Italian Sides?

If you loved this classic Zucchine alla Scapece, be sure to check out more of my easy Italian side dishes—perfect for summer gatherings, family dinners, or anytime you want a taste of tradition. Roasted parmesan broccoli side dish or one of my personal favorites Italian – style sauteed Swiss chard


Italian Marinated Fried Zucchini (Zucchini Alla Scapece)

  • 3 medium zucchini (thinly sliced into rounds)
  • Extra virgin olive oil (for frying)
  • 2-3 garlic cloves (thinly sliced)
  • ¼ cup white wine vinegar (or red wine vinegar)
  • A handful of fresh mint leaves (torn)
  • Sea salt (to taste)
  1. Slice the zucchini: Cut the zucchini into thin rounds, about ¼ inch thick. Lightly salt and let them sit for 10–15 minutes to release excess moisture. Pat dry with paper towels.
  2. Fry: Heat a generous amount of olive oil in a large pan over medium-high heat. Fry the zucchini in batches until golden on both sides. Drain on paper towels.
  3. Marinate: In a shallow dish, layer the fried zucchini with slices of garlic and mint. Drizzle with vinegar and a touch more olive oil. Repeat until all the zucchini is used.
  4. Rest: Let it marinate for at least 2 hours, or overnight in the fridge for deeper flavor. Serve chilled or at room temperature


Easy Summer caprese tomato salad

Easy Summer caprese tomato salad

This post may contain affiliate links, that help support this blog. If you make a purchase through these links, I may earn a commission—at no cost to you. For more information read my disclosure policy.

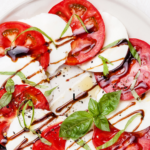
This easy summer caprese tomato salad is fresh, vibrant, and effortlessly delicious. Whether served as a light appetizer or an easy side dish, it’s the perfect companion to all your favorite warm-weather meals.

Caprese salad is the classic no-cook recipe—ideal for hot days when you’d rather not turn on the stove. It highlights three simple, high-quality ingredients: ripe, juicy tomatoes, creamy fresh mozzarella, and fragrant basil leaves. With minimal prep and bold, bright flavor, it’s a beautiful way to celebrate the season’s best produce.

For the dressing, you can keep it traditional with a drizzle of extra virgin olive oil and a splash of red wine vinegar, or take it up a notch with a luscious balsamic reduction for added sweetness and complexity.

Things to know about this easy Summer caprese tomato salad recipe

Fresh is Best: The key to an unforgettable Caprese salad is using the freshest, ripest tomatoes and creamy mozzarella. Summer tomatoes at their peak flavor make all the difference.

Simple Ingredients, Big Flavor: With just a handful of ingredients—ripe tomatoes, fresh mozzarella, basil, olive oil, and balsamic vinegar—this salad shines with pure, vibrant flavors.

Quick and Easy: This recipe comes together in minutes, making it perfect for a light lunch, picnic, or a quick side dish for your summer dinners.

Customizable: Feel free to switch up the basil for fresh arugula or add a sprinkle of sea salt or cracked black pepper to suit your taste.

Perfect for Entertaining: Its colorful presentation and fresh taste make it an elegant starter or side that impresses guests effortlessly.

Make It Ahead: While best enjoyed fresh, you can prepare it an hour ahead and keep it chilled—just add the basil and dressing right before serving to keep everything bright and fresh.

If you are looking for more easy summer salad recipes try my Pesto tortellini pasta salad. If you make these recipes please leave me a comment I love hearing from you. It’s my favorite part!!!

Easy Summer Caprese tomato Salad

  • 2-3 medium heirloom or ripe red tomatoes
  • 12 slices fresh mozzarella
  • 10–12 fresh basil leaves
  • 1 cup balsamic vinegar
  • 1 tablespoon honey
  • Salt and freshly ground black pepper (to taste)
  1. Slice the tomatoes and mozzarella into 1/4-inch thick rounds.
  2. On a serving platter, layer the tomato slices, mozzarella slices, and basil leaves in an alternating pattern, slightly overlapping them for a beautiful presentation.
  3. In a small saucepan, combine the balsamic vinegar and honey. Simmer over low heat for 5–7 minutes, stirring occasionally, until the mixture has reduced and thickened into a syrup-like glaze. Let it cool slightly.
  4. Lightly season the salad with salt and freshly ground black pepper. Drizzle the balsamic glaze over the top just before serving.


Buffalo Air fried chicken Wings

Buffalo Air Fried chicken Wings

This post may contain affiliate links, that help support this blog. If you make a purchase through these links, I may earn a commission—at no cost to you. For more information read my disclosure policy.

This Buffalo air fried  wing recipe is prefect when your craving chicken wings but want healthy too!!

We’ve been on a chicken wing kick lately. It all started on my wedding anniversary.  When our conversion turned  to the first night we met at the Anchor Bar in Buffalo  New York , where the famous Buffalo chicken wing originated.

And in our first hole in the wall eatery the lines were out the door for  the copycat version of the original Anchor Bar chicken wing.

No wonder Buffalo chicken wings have a special place  in my heart and kitchen. It’s an extra bonus that  chicken wings are a family favorite.

Even with my love for the original deep fried Buffalo Chicken wings, my direction at this age is to take the classics and make them healthier if possible. This Buffalo chicken wing recipe was an easy one to make a little heathier  using my air fry

What I used for these Buffalo air fried chicken wings

The original Anchor bar recipe for Buffalo chicken wings calls for deep frying the wings. You can use the deep frying method if it fits your lifestyle and taste. If your going the healthier route then air fried is the way to go.

The most important ingredient in the original Buffalo chicken wing recipe and in this air fried version is the Frank’s Hot sauce.

I used both sections of the  chicken wing cutting off the tip. Feel free to use the whole wing  without cutting them if that’s your preference.

Please watch the video and please don’t forget to leave  me a comment here and tag me on Instagram with your creations. I love hearing from you it’s my favorite part!!!

Buffalo Air Fried chicken Wings

  • 2 lbs. chicken wing sections
  • 1 stick of butter
  • 1/2 cup Franks hot sauce
  • 2 Tbs. each ground garlic (onion powder, chili powder and Italian seasoning)
  • 2 Tbsp. baking powder
  • Salt and pepper to taste
  1. Wash the chicken wings then pat dry let sit on a cookie sheet in the refrigerator for at a least an hour.

  2. Mix the dry ingredients together
  3. Use half of the dry ingredients for the chicken wing dry rub add the baking powder to this half. Reserve the remaining spices for the hot sauce
  4. Cover the chicken wings and set in refrigerator again for at least an hour
  5. Set air fryer to 400 or oven temperature
  6. Meanwhile melt the butter add the hot sauce and remaining dry rub.
  7. Air fry or bake the chicken wings for 15 minutes
  8. Toss in Buffalo sauce while hot


Quick Italian Bread Salad (Panzanella)

Quick Italian Bread Salad (Panzanella)

This post may contain affiliate links, that help support this blog. If you make a purchase through these links, I may earn a commission—at no cost to you. For more information read my disclosure policy.

This classic Tuscan  quick Italian bread salad ( panzanella) is a simple mix of ripe tomatoes, cucumbers, fresh mozzarella, crunchy croutons and a simple tangy vinaigrette- but don’t let the simplicity fool you. This rustic summer salad is deliciousness in every bite, proving that simply ingredients like  tomatoes and bread can be anything but ordinary. And it’s one of my favorite things to make with tomatoes when they are in season.

Things to know about this Quick Italian Bread Salad (Panzanella) recipe

This easy Italian bread salad is the perfect way to use up day-old bread. Known as Panzanella, this rustic Tuscan salad turns simple ingredients—like crusty bread, ripe tomatoes, fresh cucumbers, red onion, and basil—into a bright and refreshing summer meal. It’s a no-cook, quick recipe that’s ideal for warm days when you want something light but satisfying.

Panzanella comes together fast with pantry staples and garden-fresh vegetables. The bread is lightly toasted in the oven for texture, then tossed with juicy tomatoes and a zesty red wine vinaigrette that soaks into every bite. The result? A flavor-packed salad that’s hearty enough to serve on its own or alongside grilled meats, seafood, or a bowl of chilled soup.

This quick Italian salad is perfect for meal prep and outdoor dining. It holds up well at room temperature, making it a great choice for picnics, potlucks, or summer barbecues. You can customize it with extras like olives, roasted peppers, or mozzarella, making it endlessly adaptable. Whether you’re looking for a quick weeknight side or a simple vegetarian main, this Italian bread salad checks all the boxes.

Quick Italian Bread Salad (Panzanella)

  • 3 cups day-old crusty Italian bread, cut into 1-inch cubes
  • 2 tablespoons extra virgin olive oil (for toasting the bread)
  • 1 teaspoon Italian seasoning
  • ½ teaspoon garlic powder
  • ½ teaspoon onion powder
  • Salt and freshly ground black pepper, to taste

For the salad

  • 3 cups diced ripe tomatoes
  • 1 cucumber, peeled and chopped
  • ½ red onion, thinly sliced
  • ½ cup fresh basil leaves, torn
  • Optional: ½ cup fresh mozzarella balls or shaved Parmesan

For the dressing

  • ¼ cup extra virgin olive oil
  • 2 tablespoons red wine vinegar
  • 1 garlic clove, minced
  • Salt and freshly ground black pepper, to taste
  1. Preheat the oven to 375°F (190°C).

  2. Place the bread cubes in a large bowl. Toss with 2 tablespoons olive oil, Italian seasoning, garlic powder, onion powder, salt, and pepper until evenly coated.

  3. Spread the bread onto a baking sheet and bake for 5–7 minutes, or until lightly golden and crisp. Let cool slightly.

  4. In a small bowl, whisk together the ¼ cup olive oil, red wine vinegar, minced garlic, salt, and pepper.

  5. In a large serving bowl, combine the tomatoes, cucumber, red onion, basil, and mozzarella (if using).

  6. Add the toasted bread cubes and pour the dressing over the salad. Toss gently until everything is evenly coated.

  7. Let the salad sit for 10–15 minutes so the bread absorbs the dressing while still retaining a little texture. Taste and adjust the seasoning with additional salt and pepper if needed. Garnish with extra basil or shaved Parmesan before serving.


Italian Chickpea Cucumber Tomato Salad

Italian Chickpea Cucumber Tomato Salad

This post may contain affiliate links, that help support this blog. If you make a purchase through these links, I may earn a commission—at no cost to you. For more information read my disclosure policy.

This refreshing Italian Chickpea Salad is a celebration of simple, wholesome ingredients that come together in the most delicious way. Made with home-cooked chickpeas, juicy fresh tomatoes, crisp cucumbers, sweet bell peppers, and fragrant herbs, it’s tossed in a classic Italian vinaigrette for a light and flavorful dish. It’s perfect as a make-ahead lunch, a picnic salad, or a vibrant side for grilled meats or seafood. Naturally gluten-free and full of plant-based protein, this salad is both nourishing and satisfying.

Cooking your own chickpeas from scratch makes a noticeable difference in taste and texture. Simmered gently with garlic and bay leaf, the chickpeas soak up a subtle savory aroma that enhances the freshness of the vegetables. With bright parsley, a splash of red wine vinegar, and a drizzle of good olive oil, this salad is the kind of rustic Italian cooking that shines through its simplicity.

Things to know about this Italian chickpea cucumber tomato salad

  • Canned Chickpeas Work Too: While cooking chickpeas from scratch adds depth and texture, canned chickpeas are a great time-saver and work perfectly in this recipe. Just be sure to rinse and drain them well before using.

  • Best Served Fresh or Chilled: This salad can be served right after assembling, but letting it sit for 20–30 minutes allows the flavors to meld. It also holds up beautifully in the fridge for up to 3 days, making it ideal for meal prep.

  • Easy to Customize: Add crumbled feta, shaved Parmigiano-Reggiano, or fresh mozzarella for a cheesy twist. For more protein, toss in some canned tuna, grilled chicken, or hard-boiled eggs. Chopped artichoke hearts, capers, or even avocado also make great additions.

  • Perfect for Summer Gatherings: Light, bright, and easy to make ahead—this salad is perfect for potlucks, picnics, or any warm-weather meal.

  • Love Salads? Don’t miss my other fresh and flavorful salad recipes—perfect for any season or occasion. Watermelon cucumber feta salad or my cucumber tomato avocado salad, you’re going to love them. Please leave me a comment on your experience with this recipe. I love hearing from you it’s my favorite part,


Italian Chickpea Cucumber Tomato Salad

A fresh and flavorful Italian chickpea salad made with crisp cucumbers, juicy tomatoes, and a simple Mediterranean-inspired dressing. Perfect as a light lunch, side dish, or easy summer salad.

For the Chickpeas:

  • 1 cup dried chickpeas
  • 1 bay leaf
  • 1 garlic clove (smashed)
  • A few sprigs of fresh rosemary or thyme (optional)
  • Salt (added after cooking)

For the Salad:

  • 2 ½ to 3 cups cooked chickpeas (from above)
  • 1 cup cherry tomatoes (halved)
  • 1 cup sliced English cucumber
  • ½ cup red peppers (chopped)
  • 1/2 cup thinly sliced red onion
  • 1/2 cup fresh parsley (chopped)
  • 2 tablespoons fresh basil (torn)

For the Dressing:

  • 1/2 cup extra virgin olive oil (use a good Italian one)
  • 1/4 cup tablespoons red wine vinegar OR fresh lemon juice
  • 1 teaspoon dried oregano
  • salt and Freshly cracked black pepper to taste
  • 1 garlic clove (finely grated or mashed into a paste)
  1. Cook the Chickpeas

    Soak 1 cup of dried chickpeas in water overnight (8–12 hours). Drain and rinse.Place them in a pot and cover with water by at least 2 inches. Add:

    1 bay leaf

    1 garlic clove (smashed)

    Optional: a small sprig of rosemary or thyme

    Bring to a boil, then reduce to a gentle simmer. Cook uncovered for 45–60 minutes, or until tender but not mushy.Salt the water during the last 10 minutes of cooking. Drain and let cool slightly.

  2. Time-saver tip: Cook extra chickpeas and freeze them for future use. You can use canned chickpeas , They work fine .

  3. Assemble the Salad

    In a large bowl, combine:

    Cooked and cooled chickpeas

    Cherry tomatoes, red peppers, red onion and sliced cucumbers

    Gently mix in chopped parsley and basil.

  4. Make the Dressing

    In a small bowl, whisk together olive oil, vinegar (or lemon juice), oregano, garlic, salt, and pepper.

  5. Toss and Serve

    Pour the dressing over the salad and toss to combine. Let sit at room temperature for 20–30 minutes to develop flavor.Top with shaved Parmigiano or feta

Salad, Side Dish
Italian
Italian chickpea salad, chickpea cucumber tomato salad


Watermelon Cucumber Feta Salad

Watermelon Cucumber Feta Salad

This post may contain affiliate links, that help support this blog. If you make a purchase through these links, I may earn a commission—at no cost to you. For more information read my disclosure policy.

Watermelon  cucumber Feta Salad with Lemon-Honey Dressing

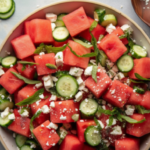
When the weather warms up and watermelon starts showing up in every market bin, I can’t help but crave this bright and refreshing salad. This Watermelon  Cucumber, feta  salad with  and Lemon-Honey Dressing is one of my go-to dishes during the warmer months. It’s light, vibrant, and incredibly refreshing—with just the right balance of sweet, salty, and tangy.

If you’ve never paired juicy watermelon with creamy feta before, you’re in for a delightful surprise. The sweetness of the melon plays beautifully against the salty bite of the cheese, while crisp cucumber and paper-thin red onions add texture and a little zip. The real magic, though, is in the simple lemon-honey vinaigrette, which brings everything together with a bright, citrusy finish.

Whether you’re hosting a backyard BBQ, heading to a picnic, or just need a quick and beautiful side dish to serve with grilled chicken or seafood, this salad is always a hit. It comes together in minutes, looks gorgeous on the table, and tastes like summer in a bowl.

Things to know about this Watermelon Cucumber Feta Salad

The key to making this salad truly shine is starting with a perfectly ripe, sweet watermelon. Look for one that feels heavy for its size, has a creamy yellow spot on one side (that’s the field spot—where it rested on the ground and ripened in the sun), and gives a deep, hollow sound when tapped. Avoid melons with shiny skin or white streaks, which can indicate under ripeness. A good watermelon should smell slightly sweet at the stem end and feel firm all over—no soft spots or bruises.

Because the watermelon is the star of this dish, its natural sweetness balances the salty feta and tangy lemon-honey dressing beautifully. Using a bland or underripe melon can really dull the salad, so take a few extra minutes at the market to choose the best one. If you can, cut into it before assembling the salad and taste a piece—juicy and flavorful is the goal! If you love salads as much as I do , try this cucumber tomato avocado salad or my five star Caesar salad


Watermelon Cucumber Feta Salad

A refreshing watermelon cucumber feta salad combining juicy watermelon, crisp cucumber, creamy feta, and fresh herbs for a light and flavorful summer salad.

For the Salad:

  • 4 cups watermelon (cubed (seedless))
  • 1 English cucumber (thinly sliced (or 2 Persian cucumbers))
  • ½ small red onion (thinly sliced)
  • ¾ cup feta cheese (crumbled or cubed)
  • ¼ cup fresh mint leaves (torn)
  • Salt & freshly cracked black pepper (to taste)

For the Dressing:

  • 3 tablespoons extra virgin olive oil
  • 1½ tablespoons fresh lemon juice
  • 1 tablespoon honey
  • ½ teaspoon Dijon mustard (optional, helps emulsify)
  • Pinch of salt
  1. Make the Dressing: In a small bowl or jar, whisk together the olive oil, lemon juice, honey, Dijon mustard (if using), and a pinch of salt. Set aside.

  2. Prep the Salad:In a large bowl, combine the cubed watermelon, cucumber slices, and thinly sliced red onion.

  3. Dress and Toss: Drizzle the dressing over the salad and gently toss to combine. Taste and adjust salt if needed.

  4. Add the Feta & Mint: Gently fold in the crumbled feta and fresh mint just before serving to keep the texture light and fresh.

  5. Serve Immediately: Best served chilled, immediately after mixing. (If making ahead, keep the watermelon mixture and dressing separate until ready to serve.)

  6. Soak the red onion slices in cold water for 10 minutes to mellow their sharpness.

    Add a handful of arugula or baby spinach for a peppery twist.

    For extra zing, finish with a sprinkle of chili flakes or a drizzle of balsamic glaze

Salad
Mediterranean
watermelon cucumber feta salad,