Italian Beef and Farro Soup

Italian Beef and Farro Soup

This post may contain affiliate links, that help support this blog. If you make a purchase through these links, I may earn a commission—at no cost to you. For more information read my disclosure policy.

When the air turns crisp and the leaves start to fall, there’s nothing better than a warm, hearty soup to bring everyone to the table. This Italian Beef and Farro Soup was a favorite in our restaurant’s fall menu—rich, rustic, and packed with flavor. Tender cubes of sirloin simmer alongside sweet carrots, celery, and aromatic herbs in a savory tomato and beef broth, while pearled farro adds a nutty, chewy texture that makes every bite satisfying. It’s the kind of soup that warms both the kitchen and the heart, perfect for a cozy weeknight or a Sunday dinner with family.

Things to know about this Italian Beef and Farro Soup

What is farro?
Farro is an ancient Italian grain with a nutty flavor and chewy texture. It’s a staple in Tuscan cooking and makes soups hearty without feeling heavy.

Can I substitute farro?
Yes! If you don’t have farro, barley works beautifully. Rice or small pasta can be used too, but they’ll change the texture.

Best cut of beef:
Sirloin works wonderfully here because it stays tender in a shorter simmer. You can also use stew meat, chuck, or even leftover roast beef.

Make-ahead friendly:
This soup tastes even better the next day as the flavors develop. Farro holds up better than pasta, so it won’t turn mushy.

Freezer tip:
Freeze in portions without adding the parsley and Parmesan. Add those fresh when reheating for the best flavor.

Serving suggestion:
A drizzle of good olive oil, a sprinkle of Parmesan, and warm crusty bread make this a complete meal 

Italian Beef and Farro Soup

Tender beef, nutty farro, and hearty vegetables simmer in a rich tomato and beef broth for a comforting Italian soup that's perfect for chilly days.

  • 1 pound sirloin, cut into 1-inch cubes
  • 2 tablespoons  olive oil
  • 1 medium onion, finely chopped
  • 2 carrots, peeled and diced
  • 2 celery stalks, diced
  • 3 garlic cloves, minced
  • 1 can (14.5 oz) diced tomatoes
  • 6 cups beef broth
  • 1 teaspoon fresh rosemary, chopped (or ½ teaspoon dried)
  • ¾ cup pearled farro
  • Salt and freshly ground black pepper, to taste
  • ¼ cup fresh parsley, chopped
  • Freshly grated Parmesan, for serving
  1. Brown the beef: Heat olive oil in a large pot over medium-high heat. Add sirloin cubes and sear on all sides until browned. Remove and set aside.

  2. Sauté vegetables: In the same pot, add onion, carrots, and celery. Cook until softened, about 5–6 minutes. Add garlic and cook 1 more minute.

  3. Build the soup base: Return the beef to the pot. Stir in diced tomatoes, beef broth, thyme, and rosemary. Bring to a boil, then reduce heat and simmer for 25–30 minutes until the beef is tender.

  4. Cook the farro: Add the farro and simmer for another 20–25 minutes until the farro is tender but chewy. Stir occasionally and add a bit more broth or water if needed.

  5. Season and finish: Taste and adjust salt and pepper. Stir in fresh parsley just before serving.

  6. Serve: Ladle into bowls, sprinkle with Parmesan, and enjoy with crusty Italian bread.



Italian Braciole in Tomato Sauce

Italian Braciole in Tomato Sauce

This post may contain affiliate links, that help support this blog. If you make a purchase through these links, I may earn a commission—at no cost to you. For more information read my disclosure policy.

The first day of September always feels like the true start of my fall cooking. The air turns a little cooler, and I naturally begin to crave those cozy Italian dishes that remind me of home.

When I was growing up, Sundays meant sauce simmering on the stove. My mom usually made it with meatballs, ribs, sausage — or sometimes all three. But every once in a while, she added braciole, and that made the meal extra special. She would pound slices of beef thin, fill them with cheese, herbs, and breadcrumbs, then roll them up tightly. After slowly cooking in the sauce until tender, they became the kind of dish that felt like a celebration.

For me, braciole will always mark the beginning of hearty, comforting meals — perfect for the cooler season ahead.

Things to Know About Italian Braciole

What is Braciole?
Braciole (pronounced brah-cho-lee) is a classic Italian dish made with thin slices of beef rolled around a savory filling, then simmered slowly in tomato sauce until tender. Once cooked, the rolls are sliced and served with the rich sauce over pasta or alongside crusty bread.

Regional Variations
Every Italian family makes braciole a little differently. In Southern Italy, you’ll often find fillings with raisins and pine nuts for a sweet-and-savory touch. In other regions, it’s kept simple with just breadcrumbs, garlic, parsley, and cheese. Some families also prepare braciole with pork or veal instead of beef.

Cooking Low and Slow
The key to tender braciole is patience. The beef needs time to soften as it gently simmers in the sauce, soaking up all that flavor. A heavy pot or Dutch oven works best for even cooking.

Perfect for Sunday Dinner
Braciole has always been considered a special occasion dish, often reserved for Sunday dinners or holidays. Making it on the first cool days of fall captures that same cozy sense of comfort and tradition.

Make-Ahead Friendly
Like many Italian dishes, braciole tastes even better the next day after the flavors have had time to meld. It’s the perfect make-ahead meal — impressive for guests yet easy to reheat and serve


Italian Braciole in Tomato Sauce

Italian Braciole in Tomato Sauce is a classic Italian Sunday dinner made with thin slices of beef rolled around a savory filling of garlic, parsley, cheese, and breadcrumbs, then slowly simmered in a rich tomato sauce until tender. This traditional Italian-American recipe is a comforting dish that brings family and generations together around the table. Serve it with pasta, crusty bread, or alongside your favorite Sunday sauce for an unforgettable meal.

For the Braciole:

  • 4-6 thin slices beef top round (about 6–8 ounces each, pounded to ¼-inch thickness)
  • 1/2 cup grated Parmesan or Pecorino Romano
  • ½ cup breadcrumbs (preferably Italian seasoned)
  • 2 garlic cloves (finely minced)
  • 1/2 cup fresh parsley (chopped)
  • 2 tablespoons pine nuts (optional, but traditional in many regions)
  • Salt & freshly ground black pepper
  • Olive oil (for searing)
  • Butcher’s twine or toothpicks for tying

For the Sauce:

  • 3 tablespoons olive oil
  • 1 small onion (finely chopped)
  • 2 garlic cloves (minced)
  • 1/2 cup chopped parsley
  • 1 can (28 ounces crushed tomatoes)
  • 1 can 14 ounces tomato sauce
  • ½ cup red wine
  • 1 teaspoon dried oregano (or 2 teaspoons fresh)
  • ½ teaspoon red pepper flakes (optional)
  • 1 bay leaf
  • Salt & pepper to taste
  • Fresh basil (for finishing)
  1. Prepare the filling – In a small bowl, combine breadcrumbs, Parmesan, garlic, parsley, and pine nuts. Season lightly with salt and pepper.

  2. Assemble the rolls – Lay each beef slice flat. cover with plastic wrap and pound thin divide  the filling evenly in the center of each slice. Roll the beef tightly into a log and secure with twine or toothpicks.

  3. Brown the braciole – Heat olive oil in a large heavy pot or Dutch oven over medium-high heat. Sear the beef rolls on all sides until browned, 6–8 minutes. Transfer to a plate.

  4. Make the sauce – In the same pot, add more olive oil if needed. Sauté onion until soft, about 5 minutes, then stir in garlic and parsley. Deglaze with red wine, scraping up any browned bits. Add crushed tomatoes and the sauce,  oregano, red pepper flakes, bay leaf, salt, and pepper. and stir well, Simmer covered for 1 hour

  5. Return the braciole to the pot, nestling them into the sauce. Cover with a lid and simmer gently on low for about 1 hour, or until the beef is tender. Stir occasionally and add a splash of water if sauce thickens too much.

  6. Serve – Remove the twine or toothpicks, slice the braciole into rounds, and serve topped with sauce. Garnish with fresh basil and more grated cheese.

  7. More Serving Suggestions for Braciole

    Over Pasta – Toss the rich tomato sauce with spaghetti, rigatoni, or ziti, then serve the sliced braciole on top.

    With Polenta – Creamy polenta is a classic Italian pairing that soaks up all the delicious sauce.

    Crusty Bread – A warm loaf is a must for dipping into the sauce.

    Vegetable Sides – Pair with roasted broccoli, garlicky green beans, or a simple side salad for balance.

    Wine Pairing – A medium-bodied red like Chianti or Montepulciano complements the richness perfectly.

Main Course
Italian
Italian Braciole in Tomato Sauce


Crispy Barbecued Buffalo Chicken Wing Recipe

Crispy Barbecued Buffalo Chicken Wing Recipe

This post may contain affiliate links, that help support this blog. If you make a purchase through these links, I may earn a commission—at no cost to you. For more information read my disclosure policy.

Some of our most-loved recipes have their roots in the kitchens of our restaurants, and these Barbecued Buffalo Chicken Wings are no exception. Just like our Smashed Italian Sausage & Pepper Sandwiches, these wings quickly became a customer favorite — and later, a family favorite at home too.

Back in the restaurant, we made them the classic way: fried until golden and crispy, with that irresistible crunch that made them a staple on the menu. We kept the seasoning simple — salt, pepper, paprika, mustard, garlic powder, and a touch of cornstarch — but the result was magic. Crispy wings with just the right balance of smoky, spicy flavor that had people coming back for more.

Over time, I started making them at home too, sometimes grilling or baking instead of frying, but always keeping that same bold flavor. Whether served with a cold drink at the bar or around our own family table, these wings are the kind of dish that proves simple ingredients can deliver unforgettable flavor.


Crispy Barbecued Buffalo Chicken Wing Recipe

Crispy barbecued buffalo chicken wings coated in a flavorful spicy sauce with the perfect balance of heat and tang. A crowd-pleasing appetizer for game days, parties, or an easy weeknight meal.

For the Wings

  • 2 lb chicken wings, split into drumettes and flats, tips removed
  • 1 tbsp baking powder (aluminum-free)
  • 1 tsp garlic powder
  • 1 tsp onion powder
  • 1 tsp smoked paprika
  • ½ tsp salt
  • ½ tsp black pepper

For the Buffalo BBQ Sauce

  • ½ cup buffalo wing sauce
  • ¼ cup barbecue sauce
  • 2 tbsp unsalted butter, melted
  • 1 tbsp honey (optional, for a touch of sweetness)
  • 1 tsp Worcestershire sauce

For Serving (Optional)

  • Ranch or blue cheese dressing
  • Celery sticks
  • Carrot sticks
  • Chopped fresh parsley
  1. Preheat the oven to 425°F (220°C). Line a baking sheet with foil and place a wire rack on top. Lightly grease the rack.

  2. Pat the chicken wings completely dry with paper towels. Dry skin is the key to crispy wings.

  3. In a large bowl, combine the baking powder, garlic powder, onion powder, smoked paprika, salt, and black pepper. Toss the wings until evenly coated.

  4. Arrange the wings in a single layer on the prepared wire rack, leaving space between each wing.

  5. Bake for 20 minutes, then flip the wings and continue baking for another 20–25 minutes, or until golden brown and crispy.

  6. While the wings bake, whisk together the buffalo wing sauce, barbecue sauce, melted butter, honey (if using), and Worcestershire sauce in a small saucepan over low heat. Warm for 2–3 minutes, stirring occasionally.

  7. Transfer the hot wings to a large bowl. Pour the warm Buffalo BBQ sauce over the wings and toss until evenly coated.

  8. For extra caramelization, return the sauced wings to the oven or place them under the broiler for 2–3 minutes, watching carefully to prevent burning.

  9. Serve immediately with ranch or blue cheese dressing, celery sticks, and carrot sticks.

  10. Baking powder helps create an extra crispy skin without frying.

    For a smokier flavor, grill the wings over medium heat for 3–5 minutes after saucing instead of broiling.

    Adjust the heat by using more barbecue sauce for a milder flavor or adding extra buffalo sauce for more spice.

Appetizer
Italian
buffalo chicken wings,


Italian Crispy roasted Potatoes

Italian Crispy roasted Potatoes

This post may contain affiliate links, that help support this blog. If you make a purchase through these links, I may earn a commission—at no cost to you. For more information read my disclosure policy.

These Italian crispy roasted potatoes are straight from my mother’s kitchen. She’d parboil them, toss with olive oil, garlic, rosemary, and a little lemon, then roast until golden and crunchy. Simple, comforting, and always the first thing to disappear at the table — I still make them just the way she did. To this day, whenever I make them, the smell that fills my kitchen instantly takes me back to her cooking, and I can’t help but smile. This recipe is her original method, and it’s one I know you’ll want to keep on repeat in your own home.

Things to Know About Italian Crispy Roasted Potatoes

  • Parboiling is key: Cooking the potatoes halfway before roasting helps give them a fluffy inside and that golden, crisp crust.

  • Rough edges = more crunch: Shaking the potatoes after draining creates little ridges that crisp up beautifully in the oven.

  • Use the right potato: Yukon Golds give a buttery texture, while Russets crisp up with an extra crunch — both work well.

  • Fresh rosemary makes a difference: If you can, use fresh rosemary sprigs. They infuse the oil and potatoes with authentic Italian flavor.

  • Don’t skip the lemon: A little zest before roasting and a squeeze of juice at the end adds brightness and balances the richness.

  • Crowding the pan ruins the crisp: Spread potatoes in a single layer so they roast instead of steam.

  • Reheating tip: Pop leftovers back in a hot oven for 10 minutes to bring back their crispness — the microwave won’t do them justice.

  • Serve these potatoes alongside a hearty main! Try my Bone-In Pork Chop Piccata or  Stuffed Chicken Breast for a full Italian dinner that everyone will love.


Italian Crispy roasted Potatoes

These Italian Crispy Roasted Potatoes are golden brown on the outside, fluffy on the inside, and seasoned with garlic, Parmesan cheese, fresh herbs, and olive oil. They're an easy Italian-inspired side dish that pairs perfectly with chicken, steak, pork, or seafood.

  • 2 lbs. Yukon Gold or Russet potatoes (peeled and cut into wedges)
  • 1/2 cup extra virgin olive oil
  • 2 minced garlic cloves
  • 2 sprigs fresh rosemary (or 1 tsp dried)
  • Zest of 1 lemon
  • Juice of 1 lemon
  • salt and pepper to taste
  1. Parboil the potatoes:

    Bring a large pot of salted water to a boil.

    Add potato wedges and cook for 5-7 minutes, until just fork-tender but not falling apart.

    Drain well and let steam dry for 2 minutes.

  2. Rough up the edges:

    Shake the colander gently to create a slightly rough surface on the potatoes. This helps them crisp in the oven.

  3. Season the potatoes:

    Preheat oven to 425°F (220°C).

    In a large bowl, toss the potatoes with olive oil, minced garlic, rosemary, lemon zest, salt, and pepper until evenly coated.

  4. Roast:

    Spread the potatoes in a single layer on a parchment-lined baking sheet.

    Roast for 35–45 minutes, flipping halfway, until deeply golden and crisp.

  5. Finish with lemon:

    Remove garlic cloves and rosemary sprigs.

    Squeeze fresh lemon juice over the potatoes just before serving.

  6. Serving Suggestion

    Serve hot as a side with roast chicken, grilled fish, or alongside a big Italian salad.

Side Dish
Italian
Italian crispy roasted potatoes


Crispy Italian Fried Cauliflower with Marinara

Crispy Italian Fried Cauliflower with Marinara

This post may contain affiliate links, that help support this blog. If you make a purchase through these links, I may earn a commission—at no cost to you. For more information read my disclosure policy.

In Italy, a fritto misto is all about sharing a platter of hot, golden, crispy bites—often a combination of vegetables, seafood, and other savory favorites. This Crispy Italian Fried Cauliflower takes inspiration from that tradition, turning humble cauliflower into an irresistible antipasto.

The cauliflower is quickly blanched in salted water so it stays tender inside, then dipped in a light garlic-and-herb batter and fried until beautifully crisp and golden. Serve it hot with warm marinara sauce for dipping, or add it to a larger Italian fried platter with zucchini, artichokes, or calamari. It’s simple, delicious, and made for sharing.

Things to Know About Crispy Italian Fried Cauliflower with Marinara

Inspired by Italian fritto misto: This recipe takes inspiration from the Italian tradition of fritto misto, where vegetables and seafood are lightly coated and fried until golden. Cauliflower makes a wonderful addition to this style of antipasto.

Blanch the cauliflower first: A quick blanch in salted boiling water is an important step. It tenderizes the cauliflower so the inside cooks perfectly while the batter becomes crisp and golden in the hot oil.

Use cold sparkling water: Cold sparkling water gives the batter a lighter, airier texture. The bubbles help create that delicate crunch without making the coating heavy.

Season the batter well: Garlic powder, paprika, and Italian herbs add subtle flavor to the cauliflower without overpowering the marinara dipping sauce.

Don’t overcrowd the pan: Fry the cauliflower in batches so the oil stays hot and each piece has enough room to cook evenly. Overcrowding can result in a heavier, less crisp coating.

For a full Italian-inspired spread, pair it with my Shrimp Oreganata or Spinach Ricotta Balls


Crispy Cauliflower Batter Recipe

Crispy cauliflower batter recipe featuring tender cauliflower coated in a light, golden, and crunchy Italian-style batter. A delicious vegetarian appetizer, side dish, or snack that is easy to make and full of flavor.

  • 1 medium head cauliflower
  • 1 cup all-purpose flour
  • 1/3 cup cornstarch (for extra crispiness)
  • 1 teaspoon baking powder
  • 1 teaspoon salt
  • 1 teaspoon garlic powder
  • 1 teaspoon smoked paprika (or regular paprika)
  • salt and pepper to taste
  • 1 cup cold sparkling water (or more, as needed)
  • Optional: pinch of cayenne pepper or chili flakes for heat
  • olive oil for frying
  1. Prep the cauliflower:
  2. Cut 1 medium head of cauliflower into florets. Rinse and pat dry thoroughly.
  3. Blanch the cauliflower:
  4. Bring a large pot of salted water to a boil. Add the cauliflower florets and cook for 2–3 minutes, just until slightly tender but still firm. Drain well and pat completely dry with paper towels.
  5. Make the batter:
  6. In a large bowl, whisk together the flour, cornstarch, baking powder, salt, and spices. Slowly add the cold sparkling water, whisking until smooth. The batter should be thick enough to coat the florets but still drip slightly — like pancake batter.
  7. Coat the florets:
  8. Dip each floret into the batter, letting any excess drip off.
  9. Fry or bake:

    To fry: Heat the oil to 350°F (175°C). Fry florets in batches for 3–5 minutes, or until golden and crispy. Drain on paper towels.

    To bake: Preheat oven to 425°F (220°C). Line a baking sheet with parchment. Place battered florets on the sheet and spray with oil. Bake for 25–30 minutes, flipping halfway, until golden and crisp.

Appetizer
Italian
crispy cauliflower


Easy Italian Lemon Garlic Shrimp Recipe

Easy Italian Lemon Garlic Shrimp Recipe

This post may contain affiliate links, that help support this blog. If you make a purchase through these links, I may earn a commission—at no cost to you. For more information read my disclosure policy.

Few dishes feel as effortlessly elegant as this Italian lemon garlic shrimp. Bright, garlicky, and kissed with lemon, it’s my Italian spin on classic lemon butter shrimp—inspired by the flavors of Pollo al Limone. Each bite is a burst of fresh, vibrant flavor, balanced with zesty citrus, mellow garlic, and a silky white wine sauce that gently clings to the shrimp.

The best part? This dish comes together in just about 20 minutes, making it perfect for a quick weeknight dinner or a more refined weekend meal. Like all great Italian recipes, it relies on simple, high-quality ingredients that speak for themselves.

Things to Know About This Easy Italian Lemon Garlic Shrimp

  1. A seafood spin on a classic. This dish is inspired by Pollo al Limone, the beloved Italian lemon chicken. The same vibrant, garlicky lemon sauce pairs perfectly with shrimp—familiar, yet refreshingly new.

  2. Fast and fuss-free. Shrimp cook in just minutes, making this a go-to recipe for busy weeknights. Sauté the shrimp first, then build the sauce right in the same skillet—minimal cleanup, maximum flavor.

  3. Choose the right shrimp. Large or jumbo shrimp (wild-caught if possible) offer the best texture and taste. Fresh or frozen (thawed) both work beautifully.

  4. Wine or broth—your choice. A splash of dry white wine adds depth, but you can easily swap in good-quality chicken broth if you’re cooking without alcohol.

  5. Don’t skip the zest. Lemon zest adds a bold citrus aroma that brightens the whole dish and balances the richness of the butter.

  6. Endlessly versatile. Serve this shrimp over pasta, creamy polenta, fluffy rice, or even zucchini noodles for a lighter, low-carb option.

  7. Make it your own. Add a pinch of red pepper flakes for a subtle kick, or stir in baby spinach at the end for an extra dose of greens.

  8. Reheat with care. Shrimp can overcook quickly, so if you have leftovers, warm them gently on the stovetop with a splash of broth or lemon water to keep them tender.

  9. If you like this Easy Italian lemon garlic shrimp recipe , here are  more to try
  10. shrimp tomato basil spaghetti 
  11. Authentic  Italian shrimp oreganata


Easy Italian Lemon Garlic Shrimp Recipe

This Easy Italian Lemon Garlic Shrimp is a classic Italian-inspired seafood dish made with tender shrimp, fresh garlic, butter, olive oil, lemon, and parsley. Ready in just 20 minutes, it's light, fresh, and packed with bright Mediterranean flavors. Serve it over pasta, rice, creamy polenta, or with warm crusty bread to soak up every drop of the delicious lemon garlic sauce. Perfect for an easy weeknight dinner or an elegant meal for entertaining.

  • 1 ½ lbs. large shrimp (peeled and deveined (16-20 per lb. ))
  • 1 teaspoon each paprika and garlic powder
  • Salt and freshly ground black pepper (to taste)
  • 2 tablespoons olive oil
  • 2 tablespoons unsalted butter
  • 2 minced garlic cloves
  • ½ cup dry white wine
  • 1 cup chicken broth
  • Juice of 2 lemons (about 1/3 cup)
  • Zest of 1 lemon
  • 1/2 cup capers (optional)
  • 2 tablespoons chopped fresh parsley
  • Lemon slices (for garnish)
  1. Sauté the Shrimp Season shrimp with salt and pepper. Heat olive oil and 1 tablespoon of butter in a large skillet over medium-high heat. Add the shrimp and sauté for about 1–2 minutes per side, just until pink and lightly golden. Remove the shrimp from the skillet and set aside.

  2. Sauté Garlic In the same skillet, lower the heat to medium and add the remaining 1 tablespoon butter. Add the sliced garlic and sauté for 30–60 seconds until fragrant, being careful not to brown it.

  3. Deglaze the Pan Pour in the white wine , scraping up any browned bits from the bottom. Let it simmer for 2–3 minutes to reduce slightly.

  4. Add Lemon and Capers Stir in the, chicken broth, lemon juice, lemon zest, and capers (if using). Simmer for another 5-7 minutes to allow the flavors to come together and the sauce to thicken slightly

  5. Return the Shrimp Return the sautéed shrimp to the skillet, along with any juices they released. Toss to coat in the lemony sauce and cook for another 1 minute, just to rewarm.

  6. Finish and Serve Sprinkle with fresh chopped parsley. Serve hot with lemon slices and extra sauce spooned over the top.

Appetizer
Italian
Easy Italian Lemon Garlic Shrimp Recipe


Tuscan roasted Tomato & Eggplant Soup

Tuscan roasted Tomato & Eggplant Soup

This post may contain affiliate links, that help support this blog. If you make a purchase through these links, I may earn a commission—at no cost to you. For more information read my disclosure policy.

There’s something special about making a meal with vegetables you’ve grown yourself. This Tuscan Roasted Tomato & Eggplant Soup came together with ingredients picked straight from my summer garden—sun-ripened tomatoes, tender eggplant, sweet peppers, and garlic. It reminded me so much of my mom’s garden growing up, where the late-summer harvest always turned into something cozy and delicious simmering on the stove.

But you don’t need a garden to enjoy this soup. Just grab the freshest produce you can find—whether it’s from the farmers’ market, your local grocery store, or a roadside stand. A simple roast in the oven brings out deep, rich flavor, and the result is a rustic bowl of comfort that tastes like it’s been passed down through generations.

Things to know about this Tuscan roasted tomato & eggplant soup

  • It’s naturally simple and wholesome. Made with just fresh vegetables, broth, and olive oil, this soup is light, nourishing, and full of flavor—perfect for any season.

  • Roasting is the magic step. Roasting the tomatoes, eggplant, peppers, and garlic concentrates their flavors and gives the soup a rich, slightly smoky depth that you just can’t get from boiling alone.

  • Customizable to your kitchen. No eggplant? Add zucchini. Want it creamier? Blend in a spoonful of ricotta or coconut milk. Add white beans for protein, a handful of pasta to make it hearty, or a pinch of smoked paprika for extra warmth.

  • Use what’s in season. Fresh summer tomatoes are ideal, but if it’s not tomato season, good-quality canned San Marzano tomatoes work too—just roast the other veggies and add the canned tomatoes in the blender stage.

  • It freezes beautifully. Cool it completely before freezing in airtight containers or freezer bags. It’s perfect for those chilly nights when you need something cozy and homemade.

  • Craving more seasonal Italian comfort?
    Here are a few more recipes straight from my kitchen to yours—fresh, simple, and full of flavor:

  • Roasted Zucchini Panzanella Salad
    Amaretti-Stuffed Summer Peaches
    Italian Summer Street Corn


Tuscan roasted Tomato & Eggplant Soup

Tuscan roasted tomato and eggplant soup combines oven-roasted tomatoes, tender eggplant, garlic, and herbs into a rich and flavorful Italian soup. A rustic, comforting recipe that highlights simple Mediterranean ingredients

  • 2 lbs. ripe tomatoes (Roma or heirloom, halved)
  • 1 medium eggplant (cut into cubes)
  • 2 bell peppers (red, yellow, or orange, seeded and chopped)
  • 1 small yellow onion (quartered)
  • 6 garlic cloves (peeled)
  • 3 tablespoons olive oil
  • Salt and freshly ground black pepper (to taste)
  • ¼ teaspoon crushed red pepper flakes (optional)
  • 3 cups vegetable or chicken broth
  • ¼ cup fresh basil leaves
  • Optional for serving: extra virgin olive oil (pesto sauce, ricotta, or crusty bread)
  1. Roast the vegetables: Preheat oven to 400°F (200°C). On a large baking sheet, toss tomatoes, eggplant, bell peppers, onion, and garlic with olive oil, salt, pepper, and red pepper flakes.Roast for 35–40 minutes, until vegetables are soft and caramelized.

  2. Blend: Transfer roasted vegetables to a blender or use an emersion blender with 1 cup of broth. Blend until smooth (or leave slightly chunky for a rustic texture).

  3. Simmer: Pour into a pot, add the remaining 2 cups of broth, and bring to a simmer over medium heat for 10–15 minutes. Stir in fresh basil.

  4. Serve: Ladle into bowls. Finish with a drizzle of olive oil, pesto sauce or a spoonful of ricotta. Serve with warm, crusty bread.

Soup
Italian


Roasted Zucchini Panzanella Salad recipe

Roasted Zucchini Panzanella Salad Recipe

This post may contain affiliate links, that help support this blog. If you make a purchase through these links, I may earn a commission—at no cost to you. For more information read my disclosure policy.

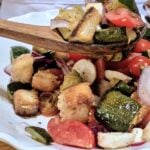
If your garden is anything like mine right now, it’s bursting with zucchini—everywhere I turn, another one is ready to be picked. I swear they multiply overnight! This time of year, I’m always looking for new ways to use them up, and this Roasted Zucchini Panzanella Salad is one of my favorite solutions. It’s rustic, simple, and the perfect way to let those garden veggies shine. With toasted bread, juicy tomatoes, and a punchy vinaigrette, it’s everything I love about summer on a plate.

It’s also one of those no-fuss dishes that gets better as it sits. The roasted zucchini brings a tender sweetness, the bread soaks up all the flavor, and the tomatoes and basil keep it light and bright. Whether you serve it as a main dish or a side for grilling season, this is one zucchini recipe you’ll come back to again and again.

Things to know about this Roasted Zucchini Panzanella Salad recipe

  • Perfect for peak zucchini season: This is a great way to use up an abundance of garden zucchini while keeping things light and flavorful.

  • Best with day-old bread: Slightly stale or toasted bread holds up best in the vinaigrette and gives that classic panzanella texture.

  • Customize it your way: Add crumbled feta, white beans, grilled corn, or olives for extra protein or punch.

  • Let it sit before serving: Giving the salad 10–15 minutes to rest allows the bread to soak up the vinaigrette and all the flavors to meld beautifully.

  • Tastes even better the next day: Store leftovers in the fridge for up to 2 days—it makes a fantastic next-day lunch.

  • Make it a meal: Serve it alongside grilled chicken, fish, or even a simple fried egg on top for a satisfying summer dinner.

  • Craving more fresh summer flavors?
    Check out a few more of my garden-inspired favorites:


Roasted Zucchini Panzanella Salad Recipe

Roasted zucchini panzanella salad combines caramelized zucchini, toasted bread, fresh herbs, and seasonal vegetables in a classic Tuscan-style bread salad. A rustic Italian recipe that is perfect for summer gatherings or a light meal.

  • 2 medium zucchini (sliced into cubed)
  • 2 cups crusty bread (cubed (day-old or toasted))
  • 2 cups cherry tomatoes (halved)
  • 1/2 red onion (thinly sliced)
  • 1/2 cup fresh basil leaves (torn)
  • 2 tbsp red wine vinegar
  • 4 tbsp extra virgin olive oil (divided)
  • 2 teaspoon each garlic powder and paprika
  • Salt and freshly cracked black pepper (to taste)
  • 1 garlic clove (minced (for vinaigrette))
  • Optional: shaved Parmigiano or crumbled feta for serving
  1. Preheat the oven to 425°F (220°C).
  2. Season the zucchini: Toss sliced zucchini with 2 tablespoons olive oil, garlic powder, paprika, salt, and black pepper. Spread on a parchment-lined baking sheet in a single layer.
  3. Roast for 20–25 minutes, flipping once, until golden and slightly crisp around the edges. Let cool slightly.
  4. Toast the bread: While the zucchini roasts, toss cubed bread with a drizzle of olive oil and toast in the oven for 10–15 minutes, until golden and crunchy.
  5. Make the vinaigrette: In a small bowl, whisk together red wine vinegar, 2 tablespoons olive oil, minced garlic (if using), a pinch of salt, and pepper.
  6. Assemble the salad: In a large bowl, combine roasted zucchini, toasted bread, halved cherry tomatoes, red onion, and basil. Drizzle with vinaigrette and toss gently.
  7. Let it sit for 10–15 minutes so the flavors meld and the bread absorbs some dressing.
  8. Serve at room temperature, optionally topped with shaved Parmigiano or crumbled feta.
Salad, Side Dish
Italian
zucchini panzanella salad, Italian bread salad,


How to Make Italian Pickled Eggplant (Melanzane Sotto’Aceto)”

How to Make Italian Pickled Eggplant (Melanzane Sotto’Aceto)”

This post may contain affiliate links, that help support this blog. If you make a purchase through these links, I may earn a commission—at no cost to you. For more information read my disclosure policy.

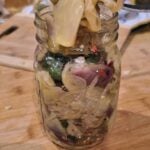
Every summer growing up in my Italian household, the kitchen became a hub of tradition and preservation. Alongside the steamy ritual of canning tomatoes, we always made room on the table for melanzane sotto’aceto—Italian pickled eggplant. The sharp aroma of vinegar mingled with garlic and oregano as jars filled the counters, ready to be tucked away for the months ahead.

These eggplant strips were nothing fancy—just simple, rustic, and packed with flavor. We’d enjoy them throughout the year, layered into sandwiches, served alongside crusty bread, added to an antipasto platter, or, more often than I probably should admit, eaten straight from the jar. For me, this recipe is more than a way to preserve summer eggplant; it’s a taste of the summers I grew up with and the Italian tradition of making the most of what the garden gave us.

Things to Know About Italian Pickled Eggplant (Melanzane Sotto’Aceto)

Choose firm, fresh eggplant: Small to medium eggplants are ideal for this recipe. Look for firm eggplants with smooth, shiny skin and no soft spots. Very large or overripe eggplants can have a spongier texture and larger seeds.

Don’t skip the salting: Salting the eggplant draws out excess moisture and helps improve its texture. Pressing the eggplant after salting also removes even more liquid, giving you a firmer finished result.

Use white wine vinegar: White wine vinegar gives the eggplant the clean, bright acidity traditionally associated with this preparation. Apple cider vinegar can be used in a pinch, but avoid balsamic or dark vinegars, which will change both the color and flavor.

Blanch briefly: The eggplant only needs a short cooking time in the vinegar mixture. Overcooking will make it soft and mushy, while a brief blanch keeps the pieces pleasantly firm.

Use good olive oil: Since the olive oil becomes part of the finished dish, choose a good-quality extra-virgin olive oil. It adds richness and carries the flavors of the garlic and herbs throughout the eggplant.

Keep the seasoning simple: Garlic, oregano, parsley, and red pepper flakes are classic additions. You can also add capers, bay leaves, or thinly sliced peppers if you want to put your own spin on the recipe.

Let it marinate: This is one of those Italian recipes that gets better with a little patience. Allow the eggplant to rest in the refrigerator for several days so the vinegar, olive oil, garlic, and herbs have time to infuse the vegetables.

Refrigerate for safe storage: This recipe is a refrigerator preparation, not a shelf-stable preserve. Keep the eggplant refrigerated in a clean, sealed container and make sure the vegetables remain covered according to the recipe instructions. For longer-term room-temperature storage, use a tested home-canning recipe and follow its instructions.

More Italian Summer Favorites

If you enjoy preserving and making the most of summer’s bounty, explore more of my Italian recipes featuring fresh seasonal ingredients. These are the kinds of recipes that turn simple summer produce into something worth remembering. 


Italian Pickled Eggplant (Melanzane Sotto’Aceto)”

Italian pickled eggplant, known as melanzane sott’aceto, is a traditional preserved recipe made with thinly sliced eggplant, vinegar, garlic, herbs, and olive oil. A classic Italian antipasto perfect for serving with bread, cured meats, or adding to salads and sandwiches.

  • 2 large eggplants
  • Kosher or sea salt (for sweating the eggplant)
  • 2 cups white wine vinegar (or apple cider vinegar)
  • 2 cups water
  • 2 garlic cloves (thinly sliced)
  • 1 teaspoons dried oregano (or fresh, if preferred)
  • Crushed red pepper flakes (optional, to taste)
  • Fresh chopped parsley and basil
  • Extra virgin olive oil (enough to cover)
  • 1 teaspoons dried oregano (or fresh, if preferred)
  • Crushed red pepper flakes (optional, to taste)
  • Fresh chopped parsley and basil
  1. Peel & Slice the Eggplant: Peel the eggplants and cut them into thin strips (about ¼ inch thick and 2–3 inches long).

  2. Salt & Press: Layer the eggplant strips in a colander, sprinkling each layer generously with salt.Place a plate or weight on top and let sit for at least 4–6 hours (or overnight) to draw out bitterness and excess water.

  3. Rinse & Squeeze: Rinse the salted eggplant under cold water to remove excess salt.Squeeze out as much moisture as possible by hand or with a clean towel.

  4. Boil in Vinegar Mixture: In a large pot, bring 2 cups white wine vinegar and 2 cups water to a boil.Add the eggplant and blanch for about 2–3 minutes, just until slightly tender.Drain well and let cool.

  5. Season: Place the cooled eggplant in a bowl. Add sliced garlic, oregano, crushed red pepper flakes (if using), and chopped parsley. Toss to combine.

  6. Jar & Cover in Oil: Pack the seasoned eggplant into sterilized jars, pressing down slightly.Pour extra virgin olive oil over the top, making sure the eggplant is fully submerged. Tap jars to release air bubbles.

  7. Seal & Store: Seal the jars tightly. Store in the refrigerator for up to 2–3 weeks.For longer storage (pantry-safe), use proper canning methods.

  8. To Serve: Let the flavors develop for at least 3 days before eating. Serve as part of an antipasto platter with bread, cheese and cured meats.

Appetizer
Italian
Italian pickled eggplant, Melanzane Sotto’Aceto,


Rustic Italian Roasted Pepper Salad

Rustic Italian Roasted Pepper Salad

This post may contain affiliate links, that help support this blog. If you make a purchase through these links, I may earn a commission—at no cost to you. For more information read my disclosure policy.

This rustic roasted pepper salad takes me right back to my childhood summers—watching my family roast peppers over the open flame,  Tossed with briny olives and tender spinach, it’s simple, fresh, and exactly the kind of dish that always showed up on the table when the garden was overflowing.

My mother used to pick the peppers straight from our garden—red, green, and sometimes the pale yellow ones that turned sweet in the late summer sun. She’d roast them right on the stovetop until the skins blistered, then peel and marinate them with olive oil, garlic, and whatever fresh herbs were on hand. This roasted pepper salad, now with baby spinach, olives, and tomatoes, brings all those flavors rushing back. It’s rustic, vibrant, and full of the warmth of those simple garden days.

Things to know about this rustic Italian Roasted pepper salad

Use a mix of peppers – Red peppers are sweet and mellow, green have a slightly bitter edge, and yellow or orange add brightness. The mix gives great balance.

Roast your peppers properly – Blister the skins until charred, then steam them in a covered bowl or bag to peel easily. This brings out their natural sweetness and smoky depth.

Choose good olives – Italian oil-cured or kalamata olives add briny contrast. Slice or leave whole depending on preference.

Spinach wilts slightly – Toss in the spinach while the peppers are still warm if you like it a little wilted; otherwise, wait until they cool.

Cherry tomatoes add freshness – They brighten the dish and bring a juicy pop. Use ripe, sweet tomatoes for best flavor.

Garlic + olive oil = essential – Don’t skip this classic combo. It’s the heart of the dressing and soaks into everything beautifully.

Make it ahead – This salad tastes even better after resting. Let it sit for 30 minutes—or overnight—for maximum flavor.

Serve it your way – It’s great as an antipasto, side salad, or even tossed with pasta or farro for something heartier.

Craving more rustic Italian flavors? Pair this salad with a my Pollo al limone , Italian lemon chicken, or one of my  personal favorites Oven baked chicken spiedini. ENJOY!!!

Italian Roasted Pepper Salad with Spinach, Olives & Tomatoes

  • 2 red bell peppers
  • 2 green bell peppers
  • 1 cup cherry tomatoes (halved)
  • 1/3 cup Italian black olives (or kalamata, pitted)
  • 2 cups baby spinach (lightly packed)
  • 1 cup fresh mozzarella balls sliced
  • 1 small garlic clove (finely minced)
  • 3 -4 tablespoons extra virgin olive oil
  • 1 tablespoon red wine vinegar or fresh lemon juice
  • Handful of chopped fresh parsley
  • Salt and black pepper (to taste)
  • Optional: a pinch of dried oregano or torn fresh basil leaves
  1. Roast the peppers: Char the red and green bell peppers on an open flame, grill, or under a broiler until the skins blister. Place in a covered bowl or bag to steam for 10 minutes, then peel off the skins, remove seeds, and slice into strips.

  2. Assemble the salad: In a large bowl, add the roasted pepper strips, cherry tomatoes, mozzarella, olives, and baby spinach.

  3. Make the dressing: In a small bowl, whisk together olive oil, vinegar or lemon juice, garlic, salt, and pepper.

  4. Toss & rest: Pour the dressing over the salad and toss gently until the spinach is just wilted and everything is coated. Let sit for 15–20 minutes so the flavors can meld.

  5. Finish: Sprinkle with chopped parsley and a touch of oregano or fresh basil, if using. Serve at room temperature or lightly chilled.

  6. Tip: This salad is even better the next day. Serve with grilled bread or as a fresh side to roasted chicken, fish, or a big bowl of pasta.