Italian Spring Stew with Artichokes, Fava Beans & Peas (Vignarola Recipe)

Italian Spring Stew with Artichokes, Fava Beans & Peas (Vignarola Recipe)

This post may contain affiliate links, that help support this blog. If you make a purchase through these links, I may earn a commission—at no cost to you. For more information read my disclosure policy.

If you’ve ever wondered what to do with fresh fava beans, this Italian spring stew is the answer.

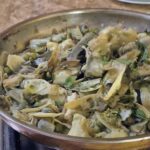
This dish, known as vignarola, comes from Rome and celebrates everything we love about spring cooking—simple ingredients, minimal fuss, and incredible flavor. Artichokes, sweet peas, and tender fava beans are gently simmered together until soft and silky, creating a light, brothy stew that feels both rustic and refined.

This vegetarian version keeps it fresh and vibrant while still full of classic Roman flavor.


Things to know about Italian Spring Stew with Artichokes, Fava Beans & Peas (Vignarola Recipe)

  • Fully vegetarian and naturally light.
  • Should be slightly brothy, not thick.
  • Fresh fava beans taste best, but frozen works in a pinch.
  • Artichokes take the longest—cook them first.
  • Variations

    Pasta Version
    Toss the finished vignarola with short pasta and a splash of pasta water for a simple spring pasta.

    Creamy Style
    Blend a small portion of the vegetables and stir back in for a silkier texture.

    No Fava Beans?
    Substitute with edamame or extra peas.

What to Serve with Vignarola

  • Grilled or roasted vegetables
  • Crusty bread for soaking up the broth
  • Or enjoy it as a light main dish on its own
  • Storage

    • Store in an airtight container in the fridge for up to 3 days.
    • Reheat gently on the stovetop with a splash of broth or water.
    • Freezing: This stew freezes well for up to 2 months. Thaw in the fridge overnight and reheat gently on the stove.

      If you love simple, seasonal Italian cooking, this spring stew is one to keep on repeat. Save it for later, and don’t forget to try it as a pasta—it’s a game changer.

      For more classic Italian recipes, check out:

Italian Spring Stew with Artichokes, Fava Beans & Peas (Vignarola Recipe)

A classic Italian spring stew made with artichokes, fava beans, and peas. This traditional Roman vignarola recipe is fresh, simple, and full of seasonal flavor.

  • 3 Tbsp. olive oil
  • 1 cup chopped onion (you can use Spring onions)
  • 2 Tbsp. minced garlic
  • 3 artichokes (cleaned & sliced)
  • 1 cup fava beans (peeled)
  • 1 cup peas (shelled)
  • 3 cups romaine lettuce (chopped)
  • 1 cup white wine
  • 1/2-1 cup vegetable stock
  • salt and pepper to taste
  1. Build the base Heat olive oil in a large pan. Add onions and garlic. Cook until soft and fragrant.

  2. Cook the artichokes Add sliced artichokes first and cook for 5–7 minutes until they begin to soften.

  3. Deglaze Pour in white wine (if using) and let it reduce slightly.

  4. Add the vegetables Stir in fava beans, peas, and chopped romaine.

  5. Simmer Add vegetable broth, cover, and cook on low for 15–20 minutes until everything is tender and silky.

  6. Finish Season with salt and pepper. Stir in fresh mint or parsley right before serving.

Cleaning Artichokes: Fresh artichokes are beautiful but a little tricky to prep. Start by trimming the tough outer leaves and cutting off the sharp tips. Remove the stem and peel away any fibrous layers until you reach the tender heart. Slice and cook immediately to prevent browning, or toss with a little lemon juice. If you’d rather skip the prep, many grocery stores now sell pre-cleaned, trimmed artichoke hearts—perfect for a quick, no-fuss vignarola.

Side Dish
Italian
Vignarola, Italian, stew, artichokes, fava , beans


Italian-Style Vegetable Scarpaccia Roll

Italian style vegetable scarpaccia roll

This post may contain affiliate links, that help support this blog. If you make a purchase through these links, I may earn a commission—at no cost to you. For more information read my disclosure policy.

There’s something about taking a traditional recipe and giving it your own twist that just feels right. This vegetable scarpaccia roll is exactly that—a rustic Italian-inspired bake that turns into something unexpectedly beautiful once it’s rolled, sliced, and served.

If you’ve ever had scarpaccia, you know it’s typically flat, crispy on the edges, and loaded with vegetables. But this version? We’re taking it a step further.

I bake it first until it’s set and lightly golden, then layer it with Italian ham and provolone, pop it back in the oven just until everything melts together, and roll it up while it’s still warm. Once it rests, it slices into the most perfect savory spirals.

It’s simple, comforting, and feels like something you’d find tucked into a small bakery case in Italy.


Things to know about this Italian-Style Vegetable Scarpaccia Roll

  • You can swap the vegetables depending on the season
  • Add herbs like basil or thyme for extra flavor
  • Make it vegetarian by skipping the ham or using grilled eggplant instead
  • It rolls best while warm—but slices best once slightly cooled
  • Serving Suggestions

    Slice the roll into 1-inch spirals and serve warm or at room temperature. It’s perfect as part of an antipasto spread with olives, roasted peppers, and a simple salad.

    This also works beautifully for:

    • Brunch boards
    • Light lunches with a side salad
    • Holiday appetizers (especially around Easter)

    If you love recipes like this, pair it with your Italian ricotta pie for a sweet finish or your asparagus frittata for a full Italian-style spread.

  • Storage

    • Refrigerator: Store leftovers in an airtight container for up to 3–4 days.
    • Reheating: Warm slices in the oven at 350°F for about 10 minutes, or enjoy at room temp.
    • Freezing: You can freeze it, but for best texture, freeze before slicing. Wrap tightly and freeze for up to 1 month. Thaw overnight in the fridge and reheat in the oven.

    More seasonal recipes to try

    These help turn this into a full menu your readers can come back to again and again 🤍

Italian-Style Vegetable Scarpaccia Roll

A rustic Italian-inspired vegetable scarpaccia roll layered with savory ham and melted provolone, baked to perfection and rolled into beautiful, sliceable spirals—easy, comforting, and perfect for entertaining.

  • 2 cups grated zucchini
  • 1 cup grated carrots
  • 1/2 cup grated onion
  • 1 – 11/2 cups water + water extract from the vegetables (Add the water extracted from the vegetables )
  • 2 tsp. salt (to help extract the liquid from the vegetables)
  • 4 – 6 slices Italian ham or prosciutto
  • 4-6 slices provolone cheese
  1. Prep the vegetables Grate the zucchini, onions, and carrots. Place them in a bowl, sprinkle with salt, and weigh them down (a plate with something heavy on top works well). Let sit for about 1 hour to draw out the liquid.

  2. Don’t waste the liquid After an hour, squeeze out the vegetables—but save that liquid. This is where all the flavor is. You’ll use it as part (or all) of the water for your batter.

  3. Make the batter In a bowl, combine the drained vegetables with flour, olive oil, pepper, and the reserved vegetable liquid (adding extra water only if needed) until you get a thin, pourable batter.

  4. First bake Pour onto a parchment-lined baking sheet, spread thin, and bake at 400°F until set and lightly golden, about 20–25 minutes.

  5. Add the filling Layer with Italian ham and provolone.

  6. Second bake Return to the oven just until the cheese melts, about 5–8 minutes.

  7. Roll and rest Roll it up while warm in a clean kitchen towel like a jelly roll, then let it rest 1 hour before slicing.

Appetizer
Italian
zucchini, vegetable, rolls, scarpaccia


Italian Kale and Potatoes

Italian Kale and PotatoesThis post may contain affiliate links, that help support this blog. If you make a purchase through these links, I may earn a commission—at no cost to you. For more information read my disclosure policy.

Tuscan Kale and Potatoes is one of those dishes that reminds us how beautiful simple food can be. In Tuscany, cooking has always been about making the most of what’s growing in the garden and what’s in the pantry. Hearty greens like Tuscan kale — often called lacinato or dinosaur kale — have been a staple in the region for centuries, especially in rustic, peasant-style cooking known as cucina povera.

Potatoes, introduced to Italy in the 16th century, eventually became a beloved part of country cooking because they were filling, affordable, and easy to grow. Pair them with sturdy kale, good olive oil, and garlic, and you have the foundation of countless traditional Tuscan dishes — simple, nourishing, and deeply satisfying.

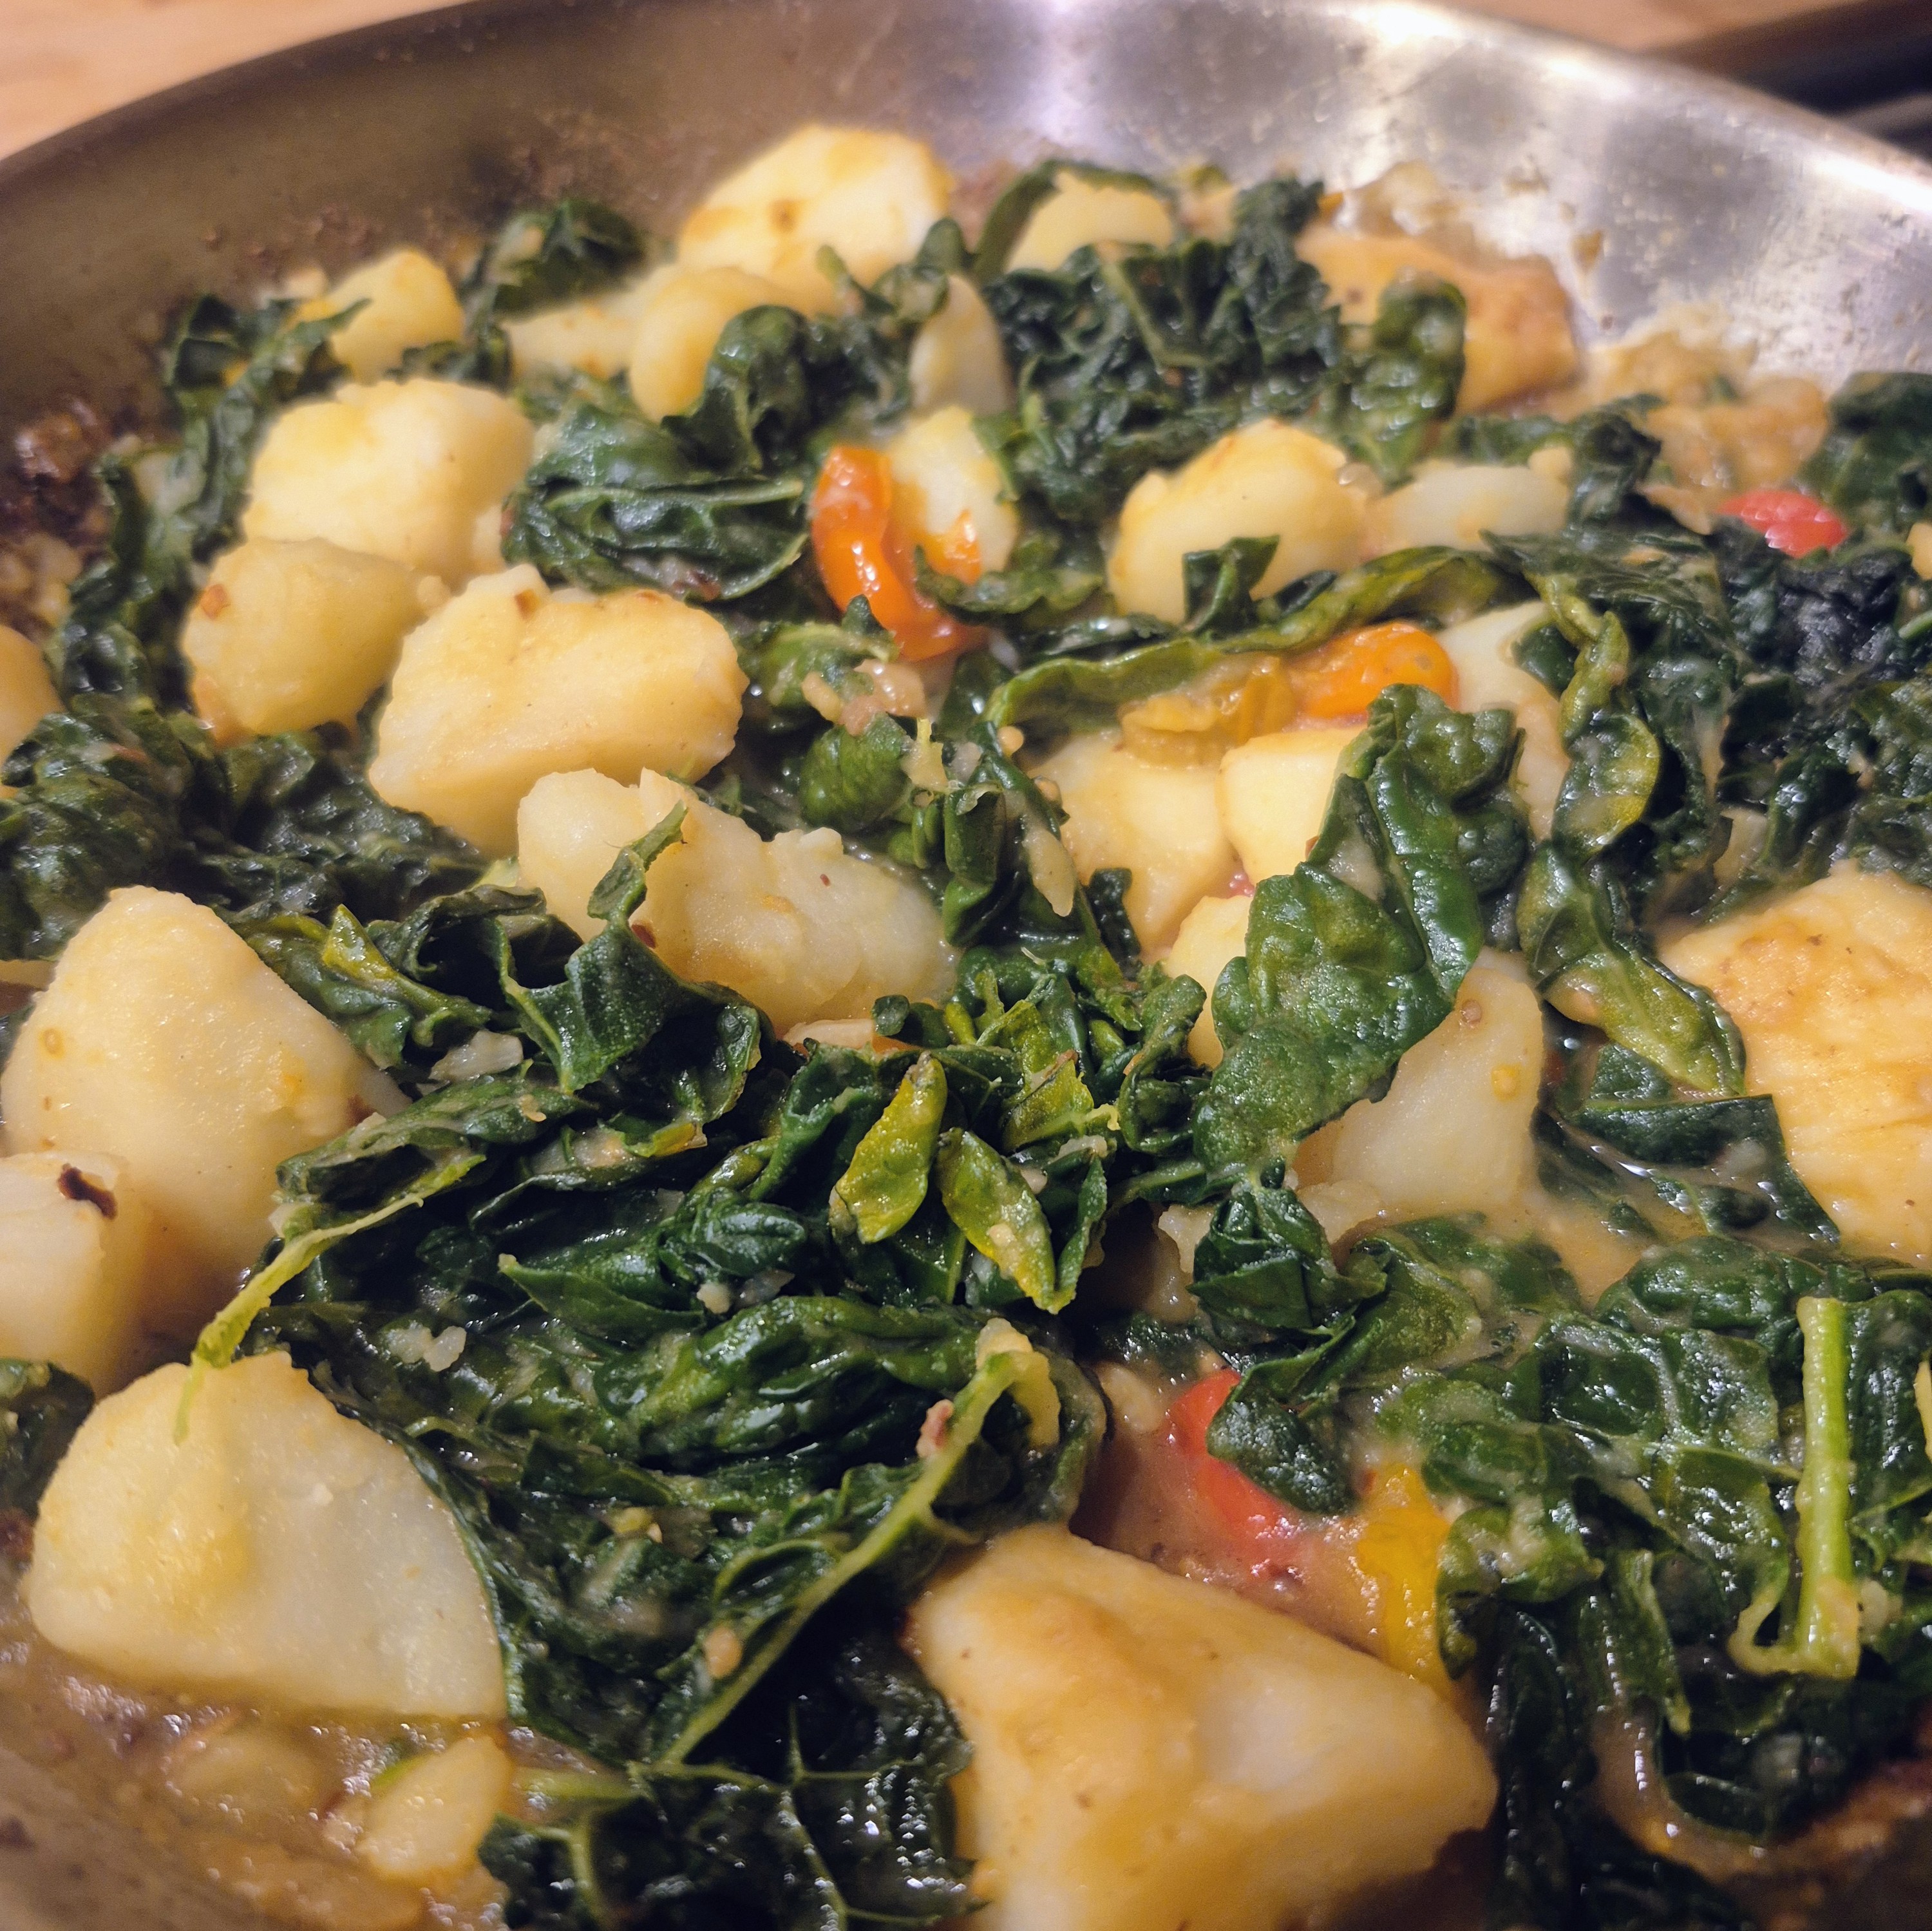
This version adds blistered cherry tomatoes for a little sweetness and brightness, but the heart of the dish stays true to its roots: humble ingredients treated with care. It’s the kind of food that feels like it belongs on a farmhouse table, served family-style with warm bread and good conversation.


Things to know about this Italian kale and potatoes

  • Don’t skip parboiling — it ensures the potatoes are creamy inside and golden when sautéed.

  • Tuscan kale (also called lacinato or dinosaur kale) holds its texture beautifully in this dish.

  • Want to make it heartier? Add white beans or top with a fried egg.

  • This dish reheats beautifully the next day.


Serving Ideas

This pairs beautifully with:

  • Grilled chicken

  • Italian sausage

  • Pan-seared fish

  • Or simply warm crusty bread and good olive oil

It’s also delicious served at room temperature, making it perfect for gatherings.


Storage

Store leftovers in an airtight container in the refrigerator for up to 3 days. Reheat gently in a skillet with a drizzle of olive oil.


Final Thoughts

This is the kind of rustic Italian cooking that proves you don’t need complicated ingredients to create something deeply satisfying. Just good olive oil, fresh vegetables, and a little care.

If you make this Tuscan Kale and Potatoes, let me know in the comments — and don’t forget to share it with someone who loves simple Italian cooking 🤍

Bring Rustic Italian Cooking Home

If you loved this Tuscan Kale and Potatoes, you’re going to enjoy some of my other simple, rustic Italian dishes that celebrate humble ingredients and big flavor.

For another cozy vegetable-forward dish, try my Italian Spaghetti Frittata — it’s a beautiful way to transform simple ingredients into something special.

If you’re looking to make this a complete meal, serve it alongside my Italian Meatloaf with Potatoes for a hearty Sunday-style dinner.

Or keep things classic with my cod Francese

And if you love traditional pasta shapes, don’t miss my Southern Italian Cavatelli perfect for pairing with greens and olive oil-based sauces.

Simple ingredients. Timeless recipes. Real Italian flavor.

If you make this dish, leave a comment below and let me know how you served it — I love seeing how these recipes come to life in your kitchen 🤍


Italian Kale and Potatoes

Golden potatoes, tender Tuscan kale, and juicy blistered cherry tomatoes tossed with garlic and a little heat . Simple ingredients, big Italian flavor.

  • 1 1/2 lbs. potatoes (cubed)
  • 1 large bunch Tuscan kale
  • 3 Tbsp extra virgin olive oil
  • 1 cup cherry tomatoes
  • 1 Tbsp. garlic (minced)
  • 1 tsp. red pepper flakes
  • 1 cup white wine
  • salt and pepper to taste
  1. Parboil the Potatoes

    Bring a large pot of salted water to a boil. Add the cubed potatoes and cook for about 8–10 minutes, just until fork-tender but not falling apart. Add the kale and cook 5 minutes longer Drain and set aside.

  2. Blister the Tomatoes

    In a large skillet over medium heat, add 1 tablespoon olive oil. Add the cherry tomatoes and cook undisturbed for 3–4 minutes until they begin to blister and burst.

  3. Sauté the Garlic and Kale

    In the same skillet, add the remaining olive oil. Add the sliced garlic and red pepper flakes, cooking for about 30 seconds until fragrant.

    Add the chopped Tuscan kale and a pinch of salt. Sauté for 4–5 minutes until wilted and tender. deglaze the pan with the white wine

  4. Bring It Together

    Add the drained potatoes back to the skillet. Gently toss everything together and cook for another 3–5 minutes to allow the flavors to meld.

    Fold in the blistered cherry tomatoes. Season with salt and black pepper to taste.

    Finish with freshly grated Pecorino Romano if desired.

Main Course
Italian
Italian, Tuscan, Kale


Farinata Italian Chickpeas Flatbread

Farinata Italian Chickpeas Flatbread

This post may contain affiliate links, that help support this blog. If you make a purchase through these links, I may earn a commission—at no cost to you. For more information read my disclosure policy.

Farinata Italian chickpeas flatbread is one of those quietly iconic Italian foods — simple, humble, and deeply rooted in tradition. Originating in Liguria, this thin chickpea flatbread has been made for centuries using just chickpeas, water, olive oil, and salt. It began as street food, valued for being filling, affordable, and made entirely from pantry staples.

Traditionally, farinata is prepared with chickpea flour, but this version goes straight to the source by using whole dried chickpeas. After soaking and blending, the batter bakes into a flatbread with crisp, golden edges and a soft, creamy center. It’s rustic, naturally gluten-free, and a perfect example of how Italian cooking lets simple ingredients do the work.

Things to know about this Farinata Italian Chickpeas Flatbread

  • Farinata Italian chickpeas flatbread should always be thin — a thick batter will bake up dense instead of creamy.

  • Resting the batter improves both flavor and texture, so don’t skip it.

  • Using whole chickpeas creates a slightly more rustic result than chickpea flour, while staying true to tradition.

  • A hot cast iron or metal pan is key for proper browning and crisp edges.

  • Farinata is best enjoyed hot, straight from the oven, but leftovers reheat well in a hot pan.

Variation: Rustic Farinata (Unstrained Batter)

For a heartier, more rustic farinata, skip straining the blended chickpea batter. The finished flatbread will be slightly thicker with more texture, while still keeping the classic crispy edges and creamy center. Just be sure the batter remains thin enough to spread easily in the pan before baking.

Storage & Reheating

Farinata Italian chickpeas flatbread is best enjoyed fresh, but leftovers store well.

  • Refrigerator: Store cooled farinata in an airtight container for up to 3 days.

  • Reheating: Reheat in a hot skillet with a small drizzle of olive oil until warmed through and the edges crisp again.

  • Avoid the microwave if possible — it softens the texture and dulls the flavor.

Farinata does not freeze well, as the texture becomes grainy once thawed.

If you love simple Italian recipes made from pantry staples, be sure to explore more on the blog. Pair this farinata with my
Homemade Beef Bone Broth for a comforting meal, or serve it alongside my Italian and Italian-inspired soups for an easy, rustic spread.

And if you make this farinata Italian chickpeas flatbread, leave a comment below or tag me on social — I love seeing how you serve it and make it your own.

Farinata Italian Chickpeas Flatbread

  • 1 cup dried chickpeas, soaked overnight (12–24 hours)
  • 1 to 1¼ cups  fresh water (for blending)
  • ½ tsp fine sea salt
  • 3–4 tbsp extra virgin olive oil, divided
  • Freshly ground black pepper, to finish

Optional Toppings (add sparingly)

  1. Soak the chickpeas. Soak dried chickpeas in plenty of water overnight. Drain and rinse well.

  2. Optional (but recommended for texture): Simmer the soaked chickpeas in fresh water for 20–30 minutes, just until tender.Drain and let cool slightly.

  3. Blend the batter. Add chickpeas and 1 cup water to a high-speed blender.Blend until completely smooth.Add more water, a little at a time, if needed — the batter should be thin, like crêpe batter, not thick like hummus.

  4. Strain for smoothness. Strain the batter through a fine-mesh sieve for a smoother texture, or skip this step for a more rustic farinata

  5. Season and rest. Stir in the salt.Cover and let the batter rest at room temperature for at least 1 hour, preferably 2–3 hours.Skim off any foam that forms on top.

  6. Preheat oven and pan. Preheat oven to 425°F (Place a 12-inch cast iron skillet or metal baking pan in the oven to heat.

  7. Oil the pan

  8. Carefully remove the hot pan and add 2 tablespoons olive oil, swirling to coat evenly.

  9. Bake. Pour the rested batter into the pan (it should spread thinly).Drizzle the remaining olive oil over the top.Add rosemary or onions now, if using.

  10. Cook until set and golden. Bake for 18–25 minutes, until:

    • Edges are crisp and deeply golden

    • Top has light browning

    • Center is just set and creamy

  11. Optional: Broil for 2–3 minutes for extra char.

  12. Serve immediately. Finish with black pepper and any fresh toppings.Slice into wedges and serve hot.


Italian Crespelle with Parmigiano in Beef Broth

Italian Crespelle with Parmigiano in Beef Broth

This post may contain affiliate links, that help support this blog. If you make a purchase through these links, I may earn a commission—at no cost to you. For more information read my disclosure policy.

This is a traditional primo piatto made with paper-thin crespelle, a light filling of Parmigiano Reggiano, and very hot broth. When done right, it tastes comforting and simple, never heavy.

In older homes, especially in Emilia‑Romagna and central Italy, crespelle were treated like fresh pasta sheets. The batter was lean. The filling was minimal. All the richness came from the broth.

For this version, I use homemade beef bone broth made with neck bones and beef shank. It gives the dish body, clarity, and natural gelatin without needing butter or cream.

What Are Crespelle?

Crespelle are Italian crêpes, but they are not sweet. They are thinner and more delicate than breakfast crêpes and are used the same way Italians use fresh pasta.

When served in brodo, crespelle are filled lightly with Parmigiano and placed in a bowl. Hot broth is poured over just before serving so the cheese melts gently.


Things to know when making Italian Crespelle with Parmigiano in Beef Broth

  • Crespelle are unsweetened and very thin.
  • Butter is not traditional for crespelle served in broth.
  • Parmigiano should be used sparingly so the broth stays clear.
  • This dish is served as a first course, not a main soup.
  • The quality of the broth matters more than anything else.

Tips for Success

  • Use finely grated Parmigiano so it melts quickly.
  • Do not overfill the crespelle.
  • Warm your bowls before serving.
  • Add salt to the broth only at the end.

A Dish Built on Broth

Crespelle al Parmigiano in brodo is a reminder that Italian cooking values simplicity over excess. When the broth is good, everything else falls into place.

Serve it hot, eat it slowly, and let the dish be what it is.

Make the Broth First

This dish depends entirely on good broth. If you don’t already have some on hand, start there.

👉 [Homemade Beef Bone Broth with Neck Bones and Beef Shank] — a slow-simmered, clear broth that gives this dish its depth, body, and natural richness.

Once the broth is ready, these crespelle come together quickly and simply.

Italian Crespelle with Parmigiano in Beef Broth Test

Servings: 3–4 (primo piatto)

Crespelle Batter (No Butter)

  • 2 large eggs
  • 1 cup whole milk ((240 ml))
  • 3/4 cup all‑purpose flour ((95 g))
  • Pinch of fine salt
  • For the pan: a lightly oiled paper towel, wiped almost dry

Filling

  1. Make the Batter

    In a medium bowl, whisk the eggs and milk until fully combined. Add the flour and salt and whisk until smooth. Let the batter rest at room temperature for 20–30 minutes.

  2. Cook the Crespelle

    Heat a 8 inch nonstick pan over medium‑low heat. Lightly wipe the surface with oil, then remove any excess.

    Pour about ¼ cup of batter into the pan and swirl immediately to create a very thin crespella. Cook for 30–40 seconds until set, then flip and cook for another 10–15 seconds.

    Transfer to a plate and repeat with the remaining batter. Stack the crespelle and keep them covered.

  3. Assemble

    Lay one crespella flat and sprinkle lightly with Parmigiano Reggiano. Fold into quarters or roll gently. Place 2–3 crespelle into each warmed bowl.

  4. Serve in Brodo

    Bring the beef bone broth to a gentle boil and taste for salt. Ladle the very hot broth over the crespelle just before serving. Serve immediately.


How to make Homemade Beef Bone Broth

How to make Homemade Beef Bone Broth

This post may contain affiliate links, that help support this blog. If you make a purchase through these links, I may earn a commission—at no cost to you. For more information read my disclosure policy.

If there’s one thing every home cook should have in their kitchen, it’s a pot of homemade beef bone broth quietly simmering away. This is the kind of old‑school cooking that builds flavor from the ground up—deep, savory, and packed with goodness. Whether you sip it straight from a mug or use it as the base for soups, risotto, or sauces, homemade bone broth is a total game‑changer.

Why Make Beef Bone Broth at Home?

Sure, you can buy broth at the store—but homemade beef bone broth has:

  • Far better flavor (rich, meaty, and deeply savory)
  • Natural gelatin from slow‑simmered bones
  • No additives or preservatives
  • Better value—you get multiple quarts for the price of bones

This is the same kind of broth our grandmothers made: simple ingredients, slow cooking, and patience.

Things to know about this Beef Bone Broth recipe

  • A properly made bone broth will gel when cold—that’s a good thing.
  • Don’t let the broth boil aggressively; a gentle simmer keeps it clear and clean‑tasting.
  • You can reuse the bones once more for a lighter second batch.

How to Use Beef Bone Broth

  • Soup bases (vegetable, beef, or noodle soups)
  • Risotto or polenta instead of water
  • Braising meats
  • Sipping warm with a pinch of salt
  • Sauces and gravies

 Storage

  • Refrigerator: up to 5 days in an airtight container
  • Freezer: up to 6 months (freeze in quart containers or silicone molds)
  • If you loved this homemade beef bone broth, here are a few ways to put it to work:
    • Use it as the base for my Italian Meatball Sauce
    • Swap it in for water in Polenta for extra depth
    • Build cozy bowls of Vegetable or Beef Soup
    • Freeze it and keep it on hand for weeknight cooking

Final Thoughts

Making beef bone broth this way is simple, intentional cooking—searing everything together, keeping the vegetables whole, and letting time do the work. The result is a clean, deeply flavored broth you can use across your kitchen all week.

How to make Homemade Beef Bone Broth

  • 4 – 5 pounds beef bones (a mix of marrow bones, knuckle bones, and meaty bones is ideal)
  • 1 beef shank
  • 2 tbsp olive oil
  • 1 whole onions, peeled
  • 2 whole carrots, peeled
  • 2 whole celery stalks
  • 4 cloves garlic 
  • 2 bay leaves
  • 1 tsp black peppercorns
  • Water, enough to cover
  • ⅓ cup apple cider vinegar
  • Salt to taste
  1. Sear the Meat

    Heat olive oil in a large stock pot or Dutch oven over medium-high heat. Season the beef shank and any meaty bones lightly with salt. Add all the meat to the pot together and sear until deeply browned on all sides. Work in batches only if needed to avoid crowding.

    This step builds the foundation of flavor directly in the pot—no roasting required.

  2. Add the Aromatics

    Add onions, carrots, celery, garlic, bay leaves, and peppercorns.

  3. Add Water & Vinegar

    Cover everything with cold water (about 12–14 cups). Stir in the apple cider vinegar—this helps extract collagen and minerals from the bones.

  4. Simmer Low and Slow

    Bring the pot just to a gentle boil, then immediately reduce to a low simmer. Skim off any foam that rises to the top during the first 30 minutes.

    Simmer covered for 2 1/2 -3 hours

    Add more water if needed to keep the bones submerged.

  5. Strain the Broth

    Remove the bones and vegetables. Strain the broth through a fine‑mesh sieve into a large bowl or container.

  6. Cool & Store

    Let the broth cool completely. Refrigerate overnight, then skim off any hardened fat from the top (save it for cooking—it’s gold).


French Onion Soup with an Italian Twist

French Onion Soup with an Italian Twist

This post may contain affiliate links, that help support this blog. If you make a purchase through these links, I may earn a commission—at no cost to you. For more information read my disclosure policy.

French onion soup has always felt like the ultimate comfort food to me, but I can’t help adding an Italian touch to the dishes I love most. In my kitchen, onions are never rushed—they’re slowly caramelized the way I learned growing up, filling the house with that unmistakable, cozy aroma that signals something special is coming. For this version, I use a mix of red onions, yellow onions, and leeks, then finish the soup the Italian way—with herb focaccia and freshly grated Fontina instead of the classic baguette and Gruyère. It’s familiar yet different, rustic but comforting, and exactly the kind of soup I make when I want something simple, soulful, and meant to be shared.

Things to know about this French Onion Soup with an Italian Twist


  • A mix of yellow onions, red onions, and leeks adds natural sweetness and depth without needing sugar.

  • Fontina melts smoothly and stays creamy, making it a perfect Italian alternative to Gruyère.

  • Herb focaccia absorbs the broth while still holding its shape, giving you that perfect bite every time.

  • The soup base can be made a day ahead; add the focaccia and cheese just before serving for best texture.

  • Storage: Store leftover soup (without focaccia or cheese) in an airtight container in the refrigerator for up to 4 days.

  • Freezing: This soup freezes well without the bread and cheese. Freeze in freezer-safe containers for up to 3 months. Thaw overnight in the refrigerator and reheat on the stovetop before adding toppings.

  • Always add the focaccia and Fontina fresh just before broiling for the best texture and flavor.

  • If you love classic comfort food with an Italian twist, this French Onion Soup with an Italian Twist is a must-try. The combination of caramelized onions, leeks, herb focaccia, and melty Fontina makes it a cozy, flavorful soup perfect for any season.

    For more hearty Italian soups, explore my Creamy Sausage Tortellini Soup or Potato Leek Soup with Pancetta—both are easy to make and full of rich, comforting flavors.

    Want to try more Italian-inspired weeknight recipes? Don’t miss my Italian sausage Escarole and Beans or Spinach Ricotta Balls for quick, flavorful meals the whole family will love.

    Remember to save this French Onion Soup recipe for later and follow my blog for more Italian cooking inspiration delivered right to your inbox!


French Onion Soup with an Italian Twist

Soup

  • 2 tablespoons olive oil
  • 2 tablespoons unsalted butter
  • 2 large yellow onions (thinly sliced)
  • 2 medium red onions (thinly sliced)
  • 2 large leeks (white and light green parts only, thinly sliced and well rinsed)
  • 1 teaspoon salt (plus more to taste)
  • ½ teaspoon freshly ground black pepper
  • 2 cloves garlic (minced)
  • ¼ cup dry white wine
  • 6 cups beef broth (or chicken broth for a lighter version)
  • 1 teaspoon fresh thyme leaves (or ½ teaspoon dried)
  • 1 bay leaf

Topping

  • 4 –6 slices herb focaccia
  • 1½ cups freshly grated Fontina cheese
  1. Caramelize the onions

    In a large heavy-bottomed pot or Dutch oven, heat the olive oil and butter over medium heat. Add the yellow onions, red onions, and leeks. Sprinkle with salt and pepper. Cook, stirring occasionally, for 35–40 minutes, until deeply golden, soft, and caramelized. Reduce heat if needed to prevent burning.

  2. Build the flavor

    Add the garlic and cook for 1 minute until fragrant. Pour in the white wine, scraping up any browned bits from the bottom of the pot. Simmer for 2–3 minutes until slightly reduced.

  3. Simmer the soup

    Add the broth, thyme, and bay leaf. Bring to a gentle simmer, cover partially, and cook for 25–30 minutes. Taste and adjust seasoning. Remove the bay leaf.

  4. Prepare for broiling

    Preheat the broiler. Ladle the soup into oven-safe bowls and place them on a baking sheet.

  5. Add the Italian topping

    Top each bowl with a slice of herb focaccia, then generously sprinkle with Fontina cheese.

  6. Broil

    Broil for 2–4 minutes, until the cheese is fully melted, bubbling, and lightly golden. Watch closely.

  7. Serve

    Serve immediately, hot and bubbling, with extra focaccia on the side if desired.


Crispy Italian Potato Scarpaccia

Crispy Italian Potato Scarpacci

This post may contain affiliate links, that help support this blog. If you make a purchase through these links, I may earn a commission—at no cost to you. For more information read my disclosure policy.

This Italian Potato Scarpaccia (Scarpaccia di Patate) is one of those humble, rustic dishes that turns the simplest ingredients into something crave-worthy. Traditionally associated with thin, baked savory cakes meant to stretch what you had on hand, this version leans into mashed potatoes, eggs, sharp Pecorino Romano, and fresh parsley. When spread very thin and baked hot on a well-oiled pan, it transforms into something magical: crisp, golden edges with a savory, almost crackly bite, and just enough tenderness in the center to hold it all together.

It’s the kind of recipe that feels equally at home as a casual weeknight side, a pre-dinner nibble cut into squares, or even set out with antipasti for guests. Best of all, it’s naturally gluten-free, unfussy, and incredibly forgiving — exactly the kind of food Italian home cooks have relied on for generations.

Things to know about this Crispy Italian Potato Scarpaccia

  • Thin is everything: The crispiness comes from spreading the mixture thinner than you think. Thick scarpaccia will stay soft.

  • Cool potatoes matter: Fully cooled mashed potatoes prevent excess moisture and help the scarpaccia crisp instead of steam.

  • Oil = texture: A generously oiled pan doesn’t just prevent sticking — it “fries” the bottom as it bakes.

  • Great for leftovers: This is a perfect way to repurpose leftover mashed potatoes.

  • Even better after resting: Letting it sit for 5–10 minutes after baking actually improves the texture before slicing.

  • If you loved this crispy potato scarpaccia, be sure to explore more Italian-inspired comfort food on the blog — from simple sides to classic recipes shaped by my years in the restaurant kitchen. Start with my Italian stuffed eggplant with rice and sausage, spinach ricotta balls, or my crispy zucchini scrapaccia

    If you make this recipe, I’d love to hear how it turned out — leave a comment below or share a photo and tag me on Instagram so I can see your scarpaccia come out perfectly crisp.


Crispy Italian Potato Scarpaccia

  • 10 x 15–inch rimmed sheet pan
  • 2 cups mashed potatoes (about 1 lb / 450 g potatoes, cooked and fully cooled)
  • 2 large eggs
  • 1 cup Pecorino Romano (finely grated)
  • ¼ cup fresh parsley (finely chopped)
  • Salt and pepper to taste
  • ¼ cup olive oil (divide)
  1. Preheat the Oven

    Preheat oven to 425°F (220°C).Place a rack in the middle-to-lower third of the oven for best crisping.

  2. Oil the Pan

    Generously coat the sheet pan with 2 tablespoons olive oil. The oil should fully cover the bottom — this helps crisp the scarpaccia like it’s shallow-fried.

  3. Make the Mixture

    In a bowl, combine mashed potatoes, eggs, Pecorino Romano, parsley, salt, and pepper. Mix until smooth and spreadable.

  4. Spread Very Thin

    Transfer the mixture to the pan and spread it very thin, almost edge to edge. Drizzle the remaining 2 tablespoons olive oil evenly over the top.

  5. Bake

    Bake for 22–28 minutes, rotating the pan halfway through.

    The scarpaccia is done when:

    The top is deeply golden

    The edges are crisp and slightly curled

    The center is firm, not soft or steamy

  6. Optional: For extra crispiness, broil for 2–3 minutes at the end. Watch closely

  7. Rest & Slice

    Let rest 5–10 minutes before slicing. This allows steam to escape and keeps it crisp.

    Cut into squares or wedges and serve warm or at room temperature.


Italian Broccoli Rabe Pizza

Italian Broccoli Rabe Pizza

This post may contain affiliate links, that help support this blog. If you make a purchase through these links, I may earn a commission—at no cost to you. For more information read my disclosure policy.

In Southern Italy, pizza is often simple. It starts with good dough, olive oil, and what is in season. Italian broccoli rabe pizza (Cime di rapa), is a common topping and is loved for its slightly bitter flavor.

This is the kind of pizza I make at home. After many years working in restaurant kitchens, I learned that Italian cooking does not need a lot of ingredients. It needs balance. For this pizza, Italian sausage adds flavor, while cannellini beans make it hearty without feeling heavy.

Everything is cooked together in one pan before going on the pizza. The result is a rustic, olive oil–based pizza that is simple, comforting, and very Italian.

Things to know about this Italian Broccoli Rabe Pizza

  • Blanching the broccoli rabe matters
    A quick blanch removes excess bitterness while keeping its signature flavor intact.

  • Everything cooks in one pan
    Cooking the garlic, sausage, broccoli rabe, and cannellini beans together allows the flavors to layer naturally—no need to remove ingredients or overcomplicate the process

  • Cannellini beans are traditional, not modern
    Beans have long been used in Southern Italy to stretch meals and add body. Lightly mashing a few into the pan creates a natural creaminess without sauce.
    (If you enjoy beans on pizza, you may also like my Italian Escarole and Beans with Sausage post.)

  • Minimal cheese is intentional
    This pizza is olive-oil based. If you use cheese, keep it light—just enough to enhance, not dominate.
    (For dough texture that works best with oil-based toppings, use my over night Pizza Dough Recipe


Italian Broccoli Rabe Pizza

  • 1 lb. 450 g broccoli rabe, trimmed
  • 3 tbsp olive oil (plus more for brushing)
  • 3 cloves garlic (thinly sliced)
  • 1/2 tsp red pepper flakes (optional)
  • 6 oz 170 g Italian sausage, casings removed
  • ½ cup cannellini beans (drained and rinsed)
  • Salt (to taste)
  • 12 oz 340 g pizza dough (homemade or store-bought — use my [Pizza Dough Recipe] for best results)
  • 2 tbsp grated Pecorino Romano
  1. Blanch the Broccoli Rabe

    Bring a pot of salted water to a boil.Blanch broccoli rabe 2–3 minutes until bright green.Drain well and gently squeeze out excess water.

  2. Build the Topping 

    Heat olive oil in a skillet over medium heat.Add garlic and red pepper flakes; sauté 30–60 seconds until fragrant.

    Add sausage directly to the pan and cook, breaking it up, until browned and cooked through (5–6 minutes).

    Add broccoli rabe and cannellini beans directly into the same pan.Toss and sauté 2–3 minutes, lightly mashing a few beans so they cream into the oil and sausage fat.Season lightly with salt. Remove from heat.

  3. Prepare the Dough

    Preheat oven to 500°F (260°C) with a pizza stone or baking sheet inside.Stretch dough into a 12-inch round on parchment paper.Brush lightly with olive oil.

  4. Assemble

    Evenly distribute the broccoli rabe, sausage, and bean mixture over the dough.Optional: finish with a very light sprinkle of Pecorino Romano.Drizzle with a touch more olive oil.

  5. Bake

    Slide pizza onto the hot stone or pan.Bake 12–15 minutes, until crust is golden and crisp.Rest 2–3 minutes before slicing.


The Ultimate Guide to Italian & Italian-Inspired Soups

The Ultimate Guide to Italian & Italian-Inspired Soups

This post may contain affiliate links, that help support this blog. If you make a purchase through these links, I may earn a commission—at no cost to you. For more information read my disclosure policy.

10 Cozy, Classic Soup Recipes for Every Season

Soup has always been at the heart of Italian home cooking — simple ingredients, slow simmering, and deep, comforting flavor. Whether you’re craving a light brothy soup or something rich and hearty, this Italian soup collection brings together my most-loved recipes, many inspired by dishes I cooked in my restaurants and made at home for my family.

This guide features 10 Italian and Italian-inspired soup recipes, perfect for weeknight dinners, holidays, and cozy weekends. Bookmark this post — it’s your go-to soup resource all year long.

Brothy & Light Italian Soups

Simple, nourishing, and perfect when you want something lighter.

1. Italian Wedding Soup

Tender meatballs, leafy greens, and delicate pasta simmered in rich chicken broth — a true Italian classic.GO TO RECIPE

2. Tortellini in Brodo

A Northern Italian favorite featuring cheese-filled tortellini served in hot, savory broth.GO TO RECIPE

Hearty & Rustic Soups

These soups eat like a full meal — filling, cozy, and deeply satisfying.

3. Pasta e Fagioli

A rustic, comforting soup made with beans, pasta, and a flavorful tomato base — just like Nonna used to make.

 GO TO RECIPE

4. Sausage & Lentil Soup

Traditionally served on New Year’s Eve for good luck, this hearty soup is rich, savory, and deeply comforting.GO TO RECIPE

5. Escarole & Beans with Italian Sausage

A classic Italian-American soup that’s simple, nourishing, and packed with bold flavor.GO TO RECIPE

Creamy & Comforting Soups

Rich, velvety soups that feel like a warm hug.

6. Creamy Sausage Tortellini Soup

A fan favorite — cheesy tortellini, Italian sausage, and a creamy broth that comes together quickly.GO TO RECIPE

7. Potato Leek Soup with Pancetta

A restaurant-style classic — silky smooth with crispy pancetta for added depth and flavor.GO TO RECIPE

8. Vegetarian Mushroom Soup (Italian Style)

Earthy mushrooms, herbs, and a rich broth make this vegetarian soup incredibly satisfying.GO TO RECIPE

 Holiday & Special Occasion Soups

Perfect for celebrations, traditions, and family gatherings.

9. Italian Holiday Chicken Soup

A comforting soup often served during holidays — light, flavorful, and deeply nostalgic.GO TO RECIPE

10. Creamy Italian Bean and Parmesan soup

A hearty, old-fashioned soup that was always a staple in my restaurants — filling, budget-friendly, and perfect for leftovers.GO TO RECIPE

Good to Know

  • Most of these soups freeze beautifully

  • Brothy soups are perfect for make-ahead meals

  • Many recipes can be adapted for vegetarian or gluten-free diets

  • Homemade broth adds the best flavor, but quality store-bought works well too

  • A heavy-bottomed 8–12 quart stainless steel stockpot is ideal for making soup because it heats evenly, prevents scorching, and gives you plenty of room for simmering brothy and hearty soups alike.

What to Serve with Italian Soup

  • Crusty Italian bread

  • Garlic bread or focaccia

  • Simple green salad

  • Grated Parmigiano Reggiano