Raspberry Vinaigrette Salad Dressing

Raspberry Vinaigrette Salad Dressing

Hello Everyone!

This raspberry vinaigrette salad dressing is so easy to make and taste way better than store bought. You only need a few ingredients and just a few minutes to make a salad dressing so good you’ll want to make it often.

Everyone loves raspberry  salad dressing, but they don’t realize how easy it is to make at home!!! To be honest this  salad vinaigrette is so easy to make, I was hesitate on whether it was a worthy enough blog post.

3 Tips for success With this Raspberry vinaigrette Salad Dressing

The first tip for success when you make this raspberry vinaigrette salad dressing is to use fresh or frozen real  raspberries. There is just something about fresh raspberries in salad dressing  verses using fruit jams.

Second, in vinaigrette salad dressing recipes the oil you use is very important. In these oil based vinaigrette recipes use a good quality extra virgin olive oil.

And third one of the most important tips when making oil based salad dressing vinaigrettes, the oil goes in last, in a slow steady stream with the blender or food processor running.

One more thing if you make this Raspberry vinaigrette salad dressing please leave me a comment. I love hearing from you it’s  my favorite part!!!

Ingredients

  • 8 oz. fresh raspberries
  • 1/4 cup honey
  • 1/2 red wine vinegar
  • 1 1/2 cups extra virgin olive oil
  • 1 Tsp. chopped garlic
  • 1 Tbls raspberry or strawberry jam
  • Salt and pepper to taste

Instructions

  1. In a food processer or blender pulse the washed raspberries until smooth
  2. With the blender running add the rest of the ingredients up to the olive oil
  3. Add the olive oil at the end with the blender running in a slow steady stream
  4. Store in glass jar in fridge up to 2 weeks



Pesto Shrimp Bruschetta

Pesto Shrimp Bruschetta

This Pesto Shrimp Bruschetta is prefect when your looking for a filling appetizer or a light lunch.

Succulent large shrimp coated with pesto, sautéed in  a delicious sauce flavored with salty crispy prosciutto makes this the prefect topping for the toasted Italian bread smeared with pesto, then topped with tangy feta cheese.

Here’s How I made this Pesto Shrimp Bruschetta

When I made this Pesto Shrimp Bruschetta, I started by slicing some good quality Italian bread on a diagonal into roughly 1/2  inch thickness, and toasting it, in my  toaster oven/ air fryer. This step can be done ahead of time even the day before.

Next I defrosted the shrimp in cold water for a quick thaw, this or defrosting the shrimp in the refrigerator overnight are the best methods of defrosting food.

Finally in a large saute pan, I sautéed some red onion and garlic,  threw in a hand full of tomatoes, deglazed the pan with chicken stock you can use white wine if you prefer, then I sautéed the shrimp to a beautiful sear, and topped the toast with the shrimp and some feta cheese.

If you make this recipe please let me know how it goes. leave me a comment. And please don’t forget to tag me on Instagram with your creations. I love hearing from you, It’s my favorite part!!!

Ingredients

  • 1/2 Lb. large cleaned shrimp
  • 1/2 loaf Italian bread cut into 1/2 inch slice
  • 2 slices prosciutto thinly sliced
  • 1/2 cup pesto sauce plus 1/3 cup to brush on  bread
  • 1/3 cup chicken stock
  • 1 cup feta cheese
  • 1/2 cup diced tomatoes
  • 1 Tbs. each chopped Italian parsley and basil
  • 2 Tbs. butter
  • 1 Tbs. olive oil
  • 1/3 cut chopped red onion
  • 1 Tbs. chopped garlic

Instructions

  1. Toast bread then spread lightly with pesto set aside
  2. Toss shrimp in the pesto sauce set aside
  3. Meanwhile in a large sauté pan bring the butter and oil to medium heat
  4. Add the onion and garlic saute until tender and just beginning to brown
  5. Add the prosciutto saute until crisp
  6. Deglaze the pan with the chicken broth simmer about 5 minutes
  7. Add the shrimp cook just until shrimp is cooked through 4 to 5 minutes
  8. Add the Italian parsley and basil
  9. Top toast with shrimp sprinkle with feta cheese… ENJOY


Roasted Grape Pizza

Roasted Grape Pizza

Pizza has came a long way since our days in the Pizza business. Back then Canadian bacon and pineapple toppings on pizza were a novelty.

Now there are as many different pizza toppings and combinations as there  are people who love pizza.

This Roasted Grape Pizza may sound like an unusually mix of ingredients but it all comes together with the most delicious flavor.

Roasting the grapes sweetens them and releases their juices producing a sweet, syrupy pizza sauce. Mix the sharp bite of the gorgonzola with the mild taste of grapes, honey and thyme, add crunchy walnuts and you a recipe for delicious results.

3 things to know About this Roasted Grape Pizza Recipe

The first thing to know about this Roasted Grape Pizza is I used The pizza dough from Trader Joe’s you can use any pizza dough you like.

Second any grape works with this recipe, I’ve used white and it was just as delicious as using the red grapes. Third and one step not to miss is to prebake the crust, so you don’t end up with a soggy crust. One more thing I  baked this this pizza in my Cuisinart Toaster Oven/ Air fryer my most used small appliance.

And lastly please leave me a comment if you make this Roasted Grape Pizza and please don’t forget to tag me on Instagram with your creations.

I love hearing from you, it’s my favorite  part!!!!


Ingredients

  •  1 lb. prepared pizza dough
  • 3 cups red grapes
  • 2 cups gorgonzola cheese
  • 1 cup grated parmesan
  • 2 cups coarsely chopped walnuts
  • 2 Tbs. thyme leaves
  • 4 Tbs. honey
  • 3 Tbs. olive oil
  • Salt and pepper to taste

Instructions

  1. Preheat oven to 400
  2. Stretch dough into thin 12 inch circle let rise for 15 minutes
  3. Meanwhile drizzle cleaned and separated whole grapes  and walnuts with olive oil, salt and thyme
  4. Roast grapes and walnuts on a small cookie sheet in  the preheated oven for 15 minutes set aside
  5.  Brush the crust with olive oil Pre bake the pizza crust for ten minutes or until crust is lightly golden
  6.  Top pre baked pizza crust with the roasted undrained grapes, gorgonzola and parmesan
  7. Return to oven and bake 15 minutes or until cheese is melted ……ENJOY!!!!


Buffalo langostino Lobster Bruschetta

Buffalo Langostino Lobster Bruschetta

This post may contain affiliate links, that help support this blog. If you make a purchase through these links, I may earn a commission—at no cost to you. For more information read my disclosure policy.

Don’t let the sound of this Buffalo Langostino Lobster Bruschetta intimidate  you.  It’s an easy recipe and affordable too when you use langostino lobster.

Consumers are attracted to using langostino lobster for two main reasons size and cost. The size of the langostino tail is ideal for cooks looking for bite size portions of meat. Moreover the price of langostino lobster is well under half the price of lobster.

As far as am concerned, they taste and eat pretty much the same and are prefect in this bruschetta recipe.

Langostino lobster is an affordable alternative to higher priced shellfish, and can be used in any recipe that calls for lobster, shrimp or crab.

How To Make This Buffalo Langostino Lobster Bruschetta

Start making this Buffalo Langostino Lobster Bruschetta by first toasting some really good crusty Italian bread spread with some really good pesto store bought or homemade. Next simmer the butter and Franks Hot sauce on low heat, stirring constantly.

Third you can prepare the topping ahead of time and assemble the bruschetta just before serving. This is a delicious recipe made more affordable by using less expensive Langostino Lobster.

I hope you try it and please don’t forget to leave me a command. I love hearing from you it’s my favorite part!!!

Buffalo Langostino Lobster Bruschetta

Crispy pesto-toasted bread is topped with spicy Buffalo langostino lobster and a fresh celery slaw with Gorgonzola, carrots, radishes, and lemon.

  • 8 slices crusty Italian bread
  • 1 cup prepared pesto sauce
  • ½ lb langostino lobster meat
  • 1 cup Frank’s Hot sauce
  • ½ stick butter
  • 1 cup crumbled gorgonzola cheese
  • 1 grated carrot
  • 1 stalk thinly sliced celery
  • 1 bunch thinly sliced radishes
  • ½ small dice red onion
  • 1 tbsp chopped garlic
  • Juice from one lemon
  • 1 tbsp chopped Italian parsley
  • Salt and pepper to taste
  1. Spread the bread with the pesto sauce toast until golden brown

  2. Meanwhile in a medium saute pan heat the butter to medium high
  3. Add the Garlic saute until tender and just beginning to brown
  4. Add the hot sauce simmer until the sauce thickens slightly about 5 minutes
  5. Add the lobster simmer 5 minutes more
  6. Make the celery slaw by mixing the celery, carrot, radishes, Italian parsley, gorgonzola and lemon juice
  7. Mix the buffalo lobster with the celery slaw
  8. Top the toasted pesto bread with the lobster mixture


Air Fried Brussel Sprouts

Air Fried Brussel Sprouts

This post may contain affiliate links, that help support this blog. If you make a purchase through these links, I may earn a commission—at no cost to you. For more information read my disclosure policy.

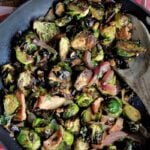
This oh-so-simple Air Fried Brussel Sprouts recipe produces  sweet, nutty, tender and crispy bits of vegetable goodness. Made with few ingredients and ready in 15 minutes, it is the prefect side dish.

For this recipe I bought cut in half Brussel sprouts for quicker cooking and the extra bonus is you end up with more of those delicious crispy edges. If you can’t find cut in half Brussel sprouts cut them in half yourself, you’ll be happy you did, not only will they cook quicker, but there’s more places for the delicious mustard sauce to creep into.

I’ve said it before and I’ll keep saying it my Toaster oven/ Air fryer is the most used small appliance in my kitchen and for good reason. It’s quick, easy, economical and a healthier option than deep frying.

What Are  Air Fried Brussel Sprouts

These tasty Air fried  Brussel sprouts are so much fun, they look like baby cabbage heads. In fact they are in the family as other crucifers along with broccoli and cauliflower.

While brussel sprouts can be fairly bitter to the taste bud, especially when eaten raw, they can have nutty and sweet taste when air friedor roasted!!

They are available year round, but usually  are at their peak flavor in the fall and winter, making them the prefect Holiday side dish.

If you make this Air fried Brussel Sprouts recipe please leave me a comment. And please don’t forget to tag me on Instagram with your creations. I love hearing from you, it’s my favorite part!!! And if you like air fryer recipes try my air fryer parmesan  chicken spiedini

Air Fried Brussels Sprouts

Crispy air-fried Brussels sprouts are tossed with smoky bacon and onions in a tangy Dijon mustard sauce finished with fresh Italian herbs.

  • 1 lb Brussel sprouts cut in half
  • 2 slices bacon
  • ½ chopped red onion
  • ½ chopped yellow onion
  • 1 cup chicken stock
  • 2 tbsp Dijon mustard
  • 1 tbsp butter
  • 1 tbsp each Italian parsley (thyme and rosemary)
  • Salt and Pepper to taste
  1. Spray Brussel sprouts with oil lightly salt and pepper to taste
  2. Set air fryer temperature to 375°

  3. Air fry the Brussel sprouts for 7 to 10 minutes or until crispy
  4. Mean while in a medium saute pan with the tablespoon of butter fry the bacon until crispy remove, drain on paper towels
  5. Add the onion and garlic saute until tender and just beginning to brown
  6. Add the chicken stock, mustard and herbs simmer 10 minutes or until sauce thickens
  7. Cut bacon into small pieces return to saute pan
  8. Add the air fried Brussel sprouts mix to coat with the mustard sauce
  9. Sprinkle with additional chopped Italian Parsley


Cheesy Mini Calzones With Beef

Cheesy Mini Calzones With Beef

This post may contain affiliate links, that help support this blog. If you make a purchase through these links, I may earn a commission—at no cost to you. For more information read my disclosure policy.

Whether your looking for an holiday starter or complete meal this  Cheesy Mini Calzones with beef recipe can be both. Store bought pizza dough filled  with juicy ground beef, full of Italian flavors will leave family and friends wanting more. It’s pizzeria style food from your own kitchen.

Sure homemade is better but at this time of year there’s no shame in semi homemade. And your family and friends would know the difference, unless you tell them!!!

You can also use store bought marinara sauce, but if you want to make your own  here is the link to my Real Easy Marinara Sauce

Things to know about this Cheesy Mini Calzones with beef recipe

Although it’s hard to believe you can’t  make these Cheesy Mini Calzones with beef, heavenly pillows of deliciousness any  better, you can. Serve them along  side marinara sauce and pesto for a flavor boost that takes this recipe over the top.

You can also make this recipe better by making it ahead of time and then reheating in the oven for a few minutes, my toaster oven/ air fryer is prefect for small reheats like this.

I’ve said it before and I’ll keep saying it my toaster oven/ air fryer is my most used small kitchen appliance.

At this time of year it’s good to keep food simple, good and if it can be made ahead of time, that’s a triple win!!! Another better idea double the recipe  it and freeze it, you can do that with this recipe.

If you make this recipe please leave me a comment and don’t forget to tag me on Instagram. I love hearing from you, and hope you are well. Blessings!!!

Cheesy Mini Calzones With Beef

Golden mini calzones are stuffed with savory beef, spinach, marinara, and melted mozzarella and Parmesan for a hearty, cheesy Italian-inspired bite.

  • 1 lb prepared pizza dough
  • 1 cup prepared marinara
  • ½ lb ground beef
  • ½ chopped onion
  • 2 tbsp chopped garlic
  • 2 cups chopped spinach
  • 1 cup each graded parmesan and shredded mozzarella
  • 1 tbsp chopped Italian parsley
  • Salt and pepper to taste
  1. Knead pizza dough to form a smooth ball let rest covered for 30 minutes

  2. Preheat oven to 400 degrees

  3. Meal while in a  medium skillet saute the onions and garlic in 1 tablespoon of olive oil until tender and just beginning to brown

  4. Add the ground and saute until golden brown

  5. Add haft the marinara, spinach,  herbs, and cheeses simmer for 5 minutes longer

  6. Form the dough into 8 balls, with a rolling pin on a lightly floured surface, roll the dough into 8 flat disks

  7. Fill each disk with filling

  8. Form into half moons pinching ends together to seal

  9. Brush tops with mixture of 1 tablespoon  olive oil and 1 tablespoon melted butter, sprinkle with additional grated cheese

  10. Bake in preheated oven for 10 minutes at 400, lower the temperature to 350and bake 1o minutes longer


Chicken Apple Stuffing

Chicken Apple Stuffing

This post may contain affiliate links, that help support this blog. If you make a purchase through these links, I may earn a commission—at no cost to you. For more information read my disclosure policy.

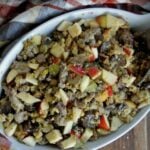
There’s still time to make this Chicken Apple Stuffing for your thanksgiving turkey. This recipe is easy, quick, delicious and uses few ingredients.

The chicken sausage and apples together with the cornbread produce a gourmet flavor sure to impress your family and friends. Not’s not even the best part, the best part it’s ready in less than 30 minutes.

A few Tips about Chicken Apple Stuffing

If your going to bake this Chicken Apple Stuffing inside the turkey don’t do so until just before your going to roast it.

Or if your going to bake it along aside the bird use a pretty covered casserole dish that goes from oven to table.

Be sure to use a large enough saute pan to get the browning you need to add extra flavor. Here is a link to my favorite saute pan.

This stuffing recipe can be make the day before and refrigerated. One more tip bring both the turkey and the stuffing to room temperature  about 30 minutes, before baking.

Happy Thanksgiving my dear friends. Even in these uncertain times is always something to be grateful for ALWAYS!!!!

Chicken Apple Stuffing

Savory chicken sausage, sweet Gala apples, celery, onion, and sage are folded into moist cornbread stuffing for a flavorful side dish with comforting fall flavors.

  • 1 medium chopped onion
  • 2 cups chopped celery
  • 3 diced Gala apples
  • 1 lb chicken sausage casting removed
  • 1 cup chicken stock
  • 4 cups corn bread stuffing
  • 2 tbsp chopped sage
  • Salt and pepper to taste
  1. In a large saute pan saute the sausage breaking it up into small pieces saute until lightly browned

  2. Add the Celery, onions, apples and sage saute until tender and just beginning to brown

  3. Meal while pour the chicken stock over the corn bread

  4. Mix the corn bread with the sautéed ingredients

  5. Salt and pepper to taste


Pesto Pizza Twists

Pesto Pizza Twists

This post may contain affiliate links, that help support this blog. If you make a purchase through these links, I may earn a commission—at no cost to you. For more information read my disclosure policy.

These pesto pizza twists are a quick appetizer, prefect for your holiday table. Store bought pizza dough,  spread with pesto sauce, and topped with cheesy goodness makes this a holiday favorite.

The hardest part is twisting the dough to resemble a flower and that’s not even too hard. Just be sure you don’t cut all the way through to the center. That’s what the shot glass is for.

And you don’t have to use a shot glass, anything that’s  one inch round works. This recipe comes together so quick, but your family and friends will think it took much longer.

It’s a great recipe to serve with marinara, pizza, or even extra pesto on the side. I have linked my favorite commercial brands of pesto and marinara the best alternative to homemade.

Why Your Going To love This Pesto Pizza Twists Recipe

One, this Pesto Pizza Twists recipe is so easy you’ll wonder why you didn’t make it sooner. Two, because your using store bought pizza dough it can be on your table in 30 minutes.

Three it doesn’t use a lot of ingredients, you probably have most of the ingredients on hand. And last but not lest everyone loves it!!!! And that is most important!!!!

If you make this recipe please leave me a comment. I love hearing from you, that’s my favorite part!!!!

Pesto Pizza Twists

Pizza dough is stuffed with pesto, mozzarella, Parmesan, and garlic, then twisted into a golden, pull-apart centerpiece that's crisp outside and irresistibly cheesy inside.

  • 1 lb store bought pizza dough
  • 1 cup prepared pesto
  • 1 cup shredded mozzarella cheese
  • 1 cup grated parmesan
  • 1 tbsp olive oil
  • 1 tbsp chopped garlic
  • 1 tbsp chopped Italian parsley
  • Salt and pepper to taste
  1. Form the pizza dough into a ball cover and let rest for 30 minutes at room temperature

  2. Preheat oven to 425°

  3. On a lightly floured broad roll the pizza dough into a 12 inch circle

  4. Spread with the pesto sauce leaving a 1/2 border

  5. Mix the cheeses, garlic and Italian parsley spread over the pesto

  6. Gather the ends of the dough to from a ball enclosing the filling

  7. Turn the stuffed dough ball upside down and flatten a bit to form a dish shape

  8. Place a shot glass in the center of the disk cut 8 to 10 thumb thick strips up to the shot glass leaving the center intact

  9. Twist the strips a quarter turn to form a pedal repeat with rest of strips

  10. Brush with the olive oi sprinkle with additional parmesan and garlic

  11. Bake at 425° for 10 minutes lower the heat to 350° and bake 20 minutes longer


Easy Baked Butternut Squash

Easy Baked Butternut Squash

This post may contain affiliate links, that help support this blog. If you make a purchase through these links, I may earn a commission—at no cost to you. For more information read my disclosure policy.

Do you need a side dish for your Holiday table? Try this Easy Baked Butternut squash recipe. Honey roasted butternut squash is glazed with a sweet cinnamon honey sauce and baked. The edges get crispy and caramelized, the inside is soft and tender, and the flavor delicious.

This easy butternut squash recipe makes a prefect healthy side dish for your Thanksgiving Table. And because it’s so easy you’ll want to make it often

Why I love Easy Baked Butternut Squash

First and foremost this easy baked butternut squash recipe really is easy. Not only is it easy it’s another one of my recipes that I use my toaster oven/air fryer to bake this in.

It’s one of those recipes that  comes together quick, doesn’t need much prep time and most importantly everyone will like it.

Serve it in this pretty casserole dish to add a festive touch to your holiday table. Happy Holidays my dear friends. Even in this crazy uncertain times there is always something to be grateful for.

If you make this recipe please leave me a comment and please don’t forget to tag me on Instagram I love hearing from you, it’s my favorite part!!!

Easy Baked Butternut Squash

Butternut squash is roasted with butter, fresh orange, honey, warm spices, and sage until caramelized and tender, with an optional topping of cranberries and goat cheese for a sweet and savory finish.

  • 1 butternut squash peeled and cut into slices
  • 3 tbsp melted butter
  • Juice from 2 oranges and rind
  • 2 tbsp honey
  • 1 tsp each cinnamon, pumpkin spice and chopped sage
  • salt and pepper to taste
  1. Preheat oven to 400

  2. Add  all the ingredients to the melted butter

  3. Toss the sliced butternut squash in the melted butter mixture

  4. Bake 30 minutes  on a small cookie sheet or until squash is tender and caramelized

  5. Optional add cranberries and goat cheese


Spinach Potato Frittata Recipe

Spinach Potato Frittata Recipe

This post may contain affiliate links, that help support this blog. If you make a purchase through these links, I may earn a commission—at no cost to you. For more information read my disclosure policy.

This Spinach potato Frittata is one of those recipes like minestrone soup, it’s never the same twice. The recipe takes advantage of what’s in the refrigerator the only must have ingredient is eggs, after eggs than it’s pretty much what you have on hand. That’s one of the best things about frittatas, you can make them different depending on your life style and taste.

Growing up Frittata was a staple. It was what my mother made for us and any gathering where a food was required. And food is required at every Italian gathering. It was called Frittata of the Day on the menu, and that’s just what it meant, I did have my favorites though, and this combination of eggs, spinach, potatoes and parmesan cheese was and still is one of my absolute favorites.


Things to know about this Spinach Potato Frittata recipe

This Spinach Potato Frittata is an egg- based Italian dish, similar to an omelet or crust less quiche. Growing up this Spinach Potato Frittata was a staple.

I have to admit am not a fan of runny yolks, I like my eggs  scrambled. frittatta are like scrambled eggs, enriched with added ingredients, like meat, cheese, or vegetables.

A frittata is is like an unfolded omelet, It is cooked slowly  over low heat, while an omelet is cooked quickly over higher heat. One important thing the right size pan is important when your cooking a frittata or an omelet.

Here is  a link to a beautiful  10 inch saute pan prefect  for an omelet or for this Spinach potato Frittata recipe, now back to the difference between frittata and omelets.

Whereas omelets are served straight from the stove hot, frittata’s are often times served at room temperature. Making them  prefect to make ahead for bunches, gatherings, picnics or anytime you want quick, easy and delicious. If you like frittatas Try my easy garden frittata

If you make this recipe please leave me a comment and please don’t forget to tag me on Instagram. I love hearing from you, it’s my favorite part.

Spinach Potato Frittata

Tender potatoes, fresh spinach, Parmesan, and herbs are folded into fluffy eggs for a hearty Italian frittata that's wholesome, comforting, and full of savory flavor.

  • 8 eggs
  • 1 cup parmesan cheese
  • 2 tbsp butter
  • 2 cups small cubed Yukon gold potatoes
  • 2 cups chopped spinach
  • ¼ cup cream or milk
  • 1 tbsp chopped garlic
  • 2 tbsp each chopped Italian parsley, sage and thyme
  • Salt and pepper to taste
  1. In a 10 inch nonstick saute pan melt the butter

  2. Add the potatoes saute until golden brown salt and pepper

  3. Add the onion and garlic saute until tender and just beginning to brown

  4. Add 1/2 cup water cover and simmer for 10 minutes add the spinach the last 5 minutes

  5. Beat the eggs until light

  6. Add the parmesan, herbs, salt and pepper to egg mixture

  7. Add egg mixture to medium heat pan cook covered 5 minutes lower heat and continuing cooking 10 minutes

  8. Turn the flame off while placing a plate over the saute pan invert on to plate slide the fritatta back into pan cook covered on low heat 10 to 15 minutes

  9. Sprinkle with additional Italian parsley and parmesan